Thingiverse
Harmonica Comb by blatantsubtlety
by Thingiverse
Last crawled date: 4 years, 4 months ago
Make a custom harmonica comb
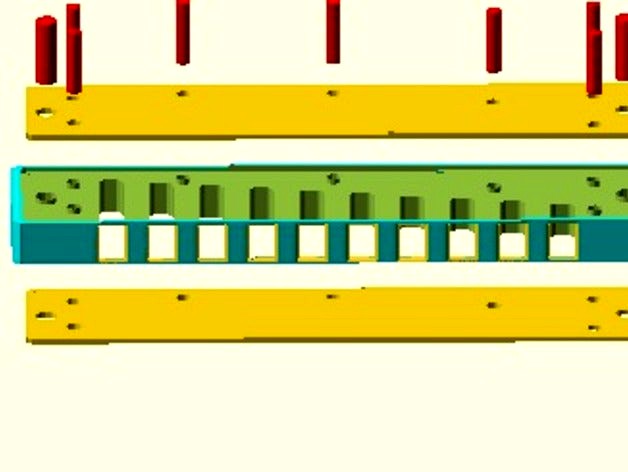
These could be 3D printed or Laser Cut. Combs can be flat, or have a recess for the reedplates.Why? You might want to experiment with sizes, make double harmonicas, or try different materials, or make fancy tortoise shell acrylic combs.
I want to replace the comb in my Suzuki Olive with a slippery plastic one as I find the plaswood composite quite draggy.
Fully parametric and customizer compatible. Please use the customizer and make combs for different harps. I will collect up the different harps and bring them back here into a collection some time in the future.
Please message with any bugs, or limitations for different harmonicas.
Setting Dimensions:
You need screwdriver and calipers.
First, unscrew your harmonica covers (note which side the screw and nut go on) and measure ReedPlateY1 before unscrewing the reedplates.
Take a photo - not which plate is top one, then unscrew reedplates and make rest of measurements. Handle reedplates carefully.
When measuring moulded combs, be careful about taper. Moulded parts have slight taper so they release easily from the tool.
ReedPlateY1 sets the distance between the edge of the comb and the reedplate front edge. It will be -ve for reedplates which are bigger than the comb. To measure, hold something flat across the front face to the comb, then measure internal depths with calipers.
SlotPitch is best calculated from the total distance between the outside walls of the outer slots using calipers. (I don't measure pitch and slot width directly, as you can't get good measurements)
Measure SlotTotalOuter and SlotDivider thickness. Make the measurements near the edge,
The outer-distance, pitch and slot width are calculated and displayed on the console, and should match what you measured. Be especially careful of taper, and measure at the same point, in the vertical centre of the comb, near the front edge. Measure multiple slots, as they can vary a bit (expecially slot width)
Note on my Suzuki Olive, the slots are 4.0mm at the opening and 4.3mm at the back, currently this front->back tapering is not supported.
SlotDepths:You can either enter the depths of the first and last slots, and it will interpolate. Or you can enter all (10) values for each slot (left to right). To measure depth, hold something flat across the front face to the comb, then measure internal depths with calipers.
The reedplate screw hole positions are measured from plate-edge to the edge of the holes with calipers (to make measurement/data entry easier)
Note that the screw hole ID in the reedplate must be entered separately to the desired hole size in the comb.
ReedPlates and Slots are centred in X, but there is an offset value if you need to slide sideways a little.
Hole Oversize The parameter HoleOS (View tab) is used allows you to trim the actual printed holesizes until they are correct. On my printer printed holes are typically 0.5mm undersize.
A Hole Test Piece with the two hole sizes in it can be made to adjust this quickly.
Upgrading Versions
Unfortunately the customizer does not support libraries, so a single file has to be used. This means that when I update the scad file, you will need to copy an paste your dimensions from the old to the new versions.
All dimensions for a particular harmonica are between the lines
//---------- Harmonica Specific BEGINS ------
//---------- Harmonica Specific ENDS ------
To make a DXF file for laser cutting plain comb set WhatToShow=3
Slicing is SLOW, do it when design is finalised.
Export DXF from menu File->Export->export to DXF .