Thingiverse

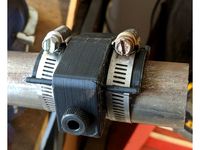
Handle Hole Jig by julvr
by Thingiverse
Last crawled date: 3 years ago
A universal tool for all your kitchen cupboard handle hanging needs...
I had to replace the hardware on my kitchen cabinets, and I know from past experience that being off by even a millimeter is very visible. I decided to make a template this time around. It worked quite well, but while using it I thought of some more improvements. While I'm done with mine for a while, I thought I'd model them up, and post here for others to use.
With the download, you get:
A Main bracket with guide holes spaced at both 3" and 5" apart (fits most hardware). Deep guide holes help make sure the the drill does not go in on an angle
Adjustable guide which keeps main bracket square with side of cabinet door/drawer. Guide can be adjusted from around 1" to 7".
Holes in Main Bracket which accept 8-32 screws for locking the guide into place. If you don't have 8-32 screws, don't worry -- they come standard with most kitchen cabinet hardware!
Center markers on Main bracket which mark the centers of the 3" and 5" holes (for easy alignment)
Centering pins. Once one hole is drilled, pin can be inserted through the guide hole into drilled hole. This will keep the jig firmly in place. Also useful when going from single hole hardware to multi hole hardware. There's two holes on the main bracket to hold the pins when not in use. (The second pin is in case you break your first one. If you break both, you can use an 11/64ths drill bit instead)
Springs to hold jig in place. These can be mounted on the end of the guide, which hold the guide in place. There's two models -- one for 3/4" and one for 5/8" hardware. They can be mounted with 8-32 screws or with krazy glue.
A couple of quick hints:
Most kitchen hardware comes with 8-32 screws. You need an 11/64 drill bit to drill shanks for this (this jig is made assuming those sizes). Also most kitchen hardware have 3" or 5" center to center, but you should double check before printing this.
The pilot holes for the 8-32 screws used to lock the guide in place are a touch small (on purpose). You either need to tap those with an 8-32 tap or predrill with a 9/64 and then you can use a screw to self-thread.
The guide is quite long, so this has to be printed in PLA on a heated bed. Kapton tape is suggested. No supports required to print.
Similar models
thingiverse
free

Customizable Cabinet Pull Jig Type 3 (Imperial) by kingmokex86
...at come with drawer pulls.
the lines across the device are center-lines to help align the jig when drilling out holes on drawers.
thingiverse
free

Customizable Cabinet Pull Jig Type 3 (Metric) by kingmokex86
...at come with drawer pulls.
the lines across the device are center-lines to help align the jig when drilling out holes on drawers.
thingiverse
free

Drawer Pull Drilling Jig (file included to modify centers) by SpeedMaker
...modify centers) by speedmaker thingiverse drawer pull drilling jig, similar to the rockler jig it, which is designed to...
3dwarehouse
free

Centre Cross-Drilling Jig
... to hold in place. drill the holes for the bolts while clamped in place to ensure the holes are aligned.) (drawn with sketchup 8)
thingiverse
free
1.5" Tube Drill Guide
...1/2-20 tap, to accept a thread-in drill guide/bushing. simply run a tap thru the print, and screw in the bushing of your choice.
thingiverse
free

Book shelf pin hole jig drill alignment tool by Bazzz
...item/new-2-sizes-hss-brass-self-centering-hinge-twist-drill-bits-1-4-5mm-screw-hole/32798182907.html?spm=a2g0s.9042311.0.0.iwcz5n
thingiverse
free

1.75" Tube Drill Guide
... 1/2-20 tap, to accept a thread-in drill guide/bushing. simply run a tap thru the print, and screw in the bushing of your choice.
thingiverse
free

2x4 Screw Jigs
...e used as pilot holes for larger drill bits. the photos included are of boards with larger holes drilled for 1/4" hex bolts.
thingiverse
free

Ikea Lack Table Stack Hack Jig by snocat
...h tabletop to legs using (8) #8 x 3" woodscrews.
use dowel screws to attach legs to bottom tabletop.
repeat as necessary.
grabcad
free

Jig Drilling
...igs are used to drill holes that are located according to a template. this is useful for drilling holes for patterns and designs.
Julvr
thingiverse
free

Book-Mark by julvr
...book-mark by julvr
thingiverse
pun intended
thingiverse
free

Pool Tool by julvr
...pool tool by julvr
thingiverse
a tool to tighten/loosen pool caps.
thingiverse
free

Yet Another Wall Hook by julvr
...yet another wall hook by julvr
thingiverse
sturdy hook. prints without support (print on its side, with 100% infill).
thingiverse
free

Santa Present Tag by julvr
...giverse
this is the base for a present tag shaped like santa. you can add text to the bottom and have some custom printed tags.
thingiverse
free

Corona Cold Hold Packs by julvr
...et for corona bottles for the cold hold. they are interchangeable with the standard cold packs (no need to reprint a new base).
thingiverse
free

Mountable Wire Clip (based on julvr's) with SketchUp file by ACTPOHOM
...rful. so i increase it in wide and made arc corners.
i have used the sketchup 2017 to do this. i share the project skp file also.
thingiverse
free

Ace Business Card Case by julvr
... a, which needs to be filed after printing. also i sanded the front with 100 to 600 grit paper, to give it a nice shiny finish.
thingiverse
free

Costa Rica Treasure Hunt by julvr
...piece of the puzzle (a province). when they put it together they get to use google maps to figure out where in the world it is.
thingiverse
free

Cold Hold Ice Pack Tray by julvr
...it also protects the pins on the packs from damage from other items in the freezer.
this is a single print, no supports required.
thingiverse
free

Mountable Wire Clip by julvr
...it: i just uploaded a slightly better version -- it's a touch wider/stronger, and i updated the clip to catch a bit better.
Jig
turbosquid
$25

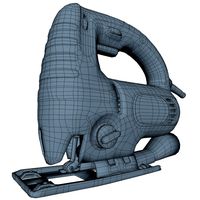
jig-saw_mid_SM
...uid
royalty free 3d model jig-saw_mid_sm for download as obj on turbosquid: 3d models for games, architecture, videos. (1244761)
turbosquid
$20
jig-saw_low
...osquid
royalty free 3d model jig-saw_low for download as obj on turbosquid: 3d models for games, architecture, videos. (1244760)
turbosquid
$10

jig-saw_hi
...bosquid
royalty free 3d model jig-saw_hi for download as obj on turbosquid: 3d models for games, architecture, videos. (1244757)
turbosquid
$7

Jig Armchair
...squid
royalty free 3d model jig armchair for download as max on turbosquid: 3d models for games, architecture, videos. (1648936)
turbosquid
$5
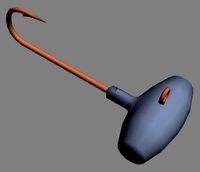
Jig Head
... available on turbo squid, the world's leading provider of digital 3d models for visualization, films, television, and games.
turbosquid
$5

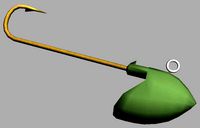
Jig Head
... available on turbo squid, the world's leading provider of digital 3d models for visualization, films, television, and games.
turbosquid
$5
Jig Head
... available on turbo squid, the world's leading provider of digital 3d models for visualization, films, television, and games.
turbosquid
$5
Jig Head
... available on turbo squid, the world's leading provider of digital 3d models for visualization, films, television, and games.
turbosquid
$5

Jig Head
... available on turbo squid, the world's leading provider of digital 3d models for visualization, films, television, and games.
turbosquid
$5

Jig Tail
... available on turbo squid, the world's leading provider of digital 3d models for visualization, films, television, and games.
Handle
archibase_planet
free
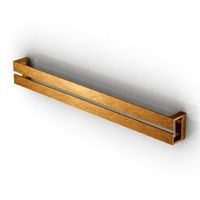
Handle
...handle
archibase planet
handle furniture handle
handle 1 - 3d model (*.gsm+*.3ds) for interior 3d visualization.
archibase_planet
free
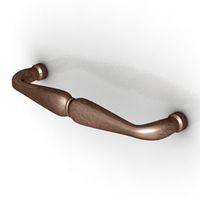
Handle
...handle
archibase planet
handle furniture handle
handle 5 - 3d model (*.gsm+*.3ds) for interior 3d visualization.
archibase_planet
free

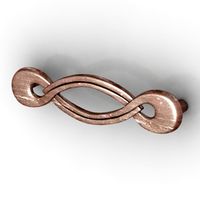
Handle
...handle
archibase planet
handle furniture handle
handle 3 - 3d model (*.gsm+*.3ds) for interior 3d visualization.
archibase_planet
free
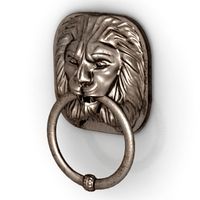
Handle
...handle
archibase planet
handle furniture handle
handle 6 - 3d model (*.gsm+*.3ds) for interior 3d visualization.
archibase_planet
free
Handle
...handle
archibase planet
handle furniture handle
handle 4 - 3d model (*.gsm+*.3ds) for interior 3d visualization.
archibase_planet
free
Handle
...handle
archibase planet
handle furniture handle
handle 2 - 3d model (*.gsm+*.3ds) for interior 3d visualization.
archibase_planet
free
Handle
...handle
archibase planet
handle furniture handle knob
handle 2 n140814 - 3d model (*.gsm+*.3ds) for interior 3d visualization.
archibase_planet
free
Handle
...handle
archibase planet
handle door knob door-handle
handle n110413 - 3d model (*.gsm+*.3ds) for interior 3d visualization.
archibase_planet
free
Handle
...handle
archibase planet
door-handle handle door-knob
handle n070209 - 3d model (*.gsm+*.3ds) for interior 3d visualization.
archibase_planet
free
Handle
...handle
archibase planet
door-handle handle door-knob
handle n270309 - 3d model (*.gsm+*.3ds) for interior 3d visualization.
Hole
design_connected
$9
Hole
...hole
designconnected
zeritalia hole shelves and storage computer generated 3d model. designed by derin design.
3ddd
$1
Magic hole
...magic hole
3ddd
magic
дизайнерское кресло magic hole
3d_export
free

black hole
...black hole
3dexport
3d rendering black hole in blender 2.9
3ddd
$1
Magic Hole
...magic hole
3ddd
philippe starck
magic hole - дизайн philippe starck (2010)
turbosquid
$4

Black Hole
...squid
royalty free 3d model black hole for download as blend on turbosquid: 3d models for games, architecture, videos. (1606724)
turbosquid
$5

security hole
...yalty free 3d model security hole for download as 3dm and max on turbosquid: 3d models for games, architecture, videos. (1669645)
turbosquid
$32
hole punch
... 3d model hole punch for download as 3ds, obj, fbx, and blend on turbosquid: 3d models for games, architecture, videos. (1230702)
3d_export
$10

Black hole
...black hole
3dexport
a minimalist representation of a singularity
turbosquid
$50

Worm Hole
... available on turbo squid, the world's leading provider of digital 3d models for visualization, films, television, and games.
turbosquid
$30

15 Hole
... available on turbo squid, the world's leading provider of digital 3d models for visualization, films, television, and games.