Thingiverse
GUST - i3 print cooler (Plus, v2.1, maybe others?) by WaveSupportApparatus
by Thingiverse
Last crawled date: 3 years ago
GUST is retired. Use its successor, Whirligig, instead!
TL;DR
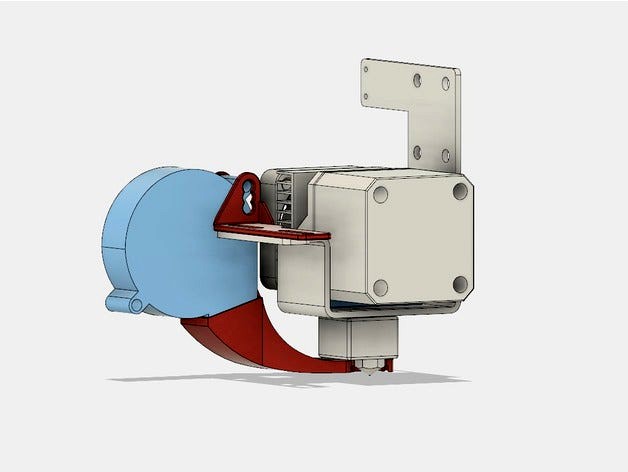
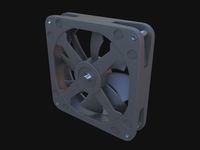
GUST is a high-efficiency part-cooling fan shroud for the i3 family of printers, designed based on the results of my print cooling experiments. It meets five design criteria:
Dump as much cold air as possible, at the highest pressure possible, as close to the nozzle as possible. This improves the quality of short layers.
Do not trap hot air in the plastic deposition area. Push it away so that warping is reduced.
Allow easy access to the nozzle for bed levelling.
Provide a clear line of sight to the nozzle and an unobstructed view of the print-in-progress for filming time lapses (I recommend my super-compact bed-mounted Raspi cam).
Allow easy removal of the entire shroud assembly for access to the hot-end.
GUST is a work-in-progress, but it's ready to use right now! I suggest you 'Watch' this thing to get notifications about new revisions.
Important compatibility info
Known to fit:
Wanhao i3 Plus or rebadged versions
Stock hot-end/extruder
Micro Swiss all-metal hot-end
Does not fit Flexion hot-end/extruder (apparently the Flexion nozzle is too short?)
Monoprice Maker Select V2.1 (thanks, Roykinn7!)
This shroud is designed for a Wanhao i3 Plus, or a rebadged version of it. It fits onto an extruder bracket that has M3 holes shaped as slots spaced around 30 mm apart, on a tab that is 45 mm long.
There is a different kind of bracket that has holes (not slots) spaced 40 mm apart, on a tab that is 50 mm long. I have provided a slotted bracket to fit these measurements, but I can't guarantee that the other bracket dimensions are the same or that the shroud will fit your bracket's height.
I have also made the assumption that your nozzle is at least 6 mm tall from the heater block to the tip, which is the case for both the Plus' stock nozzle and also for the Micro Swiss all-metal hot-end's nozzle. GUST cannot fit into the space around a shorter nozzle, and cannot be made to fit there; it's already nearly too thin.
If you are able to use this shroud on a non-Plus model, could you please comment and let the community know? Info about your bracket and nozzle would be good.
Bill of Materials
Note: Always use the latest revision of each STL (e.g. use Rev 2 instead of Rev 1). The newest files are always listed first, and they are always compatible with each other; you can use the Rev 2 duct with the Rev 1 shroud, for example, as long as they are the latest revisions of those objects. The old files remain 'below the fold' in case you want to explore them.
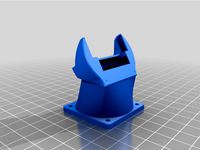
1× Cooling duct.stl. There is also a version with Meshmixer supports included, for those who don't have a slicer that can do custom supports.
1× Bracket.stl. The slotted bracket can fit on brackets with both 30 and 40 mm screw hole distances, and allows you to adjust the shroud along the X axis.
(Optional) 1 mm shim.stl to raise the shroud above the tip of your nozzle. If you need a shim that is greater than 1 mm, use 10 mm shim.stl and tell the slicer to stop at the desired height. I use 3 mm of shim for my Micro Swiss hot end.
1× 50×50×15 mm blower fan. 24 V for Plus machines, 12 V for standard machines.
1× M4 screw (25 mm), washer, and nut.
2× M3 screw (12 mm), washers, and nuts. I bonded wingnuts to grub screws with Loctite, and I use thumb wheels to tighten them down. Tool-less shroud removal!
Installation
Level your bed.
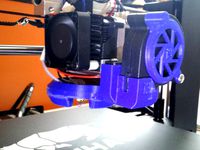
Join the blower fan, Duct, and Bracket using the M4 screw. Leave it loose for now.
Attach Bracket to the fan mounting bracket of the extruder block using the M3 screws. Leave these loose for now.
Looking from the side, align the nozzle with the opening of the shroud by moving the Bracket forwards or backwards. Tighten the M3 bracket screws.
If needed, add Shims to raise the base of the shroud about 1 mm above the tip of the nozzle.
Zero the Z axis. Pivot the Duct so that it is parallel to the bed. Confirm that it does not collide with the bed.
Tighten the M4 screw.
Suggested cooling profile: 0–20 % speed for the first layer. 100 % for all subsequent layers.
Test spike slicer settings
Want to follow along? Here are the settings I used:
PLA, 0.40 mm nozzle, 0.20 mm layer height.
2 perimeters with 2 bottom layers
No infill
75 mm/s base printing speed
Adjust printing speed for layers below 1 second, allow reduction down to 5 %
Frequently Asked Questions
Won't it melt from being so close to the nozzle?
Nope! My experience with shrouds like this is that so much cold air is passing through them that they barely deform, if at all. I have had this particular shroud printed in PLA and even touching the heater block's insulation and it isn't deformed.
If you are worried about the shroud melting while printing a large first layer without the fan running, there are four ways to deal with it:
Trust that PLA has bad thermal conductivity, and the design of the shroud means that only an island on the top surface of the shroud is being heated up, and the heat will find it difficult to spread to the rest of the shroud to cause a structural failure.
Increase the air gap between shroud and block.
Put extra insulation between the shroud and heating block.
Run the fan at a very low speed for the first layer (10-20 %) to keep air moving through it. Make sure to actually check that the fan turns at the speed you've selected; my fan won't turn for anything less than 20 % speed.
This was the best way to design the shroud as far as I could see, in order to meet the design requirement of getting right up against the nozzle. The nozzle is only 6 mm tall, so space is limited:
| Heater block |
----------------
1 mm | | Insulating air gap
2 mm | | ===========
3 mm | | Air passage
4 mm | | Air passage
5 mm | | ===========
6 mm \_____/ Clearance from print
There's no room, in short, and reducing the air passage just makes the fan louder and makes backflow worse.
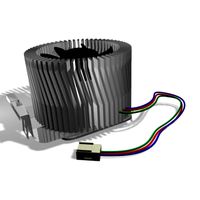
What kind of blower fan should I use?
The strongest one you can find with the highest static pressure rating. You can always turn it down if it's too powerful. I've had good times with Shenzhen Gdstime Technology Co. Ltd fans. I've also heard good things about YYQ fans, although I have never used one. But caveat emptor: CFM specs from random sellers are probably untrue.
Can I use a 12 V fan in a 24 V system?
Yes, but you shouldn't. Aside from the possibility of the fans sparking because they're over-volted, they will eventually fail and start making these horrible grinding/rattling sounds.
TL;DR
GUST is a high-efficiency part-cooling fan shroud for the i3 family of printers, designed based on the results of my print cooling experiments. It meets five design criteria:
Dump as much cold air as possible, at the highest pressure possible, as close to the nozzle as possible. This improves the quality of short layers.
Do not trap hot air in the plastic deposition area. Push it away so that warping is reduced.
Allow easy access to the nozzle for bed levelling.
Provide a clear line of sight to the nozzle and an unobstructed view of the print-in-progress for filming time lapses (I recommend my super-compact bed-mounted Raspi cam).
Allow easy removal of the entire shroud assembly for access to the hot-end.
GUST is a work-in-progress, but it's ready to use right now! I suggest you 'Watch' this thing to get notifications about new revisions.
Important compatibility info
Known to fit:
Wanhao i3 Plus or rebadged versions
Stock hot-end/extruder
Micro Swiss all-metal hot-end
Does not fit Flexion hot-end/extruder (apparently the Flexion nozzle is too short?)
Monoprice Maker Select V2.1 (thanks, Roykinn7!)
This shroud is designed for a Wanhao i3 Plus, or a rebadged version of it. It fits onto an extruder bracket that has M3 holes shaped as slots spaced around 30 mm apart, on a tab that is 45 mm long.
There is a different kind of bracket that has holes (not slots) spaced 40 mm apart, on a tab that is 50 mm long. I have provided a slotted bracket to fit these measurements, but I can't guarantee that the other bracket dimensions are the same or that the shroud will fit your bracket's height.
I have also made the assumption that your nozzle is at least 6 mm tall from the heater block to the tip, which is the case for both the Plus' stock nozzle and also for the Micro Swiss all-metal hot-end's nozzle. GUST cannot fit into the space around a shorter nozzle, and cannot be made to fit there; it's already nearly too thin.
If you are able to use this shroud on a non-Plus model, could you please comment and let the community know? Info about your bracket and nozzle would be good.
Bill of Materials
Note: Always use the latest revision of each STL (e.g. use Rev 2 instead of Rev 1). The newest files are always listed first, and they are always compatible with each other; you can use the Rev 2 duct with the Rev 1 shroud, for example, as long as they are the latest revisions of those objects. The old files remain 'below the fold' in case you want to explore them.
1× Cooling duct.stl. There is also a version with Meshmixer supports included, for those who don't have a slicer that can do custom supports.
1× Bracket.stl. The slotted bracket can fit on brackets with both 30 and 40 mm screw hole distances, and allows you to adjust the shroud along the X axis.
(Optional) 1 mm shim.stl to raise the shroud above the tip of your nozzle. If you need a shim that is greater than 1 mm, use 10 mm shim.stl and tell the slicer to stop at the desired height. I use 3 mm of shim for my Micro Swiss hot end.
1× 50×50×15 mm blower fan. 24 V for Plus machines, 12 V for standard machines.
1× M4 screw (25 mm), washer, and nut.
2× M3 screw (12 mm), washers, and nuts. I bonded wingnuts to grub screws with Loctite, and I use thumb wheels to tighten them down. Tool-less shroud removal!
Installation
Level your bed.
Join the blower fan, Duct, and Bracket using the M4 screw. Leave it loose for now.
Attach Bracket to the fan mounting bracket of the extruder block using the M3 screws. Leave these loose for now.
Looking from the side, align the nozzle with the opening of the shroud by moving the Bracket forwards or backwards. Tighten the M3 bracket screws.
If needed, add Shims to raise the base of the shroud about 1 mm above the tip of the nozzle.
Zero the Z axis. Pivot the Duct so that it is parallel to the bed. Confirm that it does not collide with the bed.
Tighten the M4 screw.
Suggested cooling profile: 0–20 % speed for the first layer. 100 % for all subsequent layers.
Test spike slicer settings
Want to follow along? Here are the settings I used:
PLA, 0.40 mm nozzle, 0.20 mm layer height.
2 perimeters with 2 bottom layers
No infill
75 mm/s base printing speed
Adjust printing speed for layers below 1 second, allow reduction down to 5 %
Frequently Asked Questions
Won't it melt from being so close to the nozzle?
Nope! My experience with shrouds like this is that so much cold air is passing through them that they barely deform, if at all. I have had this particular shroud printed in PLA and even touching the heater block's insulation and it isn't deformed.
If you are worried about the shroud melting while printing a large first layer without the fan running, there are four ways to deal with it:
Trust that PLA has bad thermal conductivity, and the design of the shroud means that only an island on the top surface of the shroud is being heated up, and the heat will find it difficult to spread to the rest of the shroud to cause a structural failure.
Increase the air gap between shroud and block.
Put extra insulation between the shroud and heating block.
Run the fan at a very low speed for the first layer (10-20 %) to keep air moving through it. Make sure to actually check that the fan turns at the speed you've selected; my fan won't turn for anything less than 20 % speed.
This was the best way to design the shroud as far as I could see, in order to meet the design requirement of getting right up against the nozzle. The nozzle is only 6 mm tall, so space is limited:
| Heater block |
----------------
1 mm | | Insulating air gap
2 mm | | ===========
3 mm | | Air passage
4 mm | | Air passage
5 mm | | ===========
6 mm \_____/ Clearance from print
There's no room, in short, and reducing the air passage just makes the fan louder and makes backflow worse.
What kind of blower fan should I use?
The strongest one you can find with the highest static pressure rating. You can always turn it down if it's too powerful. I've had good times with Shenzhen Gdstime Technology Co. Ltd fans. I've also heard good things about YYQ fans, although I have never used one. But caveat emptor: CFM specs from random sellers are probably untrue.
Can I use a 12 V fan in a 24 V system?
Yes, but you shouldn't. Aside from the possibility of the fans sparking because they're over-volted, they will eventually fail and start making these horrible grinding/rattling sounds.
Similar models
thingiverse
free

WHIRLIGIG - i3 Plus/v2.1 print cooler by WaveSupportApparatus
...ans sparking because they're over-volted, they will eventually fail and start making these horrible grinding/rattling sounds.
thingiverse
free

Printrbot Simple Metal 40mm Fan Shroud Shim by 3DMasterRace
...e hot end in the centre of the fan shroud on my printrbot simple metal.
used on this:-
http://www.thingiverse.com/make:123627
thingiverse
free
Nozzle Viewing Shroud and Blower Fan Mount for Wanhao Duplicator i3 by Pigworthy
...ve easily.
i used this fan.http://www.amazon.com/gp/product/b00mju6jr2?psc=1&redirect=true&ref_=oh_aui_detailpage_o02_s00
thingiverse
free

Fan Shroud for Turnigy Fabrikator 3D + metal hot end by joop1987
...ront. it uses the original mounting screw holes. the bottom plate doesn't let air on the nozzle and won't cool off abs.
thingiverse
free

fan shrouds for high beam version of direct i3 carriage collaborative wade extruder by curious_pl
...pports.
'decimated' version of print fan shroud does have different dimensions - it is old version for different nozzle.
thingiverse
free

Hexagon hot end shroud for MakerFarm i3 i3v Wade's Extruder by Printbus
...ounded for consistency with the makerfarm design style. suitability for other hexagon hot end applications has not been verified.
thingiverse
free

30MM Kossel Mini Hot End Fan Shroud by electronhacks
...t hot ends.
the walls of the shroud are 2 mm thick which keeps it light however be careful with it until you have it installed.
thingiverse
free

Geeetech i3 Pro B Fan Shroud by EXpanded
...et the shroud a bit closer to the nozzle.
the shroud and fan is mounted using 5 m3 screws that i had spare from the geeetech kit.
thingiverse
free

E3Dv6 plus Fan mount for MP Mini by ImChris
...nal e3dv6 these measurement may need to be adjusted. a step file has been supplied so you can modify if needed.
screws are #6x32
thingiverse
free
E3D v6 Fan Shroud for Printrbot Simple Metal by olla
...shroud to fit my printrbot simple metal that i equipped with an e3d v6 hot end.
successfully printed in pla on a prusa i3 mk3s+
Wavesupportapparatus
thingiverse
free
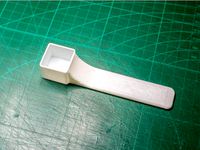
Metamucil measuring scoop by WaveSupportApparatus
...ry fibre supplement, equivalent to about 6 grams. scoop up a bunch of metamucil powder, level off the scoop, and you're done!
thingiverse
free
Drying tray by WaveSupportApparatus
...and adds more cleaning work for you later. print this drying tray and stick some rubber feet onto it, and this problem is solved!
thingiverse
free
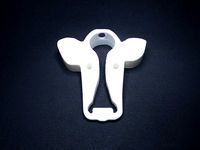
Cow face doorstop by WaveSupportApparatus
...d by gayatri for the noun project.
its dimensions are 70 × 70 × 20 mm, or very approximately 2¾ × 2¾ × ¾ inches in ye olde unitſ.
thingiverse
free

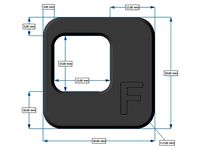
TEST - The generalised test object by WaveSupportApparatus
...ppearance and bonding.
flow rate calibration (read this procedure).
visualise ringing/vibration inherent to the x, y, and z axes.
thingiverse
free

Stub-handled ice scraper by WaveSupportApparatus
... you might hold a screwdriver, or you can hold it with your fingertips inside the hollow and the base of the handle in your palm.
thingiverse
free

Plant label (120 × 25 × 0.60 mm) by WaveSupportApparatus
...esupportapparatus
thingiverse
a large plant tag measuring 120 × 25 × 0.60 mm (l×w×d). can fit into the label slots of most pots.
thingiverse
free

8-strip PCR tube opener by WaveSupportApparatus
...r strips quickly (both domed- and flat-top tubes).
if you want to open rows of larger tubes, look at kailun's multi-decapper.
thingiverse
free

4-way wire connector (2 mm hanger wire) by WaveSupportApparatus
... by wavesupportapparatus
thingiverse
90° connector for connecting hanger wires (2 mm od). use super glue to reinforce the joint.
thingiverse
free
Dimensional test print by WaveSupportApparatus
....
dimensional accuracy is less important than getting enough plastic down. calibrate your flow rate correctly to figure this out.
thingiverse
free
Leitz Wetzlar Periplan NF 10x eyepiece cover by WaveSupportApparatus
...periplan nf 10x eyepiece to protect it from dust and damage. the cover positively snaps onto the eyepiece with very little force.
Gust
3ddd
$1

raz guste table 01
... сервиз , raz
classic table with it`s accessories
turbosquid
$15

Gust Jar Zelda Minish Cap
...del gust jar (zelda minish cap) for download as blend and fbx on turbosquid: 3d models for games, architecture, videos. (1596930)
3d_export
$5

Blood decal 1 3D Model
...blood decal 1 3d model 3dexport blood gust red dead zombie decal texture gui game ready low...
3d_export
$5

Blood decal 4 3D Model
...blood decal 4 3d model 3dexport blood gust red dead zombie decal texture gui game ready low...
3d_export
$5

Blood decal 2 3D Model
...blood decal 2 3d model 3dexport blood gust red dead zombie decal texture gui game ready low...
3d_export
$5

Blood decal 3 3D Model
...blood decal 3 3d model 3dexport blood gust red dead zombie decal texture gui game ready low...
3d_export
$30

8 blood decals pack 3D Model
...8 blood decals pack 3d model 3dexport blood gust red dead zombie decal texture gui game ready low...
3d_export
$5

crying boy nio llorando
...para entrar al mundo por internet. espero que les gust ...
3d_export
$50

Piedra del peol
...en la cima de la piedra, espero que les gust. ...
3d_export
$15

Dassault Rafale
...3dexport the dassault rafale (french pronunciation: [ʁafal], literally meaning "gust of wind", and "burst of fire" in a more...
Cooler
archibase_planet
free

Cooler
...hibase planet
wine-cooler wine cooler kitchen equipment
rk wine cooler uc - 3d model (*.gsm+*.3ds) for interior 3d visualization.
archibase_planet
free
Cooler
...cooler
archibase planet
cooler
cooler seyedmms n271212 - 3d model (*.gsm+*.3ds) for interior 3d visualization.
archibase_planet
free
Cooler
...cooler
archibase planet
refrigerator cooler kitchen's technics
cooler - 3d model for interior 3d visualization.
archibase_planet
free
Cooler
...er
archibase planet
pc equipment cooler computer equipment
cooler n040908 - 3d model (*.gsm+*.3ds) for interior 3d visualization.
archibase_planet
free
Cooler
...cooler
archibase planet
cooler cpu fan pc equipment
cooler asus n080211 - 3d model (*.gsm+*.3ds) for interior 3d visualization.
3d_export
$5

Cooler
...cooler
3dexport
water cooler. program maya 2018. materials v-ray 3.6.
3d_export
$5

Juice cooler
...juice cooler
3dexport
juice cooler
turbosquid
$10
Cooler
...uid
royalty free 3d model cooler for download as max and fbx on turbosquid: 3d models for games, architecture, videos. (1478561)
turbosquid
$20
cooler
... available on turbo squid, the world's leading provider of digital 3d models for visualization, films, television, and games.
turbosquid
$20

cooler
... available on turbo squid, the world's leading provider of digital 3d models for visualization, films, television, and games.
I3
3d_export
$10

suv i3
...suv i3
3dexport
suv i3 2013 series
3d_ocean
$89

BMW i3 2012
...y, in real units of measurement, qualitatively and maximally close to the original. model formats: - *.max (3ds max 2008 scanl...
cg_studio
$99

BMW i3 20143d model
...
cgstudio
.3ds .c4d .fbx .lwo .max .obj - bmw i3 2014 3d model, royalty free license available, instant download after purchase.
cg_studio
$99

BMW i3 20123d model
...tudio
.3ds .c4d .fbx .lwo .max .mb .obj - bmw i3 2012 3d model, royalty free license available, instant download after purchase.
cg_studio
$99

BMW i3 20143d model
...tudio
.3ds .c4d .fbx .lwo .max .mb .obj - bmw i3 2014 3d model, royalty free license available, instant download after purchase.
humster3d
$75

3D model of BMW i3 2014
...
buy a detailed 3d model of bmw i3 2014 in various file formats. all our 3d models were created maximally close to the original.
humster3d
$40

3D model of Kitchen Set I3
...uy a detailed 3d model of kitchen set i3 in various file formats. all our 3d models were created maximally close to the original.
3d_ocean
$30

Kitchen set i3
...ensils oven plates shelves sink table ware
kitchen set i3 include 3d models: cooker, oven, sink, cupboards, table, chair, plates.
3d_ocean
$89

BMW i3 2014
...y, in real units of measurement, qualitatively and maximally close to the original. model formats: - *.max (3ds max 2008 scanl...
cg_studio
$99

BMW i3 Concept 20113d model
...i3
.3ds .c4d .fbx .lwo .max .obj - bmw i3 concept 2011 3d model, royalty free license available, instant download after purchase.
Maybe
turbosquid
$28

maybe chair
... available on turbo squid, the world's leading provider of digital 3d models for visualization, films, television, and games.
3d_export
$20

maybe chair by andrea borgogni
...maybe chair by andrea borgogni
3dexport
maybe chair by andrea borgogni model in rhino
turbosquid
$25

Modern "Maybe" Chair
... available on turbo squid, the world's leading provider of digital 3d models for visualization, films, television, and games.
3d_export
$5

neon sign coffee maybe
...jpg albedo normal ao metallic roughness emissive opacity all textures has 8 bits channel available formats: .fbx .mtl .obj .blend
3d_export
$5

A soft chair
...only $ 5 (maybe someone was sitting on it) (!maybe not for...
3d_export
free

Yamaha HS5
...yamaha hs5 3dexport my first job, maybe someone will need this model...
3d_export
$5

workbench
...workbench 3dexport a simple old (or maybe not old, depending on the texture) vestak. in the...
3d_export
$5

bunny with animations
...poly bunny model with animation: run, fail, die, jump. maybe game...
3d_export
free

House
...134 objects in the scene. the house has walls, maybe you want to create an...
3d_ocean
$6

Fun Rocket
...rocket 3docean fun game rocket just a fun rocket maybe you can use for a game! comes with uv...
Plus
turbosquid
$2
plus-plus puzzle and lego
...d model plus-plus puzzle and lego for download as stl and obj on turbosquid: 3d models for games, architecture, videos. (1662633)
3ddd
$1
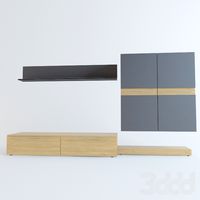
Стенка Plus
...стенка plus
3ddd
plus , модная мебель
фабрика "модная мебель", модель plus
3ddd
$1

Спальня METIS plus
... hulsta , metis , спальня
спальня metis plus
design_connected
$11
be plus B+
...be plus b+
designconnected
blå station be plus b+ chairs computer generated 3d model. designed by börge lindau.
design_connected
$11
Bank Plus
...bank plus
designconnected
röthlisberger kollektion bank plus coffee tables computer generated 3d model. designed by atelier oi.
3ddd
$1

elos Plus
... candela
elos plus — мультифункциональный аппарат для проведения лазерного и ipl лечений
3ddd
$1
Calligaris Even Plus
...calligaris even plus
3ddd
calligaris
calligaris_chair_even plus
design_connected
$29

Basket Plus
...nconnected
photo-realistic 3d models of the basket plus bed from bonaldo for 3d architectural and interior design presentations.
3ddd
free
Artpole Faktum Plus
... артполе , панель
artpole faktum plus
размеры:
высота 625мм
ширина 800мм
глубина 17мм
3ddd
$1

Мария / Jazz Plus
...мария / jazz plus
3ddd
мария
кухня фабрики мария модель__jazz plus
V2
3d_export
free

Lamp v2
...lamp v2
3dexport
lamp v2 with solar panel
3d_export
$5

hammerhead v2
...hammerhead v2
3dexport
razer hammerhead v2 headphones, modeled in cinema 4d, render in corona
3d_export
$5

manometer v2
...manometer v2
3dexport
3d_export
$5

potato v2
...potato v2
3dexport
turbosquid
$52

Lifebuoys v2
...squid
royalty free 3d model lifebuoys v2 for download as fbx on turbosquid: 3d models for games, architecture, videos. (1560870)
turbosquid
$2

Mask v2
...turbosquid
royalty free 3d model mask v2 for download as stl on turbosquid: 3d models for games, architecture, videos. (1527741)
turbosquid
free

Flashlight V2
...d
free 3d model flashlight v2 for download as , obj, and fbx on turbosquid: 3d models for games, architecture, videos. (1663559)
turbosquid
$29

Thanos v2
...
royalty free 3d model thanos v2 for download as ztl and obj on turbosquid: 3d models for games, architecture, videos. (1651077)
turbosquid
$29

Titan v2
...d
royalty free 3d model titan v2 for download as ztl and obj on turbosquid: 3d models for games, architecture, videos. (1540228)
turbosquid
$29

Frieza v2
...
royalty free 3d model frieza v2 for download as ztl and obj on turbosquid: 3d models for games, architecture, videos. (1701238)
1
turbosquid
$69

armchairs(1)(1)
... available on turbo squid, the world's leading provider of digital 3d models for visualization, films, television, and games.
turbosquid
$15

ring 1+1
... available on turbo squid, the world's leading provider of digital 3d models for visualization, films, television, and games.
turbosquid
$10

chair(1)(1)
... available on turbo squid, the world's leading provider of digital 3d models for visualization, films, television, and games.
turbosquid
$8

Chair(1)(1)
... available on turbo squid, the world's leading provider of digital 3d models for visualization, films, television, and games.
turbosquid
$2

RING 1(1)
... available on turbo squid, the world's leading provider of digital 3d models for visualization, films, television, and games.
turbosquid
$1

Table 1(1)
... available on turbo squid, the world's leading provider of digital 3d models for visualization, films, television, and games.
turbosquid
$1

house 1(1)
... available on turbo squid, the world's leading provider of digital 3d models for visualization, films, television, and games.
turbosquid
$59

Formula 1(1)
...lty free 3d model formula 1 for download as max, fbx, and obj on turbosquid: 3d models for games, architecture, videos. (1567088)
design_connected
$11

No 1
...no 1
designconnected
sibast no 1 computer generated 3d model. designed by sibast, helge.
turbosquid
$2

desert house(1)(1)
...3d model desert house(1)(1) for download as 3ds, max, and obj on turbosquid: 3d models for games, architecture, videos. (1055095)
Others
design_connected
$16

ST12 Other
...signconnected
photo-realistic 3d models of the st12 other stool from e15 for 3d architectural and interior design presentations.
turbosquid
$26

Oar and Other
...quid
royalty free 3d model oar and other for download as fbx on turbosquid: 3d models for games, architecture, videos. (1473409)
turbosquid
$5
chair with other
...id
royalty free 3d model chair with other for download as ma on turbosquid: 3d models for games, architecture, videos. (1171468)
3ddd
$1

parfume and other
...parfume and other
3ddd
тумбочка
create by sametyuzer
turbosquid
$79

The Others Collection
...others collection for download as 3ds, max, obj, fbx, and dae on turbosquid: 3d models for games, architecture, videos. (1480228)
turbosquid
$25

Other Man
... available on turbo squid, the world's leading provider of digital 3d models for visualization, films, television, and games.
turbosquid
$15

other car.max
... available on turbo squid, the world's leading provider of digital 3d models for visualization, films, television, and games.
turbosquid
$2
Other Mothers Hand
... 3d model other mothers hand for download as ma, fbx, and obj on turbosquid: 3d models for games, architecture, videos. (1663825)
turbosquid
$8

other sport wheel
... available on turbo squid, the world's leading provider of digital 3d models for visualization, films, television, and games.
turbosquid
$2

pool and other elements
... available on turbo squid, the world's leading provider of digital 3d models for visualization, films, television, and games.
design_connected
$27

...print
designconnected
moroso print computer generated 3d model. designed by wanders, marcel.
3ddd
free

Eichholtz Prints
...- eichholtz print central station i
13 - eichholtz print central station ii
14 - eichholtz print marisa
15 - eichholtz print tish
3ddd
$1

Eichholtz Prints
...print abstract - set of 2
10 - eichholtz print orange abstract
11 - eichholtz print buddha right
12 - eichholtz print buddha left
turbosquid
$1

... available on turbo squid, the world's leading provider of digital 3d models for visualization, films, television, and games.
3ddd
free

Eichholtz Prints
...of 4
2 - print dunbar 2 set of 4
3 - print guadeloupe 1 set of 4
4 - print guadeloupe 2 set of 4
5 - print giles
6 - print trett
3ddd
$1

Eichholtz Prints
...nt tutti frutti
3 - eichholtz prints watson - set of 2
4 - eichholtz prints antique nautilus - set of 2
5 - eichholtz print tiara
3d_export
$5

Monster for printing
...monster for printing
3dexport
monster 3d model printing
3ddd
free

printed rug
...printed rug
3ddd
ковер
very creative printed rug
3ddd
free

Eichholtz Prints
...иал: бумага
габариты (вхш): 72 x 62 см
описание: print sweetmeat - постер в деревянной раме.
3 - prints varsity set of 2
арти
3ddd
free

Art Print Posters
...art print posters
3ddd
прованс
art print posters by patrician prints