Thingiverse
Gravity-fed watering parts by chuckv3
by Thingiverse
Last crawled date: 4 years, 4 months ago
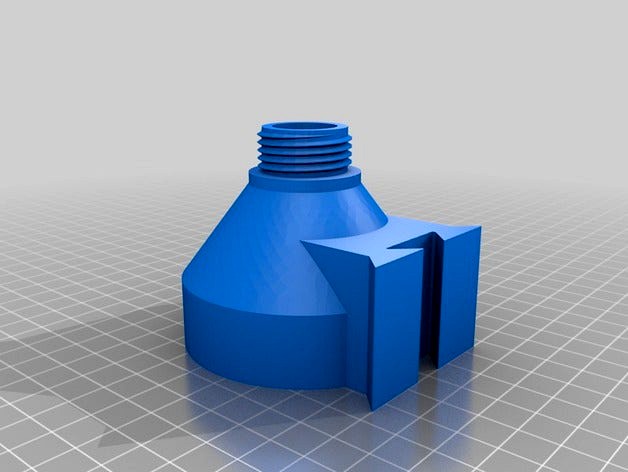
You can mount this on a wall or side of your cabinets in order to provide trickles of water to your plants using a garden-hose style timer. Screw the conical part directly into the garden hose timer, then use the mounting bracket to mount to a vertical surface using #8 wood screws or bolts. You can invert any solid bottle that has tapered sides such as a 1-liter soda or thick-sided water bottle. The bottle must be sturdy enough to create siphon pressure inside so it doesn't empty unless the water level goes below it's opening -- same way the old water coolers work.
How you regulate the flow, distribute the water from the bottom of the timer and all that are project-specific.
Note that this was designed for my personal-size sprouter which is a separate project http://www.thingiverse.com/thing:2136092 but I posted it as a separate thing in case anyone else is trying to do gravity-fed timed watering on a small scale.
EDIT: you need the type of timer that you can see through when it's in the "on" position. These are round with a clear screw-on faceplate and can be found on ebay for about $15.
Here is a timer that works if you don't trust stuff on ebay (and I don't blame you): https://www.amazon.com/dp/B000UJH6HQ
NOTE: If the dove-tails are too tight, just sand down the wide dove-tail surfaces until you get it loose enough to go on and off without pounding on it. I found out first hand that hammering can introduce slow leaks into the parts if printed on low quality. I recommend sanding until the parts are easy to insert and remove, but not so much that they wiggle when assembled. Note that for the files seen above, that's the right-front side of the cone and the top of the mounting bracket (as they are oriented in the thingiverse thumbnails).
NOTE: I suggest printing the cone 100% in-fill to minimize the possibility of leaks. You'll use a lot less plastic on the "simplified" cone. The original cone has way too much infill and the wall thickness is all over the place.