Thingiverse
Ghostly Shelf Accessory Kit by cstarrman
by Thingiverse
Last crawled date: 4 years, 6 months ago
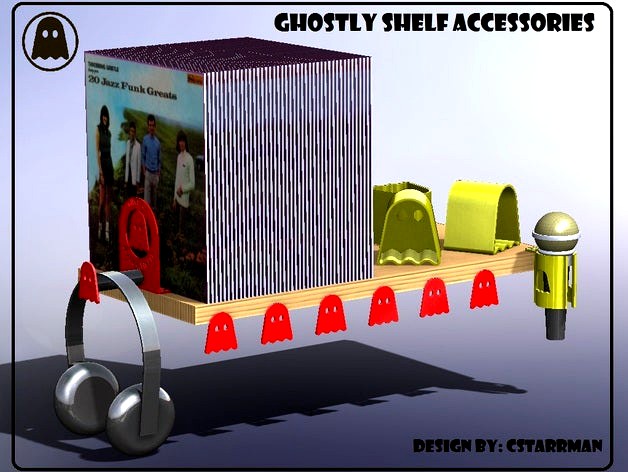
Ghostly Shelf Accessory Kit (for the DJ in the making!)
These 3D printable accessories will turn a basic shelf into a well dressed all-in-one DJ station! Each piece is easily printed on a MakerBot Mini (3.9”L x 3.9”W x 4.9”H build volume). Print as many as you need to fit your requirement and taste! Add accessories to your existing shelf, or easily construct a shelf using basic items below. Choose your colors and 3D print the accessory pieces, and customize! I suggest using the glow-in-the dark filament for a “ghostly” effect!
What you need:#8 x 1/2" Round Head Wood ScrewsPine Wood Plank 1” x 12” x 24” (or longer desired cut length)
*Shelf brackets to mount to wall, or peg brackets for pegboard
3D Printed Accessories include (as shown):
(2) Ghostly Album/CD bookends (w/ slot to accept hanger)
(1) Hanger (to hang headphones or other items)
(1) Ghostly Hanger Endcap (to keep headphones or other items from falling off of hanger)
(6) Ghostly Shelf Edge Dress (add some jazz to the front/side of shelf edge)
(3) Ghostly Pocket(s) (to house knick knacks, cleaner, or other items)
(1) Microphone Holder (self explanatory)
(1) Microphone Holder Bracket
Instructions:
Step 1: Open each accessory item (STL) and position, and center the print. Print at full scale. Select your resolution, and use rafts and supports at your discretion. All parts were designed to not utilize supports. 10% infill should be adequate.
Position and print as follows (refer to attached image):
Ghostly Album/CD Bookend (facedown, 90deg flange facing up)
Hanger (key side down, printing cylinder upwards towards peg hole)
Ghostly Hanger Endcap (facedown, 90deg flange facing up)
Ghostly Shelf Edge Dress (facedown, 90deg edge facing up)
Ghostly Pocket (flat bottom down, open side up)
Microphone Holder (flat side down, oriented with ghost side normal)
Mic. Holder Bracket (print from side position up)
Step 2: Assuming your shelf is in place, center one bookend to left/right edge of shelf. Flush to edge, and secure using (2) #8 x ½” wood screws. Insert hanger into keyslot of the bookend and rotate 90 degrees (you may use glue to secure hanger to bracket). Next, place glue on the peg of the Ghostly endcap and insert into the end of the hanger. Determine how many albums/CDs you will store upon the shelf to position the opposite side bookend. Secure with wood screws.
Step 3: If using the Ghostly shelf edge dress, slide backside edge flush against shelf bottom and secure with wood screw(s). Equally spaced if using multiple pieces.
Step 4: Secure the Microphone Holder Bracket to the top of shelf using a woodscrew. Slide the Microphone holder onto the holder bracket.
Step 4: Place the Ghostly Pockets where you like and fill up with supplies!
Step 5: Spin the wax!
Thanks for your consideration, and good luck to all participants!