Thingiverse

Generic car audio Tweeter mount 1" by David97
by Thingiverse
Last crawled date: 3 years, 1 month ago
This STL is a generic tweeter mount. Which serves as a useful way to mount tweeters to interior panels of cars.
They will need a lot of fitting, sanding, painting to get them looking good. But with enough time and patience, the results can look quite good.
I designed and built this to hold the tweeters provided in a alpine Alpine S-S65C kit. The tweeters are 1" driver, 2" mounting hole, and 17.6mm deep from the front lip. Given that these are designed around this set of tweeters, I would highly recommend doing some test prints and measurements, as the fit is quite tight. And they may not work well for every vehicle and tweeter combination. The vehicle I fitted these to was a 2004 ford courier.
Print in a material that will withstand the hot temperatures that the vehicle interior can reach. I recommend PETG, since it is easy to print, and withstands up to 80C
Assembly.
To position and fit the part I used Blu-Tack, or poster putty to position the mounts while the trims are in the vehicle. Using a dremil and grinding stone to shave down the tweeter pod. Getting it to fit well to the trim panel.
Once I had the fit correct and was happy with the position, I scribed around the part to mark the final position.
Scuff the surfaced that are to be glued together for good adhesion.Use super glue to hold hold it in the correct place.
Use epoxy resin to create a fillet between the parts.
I used fiberglass epoxy, WetSystem Z105 resin, 205 hardner, and 403 microfiber filler. No particular reason for using this stuff, other than that's what I had in my garage left over from other projects.
After mixing the resin, I added enough filler to make the resin fairly thick, so I could form a good bead between the printed part and plastic trim. Wetting a finger with rubbing alcohol to smooth out the bead and avoid the epoxy sticking to my finger helped create a smooth even fillet between both parts.
Using a sanding wheel on a dremel, I was able to sand the fillet, leaving a even radius all the way around. I used the dremel to cut out the back of the trim panel,, so I could fit the speaker and locking ring through.
Finish with hand sanding, and degreasing before applying primer filler. You may need to apply several coats of primer filler, depending on how good your sanding was. I used arcrylic based primer fill. After the primer filler drys, use wet sanding to remove any small imperfections or marks, starting at 600 grit, and progressively working up to finer sandpapers.
Finish by thoroughly washing and de-greasing. Wait for the part to dry, before applying a top coat of paint.
For my trim panel, I decided to use a satin black acrylic based rattle can. Since the color and shine closely resembled the original plastic. I'm no expert in whats the best paints to use, so use, but acrylic based paints seems to bind well with the plastics.
Unfortunately, I could not find any photos of the epoxy filling process. However will upload if I find them.
Similar models
thingiverse
free

Necklace & Bracelet Tree Holder
...fit on my printer but may need to add epoxy to make it a nice fit. i finished the parts with spray filler primer and spray paint.
thingiverse
free

Millennium Puzzle - Yu-Gi-Oh! by MechDezignGuy
...d and paint it. going to use a glow in the dark paint for the cracks and around the eye. i'll update when i'm finished.
thingiverse
free

Mercedes Benz SL500 Convertible Top Flap Replacement Hinge by jtenkely
...ed part can lie flat on the underside of the cover.
3) epoxy the new part in place and let dry before replacing cover on the car.
thingiverse
free

Frankford Vibra Primer Tube Filler Adapter and Cap (small primer) by kkrebs76
...riction fit so adhesive is not required. i used tpu material though pla or abs could be used as well. the gcode is set for tpu.
thingiverse
free

Volvo 940 Window Crank Lid by xluccianox
...ssembling the door panel. good fit, sanded it gave base of primer, some stone textured paint and then a layer of dark grey paint.
thingiverse
free

Indiana Pacers by TrendyTrioLabs
...hem off with cork on the bottom. also, acetone vapor bathed the coaster holder before pouring resin in it for strength and shine.
thingiverse
free

BMW E30 tweeter pods speaker mounts by renglish
...r the tweeter.
i have also uploaded .step files for each part and a solidworks file so feel free to make changes if you need to.
thingiverse
free

Bear Filler Mount Remix by dirtsky
...me and modified the filler guide to make it a little easier to print (fillet's are just not good for fdm for some materials).
thingiverse
free

L.A. Lakers Coaster set by TrendyTrioLabs
...hem off with cork on the bottom. also, acetone vapor bathed the coaster holder before pouring resin in it for strength and shine.
thingiverse
free

Chicago Bulls Coaster set by TrendyTrioLabs
...hem off with cork on the bottom. also, acetone vapor bathed the coaster holder before pouring resin in it for strength and shine.
David97
thingiverse
free

Switch holder for Traxxas ERevo ESC by David97
...switch holder for traxxas erevo esc by david97
thingiverse
holds the esc power switch on traxxas erevo brushless edition
thingiverse
free

Prusa i3 mk2 level bed test by David97
...prusa i3 mk2 level bed test by david97
thingiverse
prusa i3 mk2 bed leveling test.
thingiverse
free

Defy DXR XT60 holder by David97
...quad frame.
ideal for pdb boards where the battery connectors are directly above and below each other, such as the betaflightf3.
thingiverse
free

Prusa i3 mk2 SD card holder. by David97
... behind the multi-sensory interface assembly.
stores up to three pieces of encapsulated silicone wafer.
*batteries not included
thingiverse
free

Defy DXR 30 degree mount for foxeer mini by David97
...tom plate using double sided servo tape, and run a ziptie over top to secure.
also allows you to reduce standoff length to 25mm.
thingiverse
free

Hakko toroidal transformer mount (80VA 230V conversion) by David97
... printed in abs, and used acetone to glue parts together.
don't attempt conversion unless you really know what you are doing!
thingiverse
free

Mini Servo operated Claw Machine Claw Grabber by David97
...acking out, and secured the cables to it with a zip tie.
here is a short video of the claw in actionhttps://youtu.be/higzmmk-rgw
Tweeter
turbosquid
$75

tweeter
... available on turbo squid, the world's leading provider of digital 3d models for visualization, films, television, and games.
turbosquid
free

Tweeter(1)
... available on turbo squid, the world's leading provider of digital 3d models for visualization, films, television, and games.
turbosquid
free

Speaker with one Subwoofer and a Tweeter
... available on turbo squid, the world's leading provider of digital 3d models for visualization, films, television, and games.
turbosquid
$4

Tweeter Speaker 02 - Blender 3d
...r speaker 02 - blender 3d for download as blend, fbx, and obj on turbosquid: 3d models for games, architecture, videos. (1678793)
turbosquid
free

Tweeter- Driver cornet - 02 Blender 3d
...er cornet - 02 blender 3d for download as blend, obj, and fbx on turbosquid: 3d models for games, architecture, videos. (1674965)
turbosquid
free

BOX Woofer Tweeter Cornet Blender 3D
...ver - cornet - blender 3d for download as blend, fbx, and obj on turbosquid: 3d models for games, architecture, videos. (1676141)
3d_export
$15

E30 tweeter pods speaker mounts
...possible. printed with a layer of 0.2, a nozzle of 0.4. printed with abs plastic, interlayer adhesion is poor, i want to try petg
3d_ocean
$2

Tweet Tweet Bird
...tweet bird 3docean bird cartoon twitter a simple cartoon “tweeter bird. low polygon model perfect for any twitter related...
3d_export
$50

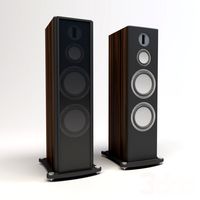
Bookshelf Speaker 3D Model
...speakers audio sound entertainment hifi home theater sub woofer tweeter vray bass treble music bookshelf speaker 3d model plutonius...
3d_export
$45

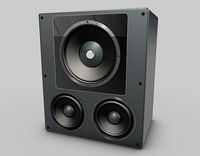
Speaker Set 3D Model
...speakers audio sound entertainment hifi home theater sub woofer tweeter vray bass treble music speaker set 3d model plutonius...
Audio
archibase_planet
free

Audio
...audio
archibase planet
home equipment audio
audio n170109 - 3d model (*.gsm+*.3ds) for interior 3d visualization.
3ddd
$1

Beats Audio
...beats audio
3ddd
наушники
наушники beats audio
3ddd
$1
колонки Monitor Audio
...колонки monitor audio
3ddd
monitor audio , monitor
колонки monitor audio - platinum
3d_ocean
$7
Audio speaker
...peakers stereo studio sub sub-woofer
high quality audio speakers. created in cinema4d but comes in various other formats as well.
3ddd
free

Clear Audio / Innovation
...clear audio / innovation
3ddd
clear audio / innovation
archive3d
free

Audio 3D Model
...ve3d
home equipment audio
audio n170109 - 3d model (*.gsm+*.3ds) for interior 3d visualization.
3ddd
$1
Vita Audio R4i
...vita audio r4i
3ddd
радио
vita audio r4i
turbosquid
$10

Audio Spectrum
...d
royalty free 3d model audio spectrum for download as blend on turbosquid: 3d models for games, architecture, videos. (1568428)
turbosquid
free

Audio Speaker
...quid
royalty free 3d model audio speaker for download as max on turbosquid: 3d models for games, architecture, videos. (1405286)
3d_export
$9
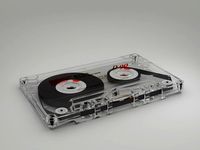
vintage audio cassette
...vintage audio cassette
3dexport
vintage audio cassette 3d model
Generic
3d_export
$17
Generator
...generator
3dexport
generator
archibase_planet
free
Generator
...base planet
generator electric generator
generator electric n300715 - 3d model (*.gsm+*.3ds+*.max) for interior 3d visualization.
design_connected
$20

Generation
...generation
designconnected
knoll generation computer generated 3d model. designed by formway design.
3d_export
$8

generator
...generator
3dexport
generator - obj, 3ds, fbx.
3d_export
$7

generator
...generator
3dexport
generator extures 4k resolution, basecolor -normal -metallic -ao-roughness-height tris:3084
turbosquid
free
generator
...rator
turbosquid
free 3d model generator for download as max on turbosquid: 3d models for games, architecture, videos. (1492909)
3ddd
$1

general
...general
3ddd
генерал
turbosquid
$99

generator
...urbosquid
royalty free 3d model generator for download as ma on turbosquid: 3d models for games, architecture, videos. (1514125)
turbosquid
$20

Generator
...rbosquid
royalty free 3d model generator for download as max on turbosquid: 3d models for games, architecture, videos. (1244841)
turbosquid
$2
Generator
...rbosquid
royalty free 3d model generator for download as fbx on turbosquid: 3d models for games, architecture, videos. (1245541)
Car
3d_export
$5

car
...car
3dexport
luxury car high quality car
3d_export
$5

car
...car
3dexport
luxury car high quality car
3d_export
$5

car
...car
3dexport
luxury car high quality car
3d_export
$5

car
...car
3dexport
luxury car high quality car
3d_export
$5

car
...car
3dexport
luxury car high quality car
archibase_planet
free
Car
...
archibase planet
car sports car motor-car sportster
car nascar#1 n300114 - 3d model (*.gsm+*.3ds) for exterior 3d visualization.
archibase_planet
free

Car
...ibase planet
car motor-car sportster sports car
car gablota xform n190214 - 3d model (*.gsm+*.3ds) for exterior 3d visualization.
archibase_planet
free

Car
...car
archibase planet
car motor car transport
car vaz 2104- 3d model for interior 3d visualization.
3d_export
$15

car
...car
3dexport
car
3d_export
free

car
...car
3dexport
car
Mount
3d_export
free

mounting bracket
...mounting plate is the portion of a hinge that attaches to the wood. mounting plates can be used indoors, cabinetry and furniture.
turbosquid
$2

MOUNTING
... available on turbo squid, the world's leading provider of digital 3d models for visualization, films, television, and games.
turbosquid
free

Mounts
... available on turbo squid, the world's leading provider of digital 3d models for visualization, films, television, and games.
turbosquid
free

Mount Fuji
...fuji
turbosquid
free 3d model mount fuji for download as obj on turbosquid: 3d models for games, architecture, videos. (1579977)
3d_export
$5

Headphone mount LR
...headphone mount lr
3dexport
headphone mount l+r
turbosquid
$39

Mount rainier
...quid
royalty free 3d model mount rainier for download as fbx on turbosquid: 3d models for games, architecture, videos. (1492586)
turbosquid
$5

pipe mounting
...quid
royalty free 3d model pipe mounting for download as obj on turbosquid: 3d models for games, architecture, videos. (1293744)
turbosquid
$3

Mounting Tires
...uid
royalty free 3d model mounting tires for download as fbx on turbosquid: 3d models for games, architecture, videos. (1708511)
3d_export
$5

Magnetic GoPro Mount
...pro mount
3dexport
cool magnetic mount for gopro. allows you to mount the camera on flat metal surfaces and get exclusive shots.
turbosquid
$5

Stone Mount
...ty free 3d model stone mount for download as ma, obj, and fbx on turbosquid: 3d models for games, architecture, videos. (1370306)
1
turbosquid
$69

armchairs(1)(1)
... available on turbo squid, the world's leading provider of digital 3d models for visualization, films, television, and games.
turbosquid
$15

ring 1+1
... available on turbo squid, the world's leading provider of digital 3d models for visualization, films, television, and games.
turbosquid
$10

chair(1)(1)
... available on turbo squid, the world's leading provider of digital 3d models for visualization, films, television, and games.
turbosquid
$8

Chair(1)(1)
... available on turbo squid, the world's leading provider of digital 3d models for visualization, films, television, and games.
turbosquid
$2

RING 1(1)
... available on turbo squid, the world's leading provider of digital 3d models for visualization, films, television, and games.
turbosquid
$1

house 1(1)
... available on turbo squid, the world's leading provider of digital 3d models for visualization, films, television, and games.
turbosquid
$1

Table 1(1)
... available on turbo squid, the world's leading provider of digital 3d models for visualization, films, television, and games.
turbosquid
$59

Formula 1(1)
...lty free 3d model formula 1 for download as max, fbx, and obj on turbosquid: 3d models for games, architecture, videos. (1567088)
design_connected
$11

No 1
...no 1
designconnected
sibast no 1 computer generated 3d model. designed by sibast, helge.
turbosquid
$2

desert house(1)(1)
...3d model desert house(1)(1) for download as 3ds, max, and obj on turbosquid: 3d models for games, architecture, videos. (1055095)