Thingiverse

Geeetech Prusa i3 C simple Lack case by monofone
by Thingiverse
Last crawled date: 3 years, 1 month ago
This is an extremly simple case for the geeetech prusa i3 acrylic series. Build of lack tables from IKEA and other mostly cheap materials. For me it was about ~45 €, without the filaments costs. But the amount of filament used is only about 200g.
Extra needs:
2 IKEA Lack tables
8 Magnets 5mm x 2mm (like https://www.conrad.de/de/permanent-magnet-rund-n45-137-t-grenztemperatur-max-80-c-conrad-components-505865.html)
4 Planes of plexiglas 500mm x 500mm x 2mm ( like https://www.bauhaus.info/aluplatten-kunststoffplatten/plexiglas-glatt-xt-/p/20114024
IKEA Ledberg LED lamp
Tiny pieces of PCB and wire for the ledberg connector
~40 screws 3.5 x 20 or similar.
Tools needed:
Drill 14mm
Forstner drill 28mm
Soldering stuff
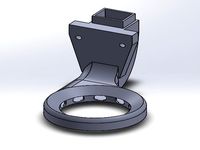
The plexiglass mounting
You need to print the lack_magnet_holder 8 times, with a resolution of at least 0.1mm and 35% and up infill
8 times lack_magnet_reverse, these are the parts put into 14mm holes in the table with a screw as counterpart to the magnets.
4 times lack_plexi_holder, these take the plexiglas at the bottom. These are put between the legs and the plate of the bottom table.
Connecting the tables
4 times a lack stackig connector like this one https://www.thingiverse.com/thing:2041575
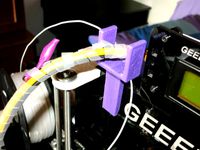
Ledberg 90° connector
2 times the ledberg connector in really high resolution with cooling enabled.
These are a little tricky. You need a little bit of a PCB and some wires. The wires a used for the male part of the connector and the PCB for the female part. Take a look at how the ledberg parts are connected and you will know what to do.
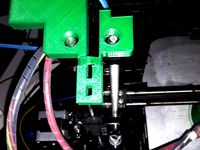
Cable routing
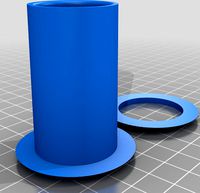
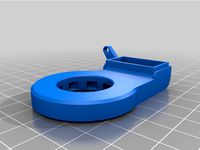
4 times the lack_cable_passthrough
It's probably enough to build only 2 of them and route all cables through one hole, I needed 2 holes because the extruder motor cables are two short for the position I used first.
Bottom mounting of electronics
For the power supply https://www.thingiverse.com/thing:2078936
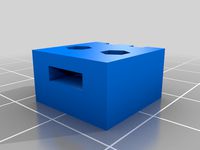
The gt2560 board is mounted with 2 of the gt2560_holder.
LCD holder
2 times needed for the LCD display, can be mounted at the bottom of the lower table.
If more information is needed use the comments to ask questions.
Extra needs:
2 IKEA Lack tables
8 Magnets 5mm x 2mm (like https://www.conrad.de/de/permanent-magnet-rund-n45-137-t-grenztemperatur-max-80-c-conrad-components-505865.html)
4 Planes of plexiglas 500mm x 500mm x 2mm ( like https://www.bauhaus.info/aluplatten-kunststoffplatten/plexiglas-glatt-xt-/p/20114024
IKEA Ledberg LED lamp
Tiny pieces of PCB and wire for the ledberg connector
~40 screws 3.5 x 20 or similar.
Tools needed:
Drill 14mm
Forstner drill 28mm
Soldering stuff
The plexiglass mounting
You need to print the lack_magnet_holder 8 times, with a resolution of at least 0.1mm and 35% and up infill
8 times lack_magnet_reverse, these are the parts put into 14mm holes in the table with a screw as counterpart to the magnets.
4 times lack_plexi_holder, these take the plexiglas at the bottom. These are put between the legs and the plate of the bottom table.
Connecting the tables
4 times a lack stackig connector like this one https://www.thingiverse.com/thing:2041575
Ledberg 90° connector
2 times the ledberg connector in really high resolution with cooling enabled.
These are a little tricky. You need a little bit of a PCB and some wires. The wires a used for the male part of the connector and the PCB for the female part. Take a look at how the ledberg parts are connected and you will know what to do.
Cable routing
4 times the lack_cable_passthrough
It's probably enough to build only 2 of them and route all cables through one hole, I needed 2 holes because the extruder motor cables are two short for the position I used first.
Bottom mounting of electronics
For the power supply https://www.thingiverse.com/thing:2078936
The gt2560 board is mounted with 2 of the gt2560_holder.
LCD holder
2 times needed for the LCD display, can be mounted at the bottom of the lower table.
If more information is needed use the comments to ask questions.
Similar models
thingiverse
free

IKEA LACK Bracket 07 by jwestonh
...a lack bracket 07 by jwestonh
thingiverse
needed a way to mount the ikea ledberg light to the inside of the ikea lack table leg.
thingiverse
free

Lack desk tidy by T_Hambush
... the table and a hole was required to pass the cables through. to be really neat print 2, one for the top and one for the bottom.
thingiverse
free

Prusa Lack Enclosure by pandro
...zuspiel’s design: https://www.thingiverse.com/thing:2012384 however, i incorporated the use magnets similar to what lkm did: https://www.thingiverse.com/thing:1843235 enclosure i built uses...
thingiverse
free

IKEA Ledberg 45° angle mount by Cyberguyen
...ring:https://www.thingiverse.com/thing:121247
it is possible to attach the 24 volt ledberg direct to the prusa mk3 power supply.
thingiverse
free

LACK side panel magnet mount by MrWhitey
...tachable.
you'll need some 10mm in diameter neodymium magnets with thickness 2-3 mm. to mount them to the legs use m4 screws.
thingiverse
free
Lack Enclosure Table Grommet by littleab
...look to both the top and bottom of the grommet.
to insulate the hole with the wires in it, just press some foam into the grommet.
thingiverse
free

Anet A8 X Axis Cable Chain Mount for IKEA Lack by carnivoreci
...x-axis cable chain mount.
now the printer fits perfect in the ikea lack printer table (http://www.thingiverse.com/thing:1843235)
thingiverse
free

Ikea Lack drawer hangers for Trofast storage bin by OtownPhilly
...rees
screw hole is 5.2mm in diameter
overall dimensions 28mm x 14mm x 28mm
prints as is, no need for rotation, rafts, or supports
thingiverse
free
3 Pin JST Male Connector PCB mount
... can mount a jst 3pin/wire male connector to a pcb. typically used for led strips i.e.
the holes are 2mm with a distance of 10mm.
thingiverse
free

Lack Cable Pass–Through by bmonty
...;m using this part to route the printer's main control cable to the bottom of the table where i have the control box mounted.
Monofone
thingiverse
free

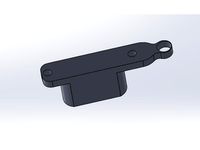
Trava Monofone by alexjfalcao
...trava monofone by alexjfalcao
thingiverse
this is the reversible lock for standard intercoms.
thingiverse
free

Sailingship card holder by monofone
...e can be placed like in the image on a wooden base plate. another option is to print a base plate with 4 holes for the two ships.
3dwarehouse
free

Moog Minimoog Model D
...between 1970 and 1981. de minimoog is een analoge monofone synthesizer. het is een van de meest invloedrijke synthesizers...
Geeetech
3d_export
free
part right for geeetech acrylic i 3
...part right for geeetech acrylic i 3
3dexport
the engine can be shifted
3d_export
free
cable holder
...cable holder 3dexport for geeetech acrylic i...
thingiverse
free

geeetech a10 by Igor_garbuz
...geeetech a10 by igor_garbuz
thingiverse
model geeetech a10 ( solidworks).
thingiverse
free
geeetech calibration by muffler1979
...geeetech calibration by muffler1979
thingiverse
just a calibration test for the bed on a geeetech
thingiverse
free
Fan for Geeetech proB
...fan for geeetech prob
thingiverse
this is my fan for the geeetech pro b i3.
thingiverse
free

Chain for Geeetech A30
...chain for geeetech a30
thingiverse
this is my personal review of chain for geeetech a30.
thingiverse
free
Zugentlastung Hotend Geeetech A30T / Strain relief Geeetech A30T by 3DDennis1983
...zugentlastung hotend geeetech a30t / strain relief geeetech a30t by 3ddennis1983
thingiverse
zugentlastung hotend geeetech a30t
thingiverse
free
Kettenhalter i3x geeetech by Autark
...kettenhalter i3x geeetech by autark
thingiverse
geeetech i3x
thingiverse
free
Geeetech A10 Fanduct by stefan177gr
...geeetech a10 fanduct by stefan177gr
thingiverse
fanduct for geeetech a10
thingiverse
free
Geeetech filament guide by RicardoZ2018
...geeetech filament guide by ricardoz2018
thingiverse
desing for geeetech i3x
Lack
3d_export
$5

LACK LACK Coffee table white 90x55 cm IKEA
..., white, 90x55 cm ikea<br>https://www.ikea.com/ru/ru/p/lack-lakk-zhurnalnyy-stol-belyy-50449907/?ysclid=l8zshj49w6656165430
turbosquid
$4

Ikea Lack
... available on turbo squid, the world's leading provider of digital 3d models for visualization, films, television, and games.
3ddd
$1

IKEA Lack Coffee Table
... кофейный
ikea lack coffee tablehttp://www.ikea.com/gb/en/catalog/products/00104291
turbosquid
$5

IKEA Lack Table
...ack table for download as blend, blend, unitypackage, and fbx on turbosquid: 3d models for games, architecture, videos. (1623135)
turbosquid
$10

Ikea Lack Set
... available on turbo squid, the world's leading provider of digital 3d models for visualization, films, television, and games.
turbosquid
$3

IKEA Lack Library
... available on turbo squid, the world's leading provider of digital 3d models for visualization, films, television, and games.
turbosquid
$1

IKEA LACK TABLE
... available on turbo squid, the world's leading provider of digital 3d models for visualization, films, television, and games.
turbosquid
free

IKEA Lack Shelf
... available on turbo squid, the world's leading provider of digital 3d models for visualization, films, television, and games.
turbosquid
$9

Ikea Table 5 Lack
... available on turbo squid, the world's leading provider of digital 3d models for visualization, films, television, and games.
turbosquid
$5

IKEA Lack Side Table
... available on turbo squid, the world's leading provider of digital 3d models for visualization, films, television, and games.
I3
3d_export
$10

suv i3
...suv i3
3dexport
suv i3 2013 series
3d_ocean
$89

BMW i3 2012
...y, in real units of measurement, qualitatively and maximally close to the original. model formats: - *.max (3ds max 2008 scanl...
cg_studio
$99

BMW i3 20143d model
...
cgstudio
.3ds .c4d .fbx .lwo .max .obj - bmw i3 2014 3d model, royalty free license available, instant download after purchase.
cg_studio
$99

BMW i3 20123d model
...tudio
.3ds .c4d .fbx .lwo .max .mb .obj - bmw i3 2012 3d model, royalty free license available, instant download after purchase.
cg_studio
$99

BMW i3 20143d model
...tudio
.3ds .c4d .fbx .lwo .max .mb .obj - bmw i3 2014 3d model, royalty free license available, instant download after purchase.
humster3d
$75

3D model of BMW i3 2014
...
buy a detailed 3d model of bmw i3 2014 in various file formats. all our 3d models were created maximally close to the original.
humster3d
$40

3D model of Kitchen Set I3
...uy a detailed 3d model of kitchen set i3 in various file formats. all our 3d models were created maximally close to the original.
3d_ocean
$30

Kitchen set i3
...ensils oven plates shelves sink table ware
kitchen set i3 include 3d models: cooker, oven, sink, cupboards, table, chair, plates.
3d_ocean
$89

BMW i3 2014
...y, in real units of measurement, qualitatively and maximally close to the original. model formats: - *.max (3ds max 2008 scanl...
cg_studio
$99

BMW i3 Concept 20113d model
...i3
.3ds .c4d .fbx .lwo .max .obj - bmw i3 concept 2011 3d model, royalty free license available, instant download after purchase.
Prusa
turbosquid
$2

Frame Filament Guide Clip-On for Prusa Mk3
...rame filament guide clip-on for prusa mk3 for download as stl on turbosquid: 3d models for games, architecture, videos. (1634730)
3d_export
free

prusa i3 mk3s laser mount for opt lasers
...to learn more about the blue laser technology that conceived the cutting and engraving laser heads from opt lasers, please visit:
turbosquid
free

Prusa small printer adapter holder
...er for download as ipt, skp, dwg, dxf, fbx, ige, obj, and stl on turbosquid: 3d models for games, architecture, videos. (1642936)
3d_export
$30

geisha by jonathan adler
...** i did a 3d printing test in the prusa software, you can find it among the attached images.<br>exchange:<br>.blend...
thingiverse
free

Prusa without Prusa (rc2) by madless
...prusa without prusa (rc2) by madless
thingiverse
just the main part of prusa rc2 faceshield, without writing.
enjoy :)
thingiverse
free

Prusa by acejbc
...prusa by acejbc
thingiverse
prusa knob info
m3 8mm screw
thingiverse
free

Prusa house
...prusa house
thingiverse
how prusa house could look like...
thingiverse
free

Prusa Mk2 "Fake Prusa" LCD cover by anraf1001
...r by anraf1001
thingiverse
version of prusa's lcd cover with "fake prusa" instead of "original prusa"
thingiverse
free

Prusa stabilizator by gutiueugen
...prusa stabilizator by gutiueugen
thingiverse
prusa stabilizator
thingiverse
free

Keychain Prusa by rbarbalho
...keychain prusa by rbarbalho
thingiverse
keychain with text prusa.
C
3ddd
$1
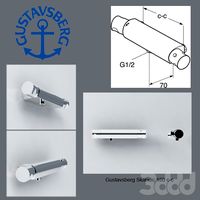
Gustavsberg Skandic 160 c-c
...gustavsberg skandic 160 c-c
3ddd
gustavsberg , смеситель
3dmax 2009
3ddd
$1
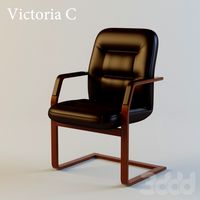
Кресло Victoria C
...кресло victoria c
3ddd
victoria c , стул
victoria c
design_connected
$25
Mobius C
...mobius c
designconnected
zenith mobius c computer generated 3d model. designed by schamburg, marc.
3ddd
$1

Molteni & C
...molteni & c
3ddd
molteni&c
molteni & c
turbosquid
$10
Raids house C&C Tiberian sun
... raids house c&c tiberian sun for download as max and fbx on turbosquid: 3d models for games, architecture, videos. (1188376)
turbosquid
$10
Civilian Asylum C&C Tiberian sun
...ilian asylum c&c tiberian sun for download as max and fbx on turbosquid: 3d models for games, architecture, videos. (1188365)
3ddd
$1

Molteni & C
...molteni & c
3ddd
molteni&c
стул molteni & c
3ddd
free
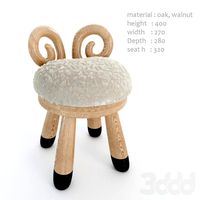
kamina&c
...kamina&c
3ddd
kamina-c , табурет барашек
sheep chair by kamina-c
design_connected
$29
Extrasoft C
...extrasoft c
designconnected
living divani extrasoft c computer generated 3d model. designed by lissoni, piero.
design_connected
$4
Mono C
...mono c
designconnected
scp mono c tables computer generated 3d model. designed by konstantin grcic.
Case
3d_export
$1

case
...case
3dexport
case
archibase_planet
free

Case
...case
archibase planet
showcase show-case glass case
glass-case + cakes - 3d model for interior 3d visualization.
archibase_planet
free

Case
...case
archibase planet
showcase show-case glass case
glass-case for chips - 3d model for interior 3d visualization.
archibase_planet
free

Case
...case
archibase planet
case shelving drawer
case - 3d model for interior 3d visualization.
archibase_planet
free

Case
...case
archibase planet
case rack locker
case - 3d model for interior 3d visualization.
archibase_planet
free

Case
...case
archibase planet
case drawer kitchen furniture
case - 3d model for interior 3d visualization.
archibase_planet
free

Case
...case
archibase planet
case cupboard shelving
glass case - 3d model for interior 3d visualization.
archibase_planet
free

Case
...case
archibase planet
case handbag suitcase
case - 3d model (*.gsm+*.3ds) for interior 3d visualization.
archibase_planet
free

Case
...case
archibase planet
case suitcase
case 5 - 3d model (*.gsm+*.3ds) for interior 3d visualization.
archibase_planet
free

Case
...case
archibase planet
locker case dresser
case - 3d model (*.gsm+*.3ds) for interior 3d visualization.
Simple
turbosquid
$1

Simple goblet (Taca simples)
... available on turbo squid, the world's leading provider of digital 3d models for visualization, films, television, and games.
3d_export
$5
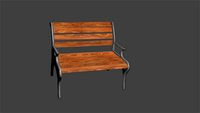
simple bench
...simple bench
3dexport
the simple bench which can be used in simple projects or video-games.
3d_export
$5
simple knob
...simple knob
3dexport
simple knob
3d_export
$5
simple handle
...simple handle
3dexport
simple handle
3d_export
$5
simple button
...simple button
3dexport
simple button
3d_export
$5

simple spindle
...simple spindle
3dexport
simple spindle
3d_export
$5

simple wheel
...simple wheel
3dexport
simple wheel
3d_export
$5
simple chair
...simple chair
3dexport
simple blue chair
3d_export
free
Simple room
...simple room
3dexport
here is a simple but beautiful room
3ddd
free
SIMPLE | Кресло
...io cianfarra , simple
производитель area declic дизайн giulio cianfarra коллекция simple