Thingiverse

Functional Attack on Titan Sword V2 (read description before printing!) by Davidsson
by Thingiverse
Last crawled date: 3 years, 1 month ago
This is my own design of a life-size Attack on Titan sword replica. The blade is detachable and is steadily held by a magnet lock. I'm quite satisfied with this one personally, but I find that there is still room for improvement, so this will most definately not be my last version.
PRINTER'S NOTES: scale everything down uniformly to approximately 90% (give or take a couple percent if you have bigger/smaller than average hands). In order to make one, you need to print five of the Blade mid.STL and one of all the other files. In addition to the 3D-printed parts, you will need a 4x785mm threaded steel rod (the blade core), a 4x36mm (threaded) rod (the lever axle), and two 5x5mm neodymium disc magnets (like these https://www.supermagnete.nl/eng/disc-magnets-neodymium/disc-magnet-diameter-5mm-height-5mm-neodymium-n45-nickel-plated_S-05-05-N).
Do note that if you scale it to anything else than 90%, the metal parts will not fit perfectly.
Assemble the blade by screwing the middle blade segments from the male connecting side to the female connecting side onto the blade core, followed by the blade base, and lastly slide and glue the blade top on the other end.
Assemble the grip by installing one of the magnets into the magnet pocket of either of the grip halves (as indicated with red on the second image), before glueing the two grip halves together. Install the other magnet in the magnet pocket of the blocker (as indicated with red on the third image), such that both magnets have identical poles facing outwards (they need to repulse eachother). Then slide the blocker into the blocker slot with the thin side facing the blade slot, before installing the lever with the lever axle.
If the magnet lock does not work smoothly, try sanding the contact surfaces of the moving parts.
Change log:
On October 22nd 2017 a model flaw has been corrected. Any prints made prior to this point would be malfunctional and need to have the 'Blade base' replaced with the updated version of the 'Blade_base01.STL' file.
On October 28th 2017 the two lower halves of the grip have been merged into one part.
IMPORTANT: On October 30th 2017 a model flaw has been corrected, Any prints made prior to this point would need some post-print modifications. Apart from 'Blade_Top.STL' and 'Blade_Mid.STL' all files downloaded before this update will be incompatible with the current model.
Similar models
thingiverse
free

Dog Bone Magnet Fidget by mrflippant
...r you do one of the halves, otherwise it will be the same polarity between the two faces, and the fidget won't work properly.
thingiverse
free

Soft Jaws for Tiny 2-Inch (51mm) Vise by adielectron
...s' pockets.
magnets can be acquired by searching for "5mm neodymium cube" in duckduckgo, google, ebay, amazon, etc.
thingiverse
free

Lack Enclosure Magnetic Door Knobs With Captive Disc Magnets (8x3mm)
...ting a magnet. make sure each magnet is facing the correct direction.
5) wait for the super glue to harden.
6) resume the print.
thingiverse
free

Attack On Titan Blade by CapnMyCapn
...attack on titan blade by capnmycapn
thingiverse
attack on titan blade
cg_trader
$5

Attack on Titan anime 3d maneuver gear sword
...maneuver gear sword in attack on titan.
the model is made up of 5 different parts: blade, blade clip, handle, grip, and leather.
thingiverse
free

Shoe Lace Magnet with Neodymium by emir_ismail
...net shoe lace
with neodymium diameter 5mm and 2mm thick
you will have 3 design. and please scale them by 10 before print :)
enjoy
thingiverse
free

Adaptive Brake Grip for Bike/Trike by GreyBeard3D
.... he doesn't have the reach needed to reach the regular lever. i will try to get a picture of the grip installed on the bike.
cg_trader
$15

Mechanical Attack On Titan ODM Gear Swords | 3D
...iggers, a moving level, and a working blade ejection system. tolerances are very tight as to not have a loose blade once printed.
grabcad
free

Attack on Titan ODM Gear Blade
...attack on titan odm gear blade
grabcad
blade used in the odm gear form attack on titan.
thingiverse
free

SpaceX Extruder Indicator by xpari
...rse
spacex extruder indicator for prusa i3 mk3
you need a neodymium magnet 5x5
fusion file (f3d) is parametrized (magnet size)
Davidsson
thingiverse
free

Ashbringer 1.3m by Davidsson
...m core inside (e.g. a broomstick of some sorts)
might have to downscale it a bit, i find the blade looking rather thick right now
thingiverse
free

Dual Edge Ratchet by Davidsson
...ld be the ideal material, pla makes for a viable alternative
assemble the parts in the order indicated on the exploded view image
thingiverse
free

Pumps (t9.29) by Davidsson
...in spanning the heel and the sole is meant to be a custom support, remove after inserting the heel core, before acetone treatment
thingiverse
free

Pumps (t9.33) by Davidsson
...in spanning the heel and the sole is meant to be a custom support, remove after inserting the heel core, before acetone treatment
thingiverse
free

Logitech G27 mechanical steering by ArvidSandstedt3d
...mechanical steering by arvidsandstedt3d thingiverse 99% created by oskar davidsson and 1% by arvid sandstedt at ed-gymnasiet,...
thingiverse
free

Lipstick/hardware case with 12+1 slots by Davidsson
...d make sure to install these in the right orientation (they are not identical)
reconmend printing the pinions with >90% infill
thingiverse
free

Lipstick/hardware case with 12+1 slots V2 by Davidsson
...ing the gears with >90% infill
disclaimer: i have not yet figured out exactly in which order to assemble the racks and pinions
thingiverse
free

Silencer Body - HD M50 Sport 1966 by barspin
...barspin thingiverse this is a "silencer body" for harley davidsson m50 s 1966. i modeled this for a friend...
thingiverse
free

Handle for 1966 HD M50S by barspin
...on the files published! back in the 60´s harley davidsson purchased 50% of aermacchi's motorcycle division and contracted them...
Titan
design_connected
$18

Titan
...titan
designconnected
original btc titan computer generated 3d model.
3d_ocean
$25
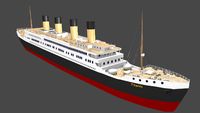
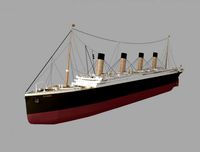
RMS Titanic
...rms titanic
3docean
ship steamer titanic
3d model of the rms titanic
turbosquid
$49
Titan
...quid
royalty free 3d model titan for download as obj and ztl on turbosquid: 3d models for games, architecture, videos. (1314276)
turbosquid
$8

Titan
...d
royalty free 3d model titan for download as , fbx, and obj on turbosquid: 3d models for games, architecture, videos. (1545505)
3d_export
$15
eren yeager titan from attack on titan
...eren yeager titan from attack on titan
3dexport
3d model of eren titan
3d_export
$5
titanic new
...titanic new
3dexport
titanic 3d model normal quality for animation
3d_export
$100
Titan 3D Model
...titan 3d model
3dexport
silo launcher rocket titan
titan 3d model acquarius 37854 3dexport
3d_ocean
$25
Titan
...nfs nfshs one ps ps1 psone rod speed sports stakes titan transport vehicle
quality exterior and low polygon interior concept car.
3ddd
$1

Titanic Lamp(table)
...titanic lamp(table)
3ddd
titanic lamp(table)
turbosquid
$10

Titan chair
...osquid
royalty free 3d model titan chair for download as max on turbosquid: 3d models for games, architecture, videos. (1301533)
Attack
turbosquid
$6

Attack Helicopter
...
royalty free 3d model attack helicopter for download as obj on turbosquid: 3d models for games, architecture, videos. (1212798)
turbosquid
$10

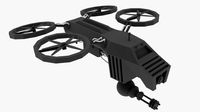
Attack Drone
...royalty free 3d model attack drone for download as ma and fbx on turbosquid: 3d models for games, architecture, videos. (1627775)
turbosquid
$10

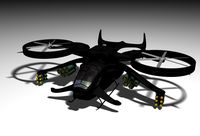
Attack Drone
...d model attack drone for download as blend, fbx, dae, and obj on turbosquid: 3d models for games, architecture, videos. (1525521)
turbosquid
$70

Attack Fighter
... available on turbo squid, the world's leading provider of digital 3d models for visualization, films, television, and games.
turbosquid
$20

Attack Drone
... available on turbo squid, the world's leading provider of digital 3d models for visualization, films, television, and games.
turbosquid
$15

Attack Bot
... available on turbo squid, the world's leading provider of digital 3d models for visualization, films, television, and games.
turbosquid
$5

Attack Helicopter
... available on turbo squid, the world's leading provider of digital 3d models for visualization, films, television, and games.
turbosquid
$1
Attack Drone
... available on turbo squid, the world's leading provider of digital 3d models for visualization, films, television, and games.
turbosquid
free

Attack on earth.max
... available on turbo squid, the world's leading provider of digital 3d models for visualization, films, television, and games.
3d_ocean
$25
Attack Ship
...ture avatar. the ship was created in c4d and has rotatable engines and props for animation purposes. the engines can either mo...
Read
design_connected
$16

Lou Read
...lou read
designconnected
driade lou read computer generated 3d model. designed by starck, philippe.
design_connected
$11

Read Noon
...read noon
designconnected
zeitraum read noon computer generated 3d model. designed by el schmid.
turbosquid
$10

Reading Table
...id
royalty free 3d model reading table for download as blend on turbosquid: 3d models for games, architecture, videos. (1412229)
turbosquid
$3

Reading Table
...yalty free 3d model reading table for download as max and fbx on turbosquid: 3d models for games, architecture, videos. (1475359)
turbosquid
free

Reading Lamp
...
free 3d model reading lamp for download as ige, obj, and 3dm on turbosquid: 3d models for games, architecture, videos. (1174095)
3d_export
$5

Jar for reading
...jar for reading
3dexport
3d_export
free

reading chair
...reading chair
3dexport
turbosquid
$5

Reading Lamp
... free 3d model reading lamp for download as 3ds, fbx, and dae on turbosquid: 3d models for games, architecture, videos. (1486900)
turbosquid
$30

Reading Chair
... available on turbo squid, the world's leading provider of digital 3d models for visualization, films, television, and games.
turbosquid
$25

Reading lamp
... available on turbo squid, the world's leading provider of digital 3d models for visualization, films, television, and games.
Sword
3d_ocean
$3

sword
...sword
3docean
sword
a high quality sword .
3d_export
$5

sword
...sword
3dexport
a sword made in a blender, a quality sword
3d_export
$35

Sword
...sword
3dexport
sword
3d_export
$10

sword
...sword
3dexport
sword
3d_export
$6

sword
...sword
3dexport
sword
3d_export
$5

sword
...sword
3dexport
sword
3d_export
$5

sword
...sword
3dexport
sword
3d_export
$5

Sword
...sword
3dexport
sword
3d_export
$5

sword
...sword
3dexport
sword
3d_export
$5

sword
...sword
3dexport
sword
V2
3d_export
free

Lamp v2
...lamp v2
3dexport
lamp v2 with solar panel
3d_export
$5

hammerhead v2
...hammerhead v2
3dexport
razer hammerhead v2 headphones, modeled in cinema 4d, render in corona
3d_export
$5

manometer v2
...manometer v2
3dexport
3d_export
$5

potato v2
...potato v2
3dexport
turbosquid
$52

Lifebuoys v2
...squid
royalty free 3d model lifebuoys v2 for download as fbx on turbosquid: 3d models for games, architecture, videos. (1560870)
turbosquid
$2

Mask v2
...turbosquid
royalty free 3d model mask v2 for download as stl on turbosquid: 3d models for games, architecture, videos. (1527741)
turbosquid
free

Flashlight V2
...d
free 3d model flashlight v2 for download as , obj, and fbx on turbosquid: 3d models for games, architecture, videos. (1663559)
turbosquid
$29

Thanos v2
...
royalty free 3d model thanos v2 for download as ztl and obj on turbosquid: 3d models for games, architecture, videos. (1651077)
turbosquid
$29

Titan v2
...d
royalty free 3d model titan v2 for download as ztl and obj on turbosquid: 3d models for games, architecture, videos. (1540228)
turbosquid
$29

Frieza v2
...
royalty free 3d model frieza v2 for download as ztl and obj on turbosquid: 3d models for games, architecture, videos. (1701238)
Functional
turbosquid
$1

functional clock
...d
royalty free 3d model functional clock for download as fbx on turbosquid: 3d models for games, architecture, videos. (1378928)
turbosquid
$5

functional door
... model functional door for download as 3ds, obj, c4d, and stl on turbosquid: 3d models for games, architecture, videos. (1483785)
3d_export
$5
multi function box
...multi function box
3dexport
it is multi function box in iges format
3ddd
$1
Fitness Equipament - Functional
...fitness equipament - functional
3ddd
треножер
fitness equipament functional, modeled from real model.
turbosquid
$19

Four function formula
...
royalty free 3d model four function formula for download as on turbosquid: 3d models for games, architecture, videos. (1154985)
turbosquid
$1
functional work table
...yalty free 3d model functional work table for download as max on turbosquid: 3d models for games, architecture, videos. (1198733)
3d_export
free
Multi-functional anaquel
...multi-functional anaquel
3dexport
https://www.dock4all.com/
turbosquid
$12

Multi-Function Knife
... available on turbo squid, the world's leading provider of digital 3d models for visualization, films, television, and games.
turbosquid
$9

function x black coin
...yalty free 3d model function x black coin for download as max on turbosquid: 3d models for games, architecture, videos. (1457828)
turbosquid
$8

Multi-function cylinder mechanism
...lti-function cylinder mechanism for download as ige and sldpr on turbosquid: 3d models for games, architecture, videos. (1223739)
Description
turbosquid
$1

wild rock (read description)
... available on turbo squid, the world's leading provider of digital 3d models for visualization, films, television, and games.
turbosquid
$10

44 Magnum Read the description
...rbosquid
royalty free 3d model 44 magnum for download as obj on turbosquid: 3d models for games, architecture, videos. (1380157)
3d_export
free

vioin
...vioin 3dexport description ...
3ddd
$1

MINIFORMS Audere semper
...audere semperартикул | art: amor tavolo tp 6040описание | description стол | tableартикул | art: lizaописание | description: стул...
3d_export
$5

modern leather chair
...chair 3dexport packinfo: packed with model packer by https://3dground.net/ description ...
3d_export
$16

low poly dragon x crew
...dragon x crew 3dexport ⚠️ please, read carefully the description before you purchase this...
3d_export
$10

Chandelier 3D Model
...chandelier 3d model 3dexport description blue glass gold lamp chandelier 3d model 3dilik 101364...
3d_export
$7

server room
...server room 3dexport why do you need a description here, if you can appreciate these 3d models...
cg_studio
$155

building 3503d model
...office government monument ancient shop dome urban structuere apartment descriptionquot;>description "> .max - building 350 3d model, royalty free...
3ddd
$1

POLAIRE
...3ddd christopher guy , polaire , статуэтка , медведь description size w35 x d14 x h19 cm...
Printing
design_connected
$27

...print
designconnected
moroso print computer generated 3d model. designed by wanders, marcel.
3ddd
free

Eichholtz Prints
...- eichholtz print central station i
13 - eichholtz print central station ii
14 - eichholtz print marisa
15 - eichholtz print tish
3ddd
$1

Eichholtz Prints
...print abstract - set of 2
10 - eichholtz print orange abstract
11 - eichholtz print buddha right
12 - eichholtz print buddha left
turbosquid
$1

... available on turbo squid, the world's leading provider of digital 3d models for visualization, films, television, and games.
3ddd
free

Eichholtz Prints
...of 4
2 - print dunbar 2 set of 4
3 - print guadeloupe 1 set of 4
4 - print guadeloupe 2 set of 4
5 - print giles
6 - print trett
3ddd
$1

Eichholtz Prints
...nt tutti frutti
3 - eichholtz prints watson - set of 2
4 - eichholtz prints antique nautilus - set of 2
5 - eichholtz print tiara
3d_export
$5

Monster for printing
...monster for printing
3dexport
monster 3d model printing
3ddd
free

printed rug
...printed rug
3ddd
ковер
very creative printed rug
3ddd
free

Eichholtz Prints
...иал: бумага
габариты (вхш): 72 x 62 см
описание: print sweetmeat - постер в деревянной раме.
3 - prints varsity set of 2
арти
3ddd
free

Art Print Posters
...art print posters
3ddd
прованс
art print posters by patrician prints