Thingiverse
Fume Extractor by 00sufs
by Thingiverse
Last crawled date: 3 years ago
Fume Hood
Brought to you by: Everything In Between, LLC
Helping Makers Make Betterhttp://www.eibsales.com/
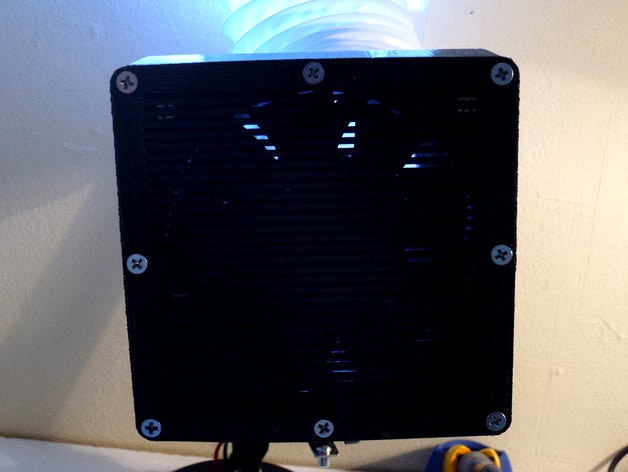
This is a fume hood I made for my personal solder station. It consists of multiple 3D printed parts and about $90 in other bits. It’s a bit expensive in the end but the fan is so powerful it can clear most of my office in no time. This will also give you the option to add fans in the future for printer venting as well as give you a 12V desktop power supply plus whatever else you decide to wire in. This was made on a Makerbot Replicator 2.
The body didn’t stick perfectly to the build plate so I got a good bit of warping. I didn’t redo it because it works just fine and that part alone is almost $7. The #8 nuts should rest flush inside the body and be attached with gel super glue. Mine only go in part way but glued just fine. Let me know in the comments if anyone needs an instructables on this.
Assembly is mostly straight forward if you have some basic soldering skills and can use a search engine. You need to attach the 2 way rocker to the PC power supply on/off wires and the 2 way toggle switches to the fan/fans. You’ll also need a deep socket wrench to bolt this to your work bench and a large enough drill bit to run all the wires and the bolt into the desk.
Print Setting:
Body: Medium Resolution 5% Infill 2 Shells (Raft might help keep it on the platform)
Face Screen: Medium Resolution 10% Infill 2 Shells
Window P1: Medium Resolution 10% Infill 2 Shells
Window P2: Medium Resolution 10% Infill 2 Shells
Electronics Box: Medium Resolution 10% Infill 2 Shells
EL Box Face Plate: Medium Resolution 10% Infill 2 Shells
El Box Screws: Medium Resolution 10% Infill 2 Shells
All in all this takes about 28 hours to print and will cost around $15.50 for the plastic parts. That is using a $33 1KG roll of PLA.
Links to Other Parts
You will also need #8 Nuts and bolts. I bought mine at Home depot.
Fan:http://www.amazon.com/gp/product/B004Y15ALK/ref=oh_aui_detailpage_o06_s00?ie=UTF8&psc=1
Power Supply:http://www.amazon.com/gp/product/B00AK23NEI/ref=oh_aui_detailpage_o05_s00?ie=UTF8&psc=1
Pipe Clamp:http://www.amazon.com/gp/product/B00880QYU4/ref=oh_aui_detailpage_o05_s00?ie=UTF8&psc=1
Vent Tubing:http://www.amazon.com/gp/product/B001PQDUA0/ref=oh_aui_detailpage_o05_s00?ie=UTF8&psc=1
Lamp:
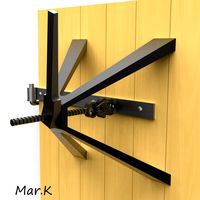
I bought mine for $20 at Home depot but this is the same style.http://www.amazon.com/Boston-Harbor-Architect-Swing-Black/dp/B002ZKDUVE/ref=sr_1_4?ie=UTF8&qid=1409767511&sr=8-4&keywords=lamp
Bind post:https://www.jameco.com/webapp/wcs/stores/servlet/ProductDisplay?langId=-1&storeId=10001&catalogId=10001&productId=125197
Switch (two way rocker):https://www.jameco.com/webapp/wcs/stores/servlet/Product_10001_10001_316014_-1
Switch X 2 Toggle:https://www.jameco.com/webapp/wcs/stores/servlet/ProductDisplay?langId=-1&storeId=10001&catalogId=10001&productId=76523
Assembly items you will need:
Solder station
Wire (needs to handle at least 4 amps)
Shrink wrap
Deep Socket set
Screw driver
Drill bit/bits
Board to secure into window
Hole saw or jig saw to cut board vent holes
Gel Super Glue (Seems to work well)
Brought to you by: Everything In Between, LLC
Helping Makers Make Betterhttp://www.eibsales.com/
This is a fume hood I made for my personal solder station. It consists of multiple 3D printed parts and about $90 in other bits. It’s a bit expensive in the end but the fan is so powerful it can clear most of my office in no time. This will also give you the option to add fans in the future for printer venting as well as give you a 12V desktop power supply plus whatever else you decide to wire in. This was made on a Makerbot Replicator 2.
The body didn’t stick perfectly to the build plate so I got a good bit of warping. I didn’t redo it because it works just fine and that part alone is almost $7. The #8 nuts should rest flush inside the body and be attached with gel super glue. Mine only go in part way but glued just fine. Let me know in the comments if anyone needs an instructables on this.
Assembly is mostly straight forward if you have some basic soldering skills and can use a search engine. You need to attach the 2 way rocker to the PC power supply on/off wires and the 2 way toggle switches to the fan/fans. You’ll also need a deep socket wrench to bolt this to your work bench and a large enough drill bit to run all the wires and the bolt into the desk.
Print Setting:
Body: Medium Resolution 5% Infill 2 Shells (Raft might help keep it on the platform)
Face Screen: Medium Resolution 10% Infill 2 Shells
Window P1: Medium Resolution 10% Infill 2 Shells
Window P2: Medium Resolution 10% Infill 2 Shells
Electronics Box: Medium Resolution 10% Infill 2 Shells
EL Box Face Plate: Medium Resolution 10% Infill 2 Shells
El Box Screws: Medium Resolution 10% Infill 2 Shells
All in all this takes about 28 hours to print and will cost around $15.50 for the plastic parts. That is using a $33 1KG roll of PLA.
Links to Other Parts
You will also need #8 Nuts and bolts. I bought mine at Home depot.
Fan:http://www.amazon.com/gp/product/B004Y15ALK/ref=oh_aui_detailpage_o06_s00?ie=UTF8&psc=1
Power Supply:http://www.amazon.com/gp/product/B00AK23NEI/ref=oh_aui_detailpage_o05_s00?ie=UTF8&psc=1
Pipe Clamp:http://www.amazon.com/gp/product/B00880QYU4/ref=oh_aui_detailpage_o05_s00?ie=UTF8&psc=1
Vent Tubing:http://www.amazon.com/gp/product/B001PQDUA0/ref=oh_aui_detailpage_o05_s00?ie=UTF8&psc=1
Lamp:
I bought mine for $20 at Home depot but this is the same style.http://www.amazon.com/Boston-Harbor-Architect-Swing-Black/dp/B002ZKDUVE/ref=sr_1_4?ie=UTF8&qid=1409767511&sr=8-4&keywords=lamp
Bind post:https://www.jameco.com/webapp/wcs/stores/servlet/ProductDisplay?langId=-1&storeId=10001&catalogId=10001&productId=125197
Switch (two way rocker):https://www.jameco.com/webapp/wcs/stores/servlet/Product_10001_10001_316014_-1
Switch X 2 Toggle:https://www.jameco.com/webapp/wcs/stores/servlet/ProductDisplay?langId=-1&storeId=10001&catalogId=10001&productId=76523
Assembly items you will need:
Solder station
Wire (needs to handle at least 4 amps)
Shrink wrap
Deep Socket set
Screw driver
Drill bit/bits
Board to secure into window
Hole saw or jig saw to cut board vent holes
Gel Super Glue (Seems to work well)
Similar models
thingiverse
free

AC Power Block Cover Fused by chaoren
...;ddkey=https%3astorecatalogdrilldownview
use stainless steel wood type screws to connect the 3d printed part to the power supply.
thingiverse
free

Jameco 161382 Motor Mount by zion_taron
...catalogid=10001&freetext=161382&langid=-1&productid=161382&storeid=10001&ddkey=http:storecatalogdrilldownview
thingiverse
free

Sonoff Enclosure by JeffLZ
...title_o00_s00?ie=utf8&psc=1
https://www.amazon.com/gp/product/b00qvb6qpu/ref=ox_sc_saved_title_1?smid=atvpdkikx0der&psc=1
thingiverse
free

Noctua Laptop Cooling Pad for 3:2 Aspect Ratio Laptops by 3Dnate
...e?ie=utf8&psc=1
rubber feet:https://www.amazon.com/gp/product/b087h5b87m/ref=ppx_yo_dt_b_asin_title_o09_s00?ie=utf8&psc=1
thingiverse
free

Desk Fan by NebNorse
...lpages04?ie=utf8&psc=1
motor control: https://www.amazon.com/gp/product/b01cnl6imc/ref=od_aui_detailpages04?ie=utf8&psc=1
thingiverse
free

Reducing Bushing Adapters for Bench Grinding Wheels by arctesla
...ding wheels by arctesla
thingiverse
https://www.amazon.com/gp/product/b071s56lr2/ref=oh_aui_detailpage_o05_s00?ie=utf8&psc=1
thingiverse
free

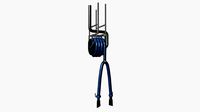
Y-6 Multicopter Frame by ashkip
...azon.com/gp/product/b00tf8uy9a/ref=oh_aui_detailpage_o00_s01?ie=utf8&psc=1
soldering iron, supplies and a lot of patience :-)
thingiverse
free
Hand Mixer by OM3
...e?ie=utf8&psc=1
power supplyhttps://www.amazon.com/gp/product/b01461mogq/ref=ppx_yo_dt_b_search_asin_title?ie=utf8&psc=1
thingiverse
free
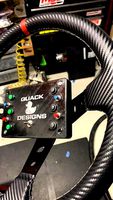
12 Function Deep Dish Button Box by coyoteyz13
..._title_o03_s00?ie=utf8&psc=1
https://www.amazon.com/gp/product/b07vhcb1q4/ref=ppx_yo_dt_b_search_asin_title?ie=utf8&psc=1
thingiverse
free
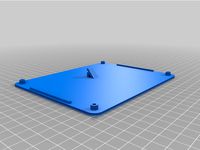
DEEJ Audio Controller - 5 linear sliders by Scnd_edition
...8&psc=1
optional: rubber feethttps://www.amazon.com/gp/product/b075f1hw3s/ref=ppx_yo_dt_b_search_asin_title?ie=utf8&psc=1
00Sufs
thingiverse
free

Food Sponge Holder by 00sufs
...food sponge holder by 00sufs
thingiverse
a simple sponge holder designed to hold a single sponge and allow it to dry.
thingiverse
free

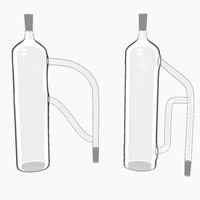
Seed vial by 00sufs
...als. it includes 4 different sizes with and without vent holes, a holder and label stakes.
find more at: http://www.eibsales.com/
thingiverse
free

Hemostats by 00sufs
...not use a raft but it would be fine.
cost to make: 8.2 grams = $.31 off a $38 spool of pla
find more at: http://www.eibsales.com/
thingiverse
free

Mortar and Pestle by 00sufs
...aven't tried printing it yet but i would recommend at least 4 shells and a low infill.
find more at: http://www.eibsales.com/
thingiverse
free

Latch by 00sufs
...d recommend using just the normal 10% infill, 2 shells, supports and the raft is optional.
find more at: http://www.eibsales.com/
thingiverse
free

Cricket dishes by 00sufs
...that they eat. it seems to work well. http://www.amazon.com/gp/product/b007b6gug4/ref=oh_aui_detailpage_o00_s00?ie=utf8&psc=1
thingiverse
free

Flute by 00sufs
...minor, not sure how accurate that is. just change your print setting to change the sound.
find more at: http://www.eibsales.com/
thingiverse
free

Garden hose sprinkler head by 00sufs
... makerbot replicator 2"
high resolution, no raft or supports
10% infill and 2 shells
find more at: http://www.eibsales.com/
thingiverse
free

Cheese Press by 00sufs
...s to make but in the end will save you a ton when considering the price of a real press.
will make up to a 2 lb wheel.
enjoy!
thingiverse
free

Pump Mount internal bracket by 00sufs
... shells and infill.
made for a danner mag drive pump (http://www.amazon.com/danner-mag-drive-supreme-water-pump/dp/b0002564je)
Fume
turbosquid
$5

Tosato Fume
... available on turbo squid, the world's leading provider of digital 3d models for visualization, films, television, and games.
turbosquid
$4
Garis Stool Fume
... available on turbo squid, the world's leading provider of digital 3d models for visualization, films, television, and games.
turbosquid
$10
Chandelier IDL 359-4S FUME
... available on turbo squid, the world's leading provider of digital 3d models for visualization, films, television, and games.
turbosquid
$3
Door Handle Interior, Fumed Brass
...rior, fumed brass for download as max, max, 3ds, fbx, and obj on turbosquid: 3d models for games, architecture, videos. (1539559)
3ddd
$1

Люстра Alicante Fume / PL4 - Euroluce Lampadari
...ик из хромированного металла и дымчатого хрустального стекла. модель рассчитана на четыре галогенные лампы макс. мощностью 40 вт.
archive3d
free
Hood 3D Model
...hood 3d model archive3d fume hood laboratory equipment laboratory fume hood - 3d model...
3d_export
$10

Burberry Cologne 3D Model
...3dexport perfume cologne burberry fragrance scent bottle spray fume fume burberry cologne 3d model riteoff 7042...
3d_export
$39

Matches 3D Model
...3dexport matches fire smoking cigar cigarette hearth oven stove fume phoenix photoreal vray obj fbx matches 3d model sbgwolf...
3d_export
$5

Fire puff 002 3D Model
...3dexport fire puff explosion flame spark hot heat render fume gas smoke fire puff 002 3d model dreamkasztni 52818...
3ddd
$1

ALABASTRI DI REX DECORO PUZZLE
...фирмы rex, коллекция alabastri 1) ambra 2) bamboo 3) fume 4) madreperla 5) miel 6) smeraldo 7)...
Extractor
turbosquid
$35
Extractor
... available on turbo squid, the world's leading provider of digital 3d models for visualization, films, television, and games.
3d_export
$5
kitchen extractor
...kitchen extractor
3dexport
extractor hood for kitchen in stainless steel with blue tempered glass, very modern.
3ddd
free

Extractor Bosch DWB098E50
...extractor bosch dwb098e50
3ddd
вытяжка , bosch
extractor bosch dwb098e50
3ddd
free
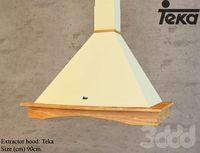
Teka - Extractor hood
...teka - extractor hood
3ddd
teka , вытяжка
teka - extractor hood
turbosquid
$1
Extractor cupboard
...
royalty free 3d model extractor cupboard for download as max on turbosquid: 3d models for games, architecture, videos. (1161308)
turbosquid
$30
Lock extractor
... available on turbo squid, the world's leading provider of digital 3d models for visualization, films, television, and games.
turbosquid
free
air extractor
... available on turbo squid, the world's leading provider of digital 3d models for visualization, films, television, and games.
turbosquid
$59
Vehicle Exhaust Extractor
...3d model vehicle exhaust extractor for download as ma and fbx on turbosquid: 3d models for games, architecture, videos. (1689744)
turbosquid
$29
Liquid Liquid Extractor
... available on turbo squid, the world's leading provider of digital 3d models for visualization, films, television, and games.
turbosquid
$15
Bosch Extractor Modern
... available on turbo squid, the world's leading provider of digital 3d models for visualization, films, television, and games.