Thingiverse

Full/Semi Auto Mini Marshmallow Gun - Compressed Air - 1 Week Classroom Project by Banana_Science
by Thingiverse
Last crawled date: 3 years, 1 month ago
After nearly two years of development, we are proud to announce the release of the Marshmallow Gun V1 and V2. These were originally inspired by the classic 1/2" PVC marshmallow blow gun in which 3 pieces of PVC were jointed at a T shape, this allowed marshmallows to be loaded in the top like a magazine and be fired continuously by blowing through one side. We decided to take this concept a little further by adding two 120psi compressed air chambers behind this simplistic firing mechanism along with a timing circuit to allow fully automatic and semi automatic firing. The total cost of this project is ~$36
Looking for an EPIC one week classroom project? This project was also a part of our Inventing Reality 2017 summer program which we taught at Redwood Day to 6th-12th students for a week. It was a blast (pun intended) with all students For more information for lesson planning, preparation, and tutorials, check out the educational sections below.
Youtube Tutorials:
-Tank assembly tutorial
-Grip wiring tutorial: coming soon...
Before we get into the details, I just want to clarify the exact meaning of full/semi automatic modes. Note that modes are selected via a mini rocker switch on the grip assembly.
Full Auto Mode As long as the trigger is held down, marshmallows will shoot out of the barrel in a continuous stream. This method of firing is significantly more inefficient and will only allow the emptying of one 20 round marshmallow magazine (approximately 12" long 1/2" PVC) before your air tank is empty. You can also shoot mini full auto bursts of marshmallows to make it a little more efficient. The range of full auto is around 50ft though accuracy significantly decreases after around 20 feet where the mini marshmallows begin to be affected by wind.
Semi Auto Mode Each time you pull the trigger, a timing capacitor drains into your solenoid valve firing a quick burst of air. To fire again, the trigger must be released and re-pulled. Depending on timing capacitor size, solenoid valve size, and air tank size this should allow you to fire around 1-3 20 round magazines and release 1 to 2 marshmallows each shot. The range of semi auto mode is similar to that of full auto mode (around 50 feet)
Safety Mode This mode essentially turns off your marshmallow gun. If the trigger is pulled in this mode, nothing will happen. Note that when you switch your marshmallow gun into safety mode after having it in semi-auto mode, there will still be one charged shot in the gun that needs to be discharged before it is really "safe".
Over the course of designing and refining this project, a couple of variations surfaced.
Grip V1 The grip V1 allows the installation of two 9v batteries directly into the grip itself. This simplifies the grip assembly though also doesn't allow the mode switch to select full/semi automatic firing or safety mode. This means that you either have to wire the 18v from the batteries through the micro switch directly to the solenoid valve to allow only full auto firing, or use a simplified timing circuit to allow only semi automatic firing.
Grip V2 External Batteries The second version of the grip mounts the batteries externally in a battery mount which slides over your solenoid valve. This creates a little more room inside your grip to add the necessary electronics for a mode switch to toggle between full and semi automatic firing.
Single Air Tank The original marshmallow gun only had a single 2"x12" PVC air tank. This air tank supplied enough air to fire one full 20 round magazine but no more. Benefits of using this simpler tank design include a significantly lighter gun which is easier to carry as well as a more sturdy gun which is less likely to break (because of the weak joint between the two tanks on the dual tank version)
Double Air Tank To take this project one step further, we added a seccond 2"12" air tank. These air tanks are joined at the rear by some 90 degree elbows and a short 2" connector piece. The double air tank will allow you to empty around 2-3 full 20 round magazines in semi auto mode and get a little extra punch in full auto mode. The dual air tanks also allow you to install a 3D printed rear cap which allows you to snap on and hold up to four extra magazines on the side of your gun.
3D Printed Parts List:
Grip V1 Explained above
Grip V2 Explained above
Trigger This trigger screws into your grip with an M3x35 bolt and lock nut. It presses into your micro switch when you pull on it!
Battery Holder (only if using Grip V2) To easily and conveniently mount your two 9v batteries as well as protect your solenoid valve wires, we've designed a handy battery holder to slide onto the top of your solenoid valve and screw on to the front of the V2 grip with an M3x35 bolt and lock nut.
Rear End Cap (only if using dual tank version) The rear end cap serves multiple functions for the dual tanked marshmallow guns. First, it's a safety necessity. Because the the two tanks are only joined by one small 1/2" PVC pipe, they are very susceptible to breaking apart. Since the tanks are pressurized at 120psi, if they were to break, it would be... explosive. The rear end cap covers the ends of both tanks and makes sure they they are protected during accidental drops and normal usage. The rear end cap also has four handy clips on the side to store four extra magazines so you aren't constantly reloading!
Dual Tank Clamp As an additional safety measure, we designed two "tank clamps" to ensure both of your air tanks stay nice and aligned and don't get twisted and break. These clamps simply go on either side of your dual tanks and screw together with an M5x35 bolt and lock nut to keep them nice and tight.
Magazine Tops Just to save a few extra dollars, instead of buying 1/2" PVC caps, you can instead print these handy caps!
Magazine Bottoms To allow you to store multiple loaded magazines without all the marshmallows falling out, these handy end caps are easily removable with a little hole to see if the magazine is loaded as well as a handy string to attach them to the magazine so they don't get lost.
Electronics & Hardware List:
-1 1/2" metal solenoid valve
-1 Three position rocker switch (only if using grip V2)
-1 Micro switch (for trigger)
-2 220uf capacitors
-2 9v batteries
-2 9v battery connectors
-[Some 24awg silicone wire](https://amzn.to/2JwgIBU )
-2 [M3x35 bolts](https://amzn.to/2uOsSRt ) (only need one if using grip V1)
-1 M5x40 bolt](https://amzn.to/2LvnV72) (only if using dual tank clamps)
-2 [M3 lock nuts](https://amzn.to/2JvhyyK )
Single Tank PVC Pipe & Hardware List (buy at local hardware store):
-1 12" length of 2" PVC pipe
-1 2" length of 1/2" PVC
-1 12" length of 1/2" PVC
-1 2" PVC socket cap
-1 2" PVC coupler
-1 2"-3/4" PVC reducer
-1 3/4"-1/2" threaded reducer
-1 1/2" PVC T joint
-1 1/2" PVC coupler
-1 1/2" PVC threaded to non threaded coupler
-1 1" wood screw
-1 Quick release air valve
Dual Tank PVC Pipe & Hardware List (buy at local hardware store):
-2 12" lengths of 2" PVC pipe
-2 2" lengths of 1/2" PVC
-1 12" length of 1/2" PVC
-1 2" PVC socket cap
-3 2" PVC couplers
-2 1/2" PVC street elbows
-1 2"-3/4" PVC reducer
-1 3/4"-1/2" threaded reducer
-1 1/2" PVC T joint
-1 1/2" PVC coupler
-1 1/2" PVC threaded to non threaded coupler
-1 1" wood screw
-1 Quick release air valve
Other Tools n' Stuff:
-A LOT of mini marshmallows (see good and bad marshmallows section below for more info)
-Plumbers tape
-1/4" drill tap for quick release valve (not necessary but helps keep things air tight)
-Duct tape
-PVC primer
-PVC cement
-PVC pipe cutters
-Safety glasses
-Air compressor
Good and Bad Marshmallows
After some extensive testing of many brands of mini marshmallows to see which ones performed the best, we concluded that Dollar Tree's "Fireside" branded marshmallows and GIANT supermarket's mini marshmallows performed the best because of their slightly larger and more consistent size compared to other brands such as Jet Puffed.
Proper Marshmallow Loading
When using your marshmallow gun, it is critical to load your magazines properly so they don't jam. The trick is to make sure that each marshmallow you load can easily slide down the magazine to the bottom without getting stuck. If a marshmallow is too large and doesn't want to slide down easily, roll it in your fingers a bit until it is just the right diameter. Remember, even one oversized marshmallow can cause a magazine to jam.
IMPORTANT SAFETY NOTICE: This project is potentially very dangerous if not done properly! Make sure that everything is glued, dried, and protected properly! YOU MUST WRAP YOUR AIR TANK(S) WITH DUCT TAPE TO HELP PREVENT THEM FROM SHATTERING IF THEY BURST! We are not responsible for any injuries obtained from building this project. Additionally, don't shoot people in the eye or from point-blank range because these can cause bruises! Lastly, wrap the tip of your barrel with bright orange tape or spray paint an orange band around it so it is not mistaken as a dangerous weapon.
Similar models
thingiverse
free

Ping pong ball gun by wilson03
...lve
epoxy (to keep air from leaking out around the valve)
wire
ping pong balls
a 1 1/2" pvc coupler
a 1 1/2" pvc endcap
thingiverse
free

Nerf Titan Tank PVC Adapter by HeartFoxx
...e diameter of the hole for the coupler is 27mm, and depending on where you get your coupler, it may need to be expanded slightly.
thingiverse
free

Solenoid Arduino Select Fire Nerf Rapidstrike Project Files
...burst can be configure by:
switch on safety, press and hold the rev. press the trigger switch to select number of darts for burst
grabcad
free

1/4" air solenoid valve
...1/4" air solenoid valve
grabcad
1/4" brass air solenoid valve
grabcad
free

1/4" NPT WSNF8327B102 Solenoid Valve
...1/4" npt wsnf8327b102 solenoid valve
grabcad
asco direct acting 3/2 316ss solenoid valve, 1/4" air connections.
cg_trader
free

14 air solenoid valve
...14 air solenoid valve
cg trader
1/4" brass air solenoid valve
grabcad
free

AUTO WHEEL WASHER
...d),
pressure tank cap. 1000 liters.
plumbing diameter 1/2" to 1 " with nozzle 3/8 " .
solenoid valve 1".
thingiverse
free

1/4" NPT to 1/2" PVC Coupler by Autodesk_Wizard
...that it isn't a perfect fit, depending on your print settings it might end up not perfectly threading on the npt valve right.
thingiverse
free

Airsoft Semi/Auto Switch by Black_Ghost232
...airsoft semi/auto switch by black_ghost232
thingiverse
this is for a airsoft gun to switch it form full auto,semi and safety.
grabcad
free

1/2" SOLENOID VALVE WITH STRAINER
...1/2" solenoid valve with strainer
grabcad
1/2" solenoid valve with strainer - piping
Marshmallow
3ddd
free

Marshmallow
...marshmallow
3ddd
оригинальный диван marshmallow
3ddd
$1

MARSHMALLOW
... круг , диски
диван marshmallow от дизайнера george nelson
3ddd
$1

Marshmallow / Replica
...marshmallow / replica
3ddd
marshmallow
дизайнерский диван
3d_export
$86

marshmallows
...pacity / normal (opengl) / roughnes<br>- 3ds max - pbr textures 4k .png /diffuse / glossiness / specular / normal (directx)
design_connected
$18

Marshmallow Sofa
...marshmallow sofa
designconnected
herman miller marshmallow sofa computer generated 3d model. designed by nelson, george.
3d_export
$8

marshmallow
...: 602 (lod0),474(lod1),210(lod2). tris: 1104 (lod0),848(lod1),384(lod2). file formats: fbx(binary) 2019 fbx(ascii) 2019 maya 2019
turbosquid
$1

Marshmallow Russian
...royalty free 3d model marshmallow russian for download as c4d on turbosquid: 3d models for games, architecture, videos. (1437955)
turbosquid
$40

Marshmallow Sofa
... available on turbo squid, the world's leading provider of digital 3d models for visualization, films, television, and games.
turbosquid
$39

Vitra Marshmallow
... available on turbo squid, the world's leading provider of digital 3d models for visualization, films, television, and games.
turbosquid
$30

Marshmallow chair
... available on turbo squid, the world's leading provider of digital 3d models for visualization, films, television, and games.
Banana
3d_export
free

banana
...banana
3dexport
banana lowpoly<br>for fruits and vegetables collection
3d_export
$19

banana
...banana
3dexport
3d_export
$10

banana
...banana
3dexport
turbosquid
free

Banana
...banana
turbosquid
free 3d model banana for download as fbx on turbosquid: 3d models for games, architecture, videos. (1367269)
3d_export
$5

banana tree
...banana tree
3dexport
banana tree
3d_export
$5

Cartoon banana
...cartoon banana
3dexport
cool banana
turbosquid
$39

Banana
...
turbosquid
royalty free 3d model banana for download as fbx on turbosquid: 3d models for games, architecture, videos. (1238376)
turbosquid
$20

Banana
...
turbosquid
royalty free 3d model banana for download as fbx on turbosquid: 3d models for games, architecture, videos. (1492054)
turbosquid
$14

Banana
...
turbosquid
royalty free 3d model banana for download as obj on turbosquid: 3d models for games, architecture, videos. (1606612)
turbosquid
$13

Banana
...
turbosquid
royalty free 3d model banana for download as lxo on turbosquid: 3d models for games, architecture, videos. (1561014)
Classroom
3d_export
$6

classroom
...classroom
3dexport
hello, i decided to create a classroom. i used blender 3d version 2.92.0.
turbosquid
$60

Classroom
...squid
royalty free 3d model 3d classroom for download as max on turbosquid: 3d models for games, architecture, videos. (1534735)
3d_export
$5

Classroom
...classroom
3dexport
https://www.dock4all.com/
3d_export
$12

modern classroom
...modern classroom
3dexport
modern classroom vr4.1
turbosquid
$15

Classroom
... available on turbo squid, the world's leading provider of digital 3d models for visualization, films, television, and games.
3d_export
$65

classroom
...classroom
3dexport
simple rendering of the scene file
3d_export
$65

Classroom
...classroom
3dexport
simple rendering of the scene file
3ddd
$1

Classroom Desk
... desk , парта
classroom desk and 2 chairs ( wood,leather and aluminum)
3d_export
$100

Classroom
...vertices: 146,703 preview images rendered in v-ray. model has real-world scale. background and lighting are included in the file.
3d_export
free

classroom
...classroom
3dexport
watch the download and render tutorial in our youtube channel.
Compressed
turbosquid
$20

compresser
... available on turbo squid, the world's leading provider of digital 3d models for visualization, films, television, and games.
turbosquid
$4

Compression Tap
...for download as blend, gltf, obj, stl, dae, fbx, wrl, and usd on turbosquid: 3d models for games, architecture, videos. (1650763)
turbosquid
$7

Compression reducing tee
...ty free 3d model compression reducing tee for download as max on turbosquid: 3d models for games, architecture, videos. (1540313)
3d_export
$5

Mustang Compressed blend
...mustang compressed blend
3dexport
turbosquid
$19

Compression hips trainer
... compression hips trainer for download as , fbx, stl, and obj on turbosquid: 3d models for games, architecture, videos. (1684685)
turbosquid
$10

Compressed air station
...compressed air station for download as max, 3ds, fbx, and obj on turbosquid: 3d models for games, architecture, videos. (1598414)
turbosquid
$35

Compressed-air Engine
... available on turbo squid, the world's leading provider of digital 3d models for visualization, films, television, and games.
turbosquid
$19

Concrete Compression Tester
... available on turbo squid, the world's leading provider of digital 3d models for visualization, films, television, and games.
turbosquid
$4

Compression TAP worn
...for download as blend, usd, dae, gltf, fbx, obj, stl, and wrl on turbosquid: 3d models for games, architecture, videos. (1652641)
turbosquid
$49
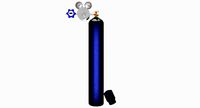
Compressed Gas Cylinder and Regulator
...odel compressed gas cylinder and regulator for download as ma on turbosquid: 3d models for games, architecture, videos. (1170670)
Week
3ddd
$1

david weeks
...david weeks
3ddd
david weeks
david weeks
turbosquid
$12

Acaba No.435 Weeks Studio
...d model acaba no.435 weeks studio for download as max and obj on turbosquid: 3d models for games, architecture, videos. (1605096)
turbosquid
$8

Treble Single david weeks
...d model treble single david weeks for download as max and obj on turbosquid: 3d models for games, architecture, videos. (1435530)
turbosquid
$12

David Weeks Floor lamp
...odel david weeks floor lamp for download as max, obj, and fbx on turbosquid: 3d models for games, architecture, videos. (1498285)
turbosquid
$50

Sxeh embryo week ten
... available on turbo squid, the world's leading provider of digital 3d models for visualization, films, television, and games.
turbosquid
$29

Wooden by David Weeks Studio
... available on turbo squid, the world's leading provider of digital 3d models for visualization, films, television, and games.
3ddd
$1

Cross Cable by David Weeks Studio
... david weeks studio
3ddd
david weeks
ссылка на сайт производителя:http://www.davidweeksstudio.com/lighting/cross-cable/
turbosquid
$15

David weeks studio Sarus Mobile
... 3d model david weeks studio sarus mobile for download as max on turbosquid: 3d models for games, architecture, videos. (1192077)
3ddd
$1

Milan Design Week 2011
...milan design week 2011
3ddd
консоль
в комплекте развертки дисплейс, нормал, спекулар , дифуз , бамп
3ddd
$1

Milan Design Week 2011 ( TV )
...milan design week 2011 ( tv )
3ddd
тумба
vray 2.0
Semi
turbosquid
$65
semi
... available on turbo squid, the world's leading provider of digital 3d models for visualization, films, television, and games.
3d_export
$65
Semi 3D Model
...semi 3d model
3dexport
semi
semi 3d model modelix 59728 3dexport
3d_ocean
$19

Semi Truck
...y rim seat semi truck speed truck tyre wheel
detailed 3d model of semi truck. all materials are included. model is ready for use.
design_connected
$10

Semi Lights
...semi lights
designconnected
gubi semi lights computer generated 3d model. designed by bonderup, claus.
3ddd
$1
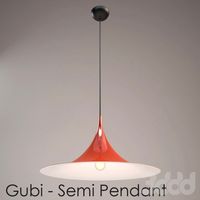
Gubi Semi Pendant
...gubi semi pendant
3ddd
gubi
gubi semi pendant
turbosquid
$110

Tesla Semi
...bosquid
royalty free 3d model tesla semi for download as obj on turbosquid: 3d models for games, architecture, videos. (1404184)
turbosquid
$99

Tesla Semi
...bosquid
royalty free 3d model tesla semi for download as max on turbosquid: 3d models for games, architecture, videos. (1706688)
turbosquid
free

Semi Truck
...rbosquid
free 3d model semi truck for download as ma and obj on turbosquid: 3d models for games, architecture, videos. (1397814)
turbosquid
$400

Semi Truck
...
royalty free 3d model semi truck for download as max and fbx on turbosquid: 3d models for games, architecture, videos. (1503399)
turbosquid
$50

SEMI-92
... available on turbo squid, the world's leading provider of digital 3d models for visualization, films, television, and games.
Science
turbosquid
$30

Science Building
...d
royalty free 3d model science building for download as max on turbosquid: 3d models for games, architecture, videos. (1148857)
turbosquid
$2

Bench Science
...quid
royalty free 3d model bench science for download as rfa on turbosquid: 3d models for games, architecture, videos. (1274551)
turbosquid
$5

Science Flasks
...ty free 3d model science flasks for download as blend and obj on turbosquid: 3d models for games, architecture, videos. (1639964)
turbosquid
$95

Megalopolis the science
...del megalopolis the science for download as max, obj, and fbx on turbosquid: 3d models for games, architecture, videos. (1189886)
turbosquid
$8

Science Stool
...3d model science stool for download as obj, dae, fbx, and stl on turbosquid: 3d models for games, architecture, videos. (1608945)
turbosquid
$25

Science Equipment
... available on turbo squid, the world's leading provider of digital 3d models for visualization, films, television, and games.
turbosquid
$20

science desk_1
... available on turbo squid, the world's leading provider of digital 3d models for visualization, films, television, and games.
turbosquid
free

Science Equipment
...ce equipment for download as max, 3ds, dae, dxf, fbx, and obj on turbosquid: 3d models for games, architecture, videos. (1690832)
turbosquid
free

Museum of Science
... available on turbo squid, the world's leading provider of digital 3d models for visualization, films, television, and games.
turbosquid
$56

Gun science fiction
...yalty free 3d model gun science fiction for download as blend on turbosquid: 3d models for games, architecture, videos. (1388382)
Auto
3d_export
$5
auto
...auto
3dexport
auto
3ddd
$1
auto
...auto
3ddd
max7
turbosquid
$69
AUTO
...to
turbosquid
royalty free 3d model auto for download as obj on turbosquid: 3d models for games, architecture, videos. (1453538)
3d_export
$10
Auto
...auto
3dexport
3d_export
free

auto
...auto
3dexport
3ddd
$1

Auto posters
...auto posters
3ddd
машина
auto posters
turbosquid
$50
auto
... available on turbo squid, the world's leading provider of digital 3d models for visualization, films, television, and games.
turbosquid
$28

Auto
... available on turbo squid, the world's leading provider of digital 3d models for visualization, films, television, and games.
turbosquid
$20
auto
... available on turbo squid, the world's leading provider of digital 3d models for visualization, films, television, and games.
turbosquid
$5
auto
... available on turbo squid, the world's leading provider of digital 3d models for visualization, films, television, and games.
Gun
archibase_planet
free

Gun
...t
gun tommy gun thompson gun thompson submachine gun
gun thompson n120313 - 3d model (*.gsm+*.3ds) for interior 3d visualization.
archibase_planet
free

Gun
...gun
archibase planet
gun machine-gun submachine gun
gun m4a1 n260713 - 3d model (*.gsm+*.3ds+*.max) for 3d visualization.
archibase_planet
free

Gun
...base planet
gun submachine gun sub-machine-gun
gun fn scar mark16 n091210 - 3d model (*.gsm+*.3ds) for interior 3d visualization.
archibase_planet
free

Gun
...gun
archibase planet
gun rifle hand-gun
gun n221010 - 3d model (*.gsm+*.3ds) for interior 3d visualization.
archibase_planet
free
Gun
...gun
archibase planet
gun automatic machine machine gun
gun p90 n020515 - 3d model (*.gsm+*.3ds+*.max) for 3d visualization.
archibase_planet
free

Gun
...gun
archibase planet
gun automatic rifle submachine-gun
gun m4 n221112 - 3d model (*.gsm+*.3ds) for interior 3d visualization.
archibase_planet
free

Gun
...gun
archibase planet
gun m16 machine gun
gun m16 n030613 - 3d model (*.gsm+*.3ds+*.max) for interior 3d visualization.
archibase_planet
free

Gun
...gun
archibase planet
machine-gun gun fire-arms shooter
gun n270211 - 3d model (*.gsm+*.3ds) for interior 3d visualization.
archibase_planet
free

Gun
...hibase planet
gun automatic machine machine gun
gun jackhammer mk3a1 n290415 - 3d model (*.gsm+*.3ds+*.max) for 3d visualization.
archibase_planet
free

Gun
...n
archibase planet
paintball gun gun paintball
gun paintball bt 4 renta n280611 - 3d model (*.3ds) for interior 3d visualization.
Mini
turbosquid
$10
Mini Mini Luceplan
...
royalty free 3d model mini mini luceplan for download as max on turbosquid: 3d models for games, architecture, videos. (1227359)
3d_ocean
$39
Mini Cooper
...mini cooper
3docean
cabrioler cooper mini
mini cooper cabrioler
3d_export
$30

Mini lathe
...mini lathe
3dexport
mini lathe
3d_export
$5
mini mouse
...mini mouse
3dexport
mini mouse
3d_export
$5
mini house
...mini house
3dexport
mini house
3d_export
free

Mini Mecha
...mini mecha
3dexport
concept of mini mecha
3d_ocean
$20
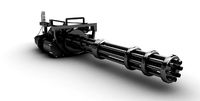
Mini Gun
...mini gun
3docean
gatling gun gun machine gun mini gun weapon
model of a mini gatling gun.
3ddd
free
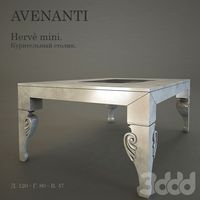
Herve mini
... кофейный , herve
http://www.mobiliavenanti.it/ru/products/hervè-mini
3d_export
$5
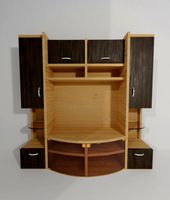
mini wall
...mini wall
3dexport
mini wall for living room
3d_export
$5

mini bank
...mini bank
3dexport
mini bank 3d model
Air
3ddd
$1
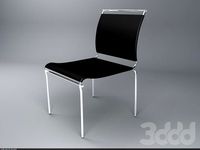
Calligaris air
...calligaris air
3ddd
air , calligaris
cтул calligaris air
3ddd
$1

Air freshener
...air freshener
3ddd
air freshener , освежитель
air freshener
design_connected
$16

Air
...air
designconnected
flexform air lounge chairs computer generated 3d model. designed by antonio citterio.
turbosquid
$250
Heat pump air air
... available on turbo squid, the world's leading provider of digital 3d models for visualization, films, television, and games.
3d_export
$5
air
...air
3dexport
3ddd
$1
Кухня AIR
...кухня air
3ddd
air , мария
кухня air фабрики "мария"
3ddd
$1
Лампа AIR
...лампа air
3ddd
boconcept , air
настольная лампа air, boconcept. в50½xø32см
3d_export
$40
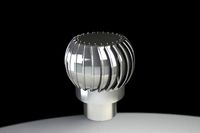
air deflector
...air deflector
3dexport
air deflector
3d_export
$15

air purifier
...air purifier
3dexport
air purifier
3d_export
$5

macbook air
...macbook air
3dexport
macbook air
Full
3ddd
$1
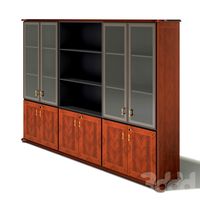
Full Mobili
...ull mobili , шкаф
группа шкафов, серия мебели "классика" фабрики «full mobili»
turbosquid
$80
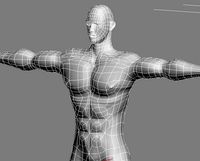
full man body+full facials
... available on turbo squid, the world's leading provider of digital 3d models for visualization, films, television, and games.
3ddd
$1
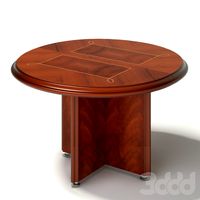
Full Mobili
...сика , стол
стол круглый офисный серия мебели "классика" фабрики «full mobili»
3ddd
$1
FULL MOBILI
... стол
cтол офисный серии мебели "классика" итальянской компании full mobili
design_connected
$16

Full Circle
...full circle
designconnected
atmosphere full circle computer generated 3d model.
3d_export
$5
full office
...full office
3dexport
this is full office cgi model created with maya -detailed -textured -uv mapped
design_connected
$16

Full Moon
...full moon
designconnected
roche bobois full moon computer generated 3d model. designed by ragot, cedric.
turbosquid
$100

FULL KITCHEN
...squid
royalty free 3d model full kitchen for download as skp on turbosquid: 3d models for games, architecture, videos. (1345817)
turbosquid
$15

Full Bedroomset
...id
royalty free 3d model full bedroomset for download as max on turbosquid: 3d models for games, architecture, videos. (1540649)
3d_export
$10

full human body
...full human body
3dexport
it is a full human sculpt
Project
3d_export
$7
project
...project
3dexport
project
3d_export
$20
Project
...project
3dexport
design_connected
$16

Project Chair
...project chair
designconnected
rex kralj project chair computer generated 3d model. designed by žitnik, marjan.
3ddd
$1

lectric Project
...настроены. сетка очень плотная.
доступно только для группы "profi"
про группу "profi" можно прочитать в чаво
3d_ocean
$19

Soon project
...kup. made in 3ds max 2013 1- 3dsmax with vray render included material and light 2- obj file 3- fbx file hope you like it plea...
turbosquid
$49
Joint | Project
...squid
royalty free 3d model joint | project for download as on turbosquid: 3d models for games, architecture, videos. (1297983)
turbosquid
$11

house project
...bosquid
royalty free 3d model house project for download as on turbosquid: 3d models for games, architecture, videos. (1672482)
turbosquid
$450

University project
...
royalty free 3d model university project for download as rvt on turbosquid: 3d models for games, architecture, videos. (1463354)
turbosquid
$30
smart projecter
...lty free 3d model smart projecter for download as max and obj on turbosquid: 3d models for games, architecture, videos. (1236214)
3d_export
$5
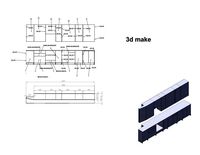
project drawing
...project drawing
3dexport
project drawing and 3d model<br>format jpg sldprt dwg<br>by 3d make
1
turbosquid
$69

armchairs(1)(1)
... available on turbo squid, the world's leading provider of digital 3d models for visualization, films, television, and games.
turbosquid
$15
ring 1+1
... available on turbo squid, the world's leading provider of digital 3d models for visualization, films, television, and games.
turbosquid
$10
chair(1)(1)
... available on turbo squid, the world's leading provider of digital 3d models for visualization, films, television, and games.
turbosquid
$8

Chair(1)(1)
... available on turbo squid, the world's leading provider of digital 3d models for visualization, films, television, and games.
turbosquid
$2

RING 1(1)
... available on turbo squid, the world's leading provider of digital 3d models for visualization, films, television, and games.
turbosquid
$1

house 1(1)
... available on turbo squid, the world's leading provider of digital 3d models for visualization, films, television, and games.
turbosquid
$1

Table 1(1)
... available on turbo squid, the world's leading provider of digital 3d models for visualization, films, television, and games.
turbosquid
$59

Formula 1(1)
...lty free 3d model formula 1 for download as max, fbx, and obj on turbosquid: 3d models for games, architecture, videos. (1567088)
design_connected
$11

No 1
...no 1
designconnected
sibast no 1 computer generated 3d model. designed by sibast, helge.
turbosquid
$2
desert house(1)(1)
...3d model desert house(1)(1) for download as 3ds, max, and obj on turbosquid: 3d models for games, architecture, videos. (1055095)
