Thingiverse
Full glass hotbed conversion by ArtemKuchin
by Thingiverse
Last crawled date: 3 years, 1 month ago
Please, read and understand everything before you do anything.
Skills needed: hand cutting and hand drilling aluminum, basic soldering, basic gluing.
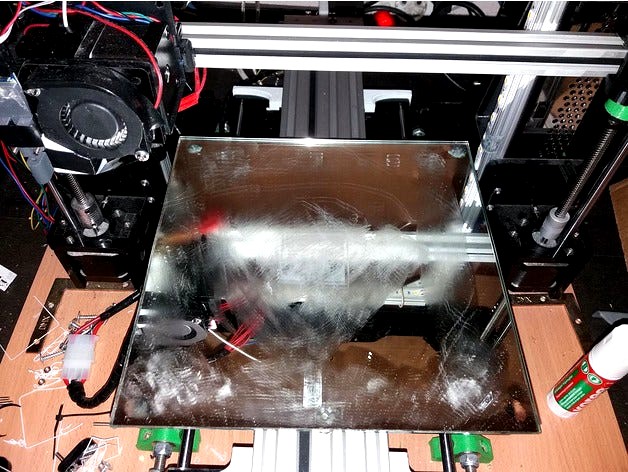
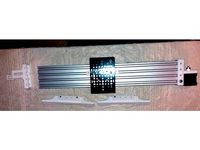
I was very tired of how uneven aluminum plates was. Cast and cnc-ed aluminum is very expensive and hard to find. Also, since my printed has a moving bed, I am always finght the bed weight. Most people use aluminum and then put glass on top. Too heavy. Some just use heater plate as a base and clamp glass on top. Okay for not moving bed, but too flimsy for a moving one.
So, I though why I need the aluminum bed at all? Just for the screws? Then let’s find way to screw the glass the carriage and not even damage the top side of the glass.
Usual window glass is no good. Maybe even maybe not. So, I tested the method on usual glass and then used a 4 mm mirror. Mirror is good because it can be visually controlled for any distortion. Eye is very sensitive instrument, can see holes up to 0.01mm and detect very small distortions.
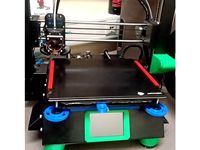
Using a mirror, I also increased the printable area to 230x230 mm.
Tasks list
1) Cut mirror
2) Attach heater
3) Attach screws
Cutting mirror
Very easy. Just use hand glass cutter of any time. Then use 150-200 grid sand paper to clean the edge. Easy.
Attaching the heater
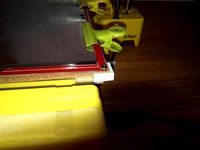
Complex tax. Need to make cut outs for the screws and glue and resolder connection. Nothing too difficult, basic soldering skills. The problem here is that I used my original aluminum table as a carriage, so the whole are still like for 214x214, the same whole distances in the heater. Also, I wanted to make 3 screws attachment, not 4. So, I made all cutout, resoldered with thick wire. Next I used thin layer of thermal compound in some pattern (see photos) and then silicon glue (pure silicon, hold up to 250C and conducts heat a lot better than air). Then I attached the mirror and heater together and put 5kg load on top for 3 days. Done.
Attaching screws.
Worst part. Took me some experiments to choose the right glue and the gluing method. The glue must be hard enough to avoid any detectable movement during direction change, but elastic enough to withstand some thermal and mechanical deformations. Also, must withstand temperature up to 100C. Must bind very good to metal and to glass.
Pure 2 component epoxy does not work well. It breaks of the glass and breaks too easily. Does not tolerate temperature change very well. Since I am in Russia I found local glue called TITAN 6http://anles.ru/product/%D1%8D%D0%BF%D0%BE%D0%BA%D1%81%D0%B8-%D1%82%D0%B8%D1%82%D0%B0%D0%BD-%E2%84%966/
It is a epoxy rubber glue, which is hard enough and can work up to 120C. Amazing glue. Very strong. Use google translate and find something like that in your area.
But still, it does not hold very good to clean glass. Hold very strong to the screw head, but can be detached from glass with no so much force. However, even like that I printed for 4 month without problems.
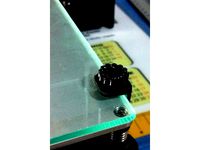
But eventually I dropped the bed when I was changing two wheels and all screws detached from the glass. No problem. This time I took a glass drill (4mm) and made 6-7 indentation in each place about 1-2mm deep. And glues the screws back. Now the holding force is amazing. Just make sure you clean the indents very well.
When gluing you need to place the screws as precise as you can. For that I used my old table as a template. Out the screws into it with two nuts and tightened it on the screw end. So, screws was sitting tight in the template plate sticking out the head as much as possible. Before that I made a whole where a new screws possible will be (I used 2 old whole, and one new, because switched to 3 point attachment).
Place glass table upside down. Clean the gluing places with IPA. Wait for it to evaporate. Put some glue onto the places and push some into the indents with a toothpick. Then just place the template plate with screws on top of it. After about 30 minutes I used toothpick to bring some more glue from bottom onto the screw heads and even a little on the thread. After 24 hours it is ready to be used.
Assembly
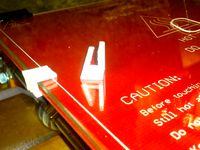
I hate springs in the table assembly. It is always a problem. Everything must hold tight. So, My assembly (from top to bottom) on each screw is like this: Screw-nut-washer-carriage-washer-lockwasher-hand nut. See photo – you will understand.
If all three screws do not want to go into the wholes at the same time, then they were places not very straight. I solved this problem just by using 4mm metal drill to enlarge one whole in the table carriage base.
Results.
Since I do not print ABS I don’t need to head by bed to 100C. I tested it up to 80 about 10 cycles and it now heats a lot faster even without any heat insulation underneath. I checked it with a pyrometer. This is obviously due to better thermal connection between heater and the bed.
I used a lot of force when detaching some PETG models and even PLA with big bed surface and did not have any problems.
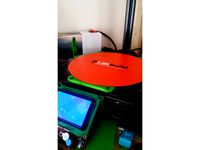
The bed is now extremely flat. Here is G29
At 25C:
0 -0.060 -0.085
1 -0.045 -0.045
At 50C:
0 -0.037 -0.055
1 -0.035 -0.035
As you see the height difference is within 0.03mm. With 0.2mm first layer gives perfect 1st layer.
As you see the heater does not cover full areas of the print bed. That’s ok. Full area only needed for rare cases and even using heater 40C will give me about 33C on the edge, so PLA attached better.
I also tried glass with PEI on top. It is more problems than advantages. Now I used just clean glass with some glue stick dissolved in water. Good for PLA, PETG, SBS.
Good luck.
ADDED 2018/09/17
One mirror has cracked after too heating too fast to 80C with cold wind around. I thought i need a new heater, but luckily, the heater detached from glass very easily. So, i just cut new mirror and reattached the heater. Works perfectly.
Skills needed: hand cutting and hand drilling aluminum, basic soldering, basic gluing.
I was very tired of how uneven aluminum plates was. Cast and cnc-ed aluminum is very expensive and hard to find. Also, since my printed has a moving bed, I am always finght the bed weight. Most people use aluminum and then put glass on top. Too heavy. Some just use heater plate as a base and clamp glass on top. Okay for not moving bed, but too flimsy for a moving one.
So, I though why I need the aluminum bed at all? Just for the screws? Then let’s find way to screw the glass the carriage and not even damage the top side of the glass.
Usual window glass is no good. Maybe even maybe not. So, I tested the method on usual glass and then used a 4 mm mirror. Mirror is good because it can be visually controlled for any distortion. Eye is very sensitive instrument, can see holes up to 0.01mm and detect very small distortions.
Using a mirror, I also increased the printable area to 230x230 mm.
Tasks list
1) Cut mirror
2) Attach heater
3) Attach screws
Cutting mirror
Very easy. Just use hand glass cutter of any time. Then use 150-200 grid sand paper to clean the edge. Easy.
Attaching the heater
Complex tax. Need to make cut outs for the screws and glue and resolder connection. Nothing too difficult, basic soldering skills. The problem here is that I used my original aluminum table as a carriage, so the whole are still like for 214x214, the same whole distances in the heater. Also, I wanted to make 3 screws attachment, not 4. So, I made all cutout, resoldered with thick wire. Next I used thin layer of thermal compound in some pattern (see photos) and then silicon glue (pure silicon, hold up to 250C and conducts heat a lot better than air). Then I attached the mirror and heater together and put 5kg load on top for 3 days. Done.
Attaching screws.
Worst part. Took me some experiments to choose the right glue and the gluing method. The glue must be hard enough to avoid any detectable movement during direction change, but elastic enough to withstand some thermal and mechanical deformations. Also, must withstand temperature up to 100C. Must bind very good to metal and to glass.
Pure 2 component epoxy does not work well. It breaks of the glass and breaks too easily. Does not tolerate temperature change very well. Since I am in Russia I found local glue called TITAN 6http://anles.ru/product/%D1%8D%D0%BF%D0%BE%D0%BA%D1%81%D0%B8-%D1%82%D0%B8%D1%82%D0%B0%D0%BD-%E2%84%966/
It is a epoxy rubber glue, which is hard enough and can work up to 120C. Amazing glue. Very strong. Use google translate and find something like that in your area.
But still, it does not hold very good to clean glass. Hold very strong to the screw head, but can be detached from glass with no so much force. However, even like that I printed for 4 month without problems.
But eventually I dropped the bed when I was changing two wheels and all screws detached from the glass. No problem. This time I took a glass drill (4mm) and made 6-7 indentation in each place about 1-2mm deep. And glues the screws back. Now the holding force is amazing. Just make sure you clean the indents very well.
When gluing you need to place the screws as precise as you can. For that I used my old table as a template. Out the screws into it with two nuts and tightened it on the screw end. So, screws was sitting tight in the template plate sticking out the head as much as possible. Before that I made a whole where a new screws possible will be (I used 2 old whole, and one new, because switched to 3 point attachment).
Place glass table upside down. Clean the gluing places with IPA. Wait for it to evaporate. Put some glue onto the places and push some into the indents with a toothpick. Then just place the template plate with screws on top of it. After about 30 minutes I used toothpick to bring some more glue from bottom onto the screw heads and even a little on the thread. After 24 hours it is ready to be used.
Assembly
I hate springs in the table assembly. It is always a problem. Everything must hold tight. So, My assembly (from top to bottom) on each screw is like this: Screw-nut-washer-carriage-washer-lockwasher-hand nut. See photo – you will understand.
If all three screws do not want to go into the wholes at the same time, then they were places not very straight. I solved this problem just by using 4mm metal drill to enlarge one whole in the table carriage base.
Results.
Since I do not print ABS I don’t need to head by bed to 100C. I tested it up to 80 about 10 cycles and it now heats a lot faster even without any heat insulation underneath. I checked it with a pyrometer. This is obviously due to better thermal connection between heater and the bed.
I used a lot of force when detaching some PETG models and even PLA with big bed surface and did not have any problems.
The bed is now extremely flat. Here is G29
At 25C:
0 -0.060 -0.085
1 -0.045 -0.045
At 50C:
0 -0.037 -0.055
1 -0.035 -0.035
As you see the height difference is within 0.03mm. With 0.2mm first layer gives perfect 1st layer.
As you see the heater does not cover full areas of the print bed. That’s ok. Full area only needed for rare cases and even using heater 40C will give me about 33C on the edge, so PLA attached better.
I also tried glass with PEI on top. It is more problems than advantages. Now I used just clean glass with some glue stick dissolved in water. Good for PLA, PETG, SBS.
Good luck.
ADDED 2018/09/17
One mirror has cracked after too heating too fast to 80C with cold wind around. I thought i need a new heater, but luckily, the heater detached from glass very easily. So, i just cut new mirror and reattached the heater. Works perfectly.
Similar models
thingiverse
free
Russian sleigh by kirilloff
... v. i. https://ru.wikipedia.org/wiki/%d0%91%d0%be%d1%8f%d1%80%d1%8b%d0%bd%d1%8f_%d0%9c%d0%be%d1%80%d0%be%d0%b7%d0%be%d0%b2%d0%b0
thingiverse
free
Heatbed and Glass bed fixture for delta type printer by NeFa
...space to glue rubber sheets (about 2mm). use thumb screws for glass fix part for easy attach / detach glass bed for maintenance.
cg_trader
$15
Laskasas Miuzza bed
...%d0%bf%d1%80%d0%be%d0%b4%d1%83%d0%ba%d1%82%d1%8b/laskasas/% d0% ba% d1% 80% d0% be% d0% b2% d0% b0% d1% 82% d1% 8c-miuzza_329787
grabcad
free

Двухъярусная кровать / Bunk bed
...84%d0%be%d1%80%d0%bc%d1%83%d0%bb%d0%b0_%d0%bc%d0%b5%d0%b1%d0%b5%d0%bb%d0%b8_%d0%b2%d0%b8%d0%bd%d1%8c%d0%be%d0%bb%d0%b0/?oid=54113
3d_sky
free
CHESTERBED
...d0%bb%d0%be%d0%b3/%d1%81%d0%bf%d0%b0%d0%bb%d1%8c%d0%bd%d0%b8/%d0%ba%d1%80%d0%be%d0%b2%d0%b0%d1%82%d1%8c/flou-chesterbed
3d_sky
free
Gas Water Heater Ariston Fast CF
...tp://www.ariston.com/ru/%d0%92%d0%be%d0%b4%d0%be%d0%bd%d0%b0%d0%b3%d1%80%d0%b5%d0%b2%d0%b0%d1%82%d0%b5%d0%bb%d0%b8/fast
3d_sky
free
Mirrors LOOK by Ozzio Design
...d0%bf%d1%80%d0%be%d0%b4%d1%83%d0%ba%d1%82%d1%8b/78680/%d0%b7%d0%b5%d1%80%d0%ba%d0%b0%d0%bb%d0%be-look-ozzio-design.html
cg_trader
$3

Zara home acrylic glass
...d0%bc-%d1%83%d0%b7%d0%be%d1%80%d0%be%d0%bc-c0p302095193.html?colorid=300&dir=true
glass made of acrylic with a raised pattern
thingiverse
free
20cm glass supports (stock Micromake D1 bed heater) by RandomFactoid
...to keep them slightly flexible so they fit the shape of the glass better. this was made for a 20cm round glass.
happy printing :)
thingiverse
free
Taz 5 Extended bed corner for Printinz Zebra Plate by weekend_warrior1999
...roximately 3mm in case your using a non oem silicone heater and glass to keep the heater from resting on the aluminum base plate.
Artemkuchin
thingiverse
free
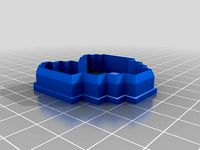
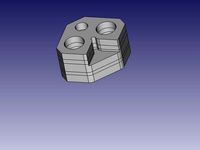
Better Undertale Heart Cookie Cutter by ArtemKuchin
...undertale heart cookie cutter by artemkuchin
thingiverse
added some plastic to make it sturdier and also made sharp bottom part.
thingiverse
free

2020 X-Axis Upgrade for Tronxy P802 by ArtemKuchin
.... i designed a hook to mini gantry keep belt parallel with 16 teeth pulley. take a look:https://www.thingiverse.com/thing:2774747
thingiverse
free

Skew calibration check for XY and Z (zx,zy) axes (axis) by ArtemKuchin
... same.
print params
pla. 1 shell. 5% infill. no supports. 1 bottom layer. 3 top layers. layer 0.15-0.25mm depends on nozzle size.
thingiverse
free
Hook for mini gantry for 20x20 aluminum extrusion x-axis conversion by ArtemKuchin
... weight is a lot more and we need as much torque as we can get.
update 06/02/2018:
printed 0.5kg of plastic with it- not problem.
thingiverse
free
80x20 aluminum exrtrusion Y-axis for Prusa type printers (Tronxy/Anet/Zonestar/Folgertech) by ArtemKuchin
...ll models are also provided in solidworks format. feel free to play around, but add a remix to my thing if you post what you did.
Hotbed
cg_studio
$22
Greenhouse3d model
...greenhouse3d model cgstudio greenhouse orangery hothouse warm house glasshouse hotbed seedbed glass metal conservatory frame greenery .obj .max .fbx...
cg_studio
$30
Greenhouse3d model
...greenhouse3d model cgstudio greenhouse orangery hothouse warm house glasshouse hotbed seedbed glass metal conservatory frame greenery easter site components...
cg_studio
$22

Greenhouse brick3d model
...brick3d model cgstudio greenhouse orangery hothouse warm house glasshouse hotbed seedbed glass metal conservatory frame greenery .max .fbx .3ds...
3d_export
$37
Green House Low poly 3d model 3D Model
...garden glazing glass architecture architectural summerhouse plants flowering gardening hotbed grow green house low poly 3d model 3d model...
cg_studio
$49
Greenhouse solar3d model
...greenhouse solar3d model cgstudio orangery hothouse warm house glasshouse hotbed seedbed glass metal conservatory frame lamp plant seedlings seed...
3d_ocean
$19

Green House Low poly 3d model
...brick conservatory flowering garden gardening glass glazing greenhouse grow hotbed old plants summerhouse a 3d model of a low...
thingiverse
free
Hotbed clip by El_Ingeniero
...hotbed clip by el_ingeniero
thingiverse
hotbed clip
thingiverse
free
hotbed clip by xfred
...hotbed clip by xfred
thingiverse
hotbed clip
thingiverse
free
hotbed mount by Aganyte
...hotbed mount by aganyte
thingiverse
hotbed mount for "print-rite" 3d printer (and probably others)
thingiverse
free
Anycubic i3 Mega Hotbed Protector
...anycubic i3 mega hotbed protector
thingiverse
protect the glass hotbed and reduce deformation of the hotbed
Conversion
3ddd
$1

Conversation Seat
...шетка
the conversation seat made in englandhttp://www.squintlimited.com/products/the_conversation_seat/gold
+ max 2011
3d_export
$10

Converse 3D Model
...converse 3d model
3dexport
converse shoe pc unix mac
converse 3d model electropainter17075 38067 3dexport
turbosquid
$100

converse-shoe
...quid
royalty free 3d model converse-shoe for download as c4d on turbosquid: 3d models for games, architecture, videos. (1398427)
turbosquid
$10

Conversation Furniture
... available on turbo squid, the world's leading provider of digital 3d models for visualization, films, television, and games.
turbosquid
$7

Converse Allstars
... available on turbo squid, the world's leading provider of digital 3d models for visualization, films, television, and games.
design_connected
$16

Conversation Club Chair
...conversation club chair
designconnected
donghia conversation club chair chairs computer generated 3d model. designed by n/a.
design_connected
$27

Hemicycle Conversation Chair
...rsation chair
designconnected
ligne roset hemicycle conversation chair computer generated 3d model. designed by nigro, philippe.
3d_export
$24

Converse keds 3D Model
...converse keds 3d model
3dexport
converse all star ked shoe clothes sports
converse keds 3d model vermi1ion 26201 3dexport
3ddd
$1

Converse All-Star Shoes
...converse all-star shoes
3ddd
кеды , обувь
converse all-star shoes
design_connected
$18

CONVERSE Jack Purcell Sneakers
...converse jack purcell sneakers
designconnected
converse jack purcell sneakers computer generated 3d model.
Full
3ddd
$1
Full Mobili
...ull mobili , шкаф
группа шкафов, серия мебели "классика" фабрики «full mobili»
turbosquid
$80
full man body+full facials
... available on turbo squid, the world's leading provider of digital 3d models for visualization, films, television, and games.
3ddd
$1
Full Mobili
...сика , стол
стол круглый офисный серия мебели "классика" фабрики «full mobili»
3ddd
$1

FULL MOBILI
... стол
cтол офисный серии мебели "классика" итальянской компании full mobili
design_connected
$16

Full Circle
...full circle
designconnected
atmosphere full circle computer generated 3d model.
3d_export
$5
full office
...full office
3dexport
this is full office cgi model created with maya -detailed -textured -uv mapped
design_connected
$16

Full Moon
...full moon
designconnected
roche bobois full moon computer generated 3d model. designed by ragot, cedric.
turbosquid
$100
FULL KITCHEN
...squid
royalty free 3d model full kitchen for download as skp on turbosquid: 3d models for games, architecture, videos. (1345817)
turbosquid
$15

Full Bedroomset
...id
royalty free 3d model full bedroomset for download as max on turbosquid: 3d models for games, architecture, videos. (1540649)
3d_export
$10
full human body
...full human body
3dexport
it is a full human sculpt
Glass
archibase_planet
free
Glasses
...glasses
archibase planet
glass wine-glass liqueur-glass
glasses- 3d model for interior 3d visualization.
archibase_planet
free

Glass
...archibase planet
glass cocktail glass tall wine glass martini glass
glass - 3d model (*.gsm+*.3ds) for interior 3d visualization.
archibase_planet
free

Glass
...glass
archibase planet
glass wine-glass glass-ware
glass n030209 - 3d model (*.gsm+*.3ds) for interior 3d visualization.
archibase_planet
free

Glass
...glass
archibase planet
glass-ware glass glass ware
glass n141109 - 3d model (*.gsm+*.3ds) for interior 3d visualization.
3d_ocean
$2
Glass
...liquid container low-poly glass nice glass obj r15 water glass
3d model of a beautiful glass. created the model in cinema 4d r15.
archibase_planet
free
Glass
...glass
archibase planet
glass tall wine glass wine-glass
glass n300514 - 3d model (*.gsm+*.3ds) for interior 3d visualization.
archibase_planet
free

Glass
...glass
archibase planet
glass wine-glass tall wine glass
glass n091210 - 3d model (*.gsm+*.3ds) for interior 3d visualization.
archibase_planet
free
Glass
...glass
archibase planet
glass tall wine glass glass-ware
glass n081011 - 3d model (*.gsm+*.3ds) for interior 3d visualization.
3d_ocean
$9
glasses
...glasses
3docean
glasses
max glasses v-ray
archibase_planet
free
Glass
...glass
archibase planet
glass-ware glass
glass - 3d model (*.gsm+*.3ds) for interior 3d visualization.