Thingiverse

FTK - Backlit Laptop Desk by F-T-K
by Thingiverse
Last crawled date: 3 years, 4 months ago
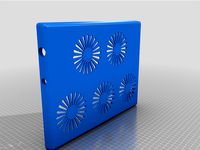
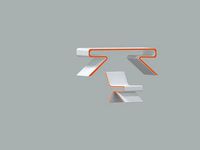
3D Planning for a REAL full size desk. Using actual wood.
I also designed this thing so that it could fit through normal doorways without needing to be broken down. Making your life easy if you ever move, adding more value to this build.
I am using 12" textured tileshttps://www.amazon.com/gp/product/B00S2JQEME/ref=ppx_yo_dt_b_asin_title_o00_s00?ie=UTF8&psc=1
And the two "red" strips are the LED lights...half will be on top of the main desk shelf shining up, the other half pass through the hole and wrap around and shine downhttps://www.amazon.com/gp/product/B079ZD7ZF1/ref=ppx_yo_dt_b_asin_title_o00_s00?ie=UTF8&psc=1
Powerstrip is Prime Wire & Cable Surge Protectorhttps://www.amazon.com/gp/product/B00L2IV90O/ref=ppx_yo_dt_b_asin_title_o02_s00?ie=UTF8&psc=1
Game Mat is Corsair MM300https://www.amazon.com/gp/product/B01798VS4C/ref=ppx_yo_dt_b_asin_title_o01_s00?ie=UTF8&psc=1
Note: The Upright board behind the laptop is meant to keep the LED's from shining in your face directly and creating any glare, as well as concealing cables and bulky power adapters. Run all wires through the holes to keep things tidy. Board can be secured with very small L shelf backets OR screws through bottom. I did not designate this in the build specifically becuase it is something I will decide when I finish it. I also plan to mount a regular under-cabinet dimmable LED light on the "ceiling" of the desk above the laptop, that I can turn on separately for extra light when needed.
You will also need THREE Plywood Sheets, Strongly recommend you get "finished and laminated" boards for a clean smooth look and feel. Use 3MF file as assembly guide - recommend you use 3D Builder App. Everything is 1:1 true scale (set your program to inches).
Board Cut Measurements (requires 3x boards)
Backboard (39" x 68")
FIRST Cut to 39" wide
SECOND Cut to 76" then 68" (this will yield the 20" board for the base without getting too small to safely cut)
Shelves (39" x 24")
FIRST Cut to 39" wide
SECOND cut TWO 24" pieces
THIRD take one of the long 9" wide scraps from the previous 39" cut and make a 39" x 9" board for the LED/Cable Concealer Board.
Overhead Shelf (82" x 40")
FIRST Cut to 82" tall
SECOND cut to 40" wide
Middle Shelf should be 3/4" Thick Acrylic and secured with double sided tape gel/foam kind. This will allow the LED light to shine through and illuminate all panels. Shelf will be slid forward on brackets to clear the textured tiles
10x 20" x 13" Shelf Brackets
3x 10" x 8" Shelf Brackets
Similar models
thingiverse
free

Sonoff Enclosure by JeffLZ
...title_o00_s00?ie=utf8&psc=1
https://www.amazon.com/gp/product/b00qvb6qpu/ref=ox_sc_saved_title_1?smid=atvpdkikx0der&psc=1
thingiverse
free

Nintendo Switch-Giveet Bluetooth Adapter Bracket
..._yo_dt_b_asin_title_o00_s00?ie=utf8&psc=1).
tight tolerances with the cable keep the adapter securely in place on the switch
thingiverse
free
Noctua Laptop Cooling Pad for 3:2 Aspect Ratio Laptops by 3Dnate
...e?ie=utf8&psc=1
rubber feet:https://www.amazon.com/gp/product/b087h5b87m/ref=ppx_yo_dt_b_asin_title_o09_s00?ie=utf8&psc=1
thingiverse
free

7" LCD display for Octopi
...utf8&psc=1&fbclid=iwar2idlttcqqeuraqqpyxsh22htajd43p3wl4hrjqgot24ievmbtf7tt4g28
quick brackets for the linked lcd display
thingiverse
free

Desk Fan by NebNorse
...lpages04?ie=utf8&psc=1
motor control: https://www.amazon.com/gp/product/b01cnl6imc/ref=od_aui_detailpages04?ie=utf8&psc=1
thingiverse
free

VW bus ash tray replacement by rozap
..._title_o00_s00?ie=utf8&psc=1https://www.amazon.com/gp/product/b013w8kpug/ref=ppx_yo_dt_b_asin_title_o00_s00?ie=utf8&psc=1
thingiverse
free

Watchmakers Screwdriver Stand
...utf8&psc=1
the filament is: https://www.amazon.com/gp/product/b071cnlmdv/ref=ppx_yo_dt_b_asin_title_o06_s01?ie=utf8&psc=1
thingiverse
free

2 1/4 Temperature / Voltage meter Instrument Insert by Terror_Industries
...title_o00_s00?ie=utf8&psc=1
https://www.amazon.com/gp/product/b01l1dlpwg/ref=ppx_yo_dt_b_asin_title_o00_s00?ie=utf8&psc=1
thingiverse
free
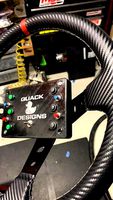
12 Function Deep Dish Button Box by coyoteyz13
..._title_o03_s00?ie=utf8&psc=1
https://www.amazon.com/gp/product/b07vhcb1q4/ref=ppx_yo_dt_b_search_asin_title?ie=utf8&psc=1
thingiverse
free

Enceinte bluetooth
...s://www.amazon.fr/gp/product/b07jqmf3kk/ref=ppx_yo_dt_b_asin_title_o02_s00?ie=utf8&psc=1
use a 18650 battery for alimentation

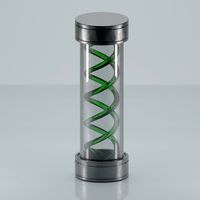
Backlit
3d_export
free

rgb backlit coffee table
...acklit coffee table
3dexport
an excellent coffee table will perfectly decorate your interior. convenient lighting will add mood.
3d_export
$5

homeclub hhb 1770 glass teapot water-filled backlit
...t
glass teapot electric homeclub hhb 1770<br>with a blue backlight below. you can turn off the backlight in the materials.
3d_export
$5

Low Poly Backlit Gaming Keyboard
...ize 4096x4096 including these maps: diffuse metalness roughness emission including formats: blend fbx obj created in blender 2.93
3d_export
$15

Desktop
...desktop 3dexport desktop, monitor, system unit, backlit ...
3d_ocean
$5

Warm Skin
...translucent veins woman warm skin material, warm glow highlights backlit areas as shown on the preview images, also includes...
3ddd
$1

Armani Casa- dressing table (coiffeuse)- GLAM
...round perimeter of the mirror in satin glass is backlit through a led system from inside which provides a...
3d_sky
free

Console with backlit Visionnaire Cycas
...console with backlit visionnaire cycas
3dsky
console visionnaire cycas
console with backlit visionnaire cycas
3d_sky
free

Bar with backlit
...bar with backlit
3dsky
bar
3dsmax 2010.v-ray 2.40.03.file formats 3ds, fbx, obj
3dbaza
$3

Backlit wall decor (124345)
...br>gold wall decor with lighting.<br>suitable for modern interiors in art deco style.<br>dimensions: 1200 * 1000mm
thingiverse
free

Backlit Sign - Brackets and Arduino Housing by FLA_Labs
...le arduino housing i used in the project.
build video for backlit sign - https://youtu.be/z08gcw3qhj4
see notes for arduino code!
Laptop
3d_export
$5

Laptop
...laptop
3dexport
laptop
archibase_planet
free

Laptop
...laptop
archibase planet
notebook laptop pc
laptop - 3d model for interior 3d visualization.
archibase_planet
free

Laptop
...laptop
archibase planet
notebook laptop pc
laptop asus - 3d model for interior 3d visualization.
3d_export
$5

Laptop
...laptop
3dexport
laptop with good typeboard. will be happy if it will be usefull for someone
3d_ocean
$19

laptop
...d com computer dell electronic high poly inspiron lap lapi laptop material model new tab usb
high poly uv unwrap, textured laptop
3d_export
$6

Laptop
...it your taste. the model consists lot of meshs. laptop body laptop cap buttons speaker cabinet speakers table table legs sul etc
3d_ocean
$8

Office Laptop
...rings.obj blender_rings.obj //////////////////////////////////////////////////////////////////////////////////////////////////...
turbosquid
$7

Laptop
...top
turbosquid
royalty free 3d model laptop for download as on turbosquid: 3d models for games, architecture, videos. (1488076)
turbosquid
$2

laptop
...laptop
turbosquid
free 3d model laptop for download as max on turbosquid: 3d models for games, architecture, videos. (1618080)
turbosquid
$10

Laptop
...
turbosquid
royalty free 3d model laptop for download as skp on turbosquid: 3d models for games, architecture, videos. (1375855)
K
turbosquid
$1
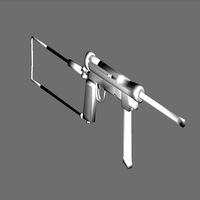
Swedish-K / K-Pist
... available on turbo squid, the world's leading provider of digital 3d models for visualization, films, television, and games.
3ddd
free
K lamp
...k lamp
3ddd
k lamp
3ddd
free
Giano K
...giano k
3ddd
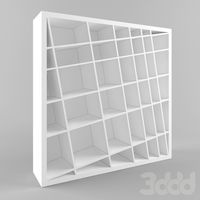
стеллаж
книжные полки giano k
3ddd
$1
K-table
...k-table
3ddd
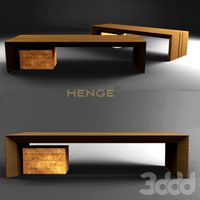
henge furniture , письменный
k-table by henge furnitures
design_connected
$13
Thin-K
...thin-k
designconnected
kristalia thin-k computer generated 3d model. designed by bertoncini, luciano.
design_connected
$9
Miss K
...miss k
designconnected
flos miss k table lights computer generated 3d model. designed by philippe cramer.
3ddd
$1

Papatya / Ego-K
...papatya / ego-k
3ddd
papatya
papatya / ego-k
3ddd
$1
DeMajo 2612/K
...demajo 2612/k
3ddd
demajo
люстра demajo 2612/k
turbosquid
$14
Fence K
...turbosquid
royalty free 3d model fence k for download as fbx on turbosquid: 3d models for games, architecture, videos. (1314643)
turbosquid
$7

K for Key
...rbosquid
royalty free 3d model k for key for download as max on turbosquid: 3d models for games, architecture, videos. (1689776)
F
3ddd
$1

Торшер Ray F. Ray F. Италия
...торшер ray f. ray f. италия
3ddd
flos
торшер ray f. ray f. италия 1280х360
turbosquid
$100

F-16 F block 62
...oyalty free 3d model f-16 f for download as max, obj, and fbx on turbosquid: 3d models for games, architecture, videos. (1310086)
3d_export
free

f-35
...f-35
3dexport
us fighter f-35
3d_export
$5

f 150
...f 150
3dexport
f 150 formats max 3ds obj stl
3d_export
$60

F-600
...f-600
3dexport
f600 fire truck, f600 truck f-600 of 1968
design_connected
$13

Tatou F
...tatou f
designconnected
tatou f computer generated 3d model. designed by urquiola, patricia.
design_connected
$13

Luxmaster F
...luxmaster f
designconnected
luxmaster f computer generated 3d model. designed by morrison, jasper.
design_connected
$10

Tab F
...tab f
designconnected
tab f computer generated 3d model. designed by osgerby , jay.
turbosquid
$30

F-4 and F-35 egg plane
... available on turbo squid, the world's leading provider of digital 3d models for visualization, films, television, and games.
design_connected
$29

Extrasoft F
...extrasoft f
designconnected
living divani extrasoft f computer generated 3d model. designed by lissoni, piero.
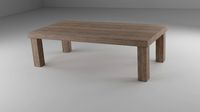
Desk
3d_ocean
$6
Desk
...desk
3docean
bureau desk desktop office plywood study table work desk writing
a desk made of plywood
3d_ocean
$8

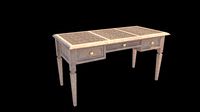
Desk
...oom or university. it can be used as an office desk or as a teacher’s desk, for example. the layer names are self explanatory....
3d_export
$5
Desk
...desk
3dexport
desk
3d_export
$5
Desk
...desk
3dexport
desk
3d_export
$5

desk
...desk
3dexport
desk
3d_export
$5
desk
...desk
3dexport
desk
3d_export
free
desk
...desk
3dexport
desk
3d_export
free
desk
...desk
3dexport
desk
3d_export
$5

desk
...desk
3dexport
computer desk
archibase_planet
free
Desk
...rchibase planet
bureau desk writing-desk
desk giorgetti epi 51610 n231010 - 3d model (*.gsm+*.3ds) for interior 3d visualization.
T
design_connected
$11
T & T
...t & t
designconnected
dark t & t computer generated 3d model. designed by de ryck, christophe.
3d_export
$5

t-800
...t-800
3dexport
t-800
3ddd
$1
Table T
...table t
3ddd
журнальный
table t
3ddd
free
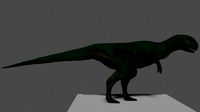
T-Rex
...t-rex
3ddd
t-rex
rrrrrr
3d_export
$5
t-virus
...t-virus
3dexport
it's t-virus
3d_export
$5

T-26T
...t-26t
3dexport
artillery tractor on the t-26 chassis ussr
3ddd
$1
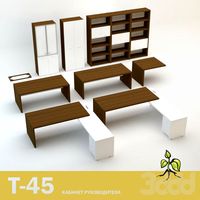
T 45
...t 45
3ddd
t-45
кабинет руководителя t 45
12 предметов
подробнее:http://www.prezident-mebel.ru/index.php?productid=1541
3ddd
free

SAFE T
...safe t
3ddd
огнетушитель
креативные огнетушители от компании safe t
3d_export
free
t-rex
...t-rex
3dexport
t-rex have normal map and base color textures
3d_export
$75

T-55
...nally, but these improvements made the tank more efficient and lethal. the t-55 was officially adopted by the soviet army in 1958