Thingiverse
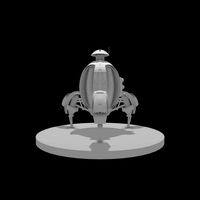
FT-5 Probe Platform PLUS by dbfrompw
by Thingiverse
Last crawled date: 3 years ago
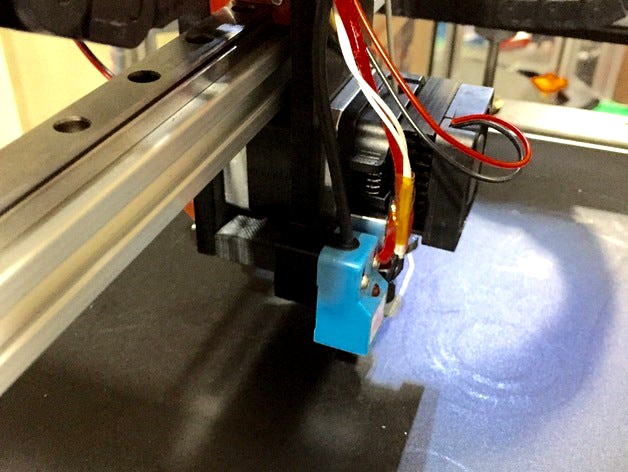
***NOTE: I am using an aluminum plate for my print build surface you may need to use aluminum foil under glass to help out the Inductive Proximity Sensor Switch!!
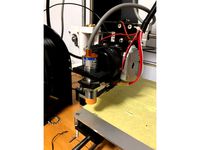
I was having problems leveling my FT-5 So I took the leap to auto-leveling. Looked around and found a few parts here and there on Thingiverse. Combined them and did some tweaking. Used http://www.thingiverse.com/thing:1738499 for the Nozzle and Fan, minus the mount. I wanted it a little closer to the bottom of the assembly. Used https://www.thingiverse.com/thing:1858771 for a start of a long trip down all the dimensions where a little off road. After days of measuring everything I added the mount for the Inductive Proximity Sensor Switch (https://www.amazon.com/gp/product/B00979RA1M/ref=oh_aui_detailpage_o09_s00?ie=UTF8&psc=1). After all that, it was time to thread the wire into the cable chain. What a fun time that was. Wiring it to the "Z" axis end stop location on the control board was easy. Probe Black to Board Green, Probe Brown to Board Red and Probe Blue to Board Black. See picture. Now on to the fun stuff, getting the firmware working. It was about a 3 hour tour. Finally got it! It works like a champ!! I am including it with the files. When you set up the hotend tip and probe, I made the tip about 2.0mm lower than the probe and cooler (see picture). You'll most likely need to do some tweaking to the "Configuration.h" file. It's about half way through the file. I placed a note where to make changes. You'll see it. Anyways, have fun! If you try it out, please post a make and leave your story too!!
Note: Use G29 at the beginning of your print to run auto leveling.
Watch the video! https://youtu.be/FgCBDTnN-CI
UPDATE: 11-26-16 For some reason the note I placed in the firmware configuration.h file for the adjustment wasn't there. I also made a note for adjusting the print size, Mine was a little small. Both notes have big arrows <<<----------------------<<.
UPDATE: 12-26-16 Adjusted the size of the print a bit more.
Update: 3-6-17. Fixed the STL's to fit better and all the holes so no drilling should be needed.
UPDATE 7-17-17 edited the sensor mount by adding a little more adjustment room.
Similar models
thingiverse
free

Wire Diagram for Alunar M508 (2016) with proximity sensor (With Marlin Firmware) (HY_BASE_L V1.0 board) by Exitoo
...18 update: have made a mistake in the description. the blue cable is connected to the power supply at v-. i adjusted the drawing.
thingiverse
free

Z probe proximity induction sensor by djsupreme98
...f trying to adjust you sensor with two spanners!! this makes it super easy for adjusting.
i printed at 40% and is very strong.
thingiverse
free

How to install an Inductive Proximity Sensor for Auto Bed Leveling by quillford
...are configured for an inductive proximity sensor here: https://github.com/quillford/marlin/blob/marlin_v1/marlin/configuration.h.
thingiverse
free

G2S Inductive Proximity Probe Holder by amphealy
...larger, but i get good results from this.
z_probe_x1 -30
z_probe_y1 -30
z_probe_x2 30
z_probe_y2 -30
z_probe_x3 -30
z_probe_y3 30
thingiverse
free

Anet A6 : Auto Leveling bed AND Cable chain ! by Athanasus
... : https://www.facebook.com/skynet3ddevelopment/
don't forget to replace "configuration.h" file by this one for a6.
thingiverse
free

Hictop 3DP-11-ATL Mini Differential IR Sensor Mount by kgrigio
..., and is now printed in abs. i am just getting ready to test it out, but from an installation standpoint, it is much better now.
thingiverse
free

Inductive Sensor Holder for K8200/3Drag by Perla
...r info about determinate the probe offsets: https://www.youtube.com/watch?v=ecgflwj0pna
feel free to post your makes and remixes!
thingiverse
free

Ender 2 bed leveling sensor probe mount by brotherchris
...o30
https://youtube.com/chrisriley
marlin firmware for ender 2:https://drive.google.com/open?id=1hodltnjpldhcgq2nxxpu7xwp9jakpvyb
thingiverse
free

Inductive Proximity Sensor Mount - Maker Select / Wanhao i3
... but well worth it.
i was getting tired of always leveling the bed and now with the sensor it is at the perfect level every time!
thingiverse
free
Alunar m508 Z Sensor Front Fan Holder by jacobf18
...cause the sensor should the sensing distance that goes below the extruder nozzle. use 7-zip file manager to extract my firmware.
Dbfrompw
thingiverse
free

Logitech 2020 Camera Mount by dbfrompw
...logitech 2020 camera mount by dbfrompw
thingiverse
logitech camera mount for 2020 tubing.
thingiverse
free

Desk Organizer Sticky Large V5 by dbfrompw
...desk organizer sticky large v5 by dbfrompw
thingiverse
a larger version.
thingiverse
free

Desk Organizer Sticky V5 by dbfrompw
...desk organizer sticky v5 by dbfrompw
thingiverse
just a newer version that's thinner and has a pocket for sticky notes.
thingiverse
free

Suitcase replacement Foot V1 by dbfrompw
... v1 by dbfrompw
thingiverse
this is a simple replacement foot for a suitcase. it has 3.6mm diameter holes that are 26.4mm apart.
thingiverse
free

Skyliner-Gondola by dbfrompw
...need to make some stickers for it next. not too good at art but will be giving it a try.
will need to file the door parts to fit.
thingiverse
free

ProStruder Dual Cooler by dbfrompw
...struder gets very hot so i designed this cooler for my rostock prostruder dual mount (https://www.thingiverse.com/thing:2626395).
thingiverse
free

RJ45 Breakout Mount by dbfrompw
...r rewiring with cat6 network cable.
https://www.amazon.com/gp/product/b06xz3bmtl/ref=oh_aui_detailpage_o02_s00?ie=utf8&psc=1
thingiverse
free

Desk Organizer 2.0 Reg Wide by dbfrompw
...desk organizer 2.0 reg wide by dbfrompw
thingiverse
yet another version....
this was by request but turned out pretty cool!
thingiverse
free

Desk Organizer Sticky Small V5 by dbfrompw
...desk organizer sticky small v5 by dbfrompw
thingiverse
just a small version of my desk organizer sticky large v5.
thingiverse
free

Rostock Pi by dbfrompw
...vector graphic of the seemecnc logo. if you break an eye off removing the print, just super glue it back on. i had to do one eye.
Probe
turbosquid
$25

Probe
... available on turbo squid, the world's leading provider of digital 3d models for visualization, films, television, and games.
turbosquid
$12
Mars probe space space exploration lunar probe
...be space space exploration lunar probe for download as max on turbosquid: 3d models for games, architecture, videos. (1630876)
turbosquid
$35
Space Probe
...osquid
royalty free 3d model space probe for download as c4d on turbosquid: 3d models for games, architecture, videos. (1571168)
turbosquid
$15
Space Probe
...osquid
royalty free 3d model space probe for download as obj on turbosquid: 3d models for games, architecture, videos. (1314864)
turbosquid
$25
Robot Probe
...y free 3d model robot probe for download as fbx, obj, and dae on turbosquid: 3d models for games, architecture, videos. (1537490)
turbosquid
$1

Dental Probe
...e 3d model dental probe for download as ma, obj, fbx, and stl on turbosquid: 3d models for games, architecture, videos. (1312400)
turbosquid
$60
Police Probe
... available on turbo squid, the world's leading provider of digital 3d models for visualization, films, television, and games.
turbosquid
$10

Dental Probe
... available on turbo squid, the world's leading provider of digital 3d models for visualization, films, television, and games.
turbosquid
$9

Space probe
... available on turbo squid, the world's leading provider of digital 3d models for visualization, films, television, and games.
turbosquid
free

Cassini Probe
... available on turbo squid, the world's leading provider of digital 3d models for visualization, films, television, and games.
Ft
3ddd
free
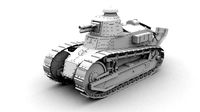
Renault FT-17
...renault ft-17
3ddd
ft-17 , renault , танк
turbosquid
$85

40 ft container
...id
royalty free 3d model 40 ft container for download as max on turbosquid: 3d models for games, architecture, videos. (1154866)
turbosquid
$45
container 40 ft
...id
royalty free 3d model container 40 ft for download as max on turbosquid: 3d models for games, architecture, videos. (1480343)
turbosquid
$85
Renault FT-17
...yalty free 3d model renault ft-17 for download as 3ds and max on turbosquid: 3d models for games, architecture, videos. (1145251)
turbosquid
$5

NVidia FT 03
... 3d model nvidia ft 03 for download as 3ds, max, obj, and fbx on turbosquid: 3d models for games, architecture, videos. (1233064)
turbosquid
$25

Container 20 ft
...l container 20 ft for download as 3ds, max, obj, fbx, and upk on turbosquid: 3d models for games, architecture, videos. (1384306)
turbosquid
$25
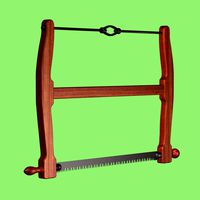
FT Buck Saw
... available on turbo squid, the world's leading provider of digital 3d models for visualization, films, television, and games.
3ddd
free
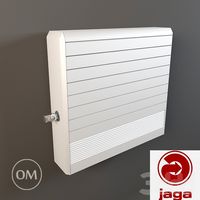
Jaga - Maxi FT-10
... om
радиатор jaga - maxi ft-10
width: 63 cm
depth: 13 cm
height: 59 cm
сайт производителя:http://www.jaga.be/
turbosquid
$45

20 ft container
...ontainer for download as blend, blend, dae, fbx, obj, and stl on turbosquid: 3d models for games, architecture, videos. (1516815)
turbosquid
$35

Yaesu FT-897D Transceiver
...y free 3d model yaesu ft-897d transceiver for download as max on turbosquid: 3d models for games, architecture, videos. (1160274)
Platform
archibase_planet
free
Platform
...rm
archibase planet
platform
platform stefano galli savio cerrato n040413 - 3d model (*.gsm+*.3ds) for exterior 3d visualization.
turbosquid
$4
Platform
...d
royalty free 3d model platform for download as max and fbx on turbosquid: 3d models for games, architecture, videos. (1363559)
3d_export
$5
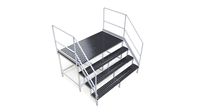
WORKING PLATFORM
...working platform
3dexport
working platform 4000x3000x1500mm
turbosquid
$20
Platform
... available on turbo squid, the world's leading provider of digital 3d models for visualization, films, television, and games.
turbosquid
$9
Platform
... available on turbo squid, the world's leading provider of digital 3d models for visualization, films, television, and games.
turbosquid
$1
Platform
... available on turbo squid, the world's leading provider of digital 3d models for visualization, films, television, and games.
turbosquid
$1

Platform
... available on turbo squid, the world's leading provider of digital 3d models for visualization, films, television, and games.
turbosquid
$1

Platform
... available on turbo squid, the world's leading provider of digital 3d models for visualization, films, television, and games.
3d_ocean
$19
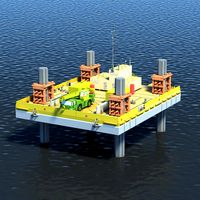
Drilling Platform
...rm for coastal areas. designed to perform drilling operations. include standart materials scene and v-ray scene with environment.
3d_export
$15
steel grill platform
...steel grill platform
3dexport
steel grill platform
Plus
turbosquid
$2
plus-plus puzzle and lego
...d model plus-plus puzzle and lego for download as stl and obj on turbosquid: 3d models for games, architecture, videos. (1662633)
3ddd
$1
Стенка Plus
...стенка plus
3ddd
plus , модная мебель
фабрика "модная мебель", модель plus
3ddd
$1
Спальня METIS plus
... hulsta , metis , спальня
спальня metis plus
design_connected
$11
be plus B+
...be plus b+
designconnected
blå station be plus b+ chairs computer generated 3d model. designed by börge lindau.
design_connected
$11
Bank Plus
...bank plus
designconnected
röthlisberger kollektion bank plus coffee tables computer generated 3d model. designed by atelier oi.
3ddd
$1
elos Plus
... candela
elos plus — мультифункциональный аппарат для проведения лазерного и ipl лечений
3ddd
$1
Calligaris Even Plus
...calligaris even plus
3ddd
calligaris
calligaris_chair_even plus
design_connected
$29

Basket Plus
...nconnected
photo-realistic 3d models of the basket plus bed from bonaldo for 3d architectural and interior design presentations.
3ddd
free
Artpole Faktum Plus
... артполе , панель
artpole faktum plus
размеры:
высота 625мм
ширина 800мм
глубина 17мм
3ddd
$1

Мария / Jazz Plus
...мария / jazz plus
3ddd
мария
кухня фабрики мария модель__jazz plus
5
turbosquid
$6

Rock 5-5
...urbosquid
royalty free 3d model rock 5-5 for download as obj on turbosquid: 3d models for games, architecture, videos. (1639063)
3d_export
$5

hinge 5
...hinge 5
3dexport
hinge 5
turbosquid
$10

A-5
... available on turbo squid, the world's leading provider of digital 3d models for visualization, films, television, and games.
turbosquid
$2

A-5
... available on turbo squid, the world's leading provider of digital 3d models for visualization, films, television, and games.
turbosquid
$12

Calligraphic Digit 5 Number 5
...hic digit 5 number 5 for download as max, obj, fbx, and blend on turbosquid: 3d models for games, architecture, videos. (1389333)
3ddd
$1

5 роз
...5 роз
3ddd
5 роз в стеклянной вазе
design_connected
$11

iPhone 5
...iphone 5
designconnected
apple iphone 5 computer generated 3d model.
3ddd
$1

Lola 5
...lola 5
3ddd
miniforms
lola 5 miniforms 300*65*134
3ddd
$1

Nexus 5
...dd
nexus , phone , телефон
google nexus 5 phone
3d_ocean
$15

iPhone 5
...iphone 5
3docean
3d 4d apple cinema iphone model modeling phone screen texture
iphone 5 3d model and texture realistic iphone 5.