CG Trader

For Anime - Light Beams
by CG Trader
Last crawled date: 1 year, 11 months ago
Hey all! This Blend contains a range of objects that allows you to put fake light beams into your shots,** to save on render time** and on time itself. I use this technique, because eevee only supports screen space effects, the compoistor can't pin-point lights from outside of the view and volumes mean more samples, making this a stable, traditional and very fast solution that should fit your project for a lot of situations. Recent example from my iStock: https://www.istockphoto.com/photo/axe-in-wood-in-the-afternoon-gm1395396058-450524555 Fine Beams: The main point in sharing this technique is that you can have a cascade of light beams using particles (or geonodes) and this allows for some really pretty shots, like the above.
I've made it shadow sensitive, because sometimes that makes something even more beautiful.
Shadow sensitive here refers to being able to have objects pass through the beams and cut them off - note that this will only work if your light source (ie a sun lamp) is pointing in exactly the same direction as the beams. *Operation: Most of the controls are handled by the particle system - size, random size, amount, etc.
Orientation of the beams are done with the beam particle itself: 1) Rotation along the X-axis (R, X) is equal to the global z and changes the direction the beams point in - NSEW. 2) Rotation along the Z-axis (R, Z) changes the angle of the beams (steaper or shallower) - vertical degrees. Shapekey to scale thickness of the particle beam. Massive beams: I added an additional type of beam and that is the kind that comes through a hole in the roof of a cave. This one is a bit harder to apply when it is shadow sensitive, but I advise going for the vertical beam approach, since this is the most common and generally, the most epic, imo.
Also shadow sensitive and I also recommend you make sure that the sun points directly down (default rotation for the sun lamp). *Operation: It has two empties, 1) Displacement (attached to the beam) Allows you to shape the beam however you want and have it be stable as you move it to it's perfect spot. 2) Turbulence (loose from the beam) Allows all the turbulence in all the beams to be consistent and animated. It contains shape keys to alter the appearance of the beam, but use with caution as with displacement it can alter the ray-flow of the light and look strange. Use with care! I suggest using the beam shape to cut the hole in the roof, since it's easier to match and the beams, by design, are for vertical use. The top bright part fills the hole with light. NOTE: EEVEE Only (includes my NPR Shaders v2.0) Contact Shadows are crucial for shadow cut-off. Both beams' emission value is set to 1, but if you find that it's not bright enough, don't be afraid to up the value. Sun lamp in the shot configured for each of the beams. Alpha Blend does have some known issues with drawing order and is invisible to the compositor (cryptomatte, material index, object index, etc.). Particle placement can be unpredictable, but using particle seed allows you to vary your results until you get something you like. I hope you guys love this and that you can make great use of it!!! beams rays shine sun weather atmosphere day turbulence animated pretty idilic underground ray hope beauty nature interior other
Similar models
thingiverse
free

Solar Finder by FabriceF
...by moving the clamp ring on which the finder is attached (see photo). you don't need great accuracy, so it's good enough.
cg_trader
$4

Shikamaru Nara Ninja Naruto Cookie Cutter | 3D
...u to make cookies in the shape of shikamaru of the nara family, the clever ninja who uses shadow imitation technique from naruto!
thingiverse
free

Pegboard drill indices by ckirby
...u'll need one pair of pegboard connectors per index. the connectors mate with the 'ears' on the bottom of each index.
thingiverse
free

Sun Tracker by samkass
...can test it by hot-gluing two servos together and the sensor to the top one to make a 2-axis tracker, as seen in the photo above.
grabcad
free

Oval Shape w/ 2 Holes
...ed cut tool to cut holes through the 3d object. the holes can go all the way through the object or only a little into the object.
3dwarehouse
free

particle canon
...e
this canon shots a beam of particles. #antitank #beam #canon #electronic #hi_tech #particle #ray #robot #smart #soldier #tanks
grabcad
free

Wavy Shape
...solidworks, and i can think that you can make springs with this kind of technique !
i hope you enjoy it !
leave a "♥"
thingiverse
free

Biarc1
...g/wall-powered-led-lights/. it printed in a little over 44 hours using a print speed of 80 mm/sec and a layer height of 0.200 mm.
grabcad
free

IR sensor KY-026
...detection point of about 60 degrees, particularly sensitive to the flame spectrum. sensitivity is adjustable, stable performance.
grabcad
free

drill machine
...utting holes in a solid material using a rotating cutting tool. the indentation is a starting point for the drilling of the hole.
Beams
archibase_planet
free
Beam
...beam
archibase planet
beam camber-beam hammer-beam
balance beam 2 - 3d model for interior 3d visualization.
design_connected
$16
Beam
...beam
designconnected
van rossum beam computer generated 3d model. designed by rossum, van.
design_connected
$11
Beam
...beam
designconnected
mdf italia beam computer generated 3d model. designed by arrivillaga, luis alberto.
turbosquid
$25

beam
...am
turbosquid
royalty free 3d model beam for download as stl on turbosquid: 3d models for games, architecture, videos. (1674400)
turbosquid
free

beam
... available on turbo squid, the world's leading provider of digital 3d models for visualization, films, television, and games.
3ddd
$1
ZERO, BEAM
...zero, beam
3ddd
zero
поворотная люстра zero , beam
archive3d
free

Beam 3D Model
...archive3d
beam camber-beam hammer-beam
balance beam 2 - 3d model for interior 3d visualization.
3ddd
free
Studio Beam
... navy
светильники studio beam
модели: mariner, ocean mariner, navy.
могут быть в разных цветах
3ddd
$1
Studio Beam
...grupius
производитель studio beam
модели: edison’s rocket pendant, edison’s rocket table lamp,romanov,elena pendant,grupius 1919.
design_connected
$11
I-Beam
...i-beam
designconnected
glas italia i-beam computer generated 3d model. designed by massaud, jean-marie.
Light
archibase_planet
free

Light
...light
archibase planet
lamp lighting light
light - s2 - 3d model for interior 3d visualization.
archibase_planet
free

Light
...light
archibase planet
light luminaire lighting
light l0465 - 3d model (*.gsm+*.3ds) for interior 3d visualization.
3d_export
$5

lighting
...lighting
3dexport
lighting
3d_export
$5

lighting
...lighting
3dexport
lighting in livingroom
turbosquid
$3

Lighting Tree with Lights
...d model lighting tree with lights for download as max and 3ds on turbosquid: 3d models for games, architecture, videos. (1585507)
archibase_planet
free

Light
...light
archibase planet
luster lighting solution
light - s - 3d model for interior 3d visualization.
archibase_planet
free

Light
...light
archibase planet
luster lamp lighting
light 1 - 3d model for interior 3d visualization.
archibase_planet
free

Lights
...lights
archibase planet
surgical lights surgical lamp
surgical lights (floor) - 3d model for interior 3d visualization.
archibase_planet
free

Light
...light
archibase planet
lighting luminaire candlelight
light l0463 - 3d model (*.gsm+*.3ds) for interior 3d visualization.
3d_export
$18

street light-lighting-light-xia bing
...
3dexport
street light-lighting-light-xia bing<br>max 2015 v-ray 3 max 2015<br>textures<br>all files in zip...
Anime
turbosquid
$120
animals pack1 -animated animals
... available on turbo squid, the world's leading provider of digital 3d models for visualization, films, television, and games.
3ddd
$1
animals
... слон , носорог , медведь
animals
design_connected
$13
Animals
...animals
designconnected
hakusan animals computer generated 3d model. designed by mori, masahiro.
turbosquid
$10
Box Animated + Animation Video
...3d model box animated + animation video for download as blend on turbosquid: 3d models for games, architecture, videos. (1255250)
turbosquid
$90
animals
...turbosquid
royalty free 3d model animals for download as obj on turbosquid: 3d models for games, architecture, videos. (1377605)
turbosquid
$10
anime
...e
turbosquid
royalty free 3d model anime for download as obj on turbosquid: 3d models for games, architecture, videos. (1411892)
3ddd
$1
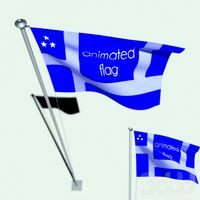
animated flag
... флаг
animated flag model ..
about 10 seconds with animation of flag cloth
for the exterior animation
turbosquid
$48

animals
... available on turbo squid, the world's leading provider of digital 3d models for visualization, films, television, and games.
turbosquid
$10
ANIMAL
... available on turbo squid, the world's leading provider of digital 3d models for visualization, films, television, and games.
turbosquid
$8
animal
... available on turbo squid, the world's leading provider of digital 3d models for visualization, films, television, and games.