Thingiverse

Flying Clamp for Tennis stringing - IMPROVED CLAMPING by sashalex007
by Thingiverse
Last crawled date: 3 years, 3 months ago
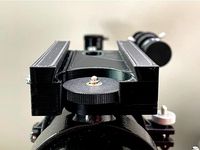
Yet another remix of edo_mae's excellent design. With this design I have eliminated the need for eyebolts with a fully 3D-printed shaft & threaded stopper. This mechanism is loosely based on the Stringway design providing improved clamping, and improved ergonomics. I have tested these designs with over 70lbs of tension.
With this remix I am also introducing a triple flying clamp (see Stringway clamps) for minimal tension loss due to drawback. Very useful for tie-offs.
PRINTING
It is important to note, that this design is intended for printing with carbon-fibre nylon, however I suspect ABS and PETG might work if all parts are printed at 90-100% density (lines). Recommended densities (%) are for CF nylon, 4 walls.
DOUBLE FLYING CLAMP
side_hexNut.stl -- 50%
side_noHexNut.stl --50%
2x middle_doubleClamp.stl --50%
shaft_doubleClamp --90%
lever.stl --90%
stopper.stl --90%
washer.stl --90%
guide.stl -- 50%
1/4 hex bolt 1.5 inch
1/4 lock nut
3/16 bolt 1 inch
8x 6x3mm round neodymium magnets
TRIPLE FLYING CLAMP
side_hexNut.stl -- 50%
side_noHexNut.stl --50%
2x middle_tripleClamp_outer.stl --50%
middle_tripleClamp_inner1.stl --50%
middle_tripleClamp_inner2.stl --50%
shaft_tripleClamp --90%
lever.stl --90%
stopper.stl --90%
washer.stl --90%
guide.stl -- 50%
1/4 hex bolt 2 inch (I didn't have one so there is an eye bolt in the image)
1/4 lock nut
3/16 bolt 1 inch
12x 6x3mm round neodymium magnets
ASSEMBLY
Assembly is generally the same for both clamp types, other than the extra middle pieces for the triple clamp.
Superglue middle pieces
Install magnets with correct polarity (opposing)
Cut 180grit sandpaper with guide.stl and superglue onto sides and middle pieces
Slightly sand mating protrusions for smooth insertion
Install bottom hex bolt
Install shaft, lever & washer, thread the stopper (threading this thing can be a challenge, but it works). Future iterations of the stopper will have textured grip...meanwhile we will have to make do...use channel locks or clamps to turn this thing.
NOTE1: You may need the enlarge to hole on the shaft with an allan key or something to get the desired feel. Ideally, the shaft should be a little loose on the bolt. If its not, this won't affect the functionality but ideally, the lever is pushed up into fully open position solely by magnetic force. It's more of an ergonomics feature, if its important to you, you might need to tune that hole size a little.
NOTE2: The bolt requirements are not strict, if you find metric bolts (or whatever else) that are in the ball-park, it will probably work fine. Also, every hole can be enlarged by quite a bit with a set of Allen keys
Similar models
thingiverse
free

wondershade 1/4 in bolt adaper square to hex bolt carriage bolt adapter by SevenCornersWorkshop
...by sevencornersworkshop
thingiverse
this adapts a 1/4 inch carriage bolt to fit in the hex cutout on the stands leg locking bolt
thingiverse
free

Flying Clamp for Tennis stringing IMPERIAL REMIX by sashalex007
...to cut your sandpaper.
usage:
these need to be clamped tight. if your clamp isn't holding tension, tighten the eyebolt more.
thingiverse
free
Celestron PowerSeeker 70EQ Dovetail Clamp by dkrnet
...ex head of the m6 x 70mm bolt is completely pressed into the hex-shaped recess
loosen the wing nut to permit attaching a dovetail
grabcad
free

Michael Engineering Clamp
...michael engineering clamp
grabcad
a clamp for 1/2 inch hex shafts.
thingiverse
free

Shuriken magnet by grim86
...shuriken magnet by grim86
thingiverse
it needs a 6x3mm neodymium magnet.
thingiverse
free

Coupler, 5 mm to 1/4 inch, for Printrbot Simple All-Metal Z-Axis by Altan
... 4 pcs of 12 mm long m3 hex screws and nuts.
print conditions:
layer height: 0.1 mm
fill: 30%
wall thickness: 1 mm
brim: 20 mm
grabcad
free

MIGE Shaft Clamp
...o the motor shaft. you may have to adjust the size of the keyway for the optimal fit.
compatible with the amstudio bolt pattern.
thingiverse
free

Refrigerator Magnet by hjelle
...ts-inch-cylinder-n48/dp/b001kv9raw/ref=sr_1_46?ie=utf8&qid=1394664231&sr=8-46&keywords=1%2f4+x+1%2f4+neodymium+magnet
thingiverse
free

Camera Mount 90 degree adapter by spudinator
...works with standard 1/4 - 20 unc threads found on most cameras, gopros, webcams.
use a 3/4 inch or 1 inch 1/4 - 20 bolt and nut.
thingiverse
free

1/4 inch compatible Minature Vice 2.0 by cyron52
...re:
the thingiverse post (doesn't have all the files)
the vice v2.0
the table clamp
hope this makes it easier for some folks.
Sashalex007
thingiverse
free

Skr 1.3 case-lid remix (for extra fan) by sashalex007
...ould repurpose it for better cooling for my drivers.
print the body from the original. https://www.thingiverse.com/thing:3688484
thingiverse
free

Elegoo Mars 2 filter & heater by sashalex007
...ilterbody.
super-glue the heater to heatermount.
super-glue the filtermount to the heatermount.
assemble filter (1/8x1/2 bolts)
thingiverse
free
Flying Clamp for Tennis stringing IMPERIAL REMIX by sashalex007
...to cut your sandpaper.
usage:
these need to be clamped tight. if your clamp isn't holding tension, tighten the eyebolt more.
thingiverse
free

Elegoo Mercury Plus - Magnetic Stirrer conversion by sashalex007
...he sensor-facing side.
video:https://www.reddit.com/r/elegoomars/comments/nz9r24/converted_my_mercury_into_a_magnetic_stirrer_uv/
thingiverse
free

Ender 5 Direct Drive linear rail mount
...speeddrive v1 - ender 3 direct drive mount by sashalex007 to fit ender 5 linear rails mod by...
thingiverse
free

SpeedDrive For TronXY Pro 2 by marcdraco
...by marcdraco thingiverse this is (yet another) remix of sashalex007#39;s rather super direct drive mod but this time for...
thingiverse
free

SpeedDrive v1 - Ender 3 direct drive mount remix for dual drive extruder
...a remix of the excellent direct drive update by sashalex007 to make it work with the cr-10s pro extruder....
thingiverse
free

SpeedDrive for E3D V6 + BMG extruder + Cable clip
...speeddrive v1 - ender 3 direct drive mount by sashalex007 (https://www.thingiverse.com/thing:3816051) speeddrive for e3d v6 + bmg extruder by...
thingiverse
free

Ender 3 Pro Chimera Mount for Fan Forced Air Convection by CrazyBucketMan
...crazybucketman thingiverse this is my remix of speeddrive by sashalex007 and the "ender 3 chimera aqua half direct mount"...
Tennis
3d_ocean
$3

Tennis Ball
...tennis ball
3docean
ball tennis tennis ball
a gorgeous red and yellow seamless tennis ball
turbosquid
$29

Tennis Racket and Tennis Ball
... available on turbo squid, the world's leading provider of digital 3d models for visualization, films, television, and games.
turbosquid
$15

Tennis
...oyalty free 3d model tennis for download as max, obj, and fbx on turbosquid: 3d models for games, architecture, videos. (1480642)
turbosquid
$30

Tennis
... available on turbo squid, the world's leading provider of digital 3d models for visualization, films, television, and games.
turbosquid
$12

TENNIS
... available on turbo squid, the world's leading provider of digital 3d models for visualization, films, television, and games.
3d_ocean
$10
![[Tennis series] Low-poly tennis court](/t/579509.jpg)
[Tennis series] Low-poly tennis court
... texture detail. it has the precise measurements of a real tennis court and net. the polygon count is just 856! all the elemen...
turbosquid
$98

Sports Tennis Girl Model with Tennis Court
... available on turbo squid, the world's leading provider of digital 3d models for visualization, films, television, and games.
3d_export
$19

tennis ball
...tennis ball
3dexport
3d_export
$12

tennis shoes
...tennis shoes
3dexport
turbosquid
free

Tennis Ball
...all
turbosquid
free 3d model tennis ball for download as max on turbosquid: 3d models for games, architecture, videos. (1482300)
Stringing
3ddd
$1

String W1
...string w1
3ddd
светильник string w1
turbosquid
$25

String
... available on turbo squid, the world's leading provider of digital 3d models for visualization, films, television, and games.
design_connected
$13

String Chair
...string chair
designconnected
magis string chair computer generated 3d model. designed by azumi, shin.
3ddd
$1

String Rack
...string rack
3ddd
декоративный набор
string rack is purpose for decorative object in living room or in study room.
turbosquid
$10

String bikini
...bosquid
royalty free 3d model string bikini for download as on turbosquid: 3d models for games, architecture, videos. (1559187)
3ddd
$1

String F1
...string f1
3ddd
rotaliana
rotaliana
string f1
design dante donegani, giovanni lauda (2011)
lower arm 80 cm
upper arm 46 cm
turbosquid
$62

Chill String
... available on turbo squid, the world's leading provider of digital 3d models for visualization, films, television, and games.
turbosquid
$10

On-A-String-Table
... available on turbo squid, the world's leading provider of digital 3d models for visualization, films, television, and games.
turbosquid
$3

Elixer strings
... available on turbo squid, the world's leading provider of digital 3d models for visualization, films, television, and games.
turbosquid
$2

Dunlop Strings
... available on turbo squid, the world's leading provider of digital 3d models for visualization, films, television, and games.
Flying
design_connected
$13
Fly-Fly
...fly-fly
designconnected
foscarini fly-fly computer generated 3d model. designed by palomba, ludovica.
3ddd
$1

Foscarini FLY-FLY
...foscarini fly-fly
3ddd
foscarini , fly-fly
foscarini fly-fly
полигонов: 73 022
3ddd
$1

Foscarini Fly-Fly
...foscarini fly-fly
3ddd
foscarini
люстра fly-fly
3d_export
free
fly
...fly
3dexport
fly
turbosquid
$15

fly fishing fly
... available on turbo squid, the world's leading provider of digital 3d models for visualization, films, television, and games.
design_connected
free

Fly
...fly
designconnected
free 3d model of fly by alias designed by acerbis, marco.
turbosquid
$49

Fly Fly Maya Rig
...turbosquid
free 3d model fly fly maya rig for download as ma on turbosquid: 3d models for games, architecture, videos. (1182393)
design_connected
$13
Fly
...fly
designconnected
zanotta fly computer generated 3d model. designed by robson , mark .
design_connected
$13

Fly
...fly
designconnected
kartell fly computer generated 3d model. designed by laviani, ferruccio.
3d_ocean
$10
3D Fly
...3d fly
3docean
3d fly 3ds max fly
this is a 3d fly model.
Clamping
3d_export
$11
clamp
...clamp
3dexport
clamp
3ddd
free

Clamp
... enricо zanolla , капитоне
дизайнерenrico zanollмодель clamp
3ddd
$1

Clamp
...ricо zanolla , капитоне
дизайнеры
enrico zanolla
andrea di filippo
модель clamp
dzstudio
3d_export
free
clamp
...clamp
3dexport
simple clamp model, more free 3d models here:
3d_export
$5
clamping handle
...clamping handle
3dexport
clamping handle
3ddd
$1

Clamp / DZstudio
... dzstudio , капитоне
люстра clamp от dzstudio/enrico zanolla(италия).
3ddd
$1
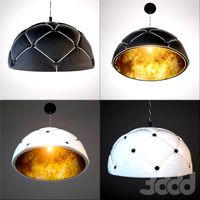
Светильник Clamp
...светильник clamp
3ddd
clamp
стеганый светильник clamp в двух цветах в черном и белом.
turbosquid
$29
clamp
...ty free 3d model clamp for download as 3ds, obj, c4d, and fbx on turbosquid: 3d models for games, architecture, videos. (1442049)
turbosquid
$29
clamp
...ty free 3d model clamp for download as 3ds, obj, c4d, and fbx on turbosquid: 3d models for games, architecture, videos. (1442041)
3d_export
$5
Clamp-14
...clamp-14
3dexport
3d model of clamp name 14
Clamp
3d_export
$11
clamp
...clamp
3dexport
clamp
3ddd
free
Clamp
... enricо zanolla , капитоне
дизайнерenrico zanollмодель clamp
3ddd
$1
Clamp
...ricо zanolla , капитоне
дизайнеры
enrico zanolla
andrea di filippo
модель clamp
dzstudio
3d_export
free
clamp
...clamp
3dexport
simple clamp model, more free 3d models here:
3d_export
$5
clamping handle
...clamping handle
3dexport
clamping handle
3ddd
$1
Clamp / DZstudio
... dzstudio , капитоне
люстра clamp от dzstudio/enrico zanolla(италия).
3ddd
$1
Светильник Clamp
...светильник clamp
3ddd
clamp
стеганый светильник clamp в двух цветах в черном и белом.
turbosquid
$29
clamp
...ty free 3d model clamp for download as 3ds, obj, c4d, and fbx on turbosquid: 3d models for games, architecture, videos. (1442049)
turbosquid
$29
clamp
...ty free 3d model clamp for download as 3ds, obj, c4d, and fbx on turbosquid: 3d models for games, architecture, videos. (1442041)
3d_export
$5
Clamp-14
...clamp-14
3dexport
3d model of clamp name 14
Improved
cg_studio
$49
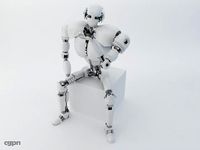
Robot Z300 (improved version)3d model
...o
.3ds .fbx .max .obj - robot z300 (improved version) 3d model, royalty free license available, instant download after purchase.
3d_export
$39

Robot Z300 improved version 3D Model
...fantasy sci-fi robots bot humanoid droid sci fi materials character
robot z300 improved version 3d model alekrazum 55067 3dexport
3d_export
$75

CV-90 Improved
...nnon. export versions are fitted with hägglunds e-series turrets, armed with either a 30 mm mk44 or a 35 mm bushmaster autocannon
turbosquid
$55
(Important textures coming back soon after improvements)Cuboid gazebo bench area
... available on turbo squid, the world's leading provider of digital 3d models for visualization, films, television, and games.
3d_export
$15

COMPLETE AUDI 80-100 SHIFT LEVER REPAIR KIT WITH IMPROVED BUSHING
...dexport
• sleeve - 1 pc. • elastic band - 1 pc. • hinge - 1 pc. audi 100c3 audi 100 c4 audi 80 b3 (checked) audi 80 b4 (checked)
3d_export
$7

REPAIR KIT FOR GEARSHIFT LEVER AUDI 80-100 IMPROVED
...ar of the gum is excluded. - rusk - 1 pc. - elastic band - 1 pc. audi 100c3 audi 100 c4 audi 80 b3 (checked) audi 80 b4 (checked)
3d_export
$30
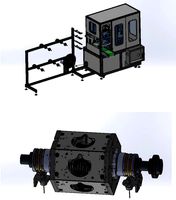
cup mask machine front section stereo mask manufacturing machine improved version
...ing rack cad outsourcing list. the drawings are mature drawings that have been produced.<br>drawing version solidworks 2018
3d_export
free
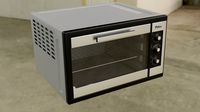
oven - forno
...oven - forno
3dexport
gradually i'm trying to improve my 3d.
3d_export
$75

T-55
...nally, but these improvements made the tank more efficient and lethal. the t-55 was officially adopted by the soviet army in 1958
3d_export
$5

civil registration authorities
...civil registration authorities
3dexport
city wedding square. the model can be used for projects, to improve the project, etc.