Thingiverse
Flow Calibration Cube by humebeam
by Thingiverse
Last crawled date: 4 years, 4 months ago
Update May 11, 2021
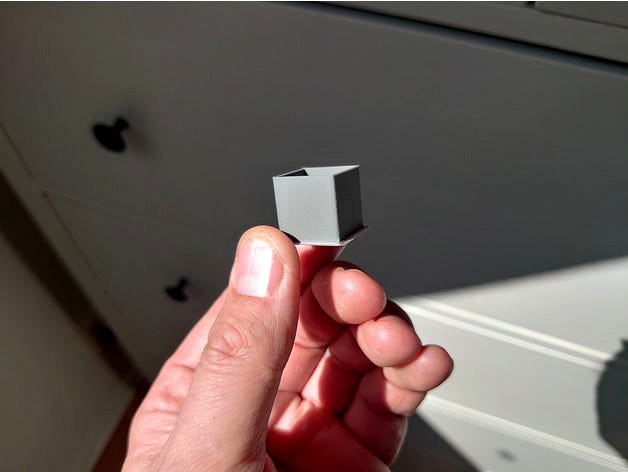
I've added flow calibration cubes for the following nozzle sizes: 0.20 mm, 0.25 mm, 0.30 mm, 0.40 mm, 0.50 mm, 0.60 mm, 0.80 mm, 1.00 mm. See How-To below.
About
One of the most important things for good quality prints is to get the flowrate / extrusion multiplier correct for your filament. Good news is that's it's easy to dial in.
How-To, 0.40 mm nozzle
For example, using a 0.40 mm nozzle, set the line width to exactly 0.40 mm in your slicer and print this calibration cube which has 0.80 mm walls. After you have printed it, measure the thickness of all four walls with a caliper and take a note of the widths. For example, let's say these are the widths of the walls measured:
0.81, 0.82, 0.83, 0.83
Then the formula to calculate the flow rate is:
0.80 / ((0.81 + 0.82 + 0.83 + 0.83) / 4) ≈ 0.97
So, the flowrate or extrusion multiplier is about 97% or 0.97 which you then set in your slicer. Print the cube again to confirm. The measured walls should now be very close to 0.80 mm thick.
What about other nozzle size?
The formula is the same for the other nozzle sizes. Set the line width to be exactly the same as your nozzle size then print that specific flow calibration cube. Then measure all walls with a caliper. Here's the formula to calculate the flow rate:
(Nozzle size * 2) / ((Wall 1 width + Wall 2 width + Wall 3 width + Wall 4 width) / 4)
Donations
All my designs are free, they're developed and tested in my spare time and most have source files available for easy editing.
If you enjoy this or any of my other designs, a small donation is not needed but welcome. Thanks! :)