Thingiverse

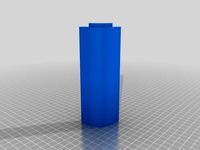
FlashForge Creator Pro - reversed fan duct by palatis
by Thingiverse
Last crawled date: 3 years ago
I tried to print one of this: http://www.thingiverse.com/thing:191297, but it requires a longer screw which I just don't have.
The longest screw sold by nearby hardware store is 35mm, which is the same length as the ones that came with the machine, and they were just too short, I need the extra 5mm...
So I just designed my own!
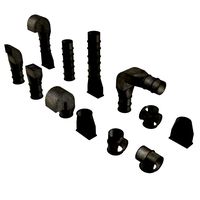
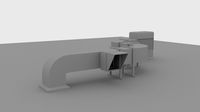
This duct serves as the spacer, the fan housing, and the fan duct.
I install the duct with the original 35mm screw, then install the fan, and yeah no extra 5mm needed.
You can still mount the fan to the cartridge, but this way:
you will need 2 very long screw per extruder, that is, 11mm for fan, 12mm for spacer, 1.5mm for heat sink, 15mm for the aluminum mounting block, plus 5mm into the stepper motor, that's 44.5mm, so you might want to get some 45mm M3 screw...
you lose the ability to quickly switch between PLA mode and ABS mode.
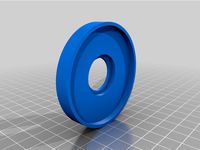
I designed a cover to change wind direction, so it's a easy switch between PLA and ABS (or any material you want it to cool down faster or slower)
when printing PLA (or other materials that requires faster cooling), you cover the upper air path and have the fan reversed (sucking air from the heat sink), so the wind blows around the just extruded material.
when printing ABS (or other materials that requires slower cooling), you cover the bottom air path, leave the upper path open, and have the fan forward (blowing air into the heat sink), so no air blowing the just extruded material.
The longest screw sold by nearby hardware store is 35mm, which is the same length as the ones that came with the machine, and they were just too short, I need the extra 5mm...
So I just designed my own!
This duct serves as the spacer, the fan housing, and the fan duct.
I install the duct with the original 35mm screw, then install the fan, and yeah no extra 5mm needed.
You can still mount the fan to the cartridge, but this way:
you will need 2 very long screw per extruder, that is, 11mm for fan, 12mm for spacer, 1.5mm for heat sink, 15mm for the aluminum mounting block, plus 5mm into the stepper motor, that's 44.5mm, so you might want to get some 45mm M3 screw...
you lose the ability to quickly switch between PLA mode and ABS mode.
I designed a cover to change wind direction, so it's a easy switch between PLA and ABS (or any material you want it to cool down faster or slower)
when printing PLA (or other materials that requires faster cooling), you cover the upper air path and have the fan reversed (sucking air from the heat sink), so the wind blows around the just extruded material.
when printing ABS (or other materials that requires slower cooling), you cover the bottom air path, leave the upper path open, and have the fan forward (blowing air into the heat sink), so no air blowing the just extruded material.
Similar models
thingiverse
free

Wanhao D4S Extruder Cooling Duct by tobyvanreenen
...nt with something that can take a bit of heat as this sits pretty close to the nozzles.
prints on it's back with no supports.
thingiverse
free

Mk7 fan duct by e-squizo
...the extruder fan so that it blows on the nozzle. this should help plastic cool faster, which again should lead to better bridges.
thingiverse
free

Fan duct for ZoneStar P802Q with J-Head hotend by Zuikkis
...tly, that's why the fan screws must be loose at this point. finally tighten the fan screws and reinstall cooling fan as well.
thingiverse
free

Air Duct Prusa i3 by IanM1981
...ve had much better fine detail and overhang success since adding this part. it just replaces one of the spacers in the heat sink.
thingiverse
free

Printrbot Simple 1401 Fan shroud with bypass extruder cooling by rsee360
...at sink. it seems to work pretty well for me although i have not done any scientific measurements of the temperature differences.
thingiverse
free

e3d v6 lulzbot fans by D125
...ooling fans designed by me and the extruder fan was designed by loco. use the stock heat inserts and screws on the cooling ducts.
thingiverse
free

Cooling duct for Easy3DMaker by Hubberthus
... abs print, the duct started to melt.
it is strongly advised to print it out of heat-resistant pla. (or abs, but it is difficult)
thingiverse
free

Ormerod 1 part cooling duct by ChristofSchwiening
...t solve someone's problem!
14/6/2017 i have updated the part to a better design with more air going to the end of the nozzle.
thingiverse
free

Ender 3 coolend fan duct by Creappie
...oes not touch the extruder and is colled by the air flowing through it, pla should also be possible.
print with supports enabled.
thingiverse
free

Raise3D N2 Single Extruder Cooling Duct for 40mm fan by theintrospective
...sed with a dual extruder model, or if you don't have the standalone part cooler that lives where the other extruder would be.
Palatis
3d_export
$5

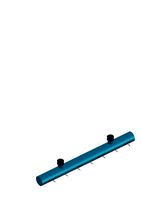
palaty bench-architect forms
...palaty bench-architect forms
3dexport
palaty bench/architect forms size: 100/35/25 size:200/40/30 design: palatystore
3d_ocean
$120

Doors Collection
...(3ds max 2010 for separate models) .max (3ds max 2010 for the scene, whose models are presented as xref objects with proxy obj...
3d_export
$15

wall wood boiserie paneling wallpaper
...atial, ornament, paneling, element, boiserie, wall, panel, wooden, wallpaper, pilasters, columns, cornice, plinth, molding, frame
3d_export
$15

wall wood boiserie paneling with wallpaper
...atial, ornament, paneling, element, boiserie, wall, panel, wooden, wallpaper, pilasters, columns, cornice, plinth, molding, frame
thingiverse
free

Gear cup by palatis
...gear cup by palatis
thingiverse
having fun with freecad :-d
can be used as a vase or pen holder or something like that.
thingiverse
free

Filament cleaner cap by palatis
...s the extruder!
should use some absorbent cotton which i just happends to not have at the moment, so used toilet paper instead.
thingiverse
free

Mjolnir (dual extrusion) by palatis
...=
emm... copied from http://www.thingiverse.com/thing:17637
sorry no relief, that's too difficult to be done in freecad.
thingiverse
free

snap-on filament cleaner by palatis
...filament when i just want to store them.
just snap the clip to the edge of the spool and you can put the spool back to the shelf.
thingiverse
free

Flashforge Creator X/Pro Filament Tube Holder remix by palatis
...ke.
i just replaced them with 2 60mm m3 screws...
add a little "horn-like" shape so it's easier to insert filament.
thingiverse
free

Cherry Key Cap by palatis
...e unknown-function lock key).
if you want some other labeled key, don't ask me to make them because i'll just ignore you.
Flashforge
thingiverse
free

Flashforge Logo
...flashforge logo
thingiverse
flashforge logo
thingiverse
free

flashforge logo by morive3d
...flashforge logo by morive3d
thingiverse
this is a flashforge stamphttps://www.youtube.com/channel/ucu6ge9qrju9cpgg6wrlxkqw
thingiverse
free

Flashforge Glass Bed by olo2000pm
...flashforge glass bed by olo2000pm
thingiverse
flashforge glass bed
thingiverse
free

Toolbox for FlashForge Finder by Gringo1970
...toolbox for flashforge finder by gringo1970
thingiverse
smal toolbox for flashforge finder
thingiverse
free
Flashforge / Dremel lid by Disco_Rob
...flashforge / dremel lid by disco_rob
thingiverse
lid extension for the flashforge dreamer
thingiverse
free

Flashforge Dreamer Filamentguide by PeterS1
...de for flashforge dreamer / dremel idea. you need also flashforge dreamer lid spacer (http://www.thingiverse.com/thing:1219953)
thingiverse
free

Flashforge creator legs by cybadigitals
...flashforge creator legs by cybadigitals
thingiverse
these legs gives a clearance of 25mm for flashforge creator series
thingiverse
free

Flashforge Inventor/Dreamer by Iprintr7
...orge inventor/dreamer by iprintr7
thingiverse
this is my first thingiverse project and is a model of the flashforge 3d printer
thingiverse
free

Flashforge Filiment Guide by russellscanlan
...flashforge filiment guide by russellscanlan
thingiverse
my design to feed filament through the door on a flashforge adventure 3
thingiverse
free
Flashforge Winder Adapter by newky2k
...winder adapter by newky2k
thingiverse
adapters for the flashforge 0.5 kg spools to the for the filament spool winder by ssinnott
Reversed
3d_export
$6

auto-reverse
...auto-reverse
3dexport
sofa and chair auto-reverse, coffee table douglas
design_connected
$16

Reverse Chair
...reverse chair
designconnected
moroso reverse chair computer generated 3d model. designed by urquiola, patricia.
turbosquid
$15

RING REVERSE
... free 3d model ring reverse for download as max, obj, and fbx on turbosquid: 3d models for games, architecture, videos. (1497378)
design_connected
$29

Auto-Reverse 241
...auto-reverse 241
designconnected
arketipo auto-reverse 241 computer generated 3d model. designed by viganò, giuseppe.
3ddd
$1
Кресло auto-reverse
...erse
фабрика arketipo
кресло auto-reverse
ширина x глубина x высота
1260 x 1030 x 600
плюс материалы для визуализации в короне
design_connected
$29

Auto-Reverse Dream
...ed
photo-realistic 3d models of the auto-reverse dream bed from arketipo for 3d architectural and interior design presentations.
turbosquid
$25

Ring and reverse gems
...yalty free 3d model ring and reverse gems for download as 3dm on turbosquid: 3d models for games, architecture, videos. (1229159)
turbosquid
$10

Reverse Vending Machine
...y free 3d model reverse vending machine for download as sldas on turbosquid: 3d models for games, architecture, videos. (1397437)
turbosquid
$15
reverse blade sword.max
... available on turbo squid, the world's leading provider of digital 3d models for visualization, films, television, and games.
turbosquid
free

Reversed Blade Sword
... available on turbo squid, the world's leading provider of digital 3d models for visualization, films, television, and games.
Duct
turbosquid
$19
Duct Set
...d
royalty free 3d model duct set for download as max and fbx on turbosquid: 3d models for games, architecture, videos. (1145038)
turbosquid
$10
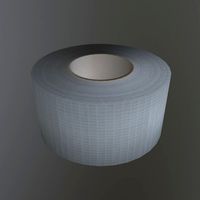
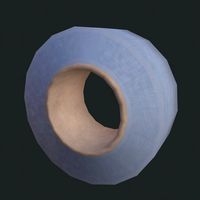
Duct Tape
...id
royalty free 3d model duct tape for download as ma and ma on turbosquid: 3d models for games, architecture, videos. (1580351)
turbosquid
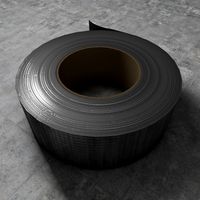
free
Duct Tape
...
free 3d model duct tape for download as obj, fbx, and blend on turbosquid: 3d models for games, architecture, videos. (1486518)
3d_ocean
$7
Air-duct
... ventilation
high quality industrial air duct ventilation model. created in cinema 4d but comes in various other formats as well.
turbosquid
$20
Air ducts
...lty free 3d model air ducts for download as max, obj, and fbx on turbosquid: 3d models for games, architecture, videos. (1262476)
3d_export
$10
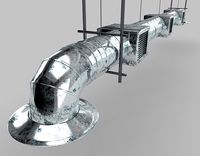
Supply air duct
...supply air duct
3dexport
supply air duct with two axial fans and hangers
turbosquid
$2
Duct Tape
...e 3d model duct tape for download as obj, fbx, blend, and dae on turbosquid: 3d models for games, architecture, videos. (1473972)
turbosquid
free

Duct Tape
... available on turbo squid, the world's leading provider of digital 3d models for visualization, films, television, and games.
3d_ocean
$3
Duct tape
...polys. includes: cinema 4d project. model in 3 formats (obj, fbx, 3ds). 6 .tga texture maps (albedo, ambient occlusion, diffus...
turbosquid
$40
Ventilation Duct PACK
...tion duct pack for download as ma, obj, fbx, and unitypackage on turbosquid: 3d models for games, architecture, videos. (1287068)
Creator
3ddd
$1

CREATOR
... молдавия
круглая кровать молдавской мастерской creator.диаметр спального места - 1900мм,материалы настроены.
turbosquid
$75

Creators Realm
... available on turbo squid, the world's leading provider of digital 3d models for visualization, films, television, and games.
3ddd
$1

LEGO Creator Part 2
...
lego , конструктор , машина
lego creator №6753
turbosquid
free

Game Creator Pack
... available on turbo squid, the world's leading provider of digital 3d models for visualization, films, television, and games.
3ddd
$1
LEGO Creator №6753 Part 3
...
lego , конструктор , машина
lego creator №6753
3ddd
$1

LEGO Creator №6753 Part 1
...
lego , конструктор , машина
lego creator №6753
turbosquid
$29

Train Track Creator Pro
... available on turbo squid, the world's leading provider of digital 3d models for visualization, films, television, and games.
3d_ocean
$39

Train Track Creator Pro
...n tracks, for video game or rendering in a matter of minutes. all the models in this pack are low poly with high resolution te...
turbosquid
$7

FPS Creator Reloaded Rock Pack 1
... available on turbo squid, the world's leading provider of digital 3d models for visualization, films, television, and games.
3ddd
$1
Декоративные элементы BV Decor CREATOR III часть
...ментов и декорирования стен.
множество вариантов для вашей фантазии.https://bvdecor.com/es/category/list/cat/creator-es
Fan
3d_export
$5

fan
...fan
3dexport
fan 3d model, table fan, fan, electric fan, ventilator
archibase_planet
free

Fan
...fan
archibase planet
fan large fan
fan out n260707 - 3d model for interior 3d visualization.
archibase_planet
free

Fan
...fan
archibase planet
fan ceiling fan ventilator
fan stealth n300615 - 3d model (*.gsm+*.3ds) for interior 3d visualization.
3d_export
$15

fan
...fan
3dexport
is an ancient fan
3ddd
$1

Fan-C-Fan by marco gallegos
...n-c-fan by marco gallegos
3ddd
вентилятор , marco gallegos
fan-c-fan by marco gallegos
3d_export
$10

fan
...fan
3dexport
a detailed fan designed for home or space blowing is now available for only 19.99!
turbosquid
$1

Fan
...fan
turbosquid
free 3d model fan for download as on turbosquid: 3d models for games, architecture, videos. (1427865)
turbosquid
$14

Fan
...fan
turbosquid
royalty free 3d model fan for download as on turbosquid: 3d models for games, architecture, videos. (1415642)
3ddd
$1

Светильник Fan
...светильник fan
3ddd
fan , italamp
светильник fan, производитель italamp
turbosquid
$25

Fan
...fan
turbosquid
royalty free 3d model fan for download as c4d on turbosquid: 3d models for games, architecture, videos. (1483246)
Pro
turbosquid
$29

Pro
...ree 3d model mac pro for download as obj, c4d, fbx, and blend on turbosquid: 3d models for games, architecture, videos. (1505782)
turbosquid
$15

Apple Mac Pro and Pro Display
...ee 3d model apple mac pro and pro display for download as max on turbosquid: 3d models for games, architecture, videos. (1417078)
3d_export
$5

iphone 13 pro max and pro
...3 pro max and 13 pro the model is made in four colors (graphite, gold, silver, and blue), all of which are attached in the files.
3d_export
free

sapphire pro
...sapphire pro
3dexport
sapphire pro 3d printer head mask
3d_export
$4

macbook pro
...macbook pro
3dexport
macbook pro 13" inch 2020 years model
3ddd
free

GentleLase Pro
... syneron , candela
gentlelase pro аппарат для лазерной эпиляции
turbosquid
$25

PRO frame
...rbosquid
royalty free 3d model pro frame for download as max on turbosquid: 3d models for games, architecture, videos. (1148329)
turbosquid
$5

Alien pro
...osquid
royalty free 3d model alien pro for download as blend on turbosquid: 3d models for games, architecture, videos. (1678446)
turbosquid
$5

iphone11 pro
...uid
royalty free 3d model iphone11 pro for download as blend on turbosquid: 3d models for games, architecture, videos. (1562707)
3ddd
$1

Mac Pro (appel)
...mac pro (appel)
3ddd
компьютер , apple
mac pro