Thingiverse
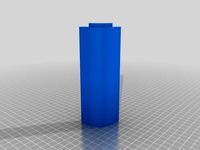
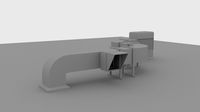
FlashForge Creator Pro left single extruder fan duct by DrLex
by Thingiverse
Last crawled date: 3 years ago
There will be no more updates to this page. Go to the new GitHub page for the latest updates.
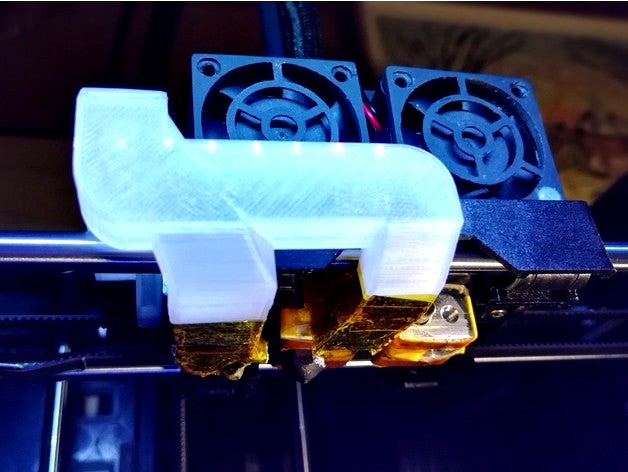
This is the single-extrusion alternative to my dual duct. I only do a dual extrusion about once every 100 prints, and I figured it is a bit pointless to have the dual duct blow air at the inactive (and usually unscrewed) nozzle all the time. It makes more sense to also direct this air at the active nozzle. By blowing air from two directions, this design reduces the ‘shadow’ problem of both the stock duct and my dual duct and cools all sides more or less equally. If you're only going to print with one extruder, this duct will give you the best quality.
Of course this does not make the dual duct obsolete: you still need it to get proper cooling on dual extrusions.
Mind that the shadow problem is not completely eliminated. Overhangs at the rear and right will still be cooled less effectively because the air cannot reach their undersides. One way to work around this is to print extra walls behind such overhangs to reflect the airflow back towards them. In most cases this will be unnecessary however, but keep it in mind for those prints that need to be really perfect.
(Someday I might try to update the design to have opposite exhausts for symmetrical cooling but this will obviously require big changes.)
This duct has not been merely designed in a wet-finger guessing way. It has been run through several dozens of iterations, the last of which were validated with computer simulations. See the ‘How I Designed This’ section for more details.
This duct unfortunately is not plug-and-play. You must read the ‘Using’ section. If you don't, your prints will likely fail, you have been warned.
The photos show a comparison of my 55° mushroom test on a PLA print between this duct, the v6 dual duct, and the stock duct. The result from the stock duct looks more decent than what I expected while I saw it being printed: it was curling up so badly at times that I feared I would need to abort the print. Somehow the upper layers managed to push down the curls again, but it still looks ugly. Even despite the fact that I did this test with the first version of the new duct which was not anywhere as good as the latest version, the result shows almost no deformations and it has a near-flat top surface. (Note: you won't be able to get this kind of result on the 55° test with the stock nozzles, especially not if they have been worn out. This was printed with a more pointy Micro Swiss hardened steel nozzle which allows to print steeper overhangs than a nozzle with a flat underside.)
Printing
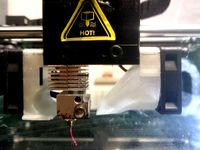
There are two models. The ‘x1’ model has the exhausts 1 mm lower than the regular model. If you aligned your nozzles with this tool, you need the regular version. If you installed Micro Swiss all-metal hotends and followed their installation instructions to the letter, then your nozzles will be 1 mm lower and you need the ‘x1’ model. See the section ‘Checking the height of your nozzle’ below for more details. Of course you can just print both models and see which one works best for you.
See the Print Settings section for detailed instructions on printing.
Installing
Be sure to read the Post-Printing section first.
A thin strip of rubber (like a piece of bicycle tire) under the little mounting tab can help to avoid that the duct vibrates and rattles.
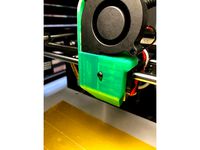
If you have an older printer and yet have to install the blower fan, you may need to print the fan mounting bracket first.
Using
First of all if you're going to do a long print with the fan disabled entirely, remove the duct to avoid that it will deform, especially if you're printing at very high temperatures, e.g. polycarbonate. Even if you applied thermal insulation, you should still remove the duct if unused during long prints.
Next, something very important: don't just print and try to use this duct, it unfortunately is not that simple. This duct is almost unusable if you cannot control fan speed. You risk getting very poor layer adhesion in the lower part of your print, and fast-printed parts like infill may detach already during printing. In other words, your print will fall apart. To avoid this, you must reduce fan speed in a specific manner. Unfortunately fan speed cannot be controlled on an unmodified FFCP, which I find the largest shortcoming of this printer by far. Modifications are required, below I explain how you can get variable fan speed after all.
Due to effects described below (see ‘Background info’ if you're interested), you must:
only enable the fan after the second or third layer,
start out with the fan running at no more than 20% speed,
gradually increase fan speed over the course of the first few millimeters of the print until the desired maximum (in my case 50% is usually more than enough).
Being able to control fan speed is the only practical way to get optimal cooling with this duct (actually with any duct for that matter). Variable speed is also essential for getting good results with filaments like PETG, which require a tiny bit of cooling for best results. You may also be surprised to hear that I always enable the fan on ABS prints albeit at very low speed, which does improve quality without ruining layer adhesion. Also, after installing an all-metal hot-end with hardened steel nozzle, I noticed I need much less cooling which made it essential to be able to throttle the fan.
How to obtain variable fan speed
Your software might make it seem as if you can vary the speed of the fan, but this is a lie. None of the printers that use the MightyBoard design like the FFCP and clones, can control fan speed without modifications. The MightyBoard can only toggle its EXTRA output between off and on, hence ramping up the fan won't be possible.
It is possible to install a custom build of the Sailfish firmware that has a software PWM implementation. Speed cannot be changed however during a print and it does not respond to speed arguments in the G-code, making it mostly useless. You can try an even more custom build that is able to respond to fan speed commands in G-code, but this can only work if you also compile a custom build of the GPX converter and somehow manage to squeeze Sailfish-compatible G-code with variable fan speeds out of your slicing software. In other words, the only practical solutions for the average user are hardware-based.
The simplest way to obtain (manual) fan speed control is to install a hardware PWM controller in between the printer motherboard and the cooling fan. This isn't complicated and the only (optional) permanent modification you need to make to your printer is to drill two tiny holes. You can use an analog controller like the one shown there, or a microcontroller like an Arduino with PWM capable output and a 24V MOSFET to drive the fan. This solution is still cumbersome because you will need to babysit every print at least during its first few layers to adjust the PWM knob.
A much more advanced way to obtain fully automatic fan speed control is to have the printer send fan speed commands to a Raspberry Pi, which does PWM through a MOSFET connected to one of its GPIO pins. I spent quite a bit of effort on this solution and it works very reliably, the only drawback is a bit of extra blip sounds during prints. Installing it is more work than mounting a single circuit board, but once you've got it running you will never want to go back.
Possible workarounds that do not require a PWM controller
I haven't really tested any of these but they are most certainly inferior compared to a PWM-based solution. Try at your own risk!
Simplest one is to just stick with the dual duct if you find it too much hassle to get the best out of this single-extruder duct. You will of course be stuck with the shadow problem too.
If you print much hotter, slowly, and in thin layers, you might get good results even if you cannot throttle the fan.
To counteract the typical extruder temperature undershoot when the fan activates at lower layers, you could boost extruder temperature by 10°C, about 10 seconds before the fan will engage. I haven't tested whether this is effective, but in theory it should ensure the extruder is in its heating regime when the blast of cold air hits it, and the undershoot should be reduced or eliminated. You may then gradually reduce extruder temperature again until the print is about 12 mm tall, but you should keep the temperature higher than when printing without fan. This is obviously cumbersome because you will either have to manually fiddle with the LCD menu to do this, or write a post-processing script to insert extra M104 commands in your G-code at the right places.
You may also try to make a hole in the side of the duct to lower the exhaust pressure. You could use tape to vary the size of this hole hence vary airflow in a clumsy manner. Of course this doesn't avoid the undershoot problem and trying to vary the airflow during a print will be challenging to say the least.
Final Notes
If you want to be notified of possible updates on this design, use the ‘Watch’ button.
Quite a bit of work went into designing this duct. If you appreciate it, remember that there is a ‘tip designer’ button :)
This is the single-extrusion alternative to my dual duct. I only do a dual extrusion about once every 100 prints, and I figured it is a bit pointless to have the dual duct blow air at the inactive (and usually unscrewed) nozzle all the time. It makes more sense to also direct this air at the active nozzle. By blowing air from two directions, this design reduces the ‘shadow’ problem of both the stock duct and my dual duct and cools all sides more or less equally. If you're only going to print with one extruder, this duct will give you the best quality.
Of course this does not make the dual duct obsolete: you still need it to get proper cooling on dual extrusions.
Mind that the shadow problem is not completely eliminated. Overhangs at the rear and right will still be cooled less effectively because the air cannot reach their undersides. One way to work around this is to print extra walls behind such overhangs to reflect the airflow back towards them. In most cases this will be unnecessary however, but keep it in mind for those prints that need to be really perfect.
(Someday I might try to update the design to have opposite exhausts for symmetrical cooling but this will obviously require big changes.)
This duct has not been merely designed in a wet-finger guessing way. It has been run through several dozens of iterations, the last of which were validated with computer simulations. See the ‘How I Designed This’ section for more details.
This duct unfortunately is not plug-and-play. You must read the ‘Using’ section. If you don't, your prints will likely fail, you have been warned.
The photos show a comparison of my 55° mushroom test on a PLA print between this duct, the v6 dual duct, and the stock duct. The result from the stock duct looks more decent than what I expected while I saw it being printed: it was curling up so badly at times that I feared I would need to abort the print. Somehow the upper layers managed to push down the curls again, but it still looks ugly. Even despite the fact that I did this test with the first version of the new duct which was not anywhere as good as the latest version, the result shows almost no deformations and it has a near-flat top surface. (Note: you won't be able to get this kind of result on the 55° test with the stock nozzles, especially not if they have been worn out. This was printed with a more pointy Micro Swiss hardened steel nozzle which allows to print steeper overhangs than a nozzle with a flat underside.)
Printing
There are two models. The ‘x1’ model has the exhausts 1 mm lower than the regular model. If you aligned your nozzles with this tool, you need the regular version. If you installed Micro Swiss all-metal hotends and followed their installation instructions to the letter, then your nozzles will be 1 mm lower and you need the ‘x1’ model. See the section ‘Checking the height of your nozzle’ below for more details. Of course you can just print both models and see which one works best for you.
See the Print Settings section for detailed instructions on printing.
Installing
Be sure to read the Post-Printing section first.
A thin strip of rubber (like a piece of bicycle tire) under the little mounting tab can help to avoid that the duct vibrates and rattles.
If you have an older printer and yet have to install the blower fan, you may need to print the fan mounting bracket first.
Using
First of all if you're going to do a long print with the fan disabled entirely, remove the duct to avoid that it will deform, especially if you're printing at very high temperatures, e.g. polycarbonate. Even if you applied thermal insulation, you should still remove the duct if unused during long prints.
Next, something very important: don't just print and try to use this duct, it unfortunately is not that simple. This duct is almost unusable if you cannot control fan speed. You risk getting very poor layer adhesion in the lower part of your print, and fast-printed parts like infill may detach already during printing. In other words, your print will fall apart. To avoid this, you must reduce fan speed in a specific manner. Unfortunately fan speed cannot be controlled on an unmodified FFCP, which I find the largest shortcoming of this printer by far. Modifications are required, below I explain how you can get variable fan speed after all.
Due to effects described below (see ‘Background info’ if you're interested), you must:
only enable the fan after the second or third layer,
start out with the fan running at no more than 20% speed,
gradually increase fan speed over the course of the first few millimeters of the print until the desired maximum (in my case 50% is usually more than enough).
Being able to control fan speed is the only practical way to get optimal cooling with this duct (actually with any duct for that matter). Variable speed is also essential for getting good results with filaments like PETG, which require a tiny bit of cooling for best results. You may also be surprised to hear that I always enable the fan on ABS prints albeit at very low speed, which does improve quality without ruining layer adhesion. Also, after installing an all-metal hot-end with hardened steel nozzle, I noticed I need much less cooling which made it essential to be able to throttle the fan.
How to obtain variable fan speed
Your software might make it seem as if you can vary the speed of the fan, but this is a lie. None of the printers that use the MightyBoard design like the FFCP and clones, can control fan speed without modifications. The MightyBoard can only toggle its EXTRA output between off and on, hence ramping up the fan won't be possible.
It is possible to install a custom build of the Sailfish firmware that has a software PWM implementation. Speed cannot be changed however during a print and it does not respond to speed arguments in the G-code, making it mostly useless. You can try an even more custom build that is able to respond to fan speed commands in G-code, but this can only work if you also compile a custom build of the GPX converter and somehow manage to squeeze Sailfish-compatible G-code with variable fan speeds out of your slicing software. In other words, the only practical solutions for the average user are hardware-based.
The simplest way to obtain (manual) fan speed control is to install a hardware PWM controller in between the printer motherboard and the cooling fan. This isn't complicated and the only (optional) permanent modification you need to make to your printer is to drill two tiny holes. You can use an analog controller like the one shown there, or a microcontroller like an Arduino with PWM capable output and a 24V MOSFET to drive the fan. This solution is still cumbersome because you will need to babysit every print at least during its first few layers to adjust the PWM knob.
A much more advanced way to obtain fully automatic fan speed control is to have the printer send fan speed commands to a Raspberry Pi, which does PWM through a MOSFET connected to one of its GPIO pins. I spent quite a bit of effort on this solution and it works very reliably, the only drawback is a bit of extra blip sounds during prints. Installing it is more work than mounting a single circuit board, but once you've got it running you will never want to go back.
Possible workarounds that do not require a PWM controller
I haven't really tested any of these but they are most certainly inferior compared to a PWM-based solution. Try at your own risk!
Simplest one is to just stick with the dual duct if you find it too much hassle to get the best out of this single-extruder duct. You will of course be stuck with the shadow problem too.
If you print much hotter, slowly, and in thin layers, you might get good results even if you cannot throttle the fan.
To counteract the typical extruder temperature undershoot when the fan activates at lower layers, you could boost extruder temperature by 10°C, about 10 seconds before the fan will engage. I haven't tested whether this is effective, but in theory it should ensure the extruder is in its heating regime when the blast of cold air hits it, and the undershoot should be reduced or eliminated. You may then gradually reduce extruder temperature again until the print is about 12 mm tall, but you should keep the temperature higher than when printing without fan. This is obviously cumbersome because you will either have to manually fiddle with the LCD menu to do this, or write a post-processing script to insert extra M104 commands in your G-code at the right places.
You may also try to make a hole in the side of the duct to lower the exhaust pressure. You could use tape to vary the size of this hole hence vary airflow in a clumsy manner. Of course this doesn't avoid the undershoot problem and trying to vary the airflow during a print will be challenging to say the least.
Final Notes
If you want to be notified of possible updates on this design, use the ‘Watch’ button.
Quite a bit of work went into designing this duct. If you appreciate it, remember that there is a ‘tip designer’ button :)
Similar models
thingiverse
free

Fan Duct - CTC Prusa I3 by cdrom93
...or the fan (optional)
don't forget to connect your fan on the pwm plus on your board to control the speed during your prints.
thingiverse
free
Fan Duct for Raise 3D N2/N2+, Single Extruder by socke
...support needed for printing if you lay it on the surface where the fan is mounted. i printed mine with esun epc and 100% infill.
thingiverse
free

Upgraded Anet A8 cooling fan duct
...omebody else too!
if you like my designs you can follow me on ig, where i often post upgrades on my work!
ig profile: engineli_3d
thingiverse
free

Fan Duct for Raise3D N2 Dual Extruder Used As Single Extruder by OldRick
...and that clearances are tight. i moved the washers from outside the fan, to the left, inside the duct, to clear the cooling fins.
thingiverse
free
FlyingBear P905 Dual Extruder Fan Duct by pbeyl
...port touching the build plate. the design should allow bridging while printing the rest of the duct without the need for support.
thingiverse
free

FlashForge Creator Pro front dual fan duct by DrLex
...fan duct that fits the flashforge creator pro and similar models that have the ‘turbo fan’ at the left...
thingiverse
free

Dual Extruder Fan Duct by ChrisX35
...6/1/17 just added two new pictures of my third fan duct. had no problems printing without support in where it cannot be removed.
thingiverse
free

Wanhao D4S Extruder Cooling Duct by tobyvanreenen
...nt with something that can take a bit of heat as this sits pretty close to the nozzles.
prints on it's back with no supports.
thingiverse
free

Fan duct for Dual Bowden rework E3Dv6 by GuruX
...se this, make sure that you do not heat your hotends, without the fans running. if you do that, you will easily clog your hotend.
thingiverse
free

Ender2 single blower cooling duct by bigt2666
... your slicer to set the cooling fan speed.
if you find this item helpful please pass your likes onto the original source designer
Drlex
thingiverse
free

MAGNET THIEF by DrLex
...magnet thief by drlex
thingiverse
magnet
thingiverse
free
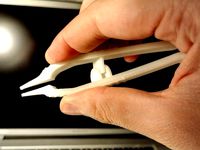
THE Tweezerer by DrLex
...ts of paper or adhesive tape).
this should be an easy print as long as your printer doesn't have problems with 45° overhangs.
thingiverse
free

Mini M3 hex key wrench by DrLex
...lex
thingiverse
this is a simple key-shaped wrench for m3 nuts, for those times when space is cramped. the socket is 14 mm deep.
thingiverse
free
Piggybank Lid for Hinged Chest by DrLex by Skyline89
... hinged chest (https://www.thingiverse.com/thing:2803507)
you need the other parts from the original chest, this is just the lid.
thingiverse
free
Display Stand for Ball in Vine by DrLex
...9;s ball in vine, which on its own tends to roll around very easily if you leave it on a flat surface, especially non-level ones.
thingiverse
free
Dummy SATA plug by DrLex
...d eyeballing a real plug, so don't expect this to be perfectly according to specs. it is accurate enough for my needs though.
thingiverse
free

Dust cap for French power outlets by DrLex
...yle sockets with an earth pin. also included a hybrid schuko with a hole, that can be used on both the schuko and french sockets.
thingiverse
free

Paracord Vase Spool (Slic3r compatible) by DrLex
...that vase mode will work in slic3r (which fills any gaps smaller than 100 microns). for more information, see the original thing.
thingiverse
free

Lid for F-Puzzle by DrLex
...t, i provided an extra space in the lid for the fourth f. place the letters as shown in the (first) photo before closing the lid.
thingiverse
free

Mini Dualstrusion Test Gizmos by DrLex
...est and fastest. they require only about 0.5g to print, and somewhere around 5 to 8 minutes depending on your setup and settings.
Flashforge
thingiverse
free

Flashforge Logo
...flashforge logo
thingiverse
flashforge logo
thingiverse
free

flashforge logo by morive3d
...flashforge logo by morive3d
thingiverse
this is a flashforge stamphttps://www.youtube.com/channel/ucu6ge9qrju9cpgg6wrlxkqw
thingiverse
free

Flashforge Glass Bed by olo2000pm
...flashforge glass bed by olo2000pm
thingiverse
flashforge glass bed
thingiverse
free
Toolbox for FlashForge Finder by Gringo1970
...toolbox for flashforge finder by gringo1970
thingiverse
smal toolbox for flashforge finder
thingiverse
free
Flashforge / Dremel lid by Disco_Rob
...flashforge / dremel lid by disco_rob
thingiverse
lid extension for the flashforge dreamer
thingiverse
free

Flashforge Dreamer Filamentguide by PeterS1
...de for flashforge dreamer / dremel idea. you need also flashforge dreamer lid spacer (http://www.thingiverse.com/thing:1219953)
thingiverse
free
Flashforge creator legs by cybadigitals
...flashforge creator legs by cybadigitals
thingiverse
these legs gives a clearance of 25mm for flashforge creator series
thingiverse
free
Flashforge Inventor/Dreamer by Iprintr7
...orge inventor/dreamer by iprintr7
thingiverse
this is my first thingiverse project and is a model of the flashforge 3d printer
thingiverse
free

Flashforge Filiment Guide by russellscanlan
...flashforge filiment guide by russellscanlan
thingiverse
my design to feed filament through the door on a flashforge adventure 3
thingiverse
free
Flashforge Winder Adapter by newky2k
...winder adapter by newky2k
thingiverse
adapters for the flashforge 0.5 kg spools to the for the filament spool winder by ssinnott
Duct
turbosquid
$19
Duct Set
...d
royalty free 3d model duct set for download as max and fbx on turbosquid: 3d models for games, architecture, videos. (1145038)
turbosquid
$10
Duct Tape
...id
royalty free 3d model duct tape for download as ma and ma on turbosquid: 3d models for games, architecture, videos. (1580351)
turbosquid
free
Duct Tape
...
free 3d model duct tape for download as obj, fbx, and blend on turbosquid: 3d models for games, architecture, videos. (1486518)
3d_ocean
$7
Air-duct
... ventilation
high quality industrial air duct ventilation model. created in cinema 4d but comes in various other formats as well.
turbosquid
$20
Air ducts
...lty free 3d model air ducts for download as max, obj, and fbx on turbosquid: 3d models for games, architecture, videos. (1262476)
3d_export
$10
Supply air duct
...supply air duct
3dexport
supply air duct with two axial fans and hangers
turbosquid
$2
Duct Tape
...e 3d model duct tape for download as obj, fbx, blend, and dae on turbosquid: 3d models for games, architecture, videos. (1473972)
turbosquid
free

Duct Tape
... available on turbo squid, the world's leading provider of digital 3d models for visualization, films, television, and games.
3d_ocean
$3
Duct tape
...polys. includes: cinema 4d project. model in 3 formats (obj, fbx, 3ds). 6 .tga texture maps (albedo, ambient occlusion, diffus...
turbosquid
$40
Ventilation Duct PACK
...tion duct pack for download as ma, obj, fbx, and unitypackage on turbosquid: 3d models for games, architecture, videos. (1287068)
Creator
3ddd
$1

CREATOR
... молдавия
круглая кровать молдавской мастерской creator.диаметр спального места - 1900мм,материалы настроены.
turbosquid
$75

Creators Realm
... available on turbo squid, the world's leading provider of digital 3d models for visualization, films, television, and games.
3ddd
$1

LEGO Creator Part 2
...
lego , конструктор , машина
lego creator №6753
turbosquid
free

Game Creator Pack
... available on turbo squid, the world's leading provider of digital 3d models for visualization, films, television, and games.
3ddd
$1

LEGO Creator №6753 Part 3
...
lego , конструктор , машина
lego creator №6753
3ddd
$1

LEGO Creator №6753 Part 1
...
lego , конструктор , машина
lego creator №6753
turbosquid
$29

Train Track Creator Pro
... available on turbo squid, the world's leading provider of digital 3d models for visualization, films, television, and games.
3d_ocean
$39

Train Track Creator Pro
...n tracks, for video game or rendering in a matter of minutes. all the models in this pack are low poly with high resolution te...
turbosquid
$7

FPS Creator Reloaded Rock Pack 1
... available on turbo squid, the world's leading provider of digital 3d models for visualization, films, television, and games.
3ddd
$1
Декоративные элементы BV Decor CREATOR III часть
...ментов и декорирования стен.
множество вариантов для вашей фантазии.https://bvdecor.com/es/category/list/cat/creator-es
Extruder
3ddd
$1

Extruded Chair
...extruded chair
3ddd
extruded , tom dixon
inspired by tom dixon extruded chair
turbosquid
$15

Extruded Table
... extruded table for download as blend, dae, fbx, obj, and stl on turbosquid: 3d models for games, architecture, videos. (1634137)
turbosquid
$2

3D Printer Extruder
...d
royalty free 3d model 3d printer extruder for download as on turbosquid: 3d models for games, architecture, videos. (1537359)
turbosquid
$1

Zombie extruded text
...oyalty free 3d model zombie extruded text for download as obj on turbosquid: 3d models for games, architecture, videos. (1322198)
turbosquid
$4

Extruder conical screw
...el extruder conical screw for download as sldpr, ige, and stl on turbosquid: 3d models for games, architecture, videos. (1524433)
turbosquid
$50

3d PRINTER - Extruder
... available on turbo squid, the world's leading provider of digital 3d models for visualization, films, television, and games.
turbosquid
$15

Extruded Table 2
...xtruded table 2 for download as blend, dae, fbx, obj, and stl on turbosquid: 3d models for games, architecture, videos. (1621846)
turbosquid
$10

Maya Extrude Tool
... available on turbo squid, the world's leading provider of digital 3d models for visualization, films, television, and games.
3d_export
$5

world earth extrude map
...world earth extrude map
3dexport
3ddd
$1

Simply Elegant Extruded Tree Coffee Table Design
...ble by link studios. the silhouette of a tree is visible at one angle, extruded from the surface to create the support structure.
Left
3d_export
$7

human-left-hand
...human-left-hand
3dexport
human-left-hand
3d_export
$5

Left arrrow 3D Model
...left arrrow 3d model
3dexport
left turn sign signal signage direction
left arrrow 3d model ryisnelly100 88746 3dexport
design_connected
$20
Nomade Chaise Left
... chaise left
designconnected
ligne roset nomade chaise left lounge chairs computer generated 3d model. designed by didier gomez.
design_connected
$16

Feng Chaise Left
...ng chaise left
designconnected
ligne roset feng chaise left lounge chairs computer generated 3d model. designed by didier gomez.
3ddd
$1

Vittorio-Left facing Sofa
...vittorio-left facing sofa
3ddd
vittorio , угловой
vittorio-left facing sofa
turbosquid
$33
Left Turn Sign
...ree 3d model left turn sign for download as 3ds, max, and obj on turbosquid: 3d models for games, architecture, videos. (1303404)
turbosquid
$15
Left-handed dagger
... available on turbo squid, the world's leading provider of digital 3d models for visualization, films, television, and games.
turbosquid
$10

no left turn - 3ds
... available on turbo squid, the world's leading provider of digital 3d models for visualization, films, television, and games.
turbosquid
$7

Left Arm Armour
... available on turbo squid, the world's leading provider of digital 3d models for visualization, films, television, and games.
turbosquid
$5

Pass Left Signs
... available on turbo squid, the world's leading provider of digital 3d models for visualization, films, television, and games.
Fan
3d_export
$5

fan
...fan
3dexport
fan 3d model, table fan, fan, electric fan, ventilator
archibase_planet
free

Fan
...fan
archibase planet
fan large fan
fan out n260707 - 3d model for interior 3d visualization.
archibase_planet
free

Fan
...fan
archibase planet
fan ceiling fan ventilator
fan stealth n300615 - 3d model (*.gsm+*.3ds) for interior 3d visualization.
3d_export
$15

fan
...fan
3dexport
is an ancient fan
3ddd
$1

Fan-C-Fan by marco gallegos
...n-c-fan by marco gallegos
3ddd
вентилятор , marco gallegos
fan-c-fan by marco gallegos
3d_export
$10

fan
...fan
3dexport
a detailed fan designed for home or space blowing is now available for only 19.99!
turbosquid
$1

Fan
...fan
turbosquid
free 3d model fan for download as on turbosquid: 3d models for games, architecture, videos. (1427865)
turbosquid
$14

Fan
...fan
turbosquid
royalty free 3d model fan for download as on turbosquid: 3d models for games, architecture, videos. (1415642)
3ddd
$1

Светильник Fan
...светильник fan
3ddd
fan , italamp
светильник fan, производитель italamp
turbosquid
$25

Fan
...fan
turbosquid
royalty free 3d model fan for download as c4d on turbosquid: 3d models for games, architecture, videos. (1483246)
Single
3d_export
$5

single sofa single chair
...single sofa single chair
3dexport
single sofa single chair 3d model
3d_export
$5

single sofa single chair
...single sofa single chair
3dexport
single sofa single chair 3d model
3d_export
$5

single fastener
...single fastener
3dexport
single fastener
3ddd
$1
Single FLOU
... sofa , трансформер
диван-трансформер single от итальянского производителя flou
3ddd
$1
bed single
...bed single
3ddd
постельное белье
bed single 190cm*90cm
3ddd
$1

Single Flou
...single flou
3ddd
качественная моделька дивана-трансформера single flou.
3d_ocean
$9
Single sofa
...le sofa
3docean
modern sofa single sofa sofa white sofa.comfortable sofa
single sofa,sofa,modern sofa,white sofa.comfortable sofa
3d_export
free

Single Knife
...single knife
3dexport
a single knife, presumably it was used as one of the throwing knives.
3d_export
free

couch - single
...couch - single
3dexport
low poly single couch with .psd file for personal customization
3d_ocean
$5
Single Sofa
...single sofa
3docean
single sofa made by fabric , wood frame & ss leg
Pro
turbosquid
$29

Pro
...ree 3d model mac pro for download as obj, c4d, fbx, and blend on turbosquid: 3d models for games, architecture, videos. (1505782)
turbosquid
$15

Apple Mac Pro and Pro Display
...ee 3d model apple mac pro and pro display for download as max on turbosquid: 3d models for games, architecture, videos. (1417078)
3d_export
$5

iphone 13 pro max and pro
...3 pro max and 13 pro the model is made in four colors (graphite, gold, silver, and blue), all of which are attached in the files.
3d_export
free

sapphire pro
...sapphire pro
3dexport
sapphire pro 3d printer head mask
3d_export
$4

macbook pro
...macbook pro
3dexport
macbook pro 13" inch 2020 years model
3ddd
free

GentleLase Pro
... syneron , candela
gentlelase pro аппарат для лазерной эпиляции
turbosquid
$25

PRO frame
...rbosquid
royalty free 3d model pro frame for download as max on turbosquid: 3d models for games, architecture, videos. (1148329)
turbosquid
$5

Alien pro
...osquid
royalty free 3d model alien pro for download as blend on turbosquid: 3d models for games, architecture, videos. (1678446)
turbosquid
$5

iphone11 pro
...uid
royalty free 3d model iphone11 pro for download as blend on turbosquid: 3d models for games, architecture, videos. (1562707)
3ddd
$1

Mac Pro (appel)
...mac pro (appel)
3ddd
компьютер , apple
mac pro