Thingiverse
![[Fixed] Dual 26650 vape with linear magnetic switch (print in place) by Alex_Thunder](/previews/8611381.jpg)
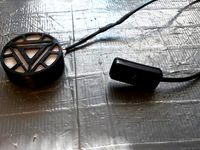
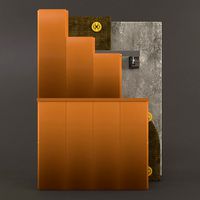
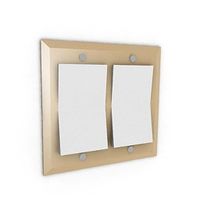
[Fixed] Dual 26650 vape with linear magnetic switch (print in place) by Alex_Thunder
by Thingiverse
Last crawled date: 3 years ago
Disclaimer
This page and the files and materials contained herein are for educational purposes only. We do not take any responsibilities for malfunctions or possible injuries or any thing happened or suffered by those who use this information. Basic electronics knowledge and common sense apply.
Updates
Remixed broken STL so it loads correctly
Flipped cover so finish matches on both sides of box.
Added improved momentary switch (not attached)
Moved atomizer post from center to end
Made a slim version v2
Revised lid for slim version for tighter fit
Added v2 print in place switch
Assembly
The print in place switch work against the repulsive force of 2 neodymium magnets or a small compression spring. I used these magnets which worked great. https://www.amazon.com/gp/product/B01MZ6EJE2/ref=oh_aui_search_detailpage?ie=UTF8&psc=1
After cleaning off the switch with a hobby knife place a dot of superglue on a magnet and using a screw driver of tweezers carefully press it firmly into the socket inside of the switch assembly blowing gently until you can safely remove the screwdriver. Once after a couple of minutes once the glue has fully set, test with a second magnet to find the repulsive side and mark it with a black marker. Now place a dot of superglue on the other side of the magnet and firmly press it into the opposing side. This is the tricky part the magnet will want to flip over or move away as you insert it. you may want to use 2 tools. One to hold the magnet down and another to adjust it into position.
After you have sanded and finished the box and button you can paint or resin coat. I used an epoxy resin product called XTC-3D combined with a little black acrylic paint. https://www.amazon.com/gp/product/B00PFXK4JY/ref=oh_aui_search_detailpage?ie=UTF8&psc=1
Once the pieces are finished, you should attach your linear switch. the button is long enough you can adjust the position to your liking. Some people may want a button that sticks out further. I Like the button to stick out just enough that when its fully pressed the button is flush with the case. Once you figure out the positioning attach the switch with a generous amount of superglue. Once this has dried you can press the button fully to see there the backstop will need to be attached making sure to leave enough extra space for your conductive contacts / momentary switch (if you are building a MOSFET switch).
You will need to figure out battery connections. either metal clips or springs should work as long as they have a large surface area. Someone suggested using sanded pennies. I also recommend using the largest gauge solid copper wire you can fit into the box. You should figure out your connections and wires and do all of the soldering first. Regardless of if you are making the series or parallel build Always make sure you have wired correctly. Once everything has been connected then fit everything into your box with hot glue.
PRO TIP: if you use hotglue and solder in any project always hotglue last. Its important to do the hotglue last as your soldering tool will heatup your wires and connections enough to melt all the hotglue into a huge sticky mess.
Batteries: Use 40A 26650's (60A is better if you can find them) Find good quality batteries. Always make sure your batteries are inserted correctly!
Similar models
thingiverse
free

TrackIR ProClip magnetic battery mount by RussPitcher
...hone mount ensuring that the magnets face out, slide them together and hold in place for a few seconds until the glue has cured.
thingiverse
free

Nerf Rival Rechargable NIMH Adapter for Nemesis, Khaos, Hera by BuffdaddyNerf
...n place.
if you want more detail, read here: https://blasterhub.com/2021/03/mod-project-replacement-nerf-rival-rechargeable-pack/
thingiverse
free

Stun Stick by Shaputer
... i haven't gotten to that point yet.
great protection on trails where stray dogs may be encountered. cheap and easy to make.
thingiverse
free
Iron Man Arc Reactor for Osram Dot-it LED by ScotchBunny
... ring for putting it on a hook. i hotglued some magnet to the battery cover and stuck them to the metal piece through my t-shirt.
thingiverse
free

Ultimate ATS Shifter for Logitech G
...ton installing(soldering wires at an angle can help), this one works great for missiles..... wait what game are we playing again?
thingiverse
free

403MHz Helix Antenna Dolly for RadioSonde Tracker by eben80
...0mm.
you can superglue into place once the wire is wound and trim the print on the side where the feed wire needs to be soldered.
thingiverse
free

9v Model Rocket Igniter by jburkhardt0
...rills) with support underneath
case top - printed sitting flat on it's top with clips sticking up
***sized in slicer at 2540%
thingiverse
free

Simple LED Flashlight by ALABS
...on in the square cutout in the acrylic window.
snap the window onto the enclosure.
put batteries in the battery holder and enjoy!
thingiverse
free

12v 23A Battery Holder by FwA
...ing setup you need. i used jst connectors for mine.
i also added a small hole in the bottom to assist with removal of the battery
thingiverse
free

GameBoy Color Power Cartridge by ArmoredCarbon
...the tabs are the negative terminals. b. follow a similar procedure with the main case. the wire should go...
26650
3d_export
$12

Rochebobois Minsk Bulb vases 3D Model
...modern living rochebobois minsk bulb vases 3d model modelplusmodel 26650 ...
thingiverse
free

26650 battery case by IND3D
...26650 battery case by ind3d
thingiverse
battery case for 26650
thingiverse
free

18650 to 26650 Converter by kkgian
...18650 to 26650 converter by kkgian
thingiverse
battery converter for 18650 to 26650.
thingiverse
free

Dual 26650 V11 by chris850
...dual 26650 v11 by chris850
thingiverse
hold 2 26650's
thingiverse
free

Dual 26650 V9 by chris850
...dual 26650 v9 by chris850
thingiverse
houses 2 26650's
thingiverse
free

21700 to 26650 adapter by KuriosityKid
...21700 to 26650 adapter by kuriositykid
thingiverse
21700 to 26650 adapter i needed one for my flashlight.
thingiverse
free

Holder for battery 26650 by tipson
...holder for battery 26650 by tipson
thingiverse
холдер под батарейки 26650
делал для вейпа под аллюминиевый корпус
thingiverse
free

Nitecore F1 26650 stopper by SheepsFeaTheR
...nitecore f1 26650 stopper by sheepsfeather
thingiverse
nitecore f1 26650 stopper
thingiverse
free

Battery converter 18650 to 26650 by ezsolt74
...battery converter 18650 to 26650 by ezsolt74
thingiverse
18650 to 26650 batterry converter
thingiverse
free

26650 Storage Container by Suzaku
...650 storage container by suzaku
thingiverse
container holds 3x 26650 rechargeable lithium battery, water resistant, screw on top
Thunder
3ddd
$1
Thunder Wings
...r wings
3ddd
lego , конструктор
реактивный самолет lego thunder wings, модель 2013 года.
turbosquid
$60

Thunder Transporter
...royalty free 3d model thunder transporter for download as fbx on turbosquid: 3d models for games, architecture, videos. (1210036)
turbosquid
$60
Thunder HG1B
...squid
royalty free 3d model thunder hg1b for download as fbx on turbosquid: 3d models for games, architecture, videos. (1210029)
turbosquid
$25

Thunder Bomber
... available on turbo squid, the world's leading provider of digital 3d models for visualization, films, television, and games.
turbosquid
$15

Thunder Wheel
... available on turbo squid, the world's leading provider of digital 3d models for visualization, films, television, and games.
turbosquid
$12

Thunder Bird
... available on turbo squid, the world's leading provider of digital 3d models for visualization, films, television, and games.
turbosquid
$12

Thunder toy
... available on turbo squid, the world's leading provider of digital 3d models for visualization, films, television, and games.
3d_export
$50

Thunder Racing 3D Model
...thunder racing 3d model
3dexport
thunder racing drag
thunder racing 3d model vulturre 51334 3dexport
turbosquid
$80
Thunder Mountian Range
...alty free 3d model thunder mountian range for download as max on turbosquid: 3d models for games, architecture, videos. (1263201)
3d_export
$10

thunder ax of thor
...d to maximally convey the main features of ax. let me know what you think of it and feel free to contact me i offer full support.
Vape
turbosquid
$3

Vape
...y free 3d model vape for download as blend, dae, fbx, and obj on turbosquid: 3d models for games, architecture, videos. (1705882)
turbosquid
$15

Vape
...e 3d model vape for download as 3ds, obj, fbx, blend, and dae on turbosquid: 3d models for games, architecture, videos. (1482296)
3d_export
$5

vape liquid bottle
...vape liquid bottle
3dexport
vape liquid bottle (~100ml)
turbosquid
$15

15ml vape
...rbosquid
royalty free 3d model 15ml vape for download as max on turbosquid: 3d models for games, architecture, videos. (1322043)
turbosquid
$2

Vape Kangertech
...id
royalty free 3d model vape kangertech for download as fbx on turbosquid: 3d models for games, architecture, videos. (1286451)
turbosquid
$32

Vape Speeder
...e 3d model vape speeder for download as ma, max, obj, and fbx on turbosquid: 3d models for games, architecture, videos. (1345657)
turbosquid
$25

vape stand
... model vape stand for download as jpg, 3ds, max, obj, and fbx on turbosquid: 3d models for games, architecture, videos. (1212875)
turbosquid
$2

Elegant vape
...egant vape for download as 3ds, obj, fbx, blend, dae, and stl on turbosquid: 3d models for games, architecture, videos. (1265978)
turbosquid
$2

Vape handmade
...e handmade for download as 3ds, obj, fbx, blend, dae, and stl on turbosquid: 3d models for games, architecture, videos. (1264507)
3d_export
$7

vape carbine
...vape carbine
3dexport
assembled without payment, directly through the button
Alex
turbosquid
$100

Alex
...ex
turbosquid
royalty free 3d model alex for download as 3ds on turbosquid: 3d models for games, architecture, videos. (1235699)
turbosquid
$3

alex
...ex
turbosquid
royalty free 3d model alex for download as c4d on turbosquid: 3d models for games, architecture, videos. (1492651)
turbosquid
$30

Alex
...
royalty free 3d model alex for download as ma, obj, and fbx on turbosquid: 3d models for games, architecture, videos. (1198462)
3ddd
free

Alex hemla
...alex hemla
3ddd
alex , hemla
depth 955 mm
height 800 mm
all texture
3ddd
free

asko alex 3seater
...asko alex 3seater
3ddd
asko , alex
all texture
turbosquid
$7

GameCharacter Alex
...
royalty free 3d model gamecharacter alex for download as fbx on turbosquid: 3d models for games, architecture, videos. (1232318)
turbosquid
$24

Kitchen Alex
... 3d model kitchen alex for download as 3ds, max, obj, and fbx on turbosquid: 3d models for games, architecture, videos. (1218421)
turbosquid
$2

Alex cabinet
...el alex cabinet for download as blend, fbx, obj, stl, and dae on turbosquid: 3d models for games, architecture, videos. (1593402)
3ddd
$1

Sir Alex chair
...0 mm
inside 2013, 2011, fbx, textures
sir alex, фабрика smania, италия, размеры 1060х740х930 мм
внутри 2013, 2011, fbx, текстуры
3ddd
free

Butterfly by Alex Earl
..., подвес , свет
дизайнерская люстра с бабочками
Linear
3ddd
$1
Linear Diffusers
...linear diffusers
3ddd
диффузор
set of linear diffusers for ceiling.
design_connected
$27
Linear Sofa
...linear sofa
designconnected
scp linear sofa computer generated 3d model.
design_connected
$18

Atlantis linear
...atlantis linear
designconnected
terzani atlantis linear pendant lights computer generated 3d model. designed by barlas baylar.
3d_export
$5
light linear unit
...light linear unit
3dexport
light linear unit
turbosquid
$5
Linear Actuator
...
royalty free 3d model linear actuator for download as blend on turbosquid: 3d models for games, architecture, videos. (1589061)
turbosquid
$29
Linear panel
...oyalty free 3d model linear panel for download as max and obj on turbosquid: 3d models for games, architecture, videos. (1391254)
turbosquid
$12
Linear Chandelier
...y free 3d model linear chandelier for download as max and obj on turbosquid: 3d models for games, architecture, videos. (1574289)
turbosquid
$10

Grohe Lineare
... available on turbo squid, the world's leading provider of digital 3d models for visualization, films, television, and games.
turbosquid
$10

Linear Axis
... available on turbo squid, the world's leading provider of digital 3d models for visualization, films, television, and games.
3d_export
$5

Linear Unit 3D Model
...linear unit 3d model
3dexport
linear unit force torque velocity
linear unit 3d model fau 71218 3dexport
Dual
turbosquid
free

Dual Pistols
...ls
turbosquid
free 3d model dual pistols for download as fbx on turbosquid: 3d models for games, architecture, videos. (1320360)
turbosquid
$2

Dual Axe
...urbosquid
royalty free 3d model dual axe for download as fbx on turbosquid: 3d models for games, architecture, videos. (1332372)
turbosquid
$10

Dual Lesaths
... available on turbo squid, the world's leading provider of digital 3d models for visualization, films, television, and games.
3ddd
$1

плитка Dual Bianco (Испания)
...й плитки venis dual (испания). технические качества: устойчивость к стирания, отличная геометрия, отсутствие проблем при укладке.
turbosquid
$35

Dual Mesh Fonts
...ree 3d model dual mesh fonts for download as ma, obj, and fbx on turbosquid: 3d models for games, architecture, videos. (1352989)
turbosquid
$29

Dual Flask with Bungs
...del dual flask with bungs for download as obj, fbx, and blend on turbosquid: 3d models for games, architecture, videos. (1210512)
turbosquid
$19

Dual Socket Plug
...3d model dual socket plug for download as obj, fbx, and blend on turbosquid: 3d models for games, architecture, videos. (1303912)
turbosquid
$13

Dual Adjustable Pulley
... available on turbo squid, the world's leading provider of digital 3d models for visualization, films, television, and games.
turbosquid
$10

Amoi N809 Dual
... available on turbo squid, the world's leading provider of digital 3d models for visualization, films, television, and games.
turbosquid
$5

Dual Turret Tank
... available on turbo squid, the world's leading provider of digital 3d models for visualization, films, television, and games.
Magnetic
3d_ocean
$2

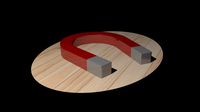
Magnet
...magnet 3docean 3d 3ds max electric magnet magnetic magnetism max model polygon realistic tesla magnet created in...
turbosquid
$6
Magnet
...
turbosquid
royalty free 3d model magnet for download as obj on turbosquid: 3d models for games, architecture, videos. (1548733)
turbosquid
$6

magnet
...uid
royalty free 3d model magnet for download as 3dm and max on turbosquid: 3d models for games, architecture, videos. (1670606)
turbosquid
$1

Magnet
...y free 3d model magnet for download as 3ds, max, obj, and fbx on turbosquid: 3d models for games, architecture, videos. (1215037)
turbosquid
$7

Magnet
...agnet for download as blend, unitypackage, fbx, gltf, and obj on turbosquid: 3d models for games, architecture, videos. (1576588)
3d_export
$5

magnetic knife holder
...magnetic knife holder
3dexport
ordinary magnetic knife holder
archive3d
free

Fridge magnet 3D Model
...3d model archive3d refrigerator magnet fridge magnet magnet toy magnetic s n280712 - 3d model (*.3ds) for interior 3d...
turbosquid
$35

Magnetic butterflies
...alty free 3d model magnetic butterflies for download as blend on turbosquid: 3d models for games, architecture, videos. (1315792)
turbosquid
$2
Magnetic Board
...quid
royalty free 3d model magnetic board for download as ma on turbosquid: 3d models for games, architecture, videos. (1264141)
turbosquid
$977
Magnetic Lego
...oyalty free 3d model magnetic lego for download as ma and obj on turbosquid: 3d models for games, architecture, videos. (1142761)
Switch
archibase_planet
free
Switch
...switch
archibase planet
switch cluster switch
light switch 1 - 3d model for interior 3d visualization.
archibase_planet
free
Switch
...switch
archibase planet
switches switch
switch 1 - 3d model (*.gsm+*.3ds) for interior 3d visualization.
archibase_planet
free
Switch
...switch
archibase planet
closer button switch cluster switch
switch - 3d model (*.3ds) for interior 3d visualization.
archibase_planet
free
Switch
...switch
archibase planet
switch closer
light switch 2 - 3d model for interior 3d visualization.
archibase_planet
free
Switch
...switch
archibase planet
closer button switch
switch n300808 - 3d model (*.gsm+*.3ds) for interior 3d visualization
archibase_planet
free
Switch
...switch
archibase planet
closer button switch
switch n141108 - 3d model (*.gsm+*.3ds) for interior 3d visualization.
archibase_planet
free

Switch
...switch
archibase planet
cluster switch closer
switch n260609 - 3d model (*.gsm+*.3ds) for interior 3d visualization.
archibase_planet
free

Switch
...switch
archibase planet
button switch closer
switch 2 - 3d model (*.gsm+*.3ds) for interior 3d visualization.
archibase_planet
free

Switch
...switch
archibase planet
button switch closer
switch n070510 - 3d model (*.gsm+*.3ds) for interior 3d visualization.
3d_export
$5

switch
...switch
3dexport
3d model of a low-poly switch
Fixed
3ddd
$1
Fixed Gear Велосипед
... fixed , bicycle
классический шоссейный велосипед, переделанный под fixed gear.
design_connected
$16
Idée fixe
...idée fixe
designconnected
jacco maris idée fixe computer generated 3d model. designed by maris , jacco.
3d_export
$5
fixing scale knob
...fixing scale knob
3dexport
fixing scale knob
turbosquid
$10

Mini Fix
...bosquid
royalty free 3d model mini fix for download as sldas on turbosquid: 3d models for games, architecture, videos. (1581558)
turbosquid
$49
fixed bike
... available on turbo squid, the world's leading provider of digital 3d models for visualization, films, television, and games.
turbosquid
$39

Fixed Bicycle
... available on turbo squid, the world's leading provider of digital 3d models for visualization, films, television, and games.
3ddd
$1
Bag Fixed
...bag fixed
3ddd
чемодан
a bag model by me
3ddd
$1
Кресло BEAU FIXE
...fixe
3ddd
beau fixe , ligne roset
кресло beau fixe:
w 80 cm d 106 cm h 97 cm sh 43,5 cm
turbosquid
free

Crowbar "Fixed"
... available on turbo squid, the world's leading provider of digital 3d models for visualization, films, television, and games.
3ddd
$1
Fixed gear
...fixed gear
3ddd
велосипед
шоссейный велосипед с фиксированной передачей
Place
3d_ocean
$7

game place
...game place
3docean
children game game park game place kids play luna park play
for kids game place
3d_export
$5

seating places
...seating places
3dexport
seating places with coverage modeling by: sketch up rendering by: lumion
3d_export
$5

seating places
...seating places
3dexport
seating places with coverage modeling by: sketch up 2017 rendering by: lumion 6.5.1
3ddd
$1

Vitra Place Sofa
...3ddd
vitra , place , модульный
vitra place sofa
turbosquid
$30

Chimney place
...quid
royalty free 3d model chimney place for download as obj on turbosquid: 3d models for games, architecture, videos. (1557502)
3ddd
$1

theodore alexander place to place
...pinched' rectangular tops with brass carrying handles to the centre, on turned and gilt highlighted legs with brass cappings.
turbosquid
$29

BOURKE PLACE
... free 3d model bourke place for download as 3ds, c4d, and skp on turbosquid: 3d models for games, architecture, videos. (1148874)
turbosquid
$10

Lounge Place
...free 3d model lounge place for download as ma, fbx, and blend on turbosquid: 3d models for games, architecture, videos. (1491379)
turbosquid
$7

Place of Ritual
... 3d model place of ritual for download as blend, fbx, and obj on turbosquid: 3d models for games, architecture, videos. (1620181)
3d_export
$100

fair place
...ir place realistic stereoscopic natural size applied to communicate sed77665544@gmail.com what's up 00962788214043 i am ahmed
design_connected
$27

...print
designconnected
moroso print computer generated 3d model. designed by wanders, marcel.
3ddd
free

Eichholtz Prints
...- eichholtz print central station i
13 - eichholtz print central station ii
14 - eichholtz print marisa
15 - eichholtz print tish
3ddd
$1

Eichholtz Prints
...print abstract - set of 2
10 - eichholtz print orange abstract
11 - eichholtz print buddha right
12 - eichholtz print buddha left
turbosquid
$1

... available on turbo squid, the world's leading provider of digital 3d models for visualization, films, television, and games.
3ddd
free

Eichholtz Prints
...of 4
2 - print dunbar 2 set of 4
3 - print guadeloupe 1 set of 4
4 - print guadeloupe 2 set of 4
5 - print giles
6 - print trett
3ddd
$1

Eichholtz Prints
...nt tutti frutti
3 - eichholtz prints watson - set of 2
4 - eichholtz prints antique nautilus - set of 2
5 - eichholtz print tiara
3d_export
$5

Monster for printing
...monster for printing
3dexport
monster 3d model printing
3ddd
free

printed rug
...printed rug
3ddd
ковер
very creative printed rug
3ddd
free

Eichholtz Prints
...иал: бумага
габариты (вхш): 72 x 62 см
описание: print sweetmeat - постер в деревянной раме.
3 - prints varsity set of 2
арти
3ddd
free

Art Print Posters
...art print posters
3ddd
прованс
art print posters by patrician prints