Thingiverse

Filastruder Electronics Case by ksihota
by Thingiverse
Last crawled date: 3 years, 4 months ago
When I went to assemble my Filastruder kit I discovered that trying to fit the electronic components inside the aluminum chassis was a little difficult for me. The components are a tight fit and the assembly of the case and the components was getting a little frustrating for me. I blame my eyesight and fumbling fingers with this as others seem to have been able to assemble this without issues. However, when viewing other user setups I did notice a lot of pictures that had the extruder in parts and mounted on boards.
I decided to try and come up with an enclosure that made the assembly of the electronic parts a little easier and that could be used connected directly to the Filastruder or as a separate part.
My design has a main case that can be bolted to the back of the Filastruder and holds all the electronics. This keeps all wiring away from the moving drive shaft inside the chassis and makes the assembly of the acrylic casing mush easier.
I wanted to try and limit changes to the machine so I used parts that come with the kit but I did have to add a couple of wire extensions to keep the wiring simple. I tried to use wire connectors so that the unit can be disassembled easily.
I did add a small PCB with 4-2pin fan connectors so that I can just plug in the fans (plus a couple of spares) which I mounted on the back. Its a simple soldering job but is not necessary. Other wire connectors could be used or you can solder the fans directly.
I also added a small plexi window over the voltage/current controller because I had some 2mm plexi pieces lying around.
I was not sure if the electronics required any cooling so I added some vents just in case and also made it possible to add a 50mm fan on the top of the case.
The front and back panels can be removed to make wiring easier. I considered adding a couple of LED lights for the switches but wanted to get the machine up and running. I may look into that at a later date, if I run out of other projects to work on.
The quality of my print job is not great because i wanted to get the print completed quickly so I swapped out my 0.4 nozzle for a 0.8 to print the project faster. I didn't use any supports in the print.
I will probably print a better quality case out of PETG when I get the time.
I inset the power barrel connector and used a zip tie to help hold it in place. I also used a wire wrapped around the stress reducer and fastened to the case to help hold it securely.
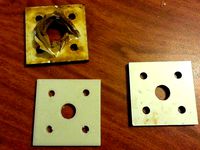
I have included a fan grill cover to cover the top hole if you choose not to install a fan and also a blank plate to cover the holes left in the side of the Filastruder case where the switches and temp controller used to reside.
Let me know if you find any issues with the design.
I decided to try and come up with an enclosure that made the assembly of the electronic parts a little easier and that could be used connected directly to the Filastruder or as a separate part.
My design has a main case that can be bolted to the back of the Filastruder and holds all the electronics. This keeps all wiring away from the moving drive shaft inside the chassis and makes the assembly of the acrylic casing mush easier.
I wanted to try and limit changes to the machine so I used parts that come with the kit but I did have to add a couple of wire extensions to keep the wiring simple. I tried to use wire connectors so that the unit can be disassembled easily.
I did add a small PCB with 4-2pin fan connectors so that I can just plug in the fans (plus a couple of spares) which I mounted on the back. Its a simple soldering job but is not necessary. Other wire connectors could be used or you can solder the fans directly.
I also added a small plexi window over the voltage/current controller because I had some 2mm plexi pieces lying around.
I was not sure if the electronics required any cooling so I added some vents just in case and also made it possible to add a 50mm fan on the top of the case.
The front and back panels can be removed to make wiring easier. I considered adding a couple of LED lights for the switches but wanted to get the machine up and running. I may look into that at a later date, if I run out of other projects to work on.
The quality of my print job is not great because i wanted to get the print completed quickly so I swapped out my 0.4 nozzle for a 0.8 to print the project faster. I didn't use any supports in the print.
I will probably print a better quality case out of PETG when I get the time.
I inset the power barrel connector and used a zip tie to help hold it in place. I also used a wire wrapped around the stress reducer and fastened to the case to help hold it securely.
I have included a fan grill cover to cover the top hole if you choose not to install a fan and also a blank plate to cover the holes left in the side of the Filastruder case where the switches and temp controller used to reside.
Let me know if you find any issues with the design.
Similar models
thingiverse
free

FIlastruder Electronics cover by ObfuscatedDevices
... of a cover design for the filastruder electronics cover. i've included a support structure so it can be printed in one pass.
thingiverse
free

TEVO Little Monster Effector Wire Cover (Bulb) by vsch
...tly need access to the connectors then print the tool. it will make putting clamps on and taking them off a one handed operation.
thingiverse
free

PC Case Fan Cover Plate 80mm 120mm 140mm by CharlieMopps
...9;re not, let me know and i'll try and correct it.
the screw holes have shoulders on the back to help prevent getting poked.
thingiverse
free

VESA Raspberry PI cover with integrated fan by portscanner
...792bw2vh ) but i would expect most any fan with the same dimensions would work.
many thanks to 0110-m-p for a fantastic design!!!
thingiverse
free

Filastruder Randolph Accesory Pack by pyrophreek
...f accessories to add to the awesome filastruder case. a two arm adjustable filament guide, and a fan duct for increased cooling.
thingiverse
free

Filastruder electronics casing by Anteino
...filastruder. the sketchup design has been added. so you can change the buttons if you prefer the ones that come with the machine.
thingiverse
free

DIY electronics experiment kit parts by HeinPragt
...create your own (extendable) electronic expermente kit for your kids. https://www.heinpragt.com/techniek/robotica/elexparts.php
thingiverse
free

Filament guide remix by CrazyCrow
...ament guide in place.
acces to the extruder is much easier without the casing and i hardly print pla so i don't need the fan.
thingiverse
free

ZK-502C 2x50W Bluetooth Amplifier Case with Active Cooling by Masterjuggler
...o i soldered wires onto the 24v connector. i have a 24v fan, but you can also use a step down converter to get whatever you need.
thingiverse
free

Filastruder Electronics Box by mrflippant
...rom being bumped and possibly messing up the stall board.
feedback and comments are welcome. and again, remixes are also welcome.
Ksihota
thingiverse
free

Predator Extruder Feed Sleeve by ksihota
... need to be sanded slightly to fit properly
if you use it, leave me a comment to indicate if it works or if it needs adjustments.
thingiverse
free

Operation Game Pieces by ksihota
...y as well as a single stl with all the parts.
i am not sure what the names are really supposed to be so i just named them myself.
thingiverse
free

1995 Volvo 850 seatbelt release button by ksihota
...riginal by filling in the centre underside. this makes for a stronger part and makes the print cleaner when printing on its edge.
thingiverse
free

Ryobi One+ Hybrid Leaf blower switch by ksihota
... canada. it is a one+ model. i have included a full picture of it for reference. the switch is a side toggle, not a slide switch.
thingiverse
free

Simple Face Shield by ksihota
... for intended use.
if you do try and like the design but find the size is not right let me know and i can resize it if necessary.
thingiverse
free

Unusual filter masks by ksihota
...thing down the nose. maybe an old sock?
obviously the filter aspect would require some redesigning, but it can be done if needed.
thingiverse
free

Hard Shell Filter Mask by ksihota
...hile printing you may have better success. of course by printing in tpu the print would also take quite a bit longer than in pla.
thingiverse
free

Ryobi Backpack Leaf Blower Nozzles by ksihota
...as a little wider and not quite as high.
i have not yet tested either nozzle ends yet. i will add comments about their use later.
thingiverse
free

MPMD E3D V6 Effector by ksihota
...base
rod connectors:
3 60mm m3 threaded rods (nuts and washers)
or
6 30mm m3 nuts bolts and washers
assorted wires and connectors
Filastruder
thingiverse
free
filastruder by Ulises
...filastruder by ulises
thingiverse
soporte para sujetar la camisa de la filastruder
thingiverse
free

Filastruder hopper extension by jesse
...filastruder hopper extension by jesse
thingiverse
doubles the height of the rectangular filastruder hopper
thingiverse
free

Official Filastruder Enclosure by OSPrinting
...e official filastruder enclosure. this is everything you need to turn your diy filastruder kit into a lean mean fighting machine.
thingiverse
free

Filastruder Vertical Chute by kayo
...filastruder vertical chute by kayo
thingiverse
just yet another chute for filastruder with extended sink.
thingiverse
free

Filastruder simple Guide by Baselalmualim
...filastruder simple guide by baselalmualim
thingiverse
filastruder simple guide use a wier to guide your filament easily
thingiverse
free

Filastruder Tripod Adapter by kbowen99
... for an adjustable angle to find the best mount. it uses an m8 bolt & nut to mount the filastruder. it is surprisingly secure
thingiverse
free

Compact Electronics Enclosure for Filastruder by fyzasidek
...compact electronics enclosure for filastruder by fyzasidek
thingiverse
compact electronics enclosure for filastruder
thingiverse
free

Filastruder Hopper Version 2 by deflore
...filastruder hopper version 2 by deflore
thingiverse
this was designed to use with filastruder v2 vertically
thingiverse
free

Filastruder Electronics Faceplate by cahorton
...mperature regulator and two switches that make up the filastruder v1 controls. it is designed to be screwed onto the base board.
thingiverse
free
FIlastruder Electronics cover by ObfuscatedDevices
... of a cover design for the filastruder electronics cover. i've included a support structure so it can be printed in one pass.
Electronics
turbosquid
$1

electron
...urbosquid
royalty free 3d model electron for download as max on turbosquid: 3d models for games, architecture, videos. (1157488)
turbosquid
$50

electronic
...
royalty free 3d model electronic for download as max and obj on turbosquid: 3d models for games, architecture, videos. (1289427)
turbosquid
$40

Electron
... available on turbo squid, the world's leading provider of digital 3d models for visualization, films, television, and games.
3d_ocean
$8
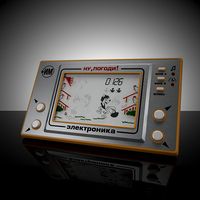
Electronic game
...electronic game
3docean
electronic games nu pogody wait a minute well
electronic game “well, wait a minute”, “nu pogody”
3ddd
$1
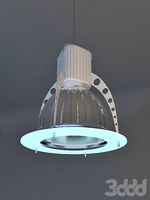
Brilux Electronic
...brilux electronic
3ddd
подвес. brilux electronic. польша. материалы настроены.
3d_export
free

electronic shop
...lectronic shop with high quality interior and exterior. it has tvs smartphone play station printer and many more electronic item.
3ddd
$1

Термостаты OJ Electronics
...ермостаты oj electronics
3ddd
oj electronics , термостат
термостаты фирмы oj electronics
3d_export
$8

electron 714
...electron 714
3dexport
game ready model for export to unreal engine soviet tv electron 714 pbr 4k
3ddd
$1

Термостат OJ Electronics
... oj electronics
3ddd
oj electronics , термостат
термостат occ2-1991 фирмы oj electronics
turbosquid
$60
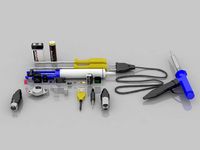
Electronics Stuff
...
royalty free 3d model electronics stuff for download as max on turbosquid: 3d models for games, architecture, videos. (1624680)
Case
3d_export
$1

case
...case
3dexport
case
archibase_planet
free

Case
...case
archibase planet
showcase show-case glass case
glass-case + cakes - 3d model for interior 3d visualization.
archibase_planet
free

Case
...case
archibase planet
showcase show-case glass case
glass-case for chips - 3d model for interior 3d visualization.
archibase_planet
free

Case
...case
archibase planet
case shelving drawer
case - 3d model for interior 3d visualization.
archibase_planet
free

Case
...case
archibase planet
case rack locker
case - 3d model for interior 3d visualization.
archibase_planet
free

Case
...case
archibase planet
case drawer kitchen furniture
case - 3d model for interior 3d visualization.
archibase_planet
free

Case
...case
archibase planet
case cupboard shelving
glass case - 3d model for interior 3d visualization.
archibase_planet
free

Case
...case
archibase planet
case handbag suitcase
case - 3d model (*.gsm+*.3ds) for interior 3d visualization.
archibase_planet
free

Case
...case
archibase planet
case suitcase
case 5 - 3d model (*.gsm+*.3ds) for interior 3d visualization.
archibase_planet
free

Case
...case
archibase planet
locker case dresser
case - 3d model (*.gsm+*.3ds) for interior 3d visualization.