Thingiverse

Filament Calibration Gauge by ElmoC
by Thingiverse
Last crawled date: 3 years, 1 month ago
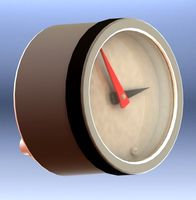
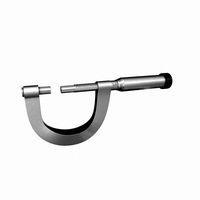
After fighting with tape measure, rulers, and curling filament trying to get the steps/mm correct for the extruder, I came up with this device. It is designed for the E3D V6, but I have included the OpenSCAD file to allow modifications for other hotend types.
To use this gauge, you need to remove your hotend and insert the gauge in its place. Feed a length of filament (can be a loose piece about 100mm in length) and align the leading edge with the very top at the zero mark. Enable cold extrusion and extrude a set amount. I used 50mm in the sample photos. The first picture shows that I actually got 53mm. Using the formula: Expected/Actual * current steps/mm = new steps/mm, I changed the configuration and reset the filament and extruded 50mm. This time I got exactly what I wanted (I had a feeling this printer was over extruding a bit).
The ruler I used is from Amazon (https://www.amazon.com/gp/product/B01DB1C3QS/ref=oh_aui_detailpage_o01_s01?ie=UTF8&psc=1) and I attached it to the gauge with some left over 3M 468MP adhesive sheets I had used to mount my print surface with (https://www.amazon.com/Gizmo-Dorks-Adhesive-Transfer-Sheets/dp/B01HP2CEG8/ref=sr_1_1?ie=UTF8&qid=1489796419&sr=8-1&keywords=3m+high+temperature+adhesive+sheet).
There is a slot on one side of the tube where you can see the filament next to the ruler. You can use whatever type of ruler you want. If the metric side is on the opposite side of the ruler, you can use OpenSCAD to rotate the opening.
I printed this with eSun Natural PLA+ filament.
Similar models
thingiverse
free

Round LED extruder hotend Anycubic i3 Mega
...he light i used 60 mm led round.https://www.amazon.com/gp/product/b015yx36rq/ref=ppx_yo_dt_b_asin_title_o05_s00?ie=utf8&psc=1
thingiverse
free

Desk Fan by NebNorse
...lpages04?ie=utf8&psc=1
motor control: https://www.amazon.com/gp/product/b01cnl6imc/ref=od_aui_detailpages04?ie=utf8&psc=1
thingiverse
free

Z Height Machinist Gauge Mount by Duker44
.../www.amazon.com/gp/product/b00b5hixxi/ref=oh_aui_detailpage_o01_s00?ie=utf8&psc=1
certainly needed when using both extruders.
thingiverse
free

Chiron Direct Drive with V6 hotend by Shoots2k
...sc=1
capricorn bowden ptfe tubinghttps://www.amazon.com/gp/product/b086ypdhmf/ref=ppx_yo_dt_b_search_asin_title?ie=utf8&psc=1
thingiverse
free

X-Carriage Anet Hotend by davidtanis
...?ie=utf8&psc=1
and the wheelshttps://www.amazon.com/gp/product/b07gf9vghd/ref=ppx_yo_dt_b_search_asin_title?ie=utf8&psc=1
thingiverse
free
Noctua Laptop Cooling Pad for 3:2 Aspect Ratio Laptops by 3Dnate
...e?ie=utf8&psc=1
rubber feet:https://www.amazon.com/gp/product/b087h5b87m/ref=ppx_yo_dt_b_asin_title_o09_s00?ie=utf8&psc=1
thingiverse
free

Watchmakers Screwdriver Stand
...utf8&psc=1
the filament is: https://www.amazon.com/gp/product/b071cnlmdv/ref=ppx_yo_dt_b_asin_title_o06_s01?ie=utf8&psc=1
thingiverse
free

Guitar Pickup Winder
...=utf8&psc=1
speed adjustmenthttps://www.amazon.com/gp/product/b07vpnhs5j/ref=ppx_yo_dt_b_asin_title_o02_s01?ie=utf8&psc=1
thingiverse
free

Turntable
...amp;psc=1
m3 screws m3x6 or m3x8https://www.amazon.com/gp/product/b07twz7x38/ref=ppx_yo_dt_b_asin_title_o03_s00?ie=utf8&psc=1
thingiverse
free

PrinterMods MDD V1.2 WinSinn Ender3 Pro Dual Gear Extruder
...=1
winsinn dual gear extruder - https://www.amazon.com/gp/product/b07sy745cf/ref=ppx_yo_dt_b_asin_title_o04_s01?ie=utf8&psc=1
Elmoc
thingiverse
free

ELMOC Classic Mini Cap by krismcewan
...eyelf for doing all the hard work and getting a cap design done. all i have done is put our local mini club logo onto it.
chris
thingiverse
free

XY Calibration by ElmoC
...odel that has the cutouts so i uploaded a version with raised letters. for some reason, the slicer was really messing things up.
thingiverse
free

Protoboard Mount by ElmoC
...f the standoffs.
note: the no derivative restrict only applies to automated bots and being used as part of a multi-part creation.
thingiverse
free

Rocket Pen by ElmoC
...e for the top so different size openings can be made.
i have included the wacom intuos3 pen holder by jamesrx for completeness.
thingiverse
free

Wheel Tightener by ElmoC
...he wheel, bend the axle, or even force the wheel into the slot in the rail. please don't ask me how i know this will happen.
thingiverse
free

Another Parts Cabinet by ElmoC
...pes with different number of partitions and orientation. hopefully there will be a combination that will suit almost every need.
thingiverse
free

0.4mm Drill Holder by ElmoC
... the lid is a bit loose, but there are some bumps to hold it in place. you could probably tighten it up some if it is too loose.
thingiverse
free

YASTT (Yet Another Stackable Tool Tray) by ElmoC
... a good chance for me to make something for the customizer.
inputs are really simple. lenght, width, height, and wall thickness.
thingiverse
free

Ceiling Fan Light Bulb Pull by ElmoC
...ke it in more than one color. splitting it would make it easier to print and allow each part to be printed in a different color.
thingiverse
free

Universal Spool Roller (Flanged Bearing) by ElmoC
...or completeness.
note: the no derivative restrict only applies to automated bots and being used as part of a multi-part creation.
Calibration
turbosquid
$15
DEFIBRILLATOR CALIBRATORS
... available on turbo squid, the world's leading provider of digital 3d models for visualization, films, television, and games.
turbosquid
$3
Calibration Test Benches
...libration test benches for download as 3ds, obj, c4d, and fbx on turbosquid: 3d models for games, architecture, videos. (1355804)
turbosquid
$79

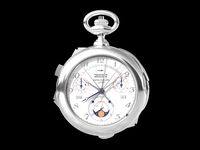
Tag Heuer Monaco Calibre 11
...free 3d model tag heuer monaco calibre 11 for download as max on turbosquid: 3d models for games, architecture, videos. (1634427)
turbosquid
$50

Smith & Wesson 50 Calibre Magnum
... available on turbo squid, the world's leading provider of digital 3d models for visualization, films, television, and games.
3d_export
$10
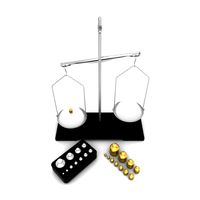
Laboratory Calibration Weight Set 1 3D Model
... 3d model
3dexport
laboratory lab science equipment weight set
laboratory calibration weight set 1 3d model bessoo 88084 3dexport
3d_export
$15
Laboratory Scale and Calibration Weight Set 3D Model
...port
laboratory lab science equipment weight set scale
laboratory scale and calibration weight set 3d model bessoo 88203 3dexport
3d_export
$5
3D printer filament calibration tool 3D Model
...ernier
3d printer filament calibration tool 3d model download .c4d .max .obj .fbx .ma .lwo .3ds .3dm .stl locoman 107942 3dexport
3d_export
$59
tag heuer link calibre 16 watch
...built to real-world scale. units used: centimeters. model is 18 centimeters tall.<br>scene objects are organized by groups.
3d_export
free
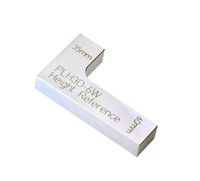
laser height reference calibration tool opt lasers
...ind out more about the engraving and cutting laser heads, this item was designed to work with, take a look at the following page:
3d_export
$99
Patek Philippe White Gold Calibre 89
...br>please note: this 3d model like all my other models cannot be used as nft, as is or modified<br>thank you for reading
Gauge
3d_ocean
$10
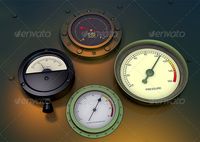
Gauges
...rim to them. each gauge has an xpresso tag to give them an automatic animation without the need for keyframing and can be chan...
3d_export
$5

pressure gauge
...pressure gauge
3dexport
pressure gauge
3d_export
$5
gauge protector
...gauge protector
3dexport
gauge protector
3d_export
$5
Gauge 3D Model
...gauge 3d model
3dexport
gauge pressure gas air liquid
gauge 3d model fau 71180 3dexport
3d_export
$5

protected pressure gauge
...protected pressure gauge
3dexport
protected pressure gauge
3d_export
$5

hard gauge protector
...hard gauge protector
3dexport
hard gauge protector
turbosquid
$29
Screw Gauge
... available on turbo squid, the world's leading provider of digital 3d models for visualization, films, television, and games.
turbosquid
$29
Marking Gauge
... available on turbo squid, the world's leading provider of digital 3d models for visualization, films, television, and games.
turbosquid
$20

Blade Gauge
... available on turbo squid, the world's leading provider of digital 3d models for visualization, films, television, and games.
3d_export
$5
12 Gauge 3D Model
...12 gauge 3d model
3dexport
shotgun shell gauge 12
12 gauge 3d model pirog 54511 3dexport
Filament
3ddd
$1

Filament Cage
...filament cage
3ddd
лофт , filament cage
модель бра, делалась по фото!
turbosquid
$3

FILAMENT COUNTER
...d
royalty free 3d model filament counter for download as stl on turbosquid: 3d models for games, architecture, videos. (1563049)
3d_export
$5

Filament lamp 3D Model
...filament lamp 3d model
3dexport
filament lamp 3d model kevin 54161 3dexport
3d_export
$5

Filament bulb candle 3D Model
...filament bulb candle 3d model
3dexport
filament bulb-candle
filament bulb candle 3d model kevin 54163 3dexport
3d_export
$5

Filament led light bulb
...filament led light bulb
3dexport
realistic 3d model of filament light bulb with v-ray materials.
3d_export
$5

Filament led light bulb
...filament led light bulb
3dexport
realistic 3d model of filament light bulb with v-ray materials.
3d_export
$5

Filament led light bulb
...filament led light bulb
3dexport
realistic 3d model of filament light bulb with v-ray materials.
3d_export
$5

Filament led light bulb
...filament led light bulb
3dexport
realistic 3d model of filament light bulb with v-ray materials.
3d_export
$5

Filament led light bulb
...filament led light bulb
3dexport
realistic 3d model of filament light bulb with v-ray materials.
3ddd
$1

Factory filament metal shade
...factory filament metal shade
3ddd
restoration hardware
restoration hardware. 20th c. factory filament metal shade.