Thingiverse

FDM printed SLA-Printer by TOS by Tinkering_On_Steroids
by Thingiverse
Last crawled date: 3 years, 1 month ago
Update 27.05.2018
Uploaded some video to YouTube with installation instructions for NanoDLPhttps://youtu.be/vNF5q_EgofE
Update 25.05.2018
Unfortunately detected a design flaw in the nanoDLP-Shield v 2.0 just now.
This prevents an connected stop key from working. If you use the shield with a model B design (Nextion UI) this will not affect you.
However, I updated the gerber files to v 2.1 to fix the issue.
You can find the updated gerber file in the file section of this thing.
An graphic that describes the issue and the fix was added to the galery.https://cdn.thingiverse.com/renders/e1/80/9d/2e/6d/2c8fb8921ea3c9bb4391917d14888a1e_preview_featured.JPG
Also added a PDF-file that contains the paper templates for the reflector mirror to the files section.
Update 04.05.2018
Uploaded some video to YouTube with build instructions for the UV-reflector
https://youtu.be/w0hcv9C8mI8
Update 02.05.2018
Uploaded some video to YouTube with a guideline about preparing the hdmi display to get used for an SLA-Printer.
The video covers the following topics:
type of display and components used
interconnection of components and display to raspberry pi
initial test of display
removal of backlight
application of protective glass
recovering/cleanup of adhesive layer of protective glass
https://youtu.be/zdHR6w-UEnI
Update 28.04.2018
uploaded some build instructions for the UV-LED-Box. You can find them at...https://youtu.be/Y7dDw7RyXCs
Update 26.04.2018
Slightly modified the nanoDLP-schield, so that screw terminals can be used for 12 v input and 12 v UV-LED.
Also created a video that shows how to solder the nanoDLP shield:https://youtu.be/Muqkb-LbFVw
Update 09.04.2018
Nextion is next! ;-)
The Nextion UI for nanoDLP is based upon Julien Delnatte (aka Tibus) "TouchScreen-For-NanoDLP" (credit where credit's due!)https://github.com/Tibus/TouchScreen-For-NanoDLP/blob/master/README.md
I added the follwing functions on top of his work:
show TCP/IP on home screen
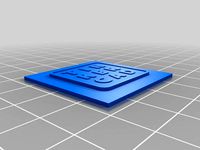
show QR-Code of TCP/IP for comfortable smartphone access
added Shutdown button
added Reboot button
added Function to add Plates
added Function to delete Plates
replaced text buttons with graphical icons
https://youtu.be/yKJH2sTfvlE
Update 05.04.2018 (2):
Started working on an 'model B' which is basically the same, but replaces the frontpanel with 3.2 inch Nextion display. For this the core- and hull parts must be replaced with
tosla_32_nxt32core.stl
tosla_32_nxt32hull.stl
Update 05.04.2018:
Big thanks to my friend Mats Zander, who was so kind to create Gerber-files for the nanoDLP-shield. The ZIP-file is now available on the Thing-Files-Section of the thing. This allows to order a professional manufactured PCB by any online provider. Of course you still need to solder the components to it, but the task becomes much easier!
BTW: we added one more connector to support Nextion displays!
Update 12.03.2018:
Uploaded some video on YouTube to explain the nanodlp shield schematic:https://youtu.be/Wb5JIAkboEg
Update 19.02.2018:
While testing, it turned out that I underestimated the criticality of a good VAT design. While I liked the simplicity of the predecessing VAT design a lot, it turned out that it just wasn't able to maintain the tension of the foil over a longer period.
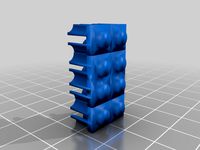
Today I uploaded a enhanced VAT design, consisting of 3 seperate 3D printed parts.
Build instructions for the new VAT can be found on YouTube:https://youtu.be/L0omLMDEv60
Update 03.02.2018:
Uploaded some build instructions for the printer body and z-axis to YouTube...https://youtu.be/DbIEzbua1AI
Update 01.02.2018:
Uploaded "tosla_31_uvdifusor.stl". Must be printed in transparent material and need to be installed inside the uv-reflector.
Update 29.01.2018:
First successful test today. Here is some video footage:https://youtu.be/10tiZy_Tpp8
Update 26.01.2018:
updated zslider to "tosla_31_zslider.stl"
(only "cosmetics" and less material, no functional change; older version can still be used)
Update 20.01.2018:
this is a major update that reflects first test results and fixes a lot of issues:
changed build plate to aluminium with hole-pattern to reduce suction effect, therefore 3D-printed part consists only of the handle, aluminium plate must be cutted, drilled separately.
shortened z-gantry to reduce leverage effect of forces to the z-axis.
moved z-stepper motor and smooth rods closer to vat, so z-gantry can be more shortened (see above)
used space that become availble by moving z-stepper motor to the front to add two additional aluminium bars (15x15 mm) to the back of the printer. This will add a lot of stability to the z-axis.
redesigned the VAT completely as it turned out that it was way to over-engineered in the first place
re-positioned z-endstops to fit in available spaces after re-positioning all the other stuff
...therefore the following 3D-printed parts have been updated to reflect all those changes:
updated the vat base to "tosla_28_vat.stl" (less parts/material, better assambly of foil)
updated the build plate to "tosla_29_zplate.stl"
updated the z-slider to "tosla_29_zslider.stl"
updated the z-top to "tosla_29_ztop.stl"
updated the z-shaft to "tosla_29_zshaft.stl"
updated the body-core to "tosla_29_bodycore.stl"
Update 14.01.2018:
updated the vat base to "tosla_26_vatbase.stl" to fix a minor issue.
updated the vat basin to "tosla_26_vatbasin.stl" to fix a minor issue.
Update 09.01.2018:
added missing uv-reflector-frame "tosla_25_uvreflector.stl"
updated the vat base to "tosla_25_vatbase.stl" to fix a minor issue.
updated the vat basin to "tosla_25_vatbasin.stl" to fix a minor issue.
Just a pre-release of the STL's for my FDM-printed SLA printer.
It's still work in progress, therefore no final/complete BOM and/or instructions for the moment.
There is a first video on YouTube that explains the z-gantry design:https://youtu.be/xuOsPoC8g8Q
BOM (work in progress):
Raspberry Pi Modell 3
5.5 inch lcd display 2560x1440,
HDMI-MIPI driver pcb compatible with 5.5 inch display
glass protector for 5.5 inch dispaly
DC converter 9a 4-40 V to 1,2-34 V, adjustable constant current (65x48x24mm)
FEP film (150 x 200 mm, 0.025 mm thick)
2x microswitch 3pin NO/NC/C, 1a 125 VAC (12,8x5.8x10mm)
12v 5a external power supply (barrel connector 2.1 ID, 5.5 OD)
Nema 17 stepper motor
flat HDMI cable with 90 degree type A connector 200 mm flat ribbon cable
UV-Light box:
4x 10 watt power UV-LED, 405nm wavelength
130 x 56 x 20 mm aluminium heatsink
40 x 40 x 10 mm 12v fan
thermal adhesive tape (as used for heatsink assamblies)
Model A only (1602 display):
1602 Serial LCD module with I2C interface
5mm LED
tactile switch 6x6x4,3, 4pin
hole matrix board 20 x 34 mm, double sided, 2.54 mm pitch/ 0.1 inch pitch
Model B only (Nextion display):
3.2 inch enhanced Nextion display
nanoDlp-shield:
voltage regulator pcb MP1584EN
DRV8825 stepper driver (or pin compatible)
mosfet IRFZ44N
some resistores (1x 100 Ohm, 4x 10k, 1x 100k)
capacitor 50v 100µF
some pinhead connectors (1x 2x20 female, 4x 1x2 female, 2x 1x8 female, 3x 1x4 male, 2x 1x3 male, 4x 1x2 male)
2x screw terminal (2pins, 5.08mm pitch)
nanodlp PCB (Gerber-files, see file-sections)
circular power switch, 19mm diameter, 250 VDC 6 Ampere
female barrel power connector (2.1 ID, 5.5 OD)
a bunch of m3 10mm screws
2x LM8LUU linear bearings
2x aluminium pipes 8mm OD x 350mm
2x aluminium bars 15x15mm x 350mm
1x leadscrew 8mm x 300mm
1x leadscrew nut 8mm
(...to be continued)
There will be some update with more details later.
Regards, TOS
Uploaded some video to YouTube with installation instructions for NanoDLPhttps://youtu.be/vNF5q_EgofE
Update 25.05.2018
Unfortunately detected a design flaw in the nanoDLP-Shield v 2.0 just now.
This prevents an connected stop key from working. If you use the shield with a model B design (Nextion UI) this will not affect you.
However, I updated the gerber files to v 2.1 to fix the issue.
You can find the updated gerber file in the file section of this thing.
An graphic that describes the issue and the fix was added to the galery.https://cdn.thingiverse.com/renders/e1/80/9d/2e/6d/2c8fb8921ea3c9bb4391917d14888a1e_preview_featured.JPG
Also added a PDF-file that contains the paper templates for the reflector mirror to the files section.
Update 04.05.2018
Uploaded some video to YouTube with build instructions for the UV-reflector
https://youtu.be/w0hcv9C8mI8
Update 02.05.2018
Uploaded some video to YouTube with a guideline about preparing the hdmi display to get used for an SLA-Printer.
The video covers the following topics:
type of display and components used
interconnection of components and display to raspberry pi
initial test of display
removal of backlight
application of protective glass
recovering/cleanup of adhesive layer of protective glass
https://youtu.be/zdHR6w-UEnI
Update 28.04.2018
uploaded some build instructions for the UV-LED-Box. You can find them at...https://youtu.be/Y7dDw7RyXCs
Update 26.04.2018
Slightly modified the nanoDLP-schield, so that screw terminals can be used for 12 v input and 12 v UV-LED.
Also created a video that shows how to solder the nanoDLP shield:https://youtu.be/Muqkb-LbFVw
Update 09.04.2018
Nextion is next! ;-)
The Nextion UI for nanoDLP is based upon Julien Delnatte (aka Tibus) "TouchScreen-For-NanoDLP" (credit where credit's due!)https://github.com/Tibus/TouchScreen-For-NanoDLP/blob/master/README.md
I added the follwing functions on top of his work:
show TCP/IP on home screen
show QR-Code of TCP/IP for comfortable smartphone access
added Shutdown button
added Reboot button
added Function to add Plates
added Function to delete Plates
replaced text buttons with graphical icons
https://youtu.be/yKJH2sTfvlE
Update 05.04.2018 (2):
Started working on an 'model B' which is basically the same, but replaces the frontpanel with 3.2 inch Nextion display. For this the core- and hull parts must be replaced with
tosla_32_nxt32core.stl
tosla_32_nxt32hull.stl
Update 05.04.2018:
Big thanks to my friend Mats Zander, who was so kind to create Gerber-files for the nanoDLP-shield. The ZIP-file is now available on the Thing-Files-Section of the thing. This allows to order a professional manufactured PCB by any online provider. Of course you still need to solder the components to it, but the task becomes much easier!
BTW: we added one more connector to support Nextion displays!
Update 12.03.2018:
Uploaded some video on YouTube to explain the nanodlp shield schematic:https://youtu.be/Wb5JIAkboEg
Update 19.02.2018:
While testing, it turned out that I underestimated the criticality of a good VAT design. While I liked the simplicity of the predecessing VAT design a lot, it turned out that it just wasn't able to maintain the tension of the foil over a longer period.
Today I uploaded a enhanced VAT design, consisting of 3 seperate 3D printed parts.
Build instructions for the new VAT can be found on YouTube:https://youtu.be/L0omLMDEv60
Update 03.02.2018:
Uploaded some build instructions for the printer body and z-axis to YouTube...https://youtu.be/DbIEzbua1AI
Update 01.02.2018:
Uploaded "tosla_31_uvdifusor.stl". Must be printed in transparent material and need to be installed inside the uv-reflector.
Update 29.01.2018:
First successful test today. Here is some video footage:https://youtu.be/10tiZy_Tpp8
Update 26.01.2018:
updated zslider to "tosla_31_zslider.stl"
(only "cosmetics" and less material, no functional change; older version can still be used)
Update 20.01.2018:
this is a major update that reflects first test results and fixes a lot of issues:
changed build plate to aluminium with hole-pattern to reduce suction effect, therefore 3D-printed part consists only of the handle, aluminium plate must be cutted, drilled separately.
shortened z-gantry to reduce leverage effect of forces to the z-axis.
moved z-stepper motor and smooth rods closer to vat, so z-gantry can be more shortened (see above)
used space that become availble by moving z-stepper motor to the front to add two additional aluminium bars (15x15 mm) to the back of the printer. This will add a lot of stability to the z-axis.
redesigned the VAT completely as it turned out that it was way to over-engineered in the first place
re-positioned z-endstops to fit in available spaces after re-positioning all the other stuff
...therefore the following 3D-printed parts have been updated to reflect all those changes:
updated the vat base to "tosla_28_vat.stl" (less parts/material, better assambly of foil)
updated the build plate to "tosla_29_zplate.stl"
updated the z-slider to "tosla_29_zslider.stl"
updated the z-top to "tosla_29_ztop.stl"
updated the z-shaft to "tosla_29_zshaft.stl"
updated the body-core to "tosla_29_bodycore.stl"
Update 14.01.2018:
updated the vat base to "tosla_26_vatbase.stl" to fix a minor issue.
updated the vat basin to "tosla_26_vatbasin.stl" to fix a minor issue.
Update 09.01.2018:
added missing uv-reflector-frame "tosla_25_uvreflector.stl"
updated the vat base to "tosla_25_vatbase.stl" to fix a minor issue.
updated the vat basin to "tosla_25_vatbasin.stl" to fix a minor issue.
Just a pre-release of the STL's for my FDM-printed SLA printer.
It's still work in progress, therefore no final/complete BOM and/or instructions for the moment.
There is a first video on YouTube that explains the z-gantry design:https://youtu.be/xuOsPoC8g8Q
BOM (work in progress):
Raspberry Pi Modell 3
5.5 inch lcd display 2560x1440,
HDMI-MIPI driver pcb compatible with 5.5 inch display
glass protector for 5.5 inch dispaly
DC converter 9a 4-40 V to 1,2-34 V, adjustable constant current (65x48x24mm)
FEP film (150 x 200 mm, 0.025 mm thick)
2x microswitch 3pin NO/NC/C, 1a 125 VAC (12,8x5.8x10mm)
12v 5a external power supply (barrel connector 2.1 ID, 5.5 OD)
Nema 17 stepper motor
flat HDMI cable with 90 degree type A connector 200 mm flat ribbon cable
UV-Light box:
4x 10 watt power UV-LED, 405nm wavelength
130 x 56 x 20 mm aluminium heatsink
40 x 40 x 10 mm 12v fan
thermal adhesive tape (as used for heatsink assamblies)
Model A only (1602 display):
1602 Serial LCD module with I2C interface
5mm LED
tactile switch 6x6x4,3, 4pin
hole matrix board 20 x 34 mm, double sided, 2.54 mm pitch/ 0.1 inch pitch
Model B only (Nextion display):
3.2 inch enhanced Nextion display
nanoDlp-shield:
voltage regulator pcb MP1584EN
DRV8825 stepper driver (or pin compatible)
mosfet IRFZ44N
some resistores (1x 100 Ohm, 4x 10k, 1x 100k)
capacitor 50v 100µF
some pinhead connectors (1x 2x20 female, 4x 1x2 female, 2x 1x8 female, 3x 1x4 male, 2x 1x3 male, 4x 1x2 male)
2x screw terminal (2pins, 5.08mm pitch)
nanodlp PCB (Gerber-files, see file-sections)
circular power switch, 19mm diameter, 250 VDC 6 Ampere
female barrel power connector (2.1 ID, 5.5 OD)
a bunch of m3 10mm screws
2x LM8LUU linear bearings
2x aluminium pipes 8mm OD x 350mm
2x aluminium bars 15x15mm x 350mm
1x leadscrew 8mm x 300mm
1x leadscrew nut 8mm
(...to be continued)
There will be some update with more details later.
Regards, TOS
Similar models
grabcad
free

Nextion 7 " Display
...nextion 7 " display
grabcad
7 inch intelligent series display
thingiverse
free

ASP (Elite Dangerous) by JotaErre
...015/ 08 / 01
fixed some mesh issues.
update 2016/ 01/ 21
fixed some mesh issues.
added 3 separated meshes (main, fins, exhaust)
thingiverse
free

snapmaker 2.0 snap turtle cutter by fips
...bushing" (or similar) 2x misumi sfj5-75 "linear shaft" (or similar "ø5g6 x 75") 1x rubber band 1x drag knife...
thingiverse
free

MMDVM and Nextion display 3.5 inch
...mmdvm and nextion display 3.5 inch
thingiverse
dumplex mmdvm and nextion display 3.5 inch
3dwarehouse
free

Inches Raised Garden Bed (Demian Feldman)
...inches raised garden bed (demian feldman)
3dwarehouse
for an instructional video on youtube, go to https://youtu.be/96zudog0-fa
thingiverse
free

Nextion 3.5" housing by jullit31
...xtion 3.5" housing by jullit31
thingiverse
thin symmetric housing for the 3.5" nextion display. use 2.2x6.5 mm screws.
thingiverse
free

Clean & Slim Case for Nextion 2.4" Display Module by KikiTay
...http://www.thingiverse.com/thing:2245148
check out my other designs by clicking on my profile!
kiki tayhttp://www.kikitayblog.com
thingiverse
free

Nextion 5" HMI enclosure with buttons by Nummer987
...x2mm
1x emergency button x6 serie 30mm
i also secured the display and the backplate with threaded insert nuts (m3) and m3 screws.
thingiverse
free

Front Axle 22RE engine
...e
1x - ed-013 d
1x - front-axle-housing_repaired
4x - esfera susp
2x - am-00101
2x - am-00102
2x - am-002
2x - am-003
2x - am-005
grabcad
free

Nextion NX8048K070 HMI Display
...nextion nx8048k070 hmi display
grabcad
7.0" nextion hmi display
Steroids
thingiverse
free

SHARKZ with steroids by MuuSer
...sharkz with steroids by muuser
thingiverse
picture tells more than thousands of words...
added improved one...
thingiverse
free

Warrior on steroid sword by Helix6187
... grim dark futur.
i made them for the fisty and knighty boy of one of my friend.
please share your print if you ever print them.
thingiverse
free

bench, benchy's steroid addicted cousin
...ed hydroplane cousin.
might need some support for the spoiler, i need to make a few changes to the model so it can print without.
thingiverse
free

cnc1419 "on steroids"
... but with the aluminium mount, i can now machine quite a bit faster, ( up to 500mm/min with an 5mm 4-flute endmill in aluminium).
thingiverse
free

Printrbot on Steroids by LXDickman
...r fixed (no more hole in the gear mesh, thicker at the set screw), be careful on the shells on the large gear(hollow teeth= bad))
thingiverse
free

SATSANA ON STEROIDS - BONDTECH - BMG - DIRECT DRIVE -EXTRUDER by MrSonyx3DPrint
...e details
capricorn tube length on my ender 3 with stock hotend is 92mm
feel free to ask me any questions about it.
happy printig
thingiverse
free

Cobblebot Vanguard Remix on Steroids
...t app--the free web version is quite limited in the tools that are available, and the precision isn't as tight as other apps.
thingiverse
free

PrintrPlate - Printrbot Full Build Tray (On Steroids) by sponnet
...way from the corners of your build platform , to avoid bumping into clipses at the corners of your glass plate if you have one...
thingiverse
free
Thunderbolt Starfury variant by Mike1701
...thunderbolt starfury variant by mike1701 thingiverse a starfury on steroids it can even go planetside! (grabbed from 3d warehouse...
thingiverse
free

Mount for Eachine Pro58 module for Eachine VR D2 goggles
...thingiverse you can read more about the upgrade on: http://lll.mk/fpv/eachine-pro58-boxed-goggles-on-steroids ...
Tos
turbosquid
$65

TOS 1
... available on turbo squid, the world's leading provider of digital 3d models for visualization, films, television, and games.
3d_export
$30

TOS SYSTEM 3D Model
...1 buratino russianarmy panzer
tos system 3d model download .c4d .max .obj .fbx .ma .lwo .3ds .3dm .stl enotdesign 111177 3dexport
turbosquid
$3

TOS Captain Chair
... available on turbo squid, the world's leading provider of digital 3d models for visualization, films, television, and games.
turbosquid
$80

ST TOS ROMULAN BOP
...
royalty free 3d model st tos romulan bop for download as max on turbosquid: 3d models for games, architecture, videos. (1552211)
cg_studio
$49

Three-Toed Sloth3d model
...
.max .obj .mb .lwo .fbx .c4d .3ds - three-toed sloth 3d model, royalty free license available, instant download after purchase.
humster3d
$40

3D model of Three-Toed Sloth
... a detailed 3d model of three-toed sloth in various file formats. all our 3d models were created maximally close to the original.
turbosquid
$14

TOS inspired Dagger and Agonizer prop
...and agonizer prop for download as max, obj, fbx, dwg, and stl on turbosquid: 3d models for games, architecture, videos. (1485619)
turbosquid
$12

TOS Original Series Scotty 39s Magnatomic Scope
... magnatomic scope for download as max, obj, fbx, dwg, and stl on turbosquid: 3d models for games, architecture, videos. (1488602)
archibase_planet
free
Shoes
...shoes
archibase planet
shoes open shoes open toed shoes
shoes n151112 - 3d model (*.gsm+*.3ds) for interior 3d visualization.
archibase_planet
free
Shoes
...shoes
archibase planet
shoes open shoes open toed shoes
shoes n120513 - 3d model (*.gsm+*.3ds) for interior 3d visualization.
Tinkering
thingiverse
free
TINKER CAP
...tinker cap
thingiverse
cap
thingiverse
free
Tinker obj elise
...tinker obj elise
thingiverse
tinker obj em lyon
thingiverse
free

Tinker Bot by DreadForgeMiniatures
...tinker bot by dreadforgeminiatures
thingiverse
tinker bot from dfm november 2019 pack.
thingiverse
free
Tinker Cad frame by nurcool99
...tinker cad frame by nurcool99
thingiverse
this is like a 3d picture of tinker cad
thingiverse
free

Tinker Sign by Mocha22
...tinker sign by mocha22
thingiverse
xxx
thingiverse
free
Tinker Thing by arrexender
...tinker thing by arrexender
thingiverse
this is a test model.
thingiverse
free

tinker toys by kpcampbell07
...tinker toys by kpcampbell07
thingiverse
made by ry
thingiverse
free

A tinker Toy by kpcampbell07
...a tinker toy by kpcampbell07
thingiverse
made by ry
thingiverse
free
Beet-Tinker by alithecat
...beet-tinker by alithecat
thingiverse
tinkercad sample - beetroot
thingiverse
free
Tinker CRAB by earnason
...tinker crab by earnason
thingiverse
crab designed in tinkercad
Sla
3ddd
$1

CILEK SL ACTIVE
...sl active 3ddd cilek cilek active (sl active white) sla1304 кровать...
3ddd
$1
Cilek SL ACTIVE
...3ddd cilek , стеллаж cilek active (sl active white) 1501-sla стеллаж...
3d_export
$5

ring-love norian-54-64 mm 4pcs
...norian-54 ring-love norian-56 ring-love norian-60 ring-love norian-64 suitable for sla and sls and similar printing...
3d_export
$10

cute kitten v2 stl 3d print model
...print model 3dexport solid type (fdm) and hollow type (sla & dlp)<br>stl file for 3d print<br>size :<br>x : 66...
3d_export
$5
tesseract hypercube
...each diagonal has 6 faces. you can use sls, sla and other technologies to print it. moreover different textures...
3d_export
$23
the last engineer 3d printing figurine
...will also receive "assembly manual" for fff/fdm 1.0 and dlp/sla 1.0 versions in pdf format. the figurine is saved...
3d_export
$5
groot con grabadora
...enabled, however you can also use a dlp or sla printer with resin as well. for small scale printouts,...
3d_export
$5

deer christmas 3
...enabled, however you can also use a dlp or sla printer with resin as well. you should use a...
3d_export
$5

deer christmas 2
...enabled, however you can also use a dlp or sla printer with resin as well. you should use a...
3d_export
$5

deer christmas
...enabled, however you can also use a dlp or sla printer with resin as well. you should use a...
Fdm
3d_export
$15

old brick wall with corner version
...texture + corner version. miniatures printing - resin & fdm ...
3d_export
$5

shutter shade sunglasses
...shutter shade sunglasses 3dexport this model suitable for fdm printer, the gaps between two dynamic part is 0.4...
3d_export
$5

toggle clamp
...model to your favorite size. this model design for fdm 3d printing plus it design with standard sheet metal...
3d_export
$10
cute kitten v2 stl 3d print model
...kitten v2 stl 3d print model 3dexport solid type (fdm and hollow type (sla & dlp)<br>stl file for 3d...
3d_export
free

Articulated centipede
...actual scale is the smallest scale i've tried for fdm with perfect results. you can scale it up with...
3d_export
$5
groot con grabadora
...is recommended to print these models with a good fdm printer by using some supports enabled, however you can...
3d_export
$5
deer christmas 3
...is recommended to print these models with a good fdm printer by using some supports enabled, however you can...
3d_export
$5
deer christmas 2
...is recommended to print these models with a good fdm printer by using some supports enabled, however you can...
3d_export
$5
deer christmas
...is recommended to print these models with a good fdm printer by using some supports enabled, however you can...
3d_export
$5
deer christmas 5
...is recommended to print these models with a good fdm printer by using some supports enabled, however you can...
Printer
archibase_planet
free

Printer
...inter
archibase planet
printer laser printer pc equipment
printer n120614 - 3d model (*.gsm+*.3ds) for interior 3d visualization.
archibase_planet
free

Printer
...rchibase planet
laser printer office equipment computer equipment
printer - 3d model (*.gsm+*.3ds) for interior 3d visualization.
turbosquid
$100

Printer
...er
turbosquid
royalty free 3d model printer for download as on turbosquid: 3d models for games, architecture, videos. (1487819)
turbosquid
$3

Printer
...turbosquid
royalty free 3d model printer for download as max on turbosquid: 3d models for games, architecture, videos. (1670230)
turbosquid
$1

printer
...turbosquid
royalty free 3d model printer for download as max on turbosquid: 3d models for games, architecture, videos. (1595546)
turbosquid
$1

printer
...turbosquid
royalty free 3d model printer for download as max on turbosquid: 3d models for games, architecture, videos. (1595105)
turbosquid
$10

Printer
...id
royalty free 3d model printer for download as max and 3dm on turbosquid: 3d models for games, architecture, videos. (1607146)
turbosquid
$7

Printer
...royalty free 3d model printer for download as ma, ma, and obj on turbosquid: 3d models for games, architecture, videos. (1644580)
turbosquid
$30

Printer
... available on turbo squid, the world's leading provider of digital 3d models for visualization, films, television, and games.
turbosquid
$20

Printer
... available on turbo squid, the world's leading provider of digital 3d models for visualization, films, television, and games.
Printed
design_connected
$27

...print
designconnected
moroso print computer generated 3d model. designed by wanders, marcel.
3ddd
free

Eichholtz Prints
...- eichholtz print central station i
13 - eichholtz print central station ii
14 - eichholtz print marisa
15 - eichholtz print tish
3ddd
$1

Eichholtz Prints
...print abstract - set of 2
10 - eichholtz print orange abstract
11 - eichholtz print buddha right
12 - eichholtz print buddha left
turbosquid
$1

... available on turbo squid, the world's leading provider of digital 3d models for visualization, films, television, and games.
3ddd
free

Eichholtz Prints
...of 4
2 - print dunbar 2 set of 4
3 - print guadeloupe 1 set of 4
4 - print guadeloupe 2 set of 4
5 - print giles
6 - print trett
3ddd
$1

Eichholtz Prints
...nt tutti frutti
3 - eichholtz prints watson - set of 2
4 - eichholtz prints antique nautilus - set of 2
5 - eichholtz print tiara
3d_export
$5

Monster for printing
...monster for printing
3dexport
monster 3d model printing
3ddd
free

printed rug
...printed rug
3ddd
ковер
very creative printed rug
3ddd
free

Eichholtz Prints
...иал: бумага
габариты (вхш): 72 x 62 см
описание: print sweetmeat - постер в деревянной раме.
3 - prints varsity set of 2
арти
3ddd
free

Art Print Posters
...art print posters
3ddd
прованс
art print posters by patrician prints