Thingiverse
Ez Arduino 8 DOF Quadruped Robot by manic-3d-print
by Thingiverse
Last crawled date: 3 years ago
This robot is obsolete, see the update version here.
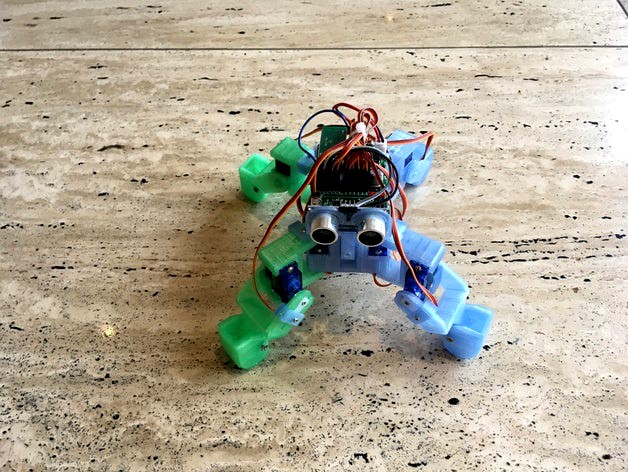
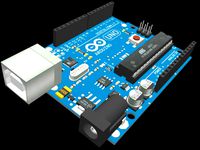
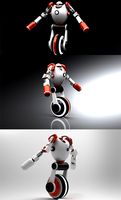
This quadruped robot is driven by an arduino board and using low price cheap tower pro 9g servo. It has two play modes. One is autonomous which it walks itself randomly in each 5 seconds to different directions. Another is played using an Android app. With ultrasonic distance sensor it will avoid obstacle in front.
Video Demo:https://youtu.be/QG3WbcEscfIhttps://youtu.be/K2RES72E9Pw
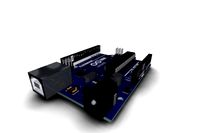
Electronics for Demo Built:
1) GSTduino with on-board SPP-C-Bluetooth-UART board.
2) a 3.7V 18650 lithium-ion battery pack (two 18650 batteries in parallel), to charge the battery find our another design.
3) 8 x Tower Pro 9g servo.
4) a HC-SR04 ultrasonic distance sensor. This is optional if you don't want obstacle detection
5) a SPP-C Bluetooth UART or equivalent for Andriod phone control. Baud rate sets to 115200. You don't need to buy separately if you use item 1.
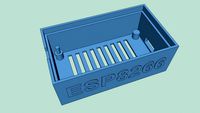
To charge batteries, you can use the charger dock we design.
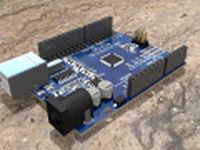
If you use other Arduino board such as nano, likely you will need a I/O shield for connecting servos. If you are experienced maker, of cause you can use a proto board to customized one. The body of robot is the chamber which can hold two 18650 Lithium-ion batteries. You may have to look after the power regulator too.
Hardware:
1) Dupoint wires
2) Eight M2x4 tapping screws for servo arm clip and M2x6 tapping screws for others
Software:
1) Arduino code on githup
2) Android app on Google Play.
Alternative, you can use the software in our another design thing:2317065, this is the demo https://youtu.be/Htz4qVPmL7Y
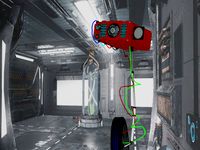
Wring:
Connection to digital pins of Arduino are as following -
1) D2 to front right hip servo
2) D3 to front right leg servo
3) D4 to back right hip servo
4) D5 to back right leg servo
5) D6 to back left hip servo
6) D7 to back left leg servo
7) D8 to front left hip servo
8) D9 to front left leg
9) D10 to HC-SR04 trigger pin
10) D11 to HC-SR04 echo pin
11) D12 for play mode selection, to 0V (low state) or 3.3V(high state)
12) Bluetooth UART module to the board's Bluetooth connector
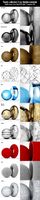
All servos initial angles must set to 90° as the photo showing initial posture. HC-SR04 power input is to 5V pin.
This quadruped robot is driven by an arduino board and using low price cheap tower pro 9g servo. It has two play modes. One is autonomous which it walks itself randomly in each 5 seconds to different directions. Another is played using an Android app. With ultrasonic distance sensor it will avoid obstacle in front.
Video Demo:https://youtu.be/QG3WbcEscfIhttps://youtu.be/K2RES72E9Pw
Electronics for Demo Built:
1) GSTduino with on-board SPP-C-Bluetooth-UART board.
2) a 3.7V 18650 lithium-ion battery pack (two 18650 batteries in parallel), to charge the battery find our another design.
3) 8 x Tower Pro 9g servo.
4) a HC-SR04 ultrasonic distance sensor. This is optional if you don't want obstacle detection
5) a SPP-C Bluetooth UART or equivalent for Andriod phone control. Baud rate sets to 115200. You don't need to buy separately if you use item 1.
To charge batteries, you can use the charger dock we design.
If you use other Arduino board such as nano, likely you will need a I/O shield for connecting servos. If you are experienced maker, of cause you can use a proto board to customized one. The body of robot is the chamber which can hold two 18650 Lithium-ion batteries. You may have to look after the power regulator too.
Hardware:
1) Dupoint wires
2) Eight M2x4 tapping screws for servo arm clip and M2x6 tapping screws for others
Software:
1) Arduino code on githup
2) Android app on Google Play.
Alternative, you can use the software in our another design thing:2317065, this is the demo https://youtu.be/Htz4qVPmL7Y
Wring:
Connection to digital pins of Arduino are as following -
1) D2 to front right hip servo
2) D3 to front right leg servo
3) D4 to back right hip servo
4) D5 to back right leg servo
5) D6 to back left hip servo
6) D7 to back left leg servo
7) D8 to front left hip servo
8) D9 to front left leg
9) D10 to HC-SR04 trigger pin
10) D11 to HC-SR04 echo pin
11) D12 for play mode selection, to 0V (low state) or 3.3V(high state)
12) Bluetooth UART module to the board's Bluetooth connector
All servos initial angles must set to 90° as the photo showing initial posture. HC-SR04 power input is to 5V pin.
Similar models
thingiverse
free

Ez Arduino 8 DOF Quadruped Robot - MiniKame by manic-3d-print
...to front left leg
9) d12 for setup mode (see the assemble video)
10) bluetooth uart module to the board's bluetooth connector
thingiverse
free

Arduino Door (Puerta) for Micro Servo 9g by jordansoy
...hingiverse
arduino door (puerta) for micro servo 9g .
level crossing - paso a nivel
servo 180
ultrasonic distance sensor hc-sr04
thingiverse
free

Quadruped Spider Robot by 3Dadicto
...ts:
8 micro servos
1 arduino nano
1 bluetooth hc-06 for arduino
1 4aa battery case
1 switch
2 leds
wires
2 screws m3x20
2 nuts m3
thingiverse
free

Ultrasonic sensor (HC-SR04, US-015) holder by metshein
...asonic sensor (hc-sr04, us-015) holder by metshein
thingiverse
ultrasonic sensor (hc-sr04, us-015) holder for arduino 2wd robot.
thingiverse
free
Ez Arduino MiniKame - 8 DOF Quadruped Robot (Arduino Nano with Shield) by Bhm93
...youtu.be/z36ekf0ifoa
i used:
8 servos sg90
1 arduino nano
1 shield arduino nano v3
1 bluetooth hc-05
1 lipo battery 7,5v
1 lm2596
thingiverse
free
Bobwi - Cheap, dancing robot. (with BT and easy to print) by galile0
.....
for the source code (3d parts and arduino code) to make bobwi dance, or be controlled from android.
https://github.com/g4lile0
thingiverse
free

Smart Robot Mounting Servo Brackets for HC-SR04 by markaerrington
...-sr04 ultrasonic ranging module and the analog servo.
this is the same one that you can buy online. mine broke, so i made my own.
grabcad
free

HC-SR04 Ultrasonic sensor
...hc-sr04 ultrasonic sensor
grabcad
hc-sr04 ultrasonic arduino sensor outline file for use in design work.
thingiverse
free

Ultrasonic Sensor HC-SR04 by jeremy2nis
...ultrasonic sensor hc-sr04 by jeremy2nis
thingiverse
ultrasonic sensor hc-sr04 for arduino
thingiverse
free

MR - 3 : 9G Servo Driven Robot by timmiclark
...sion for the adafruit rgb color sensor
the wheel traction is provided by a "fowlers vacola" size 3 preserving jar seal.
Manic
3ddd
$1

подушки Manic
...dd
подушки manic , подушка , сова
подушки manic
3d_sky
$8

Manic pillows
...manic pillows
3dsky
pillow
manic pillows
thingiverse
free

Manic Miner's Willy character by Artemisio
...willy character by artemisio
thingiverse
the main character of the infamous manic miner game for zx spectrum
back from the 1983.
thingiverse
free

Box that fits in the bag for manic mini 2 by Loop7500
...box that fits in the bag for manic mini 2 by loop7500
thingiverse
box that fits in the bag for manic mini 2
thingiverse
free
ZX Spectrum Manic Miner Coaster Set by mattstroud
... have a dual head extruder, print the character on each coaster with a different colour to really make them stand out.
enjoy!!!
thingiverse
free

Manic Miner Character - Miner Willy by Dorchester3D
...e is a 3d model of miner willy from the zx spectrum game manic miner! can be printed laying flat without needing to use supports.
thingiverse
free

Ez Wii Nunchuk Adaptor Housing by manic-3d-print
...ez wii nunchuk adaptor housing by manic-3d-print
thingiverse
for convenience to use wii nunchuck in projects
thingiverse
free

Box that fits in the bag/lid for manic mini 2 by Loop7500
...that fits in the bag/lid for manic mini 2 by loop7500
thingiverse
a box that fits in the lid of the bag that the mini 2 comes in
thingiverse
free

Ez 18650 Battery Clip by manic-3d-print
... a rubber band. be caution and make sure you are aware of which is positive and negative terminals when is used in your project.
thingiverse
free

Ez TT motor Hub For Pololu Wheel 42×19mm by manic-3d-print
...19mm is for motor having 3mm d output shafts. this hub replaces white plastic hub so that the wheel can used with cheap tt motor.
Quadruped
turbosquid
$15

Quadruped Creature
...ree 3d model quadruped creature for download as fbx and blend on turbosquid: 3d models for games, architecture, videos. (1362679)
turbosquid
$99

Bunny Rabbit Quadruped
...model bunny rabbit quadruped for download as ma, obj, and fbx on turbosquid: 3d models for games, architecture, videos. (1412410)
3d_export
$15
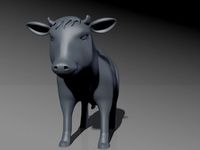
Cow Model with UVs 3D Model
...with uvs 3d model 3dexport cow model animal mammal quadruped cow model with uvs 3d model zeta 58962...
3d_export
$99

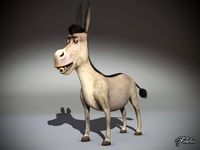
Donkey 3D Model
...3d model 3dexport donkey shrek character dreamworks sony animal quadruped peolpe male fantasy game movie motion picture cartoon photorealistic...
3d_export
$49
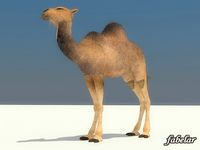
Camel 3D Model
...camel 3d model 3dexport camel egypt africa hump humpbacked quadruped mammal animal dromedary desert walking arabia egypt arabian camels...
3d_ocean
$8

Low Poly Horse Base Mesh
...3docean animal base games horse low mammal mesh poly quadruped this is a low poly base mesh of a...
3d_export
$5
robot pack
...and uploaded with maya. it includes:<br>- three head types.<br>- quadruped robots.<br>- three-legged robots.<br>- six-legged...
3d_export
$179

SHREK DONKEY 3D Model
...3d model 3dexport donkey shrek character dreamworks sony animal quadruped peolpe male fantasy game movie motion picture cartoon photorealistic...
3d_ocean
$65
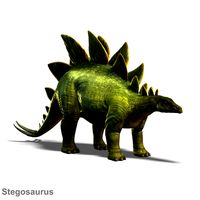
Stegosaurus
...stegosaurus 3docean dinosaur herbivore herbivorous prehistoric quadraped quadruped roof lizard stegasaurus stegosaurus this package contains a high...
3d_export
$99
Donkey std mat 3D Model
...3d model 3dexport donkey shrek character dreamworks sony animal quadruped peolpe male fantasy game movie motion picture cartoon photorealistic...
Dof
turbosquid
free

hallway-DOF
... available on turbo squid, the world's leading provider of digital 3d models for visualization, films, television, and games.
3d_ocean
$4

DVD Cases with DOF
...th c4d r10 or later. great for displaying your dvds. i added proper depth of field which you will see when you render the scen...
3ddd
$1
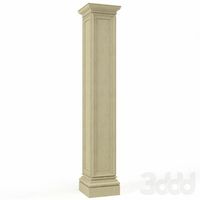
interior column
...interior column 3ddd колонна classic column dof ...
3d_ocean
$8
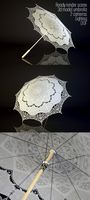
3d model lacy umbrella and render scene
...model lacy umbrella and render scene 3docean 3d accessory dof lacy model render scene umbrella vray 3d model lacy...
3d_ocean
$18
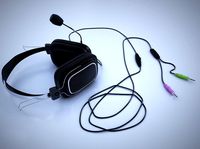
Realistic Headphones
...headphones, great for interior visualization. highly detailed, great for dof ...
3d_ocean
$15
Ready collection V-ray tileable materials
...ready collection v-ray tileable materials 3docean cameras collection concrete dof fabric glass grid light max2010 metal black gloss mix...
3d_ocean
$12

Umbrella
...umbrella 3docean 3d accessory dof lacy model render scene umbrella vray 3d model of...
3d_ocean
$6

Nail Clippers
...model suitable for close-up render’s. included modo file hsa dof (depth of field) applied. included moi source file in...
3d_ocean
$9
Easy Render Scene For C4D/Vray
...scene for c4d/vray 3docean 3d rendering depth of field dof render scene scene through this complete scene you will...
3d_ocean
$5

Vray scene setup
...setup 3. 2 vray cameras, one of them with dof 4. vray lights 5. vitra panton chair model 6....
Ez
turbosquid
$15

EZ stack cutting
...ree 3d model ez stack cutting for download as sldpr and sldas on turbosquid: 3d models for games, architecture, videos. (1422984)
turbosquid
$35
LG Flatron ez T710BH
... available on turbo squid, the world's leading provider of digital 3d models for visualization, films, television, and games.
3d_export
$99

Toyota Verso EZ 2013 3D Model
...a verso e'z ez 2012 2013 2014 2015 2016 mpv van minivan japan japanese
toyota verso ez 2013 3d model humster3d 65289 3dexport
turbosquid
$119
Renault EZ-Go concept - rigged
... concept - rigged for download as max, max, 3ds, fbx, and obj on turbosquid: 3d models for games, architecture, videos. (1525261)
turbosquid
$3

Digital Camera: BTEC EZ Shot 4002
... available on turbo squid, the world's leading provider of digital 3d models for visualization, films, television, and games.
3d_export
$99

Toyota Verso EZ 2012 3D Model
...ta verso e'z 2012 2013 2014 2015 hatchback compact b-mpv mpv urban cvt
toyota verso ez 2012 3d model humster3d 50814 3dexport
3d_export
$5
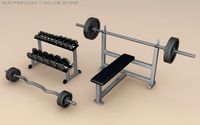
3 Peice Weight Training Set 3D Model
...3d model 3dexport dumb bell bar dumbell dumbbell ez ezar bench benchpress press weight rack 3 peice weight training...
3d_export
$16

Ibaez guitar 3D Model
...a render musica guitarra
ibaez guitar 3d model download .c4d .max .obj .fbx .ma .lwo .3ds .3dm .stl downriversumo 108254 3dexport
3d_ocean
$89

Toyota Verso (E'Z) 2013
...toyota verso (e'z) 2013 3docean 2012-2016 e'z ez japan japanese minivan mpv toyota toyota verso van verso...
cg_studio
$99

Toyota Verso (E'Z) 20133d model
...20133d model cgstudio cars mpv van toyota verso e'z ez 2012 2013 2014 2015 2016 minivan japan japanese .3ds...
Arduino
turbosquid
$7
Arduino
...turbosquid
royalty free 3d model arduino for download as max on turbosquid: 3d models for games, architecture, videos. (1197165)
turbosquid
$3
Arduino
...turbosquid
royalty free 3d model arduino for download as c4d on turbosquid: 3d models for games, architecture, videos. (1305484)
3d_export
$5
arduino satellite
...rt
this model is the exact arduino based satellite model with some basic sensors and camera modules and also includes batteries.
turbosquid
$1
Arduino UNO
...alty free 3d model arduino uno for download as , stl, and wrl on turbosquid: 3d models for games, architecture, videos. (1515932)
3d_export
$5
esp8266 box arduino
...esp8266 box arduino
3dexport
box for esp8266 module with wire hole. inside dimensions: 49x26 mm. height 15 mm.
3d_export
$60
Arduino Uno Rev3 Microcontroller 3D Model
...mega328p circuit board spark cable wire 5v 74v 9v 111v
arduino uno rev3 microcontroller 3d model danielgarnier4403 97237 3dexport
3d_export
free
arduino rover kit
...no!!! materials: no!!! rigged: no animated: no uv mapped: no it is not an exact copy of the original! not subject to 3d printing!
3d_ocean
$7
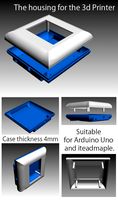
The housing for the 3d Printer
...the housing for the 3d printer 3docean arduino device housing stl the housing consists of two portions:...
3d_export
$5
arm 4 axis
...uno -4 servo motor 180° -3 joystick (x,y) for arduino -mdf wood -some wires -cnc laser cut...
3d_export
$5
solar tracker
...machine for the frame . list of material : -arduino uno -2 step motor with driver -4 ldr sensor...
Robot
3d_ocean
$20

Robot
...robot
3docean
character metal robot robot robotic white
robot model for 3dsmax 2009 and greater
3d_ocean
$45
Robot
...robot
3docean
fighing machine robot
a fighting robot from the scrapyard.
3d_ocean
$18
Robot
...robot
3docean
machin robot science fiction
high poly robot.
3d_export
$7

Robot
...robot
3dexport
robot
3d_export
$5
robot
...robot
3dexport
robot
3d_export
free

Robot
...robot
3dexport
robot
turbosquid
$10

Robot/ Alien Robot
...
royalty free 3d model robot/ alien robot for download as max on turbosquid: 3d models for games, architecture, videos. (1442828)
3d_export
$5

robot
...robot
3dexport
robot in blender
3ddd
$1
robot
...robot
3ddd
робот
robot
3ddd
$1

Robot
...robot
3ddd
робот
robot
8
turbosquid
$6

Rock 8-8
...urbosquid
royalty free 3d model rock 8-8 for download as obj on turbosquid: 3d models for games, architecture, videos. (1659393)
3ddd
$1
Italamp 387/8+8
...italamp 387/8+8
3ddd
italamp
люстра italamp 387/8+8
размеры 92x71h
3ddd
$1

8 марта
...8 марта
3ddd
8 марта
кресло 8 марта
design_connected
$16

No 8
...nected
photo-realistic 3d models of the sibast no 8 armchair from sibast for 3d architectural and interior design presentations.
3d_export
$5
hinge 8
...hinge 8
3dexport
hinge 8
3d_export
$5

iphone 8
...iphone 8
3dexport
iphone 8
turbosquid
$69

iPhone 8 and iPhone 8 Plus
... free 3d model iphone 8 and iphone 8 plus for download as max on turbosquid: 3d models for games, architecture, videos. (1202442)
turbosquid
$12

Calligraphic Digit 8 Number 8
...hic digit 8 number 8 for download as max, obj, fbx, and blend on turbosquid: 3d models for games, architecture, videos. (1389341)
3ddd
free

PLANTS 8
...plants 8
3ddd
цветок , горшок
plant 8,,, hope u all like it
3ddd
$1
8 Марта / Amadey
...8 марта / amadey
3ddd
8 марта
8 marta amadey
design_connected
$27

...print
designconnected
moroso print computer generated 3d model. designed by wanders, marcel.
3ddd
free

Eichholtz Prints
...- eichholtz print central station i
13 - eichholtz print central station ii
14 - eichholtz print marisa
15 - eichholtz print tish
3ddd
$1

Eichholtz Prints
...print abstract - set of 2
10 - eichholtz print orange abstract
11 - eichholtz print buddha right
12 - eichholtz print buddha left
turbosquid
$1

... available on turbo squid, the world's leading provider of digital 3d models for visualization, films, television, and games.
3ddd
free

Eichholtz Prints
...of 4
2 - print dunbar 2 set of 4
3 - print guadeloupe 1 set of 4
4 - print guadeloupe 2 set of 4
5 - print giles
6 - print trett
3ddd
$1

Eichholtz Prints
...nt tutti frutti
3 - eichholtz prints watson - set of 2
4 - eichholtz prints antique nautilus - set of 2
5 - eichholtz print tiara
3d_export
$5

Monster for printing
...monster for printing
3dexport
monster 3d model printing
3ddd
free

printed rug
...printed rug
3ddd
ковер
very creative printed rug
3ddd
free

Eichholtz Prints
...иал: бумага
габариты (вхш): 72 x 62 см
описание: print sweetmeat - постер в деревянной раме.
3 - prints varsity set of 2
арти
3ddd
free

Art Print Posters
...art print posters
3ddd
прованс
art print posters by patrician prints