Thingiverse
EX6 Arcade Fight Stick by ampjburn
by Thingiverse
Last crawled date: 3 years, 3 months ago
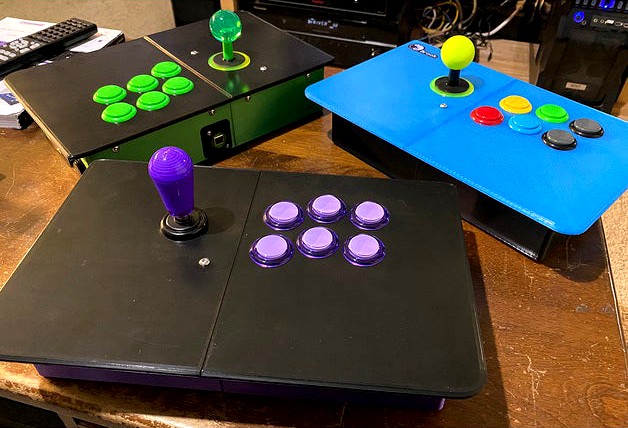
EX6 Arcade Fight Stick
What started as just doing a few tweaks to an existing model turned into a near full redesign and a (almost) fully printable arcade/fight stick case platform; the EX6. Printable on the Ender 3 or any 200x200 printer. Assembled top panel size of 12.5" Wide x 7.875" High, gives a full sized arcade feel with plenty of space for your hands. The modular design of this stick allows you to choose & print a variety of top panel options so you try different button layouts and various sticks as well. Top panels for both Japanese & Korean sticks and multiple 6 button layouts are included, with more to come. Button layouts will fit any 30mm button of your choice, Sanwa, Seimitsu, Crown, etc. The bottom pieces come with various button hole layouts for start, select, home, turbo and a mounting for a Neutrik NAUSB-W A/B USB Feed-Through adapter. Also included are joystick spacers so you can set the stick to your desired height and a pcb mount for Brooks ZeroPi & UFB* control boards (both should be the same size YMMV).
Remixed from the Full Size Arcade Stick by jasondemeter (thing:3514821).
Hardware Need:
10 - M4x12 Screws (For Case)
2 - M4x16 or M4x20 Screws (For Joystick Mounting) Size depends on spacer used.
14 - M4 Nuts
6 - M3x12 Screws (For Neutrik USB [2] + PCB Mount [4])
6 – M3 Nuts
Neutrik NAUSB-W A/B USB Feed-Through
Non-Slip Surface Grip Pads - for bottom of case. ( I used these off Amazon - SoftTouch Self-Stick Non-Slip Surface Grip Pads)
Top Panel Options:
Top Left EX 60mm Japanese.stl – 40mmx85mm mount holes will fit Sanwa & Seimitsu sticks or any others that use the same mounting
Top Left EX 60mm Korean.stl – 50mmx73mm mount holes with full collar hole (35mm)
Top Right EX 60mm Vewlix.stl – Vewlix layout based on the dimensions from slagcoin.com
Top Right EX 60mm Slant36.stl – Slant Hori style layout based on the dimensions from slagcoin.com
Top Right EX 60mm Noir.stl – Noir Layout based on artwork spec from focusattack.com
Instructions:
You will need print:
1 Top Right Panel
1 Top Left Panel
1 Bottom Right
1 Bottom Left
Joystick Spacer
PCB Mount (Optional)
Printing Tips:
The bottom pieces are a tight fit, you most likey will need to adjust the Horizontal Expansion setting in the slicer to get them to fit together. I'm printing them at -.15mm, but depending on your printers calibration this number will be different.
Bottom pieces will need supports, top pieces do not.
Tops should be set flat on the build plate and dropped -0.5mm into the build plate to remove the overhang on the bottom couple layers.
The pcb mount needs supports, the holes are undersized so the screws can just screw in.
The joystick spacers can be resized on the z axis in your slicer so you can make them any height you want. Iv found 3mm to be perfect for Sanwa JLFs and the 5mm to be good for the Korean sticks. Seimitsu sticks can vary in shaft length so you may need some testing to see what you like. I don't use a spacer with the LS-40 or LS32 due to the shorter shaft height.
Assembly:
Snap the bottom piece together and get them to fit as flat as possible to each other. Since the fit is tight sometimes a few whacks with a rubber mallet is need to get them level to each other. (Dont get crazy with it) Screw the two sides together (M4 x 12) through the mounts at the top centers of the bottom pieces. The bottom pieces should be glued together for maximum stability after being screwed together. Running some medium or thin CA glue over the seam has worked well for me (do it from the inside of the case to keep the bottom looking good)
Glue the nuts into the top panels with some CA glue. The nuts will pop into the holes on the top panels but are not tight enough on their own. Be sure that the nuts are sitting flat in the holes so you don't get any mis threading when screwing the bolts in.
8 M4 x 12 screws will secure the tops in place
If you are using a joystick spacer the best way to install it is to screw the mounting screws to the top panel, then add the spacer, then screw the joystick on with 2 more nuts. The holes in the spacers are sized to fit over the nuts. This makes installing the joystick easier and lets you do it with just a wrench, the first set of nuts will hold the bolts in place and keep them from spinning when you are installing the joystick.
If using the pcb mount use 4 – M3 x 12 screws. Screw them into the bottom of the pcb mount, add the board and then use M3 nuts to secure it. The Brooks ZerPi board only needs 3 screws, the one by the USB plug is almost impossible to get on so just leave it off. In the files there is the Brooks PCB Nut Tool.stl which is a small wrench for the M3 nuts to make screwing them on much easier.
The pcb mount holes are undersized so the screws can just screw in to the mount itself, the nuts are only needed to hold the board in place. You can mount it to the case with strong tape, I used servo tape.
The last 2 M3x12 screws can be used for the Neutrik NAUSB-W A/B USB Feed-Through if it didn't come with any.
Similar models
thingiverse
free

Arcade Fightstick by cmanoncom
...lic piece.
on the back there's a cut for either a neutrik or switchcraft usb connector.
the top piece is hold by 8 m4 screws.
grabcad
free

Sanwa joystick
...sanwa joystick
grabcad
sanwa japanese style joystick for arcade control panel layout
thingiverse
free

Arcade Stick Dustwasher Sanwa Style 38mm & 48mm by ampjburn
... from model orientation)
iv been printing them solid, all bottom layers in concentric with ironing enabled on the top most layer.
3dwarehouse
free

Happ arcade stick
...app arcade stick
3dwarehouse
a happ stick. all parts included and mounted. #arcade_stick #game_controller #happ #joystick #sanwa
thingiverse
free

ArcadeStick By Stoner 200x380x44
...eated holes.
then you can use 30mm long m6 screws to fix the top and bottom pieces together
please use the neutrik nausb-w slot
thingiverse
free

Ergonomic Arcade Joystick 24/30mm by keganholtzhausen
... joystick
4x sanwa obsf-24
2x sanwa obsf-30
10x 6mm m3 button head screws
4x 4mm plastic screws
4x self-adhesive rubber feet
wire
grabcad
free

Sanwa Joystick JLF-TP-8YT-W
...sanwa joystick jlf-tp-8yt-w with
sanwa gt-y octagonal restrictor plate 8 way
hope it will help you to visualize your arcade stick
thingiverse
free

Zero Delay USB Arcade Encoder 3printed pcb fastener by Dr_Eamy
...cade encoder pcb spacer to mount encoder pcb inside cabinet, the part is designed to take m2 standoffs, whit nuts for 4mm spanner
thingiverse
free

Reinforcement for Neutrik USB panel mount by thesle
...forcement buffer for this neutrik connector (nausb). if you also have this connector i highly recommend this print for longevity.
thingiverse
free

Arcade joystick grenade handle by flex-arcade
... chinese/no brand models.
it prints without supports
to see my arcades visit www.flex-arcade.fr or www.instagram.com/flex_arcade/
Ex6
unity_asset_store
$28

EXPLORER Warp Drive SHIP EX6
...low with the explorer warp drive ship ex6 asset from cgpitbull. find this & other space options on the unity asset store.
grabcad
free

Ex6
...ex6
grabcad
some of drawing examples on solidworks
grabcad
free

Ex6 DA2
...ex6 da2
grabcad
da2
cg_trader
$36

EXPLORER WarpDrive-Ship EX6
...fessional touch to your scifi videogame project with this original low poly model. set of one scifi spaceship. no animated parts.
grabcad
free

Peça - Fusion360
...peça - fusion360 grabcad ex6 ...
clara_io
free

ex6
...ex6
clara.io
Arcade
3ddd
$1
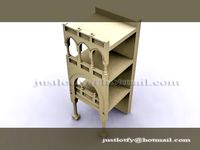
Simas / Arcade
...dd
simas , simas arcade , тумба
simas arcade 46
3d_export
$5

Arcade
...arcade
3dexport
3ddd
free
Turri / Arcade
...turri / arcade
3ddd
turri , журнальный
turri / arcade
turbosquid
$15
Arcade
... available on turbo squid, the world's leading provider of digital 3d models for visualization, films, television, and games.
turbosquid
free
Arcade
... available on turbo squid, the world's leading provider of digital 3d models for visualization, films, television, and games.
3d_ocean
$16
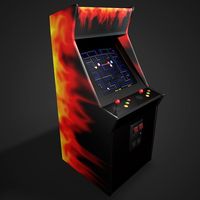
Arcade Game
...tomate button coin computer console fun game gamer gaming joystick machine play side art video game
detailed arcade game machine.
3d_export
$5

Arcade 3D Model
...arcade 3d model
3dexport
architecture arcade elements decor
arcade 3d model evgenadm 86783 3dexport
3d_export
$10

Arcade 3D Model
...arcade 3d model
3dexport
arcade arch porch portico well round
arcade 3d model loscarpello 54648 3dexport
3d_export
$9
Arcade 3D Model
...arcade 3d model
3dexport
arcade architecture old building classic arch
arcade 3d model lotfy 150 3dexport
archive3d
free

Arcade 3D Model
...arcade 3d model
archive3d
arcade slot machine game
Fight
3d_export
$65

fighting
...fighting
3dexport
simple rendering of the scene file
3d_export
$65

fighting
...fighting
3dexport
simple rendering of the scene file
3d_export
$65

fighting
...fighting
3dexport
simple rendering of the scene file
turbosquid
free

Fight Stick
...ick
turbosquid
free 3d model fight stick for download as max on turbosquid: 3d models for games, architecture, videos. (1482301)
turbosquid
$2

Fighting Sticks
...
royalty free 3d model fighting sticks for download as blend on turbosquid: 3d models for games, architecture, videos. (1281842)
3d_ocean
$12

Fighting Fish
...el of a great aquarium fish, siamese fighting fish. this can be used for small 3d projects, games and educational purpose. enjoy!
3d_export
$5

Fighting Hammer
...fighting hammer
3dexport
turbosquid
$25

fighting robot
...ree 3d model fighting robot for download as 3ds, obj, and c4d on turbosquid: 3d models for games, architecture, videos. (1390697)
turbosquid
$20

Fighting tower
...ighting tower for download as max, obj, fbx, and unitypackage on turbosquid: 3d models for games, architecture, videos. (1147390)
turbosquid
$799

Wolf fight
... available on turbo squid, the world's leading provider of digital 3d models for visualization, films, television, and games.
Stick
3d_ocean
$5

Deodorant Stick
...deodorant stick
3docean
deodorant stick
deodorant stick. product label included.
3ddd
$1

Stick Lamp
...stick lamp
3ddd
stick
stick бра
раз. 330*280*650mm
3d_ocean
$5

Usb Stick
...usb stick
3docean
flash stick usb usb memory usb stick
usb stick created using 3ds max 2015 and rendered on mental ray.
3d_ocean
$6

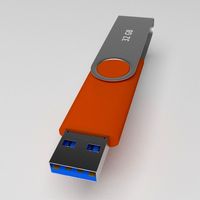
USB Stick
...tick
3docean
32 gb flash ram gigabyte memory metal nand plug ram stick usb usb 3 usb stick
usb stick with texture and normal map.
3d_ocean
$5
USB Stick
...usb stick
3docean
32gb computer memory plug plugin protection usb usb stick
an usb stick with built-in plug protection
3d_export
$5

stick with leaf
...stick with leaf
3dexport
i made a stick or branch with an oak leaf on it.
3ddd
$1

F23 Stick
...f23 stick
3ddd
fabbian
http://www.fabbian.com/en/f23-stick-2#.vkobhfmswsr
86000 полигонов
archive3d
free

Sticks 3D Model
... 3d model
archive3d
drum sticks
sticks - 3d model (*.gsm+*.3ds) for interior 3d visualization.
3d_export
$5

bread sticks
...bread sticks
3dexport
turbosquid
$2

Acai on sticks
...osquid
royalty free 3d model acai on sticks for download as on turbosquid: 3d models for games, architecture, videos. (1649053)