Thingiverse

ET4 X Linear Rail by peddomgar
by Thingiverse
Last crawled date: 3 years ago
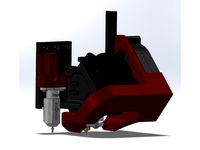
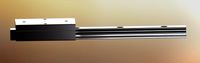
This is a simple but working mod to replace X Axis V slot for a linear rail, you can use same V-slot screws but will need 4 x M4 nut.
Print the right and left parts with strong PETG or ABS as minimun 30% infill. I use a Mellow NF-BMG-WIND so need the body part too, if you use the default hotend you don't need the body part.
Unmount hotend removing the wheels, you can directly mount again without wheels on the new roller support (if you have the original one), then unmount X Axis V slot, you will need to remove 4 screws from metal backside.
For mounting the linear rail you need:
350 mm MGN 12H linear rail
4x M4 from V-Slot
4x M4 hex nuts
5x M3 hex nuts
5x M3x12 screw
Once you have printed parts:
1) Mount 2 x M4 screws on right front part and 2 x M3 Hex nuts at the back, use a M3x18 screw to fix the nuts in the internal hex hole, then do the same for left part, this one has one more M3 Hex nut.
2) Place and fix parts to X Axis support
3) Place and fix Linear rail to installed parts, no matter orientation, ¡¡look where are the
4.A) If you are using the default hotend, you can fix the metal carriage using a longer M3 screw on the left hotend hotel so will pass through the carriage and fix on the upper left hole from roller, then use 2x M3x5 screws to fix from bottom linear hole at carriage to bottom holes at roller.
4.B) If you are using another extruder the body part has two holes that fits with my extruder Mellow NF-BMG-WIND, hope if you use another you can find the way ...
THAT's ALL!!
Similar models
thingiverse
free
CR10 / Ender 3 NF-Crazy+ Hotend mount & Part Cooling by sportivo_jam
...is design: https://www.thingiverse.com/thing:3466809
you will need an m3 insert screw to fix the fan shroud to the hot-end mount.
thingiverse
free

4 Max Pro with Mellow NF-BMG-Air left by maece78
... z-axis bushings to get enough travel. have a look at the photos.
have fun and success with rebuilding and give me some feedback.
thingiverse
free

Prusa i3 BMG Extruder Carriage
...xis. (https://es.aliexpress.com/item/32599122130.html?spm=a2g0s.9042311.0.0.274263c07swcgb)
you need m3 screw and nuts for mount.
thingiverse
free

FLSUN-G Corexy Adapter For NF TC-01 2in 1out Hotend
...you tighten the nuts from the back.
mount the nf tc-01 hotend to the adapter.
mount the adapter to the x-carriage with the nuts.
thingiverse
free

Ender 3 X Axis Linear Rails Plate Extended by jagerkti
...en the carriage holes and the hotend mounting holes by 3mm. this allowed be to get a nut in the back to attach the hotend easily.
thingiverse
free

Creality Linear Rail hotend bracket for MGN12 Linear Rail X-Axis by lumanet
... the hotend and 2 are for the hotend fan / part cooling housing.
material : petg
additional material : knurled insert nuts 5mm
thingiverse
free

CR6-SE X axis Linear Rail Mount by ScottSword
... a step in bracket to help you align it.
if you have replaced you x axis with full t-slot use 10mm version m4 x 10 and m4 t-nuts.
thingiverse
free

X axis carriage for j head E3D by hafidz
...s carriage for j head (e3d) hotend tevo tarantula
this carriage also available for mgn12 rail.
you need m4x 20mm bolt and m4 nut
thingiverse
free

Artillery Sidewinder X1 X axis mgn12 linear rail by kse
...d mgn12h carriage, 6 t-slot nuts with m3 thread for 2020 profiles, and 6 m3x8 din912 screws.
you also need a m3 thread drill bit.
thingiverse
free

Ender 6 Linear Rail Mount X Carriage by Tertullidan
...s for fixing on the linear guide
the v4 bmg version is a remix of rics_3d extruder mounthttps://www.thingiverse.com/thing:4730903
Peddomgar
thingiverse
free

Hex Drawer Low Cost by peddomgar
...e was perfect at 60 mm/s. box will need 4:30 h to complete, drawer 3:30 h and knob 0:10 h. faster, cheaper and pretty, what else?
thingiverse
free

ET4 Y Linear Rail by peddomgar
...vechado para instalar una nueva correa gt2, no sé si la original da el largo.
listo!! vuelve a montar la cama y nivela de nuevo!!
Et4
3d_export
$200

Modern Vespa Collection 3D Model
...modern contemporary scooter motorcycle 200 rally p150x 150 125 et4 lx 1972 1978 1996 2005 2010 italian european vintage...
thingiverse
free

ET4 fanduct modified
...et4 fanduct modified
thingiverse
anet et4
thingiverse
free

et4 by zaris299
...et4 by zaris299
thingiverse
thingiverse
free

Anet Et4 Box
...anet et4 box
thingiverse
tool box for anet et4
thingiverse
free

Box for Anet ET4
...box for anet et4
thingiverse
this is a simple box for tool of anet et4
thingiverse
free

Anet ET4+ Nozzle Fan by Tronicpixel
...anet et4+ nozzle fan by tronicpixel
thingiverse
anet et4+! fan duct upgrade. not sure if it fits to normal et4 and et4 pro
thingiverse
free

Anet ET4 senzor holder
...anet et4 senzor holder
thingiverse
anet et4 senzor holder
thingiverse
free

Anet ET4 Light mount
...anet et4 light mount
thingiverse
anet et4 light mount
thingiverse
free

Anet ET4 Nozzle Nut
...anet et4 nozzle nut
thingiverse
anet et4 nozzle touch sensor nut
thingiverse
free

ET4 Cooler by raymans2
...raymans2
thingiverse
was having deformation issues with my other et4 cooler (printing @ 230-240), so i came up with this one....
Linear
3ddd
$1
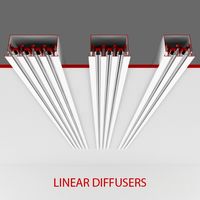
Linear Diffusers
...linear diffusers
3ddd
диффузор
set of linear diffusers for ceiling.
design_connected
$27

Linear Sofa
...linear sofa
designconnected
scp linear sofa computer generated 3d model.
design_connected
$18

Atlantis linear
...atlantis linear
designconnected
terzani atlantis linear pendant lights computer generated 3d model. designed by barlas baylar.
3d_export
$5
light linear unit
...light linear unit
3dexport
light linear unit
turbosquid
$5

Linear Actuator
...
royalty free 3d model linear actuator for download as blend on turbosquid: 3d models for games, architecture, videos. (1589061)
turbosquid
$29
Linear panel
...oyalty free 3d model linear panel for download as max and obj on turbosquid: 3d models for games, architecture, videos. (1391254)
turbosquid
$12
Linear Chandelier
...y free 3d model linear chandelier for download as max and obj on turbosquid: 3d models for games, architecture, videos. (1574289)
turbosquid
$10

Grohe Lineare
... available on turbo squid, the world's leading provider of digital 3d models for visualization, films, television, and games.
turbosquid
$10

Linear Axis
... available on turbo squid, the world's leading provider of digital 3d models for visualization, films, television, and games.
3d_export
$5
Linear Unit 3D Model
...linear unit 3d model
3dexport
linear unit force torque velocity
linear unit 3d model fau 71218 3dexport
Rail
3d_ocean
$5
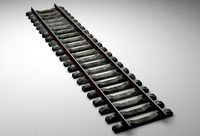
rails
...rails
3docean
old rails rails sleepers
old rails
archibase_planet
free
Rail
...chibase planet
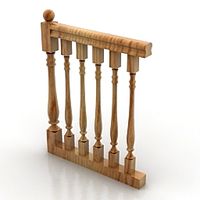
rail railing handrail guard-rail
rail forged fence n310814 - 3d model (*.gsm+*.3ds) for exterior 3d visualization.
archibase_planet
free

Rail
...rail
archibase planet
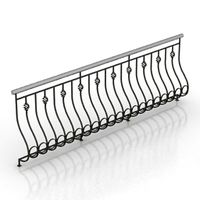
handrail railing guard-rail
rail n220914 - 3d model (*.gsm+*.3ds) for interior 3d visualization.
archibase_planet
free

Rail
...rail
archibase planet
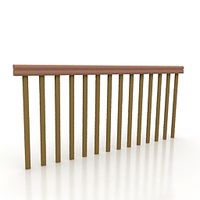
railing hand-rail banisters
rail n130309 - 3d model (*.gsm+*.3ds) for interior 3d visualization.
archibase_planet
free
Rail
...rail
archibase planet
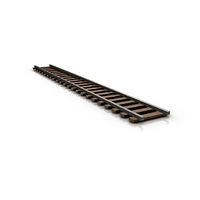
railing hand-rail banisters
rail n270510 - 3d model (*.gsm+*.3ds) for interior 3d visualization.
archibase_planet
free
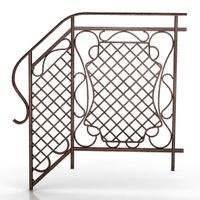
Railing
...
archibase planet
railing handrail fence guard-rail
railing n140314 - 3d model (*.gsm+*.3ds+*.max) for exterior 3d visualization.
archibase_planet
free

Railing
...railing
archibase planet
railing
railing- 3d model (*.gsm+*.3ds) for interior 3d visualization.
archibase_planet
free
Railing
...railing
archibase planet
railing enclosure barrier
light railing - 3d model for interior 3d visualization.
archibase_planet
free
Rail
...rail
archibase planet
metal railing
rail n280608 - 3d model (*.gsm+*.3ds) for interior 3d visualization.
archibase_planet
free

Railing
...railing
archibase planet
railing kitchen ware
railing 1 - 3d model (*.gsm+*.3ds) for interior 3d visualization.