Thingiverse
ESP8266 Sonoff Programmer by Dimwit-Dave
by Thingiverse
Last crawled date: 3 years ago
First and most important don't connect the mains power to the Sonoff module during programming. Personally I would not trust the PCB's electrical isolation and I value my PC's USB inputs, also we need to control the power to the ESP8266 to program it.
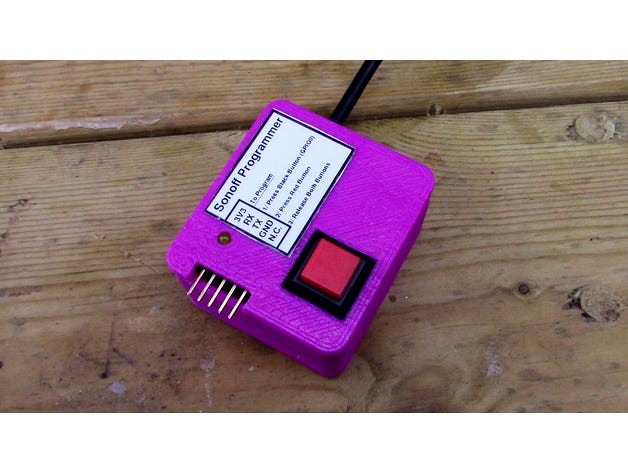
To put the ESP8266 into programming mode we need to hold the GPIO0 input low during a reset or power up cycle. On the Sonoff module neither the reset or GPIO0 is available on the optional headers. But the black push button is connected to the GPIO0 and pressing it takes this line low, so then all we need to do is cycle the power. That's how this box works.
Parts
USB serial cable - http://www.ebay.com/itm/Auto-Converter-Adapter-Module-USB-To-COM-Cable-USB-To-RS232-TTL-UART-PL2303HX-/182504686740?hash=item2a7e208494:g:yjcAAOSwXYtY2JFR
Normally closed push button - http://www.ebay.com/itm/Square-Momentary-On-Off-Normally-Closed-Push-To-Break-Switch-SPST-/252245252476?var=&hash=item3abafd197c:m:mDzggwvqL3y84SrcnNRIVLw
ASM1117 3V3 Regulator
3mm LED
100R Resistor
5 pin 0.254mm 90 degree header
USB cable cut to length
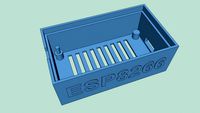
Case - Can be 3D printed
To use. Solder a 5 pin header to the Sonoff PCB and connect the programmer to the Sonoff board, remember don't connect the mains! Using the Arduino IDE select the USB device, the light on the programmer should light up. Press and hold the black push button and press the Red button, then release both buttons. Now you ready to program the Sonoff.
Youtube https://www.youtube.com/watch?v=cAO2zGWNwww&feature=youtu.be
P.S.
I have included the FreeCad File used to make the item.
To put the ESP8266 into programming mode we need to hold the GPIO0 input low during a reset or power up cycle. On the Sonoff module neither the reset or GPIO0 is available on the optional headers. But the black push button is connected to the GPIO0 and pressing it takes this line low, so then all we need to do is cycle the power. That's how this box works.
Parts
USB serial cable - http://www.ebay.com/itm/Auto-Converter-Adapter-Module-USB-To-COM-Cable-USB-To-RS232-TTL-UART-PL2303HX-/182504686740?hash=item2a7e208494:g:yjcAAOSwXYtY2JFR
Normally closed push button - http://www.ebay.com/itm/Square-Momentary-On-Off-Normally-Closed-Push-To-Break-Switch-SPST-/252245252476?var=&hash=item3abafd197c:m:mDzggwvqL3y84SrcnNRIVLw
ASM1117 3V3 Regulator
3mm LED
100R Resistor
5 pin 0.254mm 90 degree header
USB cable cut to length
Case - Can be 3D printed
To use. Solder a 5 pin header to the Sonoff PCB and connect the programmer to the Sonoff board, remember don't connect the mains! Using the Arduino IDE select the USB device, the light on the programmer should light up. Press and hold the black push button and press the Red button, then release both buttons. Now you ready to program the Sonoff.
Youtube https://www.youtube.com/watch?v=cAO2zGWNwww&feature=youtu.be
P.S.
I have included the FreeCad File used to make the item.
Similar models
thingiverse
free

ESP8266 Programmer by Dimwit-Dave
...t switch with 7mm or large button
see youtube for more details = https://www.youtube.com/watch?v=p2uc_ufzns8&feature=youtu.be
thingiverse
free

XIAOMI DEEP FLASH TOOL by bitxbit
...ngle-row-straight-header-strip-connector-for-arduino-new-/171739796784?epid=1453057160&hash=item27fc7d5530:g:5hoaaoswhq9wt~3l
thingiverse
free

ESP 8266 Flash Button Lever by fotomas
...resses the reset button. a maneuver needed to flash new firmware/sketch.
it does not interfere with usb connection or breadboard.
grabcad
free

ESP8266-ESP07
...com/itm/esp8266-remote-serial-wireless-transceiver-wifi-module-esp-07-ap-sta-/141937382390?hash=item210c2093f6:g:73qaaosw0gdxtqhe
cg_trader
free

Arduino
...-to-serial driver chip. instead, it features the atmega16u2 (atmega8u2 up to version r2) programmed as a usb-to-serial converter.
thingiverse
free

tda749p amplifier board box with buttons by GsenDK
...pcs-on-off-on-3-position-spdt-round-boat-rocker-switch-6a-250v-10a-125v-ac-lw-/182387276370?hash=item2a7720fa52
unknown connector
grabcad
free

Push button big 12x12x7 with PCB
...push button big 12x12x7 with pcb
grabcad
push button big 12x12x7 with pcb + header pin
grabcad
free

Arduino
...tures the atmega16u2 (atmega8u2 up to version r2) programmed as a usb-to-serial converter.
info: http://www.teslabem.com/tienda/
thingiverse
free

Box for Programmer esp8266 by moreken
...programmer esp8266 by moreken
thingiverse
box to hold the module from usb to serial necessary to program the wifi module esp8266
thingiverse
free
Programmer for ESP-12 & ESP-03 modules
...ports both programming and run modes and makes the gpio pins available via a simple header so you can connect it to a breadboard.
Dimwit
thingiverse
free

USB Relay Case by Dimwit-Dave
...usb relay case by dimwit-dave
thingiverse
a simple case for a usb relay
thingiverse
free

Flash-light Wall Bracket by Dimwit-Dave
...flash-light wall bracket by dimwit-dave
thingiverse
a simple wall bracket for a ultrafire led flashlight
thingiverse
free

Toyota Sewing Machine Tool Tray by Dimwit-Dave
...toyota sewing machine tool tray by dimwit-dave
thingiverse
a tool tray for a toyota sewing machine.
thingiverse
free

Arduino Wall Mounted Case by Dimwit-Dave
...ino wall mounted case by dimwit-dave
thingiverse
a wall mounted case for an arduino (uno size) with a selection of front panels.
thingiverse
free

ESP8266 ESP32 Programmer Case by Dimwit-Dave
...esp8266 esp32 programmer case by dimwit-dave
thingiverse
a simple two part case for my esp8266 esp32 usb programmer unit
thingiverse
free

Arduino With Ethernet Mounting Frame by Dimwit-Dave
...th ethernet mounting frame by dimwit-dave
thingiverse
a simple frame to mount an arduino (uno size) plus a w5100 ethernet board.
thingiverse
free

Case for 4 channel power sensor by Dimwit-Dave
...case for 4 channel power sensor by dimwit-dave
thingiverse
a case for a 4-channel mains power sensor
thingiverse
free

LED Tester by Dimwit-Dave
...html
other stuff
homepage https://www.mottramlabs.com/index.html
youtube https://www.youtube.com/channel/ucoyvktwv2gowq2koba3q6wg
thingiverse
free

Small Project Box by Dimwit-Dave
...roject box by dimwit-dave
thingiverse
small project box
can be used outside. size 60mm x 26mm x 25mm (inside 39mm x 21mm x 20mm)
thingiverse
free

Outdoor Case For Wemos ESP32 LED Driver by Dimwit-Dave
...outdoor case for wemos esp32 led driver by dimwit-dave
thingiverse
an outdoor case for an led driver board
Sonoff
thingiverse
free

espelho sonoff by TICODRONE
...espelho sonoff by ticodrone
thingiverse
espelho para sonoff
thingiverse
free

sonoff enclosure by dubaimodeler
...sonoff enclosure by dubaimodeler
thingiverse
sonoff enclosure. different look
thingiverse
free

Sonoff button by amonroy_uy
...verse
similar to a shelly button, this sonoff case for a sonoff basic creates a switch for a lamp or whatever.
no screws needed.
thingiverse
free

Sonoff Lid
...sonoff lid
thingiverse
sadsada
thingiverse
free

sonoff boxes by Kaatz
...
sonoff th10/16 box & lid
sonoff basic box only
for the lid https://www.thingiverse.com/thing:2876708 by mark4h
11.5mm hole
thingiverse
free

Sonoff S26 Button
...ingiverse
sonoff s26 button
my sonoff s26 button , easy broken so i decide to make simple button with clear filament
enjoyy !!!
thingiverse
free

Sonoff Box by Decoder112
...sonoff box by decoder112
thingiverse
i´ve created that box for my sonoff wifi switch
thingiverse
free

Sonoff POWR2 Bracket
...owr2 bracket
thingiverse
bracket for sonoff powr2
e.g. for installation on a breadboard or directly at the device to be switched
thingiverse
free

sonoff case by Chadac77
...sonoff case by chadac77
thingiverse
this is just a case for the sonoff that can fit addons like dht22 or a relay or both.
thingiverse
free

Sonoff Mini - foot switch
...sonoff mini - foot switch
thingiverse
sonoff mini foot switch
Dave
3d_export
$15

Cyborg Dave
...cyborg dave
3dexport
cyborg dave from a parallel universe
turbosquid
$2

Crazy Dave
...bosquid
royalty free 3d model crazy dave for download as fbx on turbosquid: 3d models for games, architecture, videos. (1178843)
turbosquid
free

dave valve
...bosquid
free 3d model dave valve for download as dwg and stl on turbosquid: 3d models for games, architecture, videos. (1531462)
turbosquid
$20
Tosconova Dave
...alty free 3d model tosconova dave for download as max and fbx on turbosquid: 3d models for games, architecture, videos. (1343864)
turbosquid
$30

Winter Dave
... available on turbo squid, the world's leading provider of digital 3d models for visualization, films, television, and games.
3ddd
$1
Dave Shield Wood Table
...dave shield wood table
3ddd
журнальный
dave shield wood modern table
turbosquid
$8

Dave Table Lamp
... model dave table lamp for download as max, max, fbx, and obj on turbosquid: 3d models for games, architecture, videos. (1659415)
turbosquid
$20

Dave the hairy monster
... available on turbo squid, the world's leading provider of digital 3d models for visualization, films, television, and games.
turbosquid
free

Daves basketball court.max
... available on turbo squid, the world's leading provider of digital 3d models for visualization, films, television, and games.
3ddd
$1
Calia Italia DAVE. 852
...dave. 852
3ddd
dave
ссылка на сайт производителя:http://www.caliaitalia.com/en/categorie-collezioni/emporio/#ad-image-2
Esp8266
3d_export
$5
esp8266 box arduino
...esp8266 box arduino
3dexport
box for esp8266 module with wire hole. inside dimensions: 49x26 mm. height 15 mm.
thingiverse
free

esp8266
...esp8266
thingiverse
esp8266
thingiverse
free

ESP8266 box by Frankdaastoel
...esp8266 box by frankdaastoel
thingiverse
enclosure for esp8266 and ds18b20 temperature logger.
thingiverse
free

ESP8266 by vashp2029
...esp8266 by vashp2029
thingiverse
test upload
thingiverse
free

ESP8266 PROGRAMADOR by kacitran
...esp8266 programador by kacitran
thingiverse
zocalo de conexion rapida para programar esp8266
thingiverse
free

ESP8266 Socket by Jager-f
...connector for easy flashing 3 versions esp8266-01, esp8266-03 and esp8266-12.
other photo and files sldrt http://modkam.ru/?p=666
thingiverse
free

Adafruit ESP8266 Feather by tankapotamus
...adafruit esp8266 feather by tankapotamus
thingiverse
adafruit esp8266 feather.
thingiverse
free

ESP8266 Clock Box by susiloharjo
...esp8266 clock box by susiloharjo
thingiverse
my design for my esp8266 desktop watch
d1 mini esp8266
dht11
-oled mini 128x32
thingiverse
free

NodeMCU ESP8266 Case by michaelwinkler
...e
more informations https://mwinkler.jimdo.com/smarthome/eigene-aktoren-sensoren/nodemcu-esp8266/
this is a nodemcu esp8266 case
thingiverse
free

ESP8266 Projector by TinkerdoodleDIY
...y
thingiverse
make a projector with esp8266 and ssd1306 lcd. see the instructions at https://www.youtube.com/watch?v=-ea242neycm
Programmer
3d_export
$5

vitsoe 620 programme
...vitsoe 620 programme
3dexport
vitsoe 620 programme lounge chair
turbosquid
$20
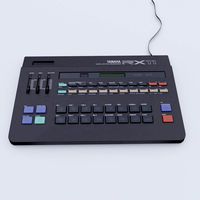
Yamaha RX11 Digital Rhythm Programmer
...1 digital rhythm programmer for download as fbx, dae, and obj on turbosquid: 3d models for games, architecture, videos. (1690517)
3d_export
$39

astronaut suit nasa artemis programme
...ax 2017 and exported as fbx so you can use it in any software the model is made on real scale and also placed in the world center
3d_export
$25
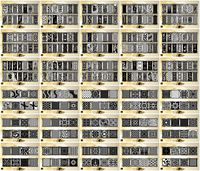
2000pcs 2d jali cutting files for artcam and aspire programmes
...will be able to see attached stl or pdf file with for downloading the model. if there is no access to the file please contact me.
3d_export
$15
Microchip 3D Model
...silicon chip micro microprocessor monolithic ic semiconductor programmable computer programmer multi microchip 3d model download .c4d .max .obj .fbx...
3d_export
$60

Griffon 3D Model
...l
3dexport
griffon decorative element model for tool with numeric programme management
griffon 3d model stameska62 30305 3dexport
3d_export
$5

Mcafee activate 25 digit code
...it code
3dexport
your pc will receive continuous and continuing protection from internet threats thanks to the mcafee programme.
3d_export
$30

Rosette 3D Model
...corative element model for tool with numeric programme management rosette architectral
rosette 3d model stameska62 30226 3dexport
3ddd
$1

Диван Альба
... ангстрем
диван "альба"
фабрика мебели ангстремhttp://www.angstrem-mebel.ru/catalog/programms/divaldi/
3d_export
$120

Frame for mirror 3D Model
...orative element model for tool with numeric programme management frame mirror
frame for mirror 3d model stameska62 30228 3dexport