Thingiverse
ENDER3 Y linear rails carrier + calibration tools by catlord21
by Thingiverse
Last crawled date: 3 years, 3 months ago
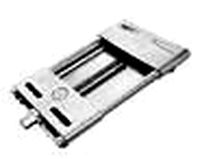
These pieces have been designed for enhancing the Ender3 Y axis with 250mm linear rails.
I have used 250mm linear rails because I have belt tensionners that don't allow me to use 300mm linear rails. ANyway, I never use the extreme part of the printing surface.
inconvenient:
With this enhancement you loose 20/25mm of Y axis.
advantages:
get ride of wobbling situation with the rollers
get ride of misalignement situation due to rollers
get ride of rollers wearing,periodic error (roller shape)
smoother displacments (less friction = less vibrations = better looking prints)
you will need :
mechanic:
2X 250mm linear rails, good quality (reliabot on amazon)
a bunch of M3x10 chc screws (around 20)
a bunch of M3 T-nuts (around 10)
3X M5x30 screws ( use the one of your actual roller carriage)
1X M5x10 screw (optional)
colon drill (if you don't have one, use a drill but drill has perpendicular to surface as possible ^^)
lubrification part following Alex Kenis guide on youtube
Best way :
naptha (zippo lighter fluid)
WD40
Triflow lubricant (teflon)
super lube
lazy way:
WD40
triflow lubricant
3 in one oil
Follow the Alex Kenis "cheap linear rails review" on youtube where he explains the lubrification process for both methods.
Use the "gabarit perçage" piece to drill the holes in your bed carrier, DON'T MESS UP WITH FRONT / BACK LEFT/ RIGHT !
Use a 5.5mm bit to drill the holes
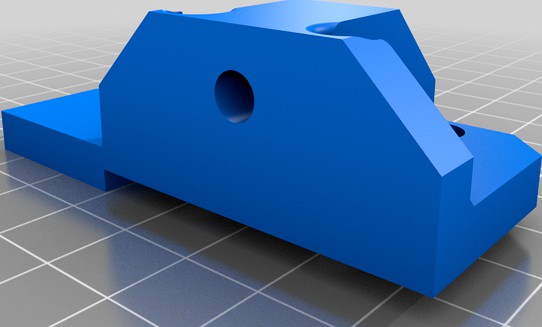
You have 2 carriers . the one for the left rails ( when you watch your printer from front) has 2 holes for M5x30 screws: this prevent a Rz rotation of the carriers (if one carrier is going forward while the other one is staying in place, you will make a rotation of your bed)
Carriers has been designed with mechanical play in the M3 holes (link between carrier and linear rail carrier) to allow a good positionning of the system
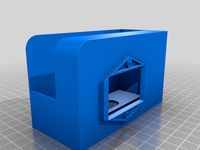
Left carrier has been designed to be compatible with motherboard fan cover of the ender3.
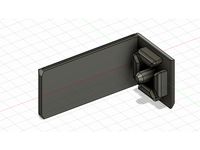
Right carrier has been designed to be compatible with Y endstop without unmounting it
First: clean and lubricate your rails (and carriers)
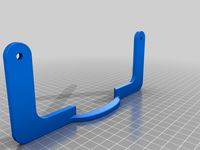
second: place the calibrations tools. front and back for Z setting, front (cf picture) for depth.
We want to have the rails as paralell as possible and with the same depth.
Put the rails in place and keep them toward the gauges (Z and depth) while screwing them in place. I use 2 M3+T-nut on both end of the rail and one in the center ( so it's 5 screws+Tnut per rail)
Install the left and right carrier ( "support rail gauche" et "support rail droit") on the rail carrier but don't Screw it tight now ! It must be loose !
Install your bed carrier on these pieces
Pull the rail carriers toward the depth gauge
Screw the bed carrier on the carrier tight (not too much but keep in mind that it's should be "defnitive"), use Nylock nuts. during this process: carriers much be pushed versus the depth gauge and the bed carrier must be as perpendicular as possible to the Y transaltion
control that you don't have hard spot along your Y axis when you move the system
tighten the carriers to the rail carriers
control that the motion is fluid. (no hard point along translation)
If you have hard spots, it's probably :
rails aren't paralell
rail carriers have bad lubrification
dust on rails
[Will post picture and video later]
I have used 250mm linear rails because I have belt tensionners that don't allow me to use 300mm linear rails. ANyway, I never use the extreme part of the printing surface.
inconvenient:
With this enhancement you loose 20/25mm of Y axis.
advantages:
get ride of wobbling situation with the rollers
get ride of misalignement situation due to rollers
get ride of rollers wearing,periodic error (roller shape)
smoother displacments (less friction = less vibrations = better looking prints)
you will need :
mechanic:
2X 250mm linear rails, good quality (reliabot on amazon)
a bunch of M3x10 chc screws (around 20)
a bunch of M3 T-nuts (around 10)
3X M5x30 screws ( use the one of your actual roller carriage)
1X M5x10 screw (optional)
colon drill (if you don't have one, use a drill but drill has perpendicular to surface as possible ^^)
lubrification part following Alex Kenis guide on youtube
Best way :
naptha (zippo lighter fluid)
WD40
Triflow lubricant (teflon)
super lube
lazy way:
WD40
triflow lubricant
3 in one oil
Follow the Alex Kenis "cheap linear rails review" on youtube where he explains the lubrification process for both methods.
Use the "gabarit perçage" piece to drill the holes in your bed carrier, DON'T MESS UP WITH FRONT / BACK LEFT/ RIGHT !
Use a 5.5mm bit to drill the holes
You have 2 carriers . the one for the left rails ( when you watch your printer from front) has 2 holes for M5x30 screws: this prevent a Rz rotation of the carriers (if one carrier is going forward while the other one is staying in place, you will make a rotation of your bed)
Carriers has been designed with mechanical play in the M3 holes (link between carrier and linear rail carrier) to allow a good positionning of the system
Left carrier has been designed to be compatible with motherboard fan cover of the ender3.
Right carrier has been designed to be compatible with Y endstop without unmounting it
First: clean and lubricate your rails (and carriers)
second: place the calibrations tools. front and back for Z setting, front (cf picture) for depth.
We want to have the rails as paralell as possible and with the same depth.
Put the rails in place and keep them toward the gauges (Z and depth) while screwing them in place. I use 2 M3+T-nut on both end of the rail and one in the center ( so it's 5 screws+Tnut per rail)
Install the left and right carrier ( "support rail gauche" et "support rail droit") on the rail carrier but don't Screw it tight now ! It must be loose !
Install your bed carrier on these pieces
Pull the rail carriers toward the depth gauge
Screw the bed carrier on the carrier tight (not too much but keep in mind that it's should be "defnitive"), use Nylock nuts. during this process: carriers much be pushed versus the depth gauge and the bed carrier must be as perpendicular as possible to the Y transaltion
control that you don't have hard spot along your Y axis when you move the system
tighten the carriers to the rail carriers
control that the motion is fluid. (no hard point along translation)
If you have hard spots, it's probably :
rails aren't paralell
rail carriers have bad lubrification
dust on rails
[Will post picture and video later]
Similar models
thingiverse
free

Artillery Sidewinder X1 Y Axis Linear Rail by GO3R
...x m3x20mm
8x t-nut
8x m3x8mm
8x m3x6mm
2x m3 nut
4x m3x30mm (with heads cut of)
1x bohrplatte.stl
2x gt2.stl
1x endstopholder.stl
grabcad
free

Frame_w_Bed
..., linear rails, lead screws for z axis movement (don't know what's happening with the hot end carriage rails on this one)
thingiverse
free

CR10 linear rail bed plate carriage
...you will also need eight aluminum 2020 corner braces, similar to the ones in my...
thingiverse
free

1/2" tap drill handle by cmceezee
...his thing to solve your current problem!
let us know how it worked for you! worked great for me and my 3/8" npt tap drill!
thingiverse
free

Y axis brackets for MNG12 rails by bardocz
... right size. but i rather print them a bit smaller, then drill, than print them with too big holes, since you can't fix that.
thingiverse
free

Y-Axis bed Stabilizer for p802ma
...der parts,but if you don't have that use narrow one. use also 5
"of threaded rod1/4
"'x 20un and nut to tide-up
thingiverse
free

ET4 X Linear Rail by peddomgar
...rt has two holes that fits with my extruder mellow nf-bmg-wind, hope if you use another you can find the way ...
that's all!!
thingiverse
free

Y Axis Bearing 11mm x 5mm M4 for CTC Replicator Flashforge by 3DWorkhorse
...t i was nearly that stupid.
the bearings improved the stiffness of the y-axis a lot. much less wobbling on fast prints.
have fun!
thingiverse
free

Cr-10/Tevo tornado Y easy all metal linear rails conversion
...inear rail carriages are 3mm, recommending to drill at least 4mm holes to have margin for drill imprecissions and use screw pads.
thingiverse
free

FLsun Cube Endstop Mounts for Linear Rails Upgrade by formateins
...ndstop just mirror it in your slicer. you have to use the square t-nuts provided with the printer - regular t-nuts won't fit.
Catlord21
thingiverse
free

PYRO/SOLDER RACK FOR IKEA MICKE by catlord21
...ill leave the .prt file if you want to modify it at your convenience ;)
i have included bottom support for pliers or other stuff.
thingiverse
free

Ender3 LACK enclosure new feet/links by catlord21
...rt part to be stiffer. lack table are just 5mm thick and 2 screws are not enought if you manipulate the enclosure too many times.
thingiverse
free

Pliers support for Ikea Micke office by catlord21
...t the last 2 plier holder if you want in the file. (3 pliers instead of 5)
i have included the .prt file for easier modification.
thingiverse
free

ENDER3 LED BAR by catlord21
... ;)
possibilité de tarauder votre rails pour une fixation très rigide. l'ensemble tient très bien sans fixation aussi rigide.
Ender3
3d_export
free

ender 3 3d print bed clips
...ender 3 3d print bed clips 3dexport ender3 3d print, print bed clips, glass bed clips, i...
3d_export
free

danish lunch
...with 3d printer made in thindercad and printed on ender3 max,<br>i used petg filament and have painted with vajjejo...
thingiverse
free
Ender3 pro
...ender3 pro
thingiverse
a plastic cover for the ender3 pro power supply, 100% fit.
note: fits only on the ender3 pro.
thingiverse
free

Guide filament ENDER3
...guide filament ender3
thingiverse
guide filament pour ender3
thingiverse
free

Ender3 Display Knob
...ender3 display knob
thingiverse
rotary encoder knob for ender3
thingiverse
free
Poignée ender3
...poignée ender3
thingiverse
bon print
thingiverse
free

Support Buses Ender3 / Nozzles holder Ender3
...support buses ender3 / nozzles holder ender3
thingiverse
un support de buses directement sur votre ender 3
thingiverse
free
Scrapper holder for Ender3 by clem3109
...scrapper holder for ender3 by clem3109
thingiverse
scrapper holder for ender3
thingiverse
free

ender3 filament guide by robotic_arm
...ender3 filament guide by robotic_arm
thingiverse
ender3 filament guide
thingiverse
free

Ender3, Ender3 pro reel holder with ballracer by nesan
...ender3, ender3 pro reel holder with ballracer by nesan
thingiverse
ender 3 ball racers need raft support on bed plate only.
Calibration
turbosquid
$15

DEFIBRILLATOR CALIBRATORS
... available on turbo squid, the world's leading provider of digital 3d models for visualization, films, television, and games.
turbosquid
$3
Calibration Test Benches
...libration test benches for download as 3ds, obj, c4d, and fbx on turbosquid: 3d models for games, architecture, videos. (1355804)
turbosquid
$79

Tag Heuer Monaco Calibre 11
...free 3d model tag heuer monaco calibre 11 for download as max on turbosquid: 3d models for games, architecture, videos. (1634427)
turbosquid
$50

Smith & Wesson 50 Calibre Magnum
... available on turbo squid, the world's leading provider of digital 3d models for visualization, films, television, and games.
3d_export
$10
Laboratory Calibration Weight Set 1 3D Model
... 3d model
3dexport
laboratory lab science equipment weight set
laboratory calibration weight set 1 3d model bessoo 88084 3dexport
3d_export
$15
Laboratory Scale and Calibration Weight Set 3D Model
...port
laboratory lab science equipment weight set scale
laboratory scale and calibration weight set 3d model bessoo 88203 3dexport
3d_export
$5
3D printer filament calibration tool 3D Model
...ernier
3d printer filament calibration tool 3d model download .c4d .max .obj .fbx .ma .lwo .3ds .3dm .stl locoman 107942 3dexport
3d_export
$59

tag heuer link calibre 16 watch
...built to real-world scale. units used: centimeters. model is 18 centimeters tall.<br>scene objects are organized by groups.
3d_export
free
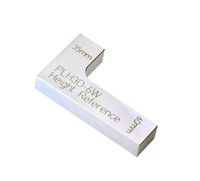
laser height reference calibration tool opt lasers
...ind out more about the engraving and cutting laser heads, this item was designed to work with, take a look at the following page:
3d_export
$99

Patek Philippe White Gold Calibre 89
...br>please note: this 3d model like all my other models cannot be used as nft, as is or modified<br>thank you for reading
Carrier
3d_export
$5
adhesive tape carrier
...adhesive tape carrier
3dexport
adhesive tape carrier
turbosquid
$120

Troop Carrier
...quid
royalty free 3d model troop carrier for download as skp on turbosquid: 3d models for games, architecture, videos. (1532045)
turbosquid
$25

Truck carrier
...quid
royalty free 3d model truck carrier for download as fbx on turbosquid: 3d models for games, architecture, videos. (1563111)
turbosquid
$7

Battle Carrier
...uid
royalty free 3d model battle carrier for download as lwo on turbosquid: 3d models for games, architecture, videos. (1654772)
3d_export
$20
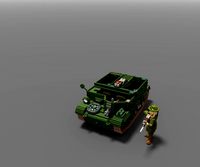
Universal carrier
...a real “universal”: reconnaissance, transportation of military cargo, towing artillery. the model is as detailed as voxels allow.
turbosquid
$10

Cyclone carrier
...lty free 3d model cyclone carrier for download as max and fbx on turbosquid: 3d models for games, architecture, videos. (1381936)
3d_ocean
$95

Aircraft Carrier
... very easy to get the sea wave and the sunset. all necessary files are included and could be used directly. if you donR...
turbosquid
$5

firewood carrier
...model firewood carrier for download as 3ds, max, obj, and fbx on turbosquid: 3d models for games, architecture, videos. (1452769)
3d_export
$5

gas carrier ship
...gas carrier ship
3dexport
gas carrier ship 3d model high quality for animation
turbosquid
$150

Troop Carrier
... available on turbo squid, the world's leading provider of digital 3d models for visualization, films, television, and games.
Linear
3ddd
$1
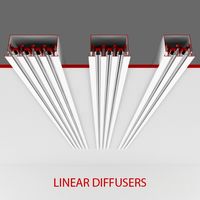
Linear Diffusers
...linear diffusers
3ddd
диффузор
set of linear diffusers for ceiling.
design_connected
$27
Linear Sofa
...linear sofa
designconnected
scp linear sofa computer generated 3d model.
design_connected
$18

Atlantis linear
...atlantis linear
designconnected
terzani atlantis linear pendant lights computer generated 3d model. designed by barlas baylar.
3d_export
$5
light linear unit
...light linear unit
3dexport
light linear unit
turbosquid
$5
Linear Actuator
...
royalty free 3d model linear actuator for download as blend on turbosquid: 3d models for games, architecture, videos. (1589061)
turbosquid
$29
Linear panel
...oyalty free 3d model linear panel for download as max and obj on turbosquid: 3d models for games, architecture, videos. (1391254)
turbosquid
$12
Linear Chandelier
...y free 3d model linear chandelier for download as max and obj on turbosquid: 3d models for games, architecture, videos. (1574289)
turbosquid
$10
Grohe Lineare
... available on turbo squid, the world's leading provider of digital 3d models for visualization, films, television, and games.
turbosquid
$10

Linear Axis
... available on turbo squid, the world's leading provider of digital 3d models for visualization, films, television, and games.
3d_export
$5
Linear Unit 3D Model
...linear unit 3d model
3dexport
linear unit force torque velocity
linear unit 3d model fau 71218 3dexport
Rails
3d_ocean
$5
rails
...rails
3docean
old rails rails sleepers
old rails
archibase_planet
free
Rail
...chibase planet
rail railing handrail guard-rail
rail forged fence n310814 - 3d model (*.gsm+*.3ds) for exterior 3d visualization.
archibase_planet
free
Rail
...rail
archibase planet
handrail railing guard-rail
rail n220914 - 3d model (*.gsm+*.3ds) for interior 3d visualization.
archibase_planet
free
Rail
...rail
archibase planet
railing hand-rail banisters
rail n130309 - 3d model (*.gsm+*.3ds) for interior 3d visualization.
archibase_planet
free
Rail
...rail
archibase planet
railing hand-rail banisters
rail n270510 - 3d model (*.gsm+*.3ds) for interior 3d visualization.
archibase_planet
free
Railing
...
archibase planet
railing handrail fence guard-rail
railing n140314 - 3d model (*.gsm+*.3ds+*.max) for exterior 3d visualization.
archibase_planet
free

Railing
...railing
archibase planet
railing
railing- 3d model (*.gsm+*.3ds) for interior 3d visualization.
archibase_planet
free
Railing
...railing
archibase planet
railing enclosure barrier
light railing - 3d model for interior 3d visualization.
archibase_planet
free
Rail
...rail
archibase planet
metal railing
rail n280608 - 3d model (*.gsm+*.3ds) for interior 3d visualization.
archibase_planet
free
Railing
...railing
archibase planet
railing kitchen ware
railing 1 - 3d model (*.gsm+*.3ds) for interior 3d visualization.
Tools
turbosquid
$21
Tool box with tools
... available on turbo squid, the world's leading provider of digital 3d models for visualization, films, television, and games.
archibase_planet
free
Tools
...tools
archibase planet
tools instruments implements
tools n070114 - 3d model (*.gsm+*.3ds+*.max) for interior 3d visualization.
3d_ocean
$12
Tools
...tools
3docean
hammer metal old screw tools wrench
maya
turbosquid
$6

Tool Cart / Tool Box
...
royalty free 3d model tool cart / tool box for download as on turbosquid: 3d models for games, architecture, videos. (1241859)
3d_ocean
$15
crimp tool
...compact tool copper cutter crimp crimp tool electrical electrical tools press tools pressing tool tools wire cutter created in...
3d_ocean
$5

Tools
...tools
3docean
3d models paint tools work
3d,models,works,paint,art,create,working,
3d_export
free
tools
...tools
3dexport
coldsteel
turbosquid
$15
Tools
...turbosquid
royalty free 3d model tools for download as blend on turbosquid: 3d models for games, architecture, videos. (1331352)
3ddd
$1
bar tool
...bar tool
3ddd
барный
bar tool
turbosquid
$35

tools
... available on turbo squid, the world's leading provider of digital 3d models for visualization, films, television, and games.
Y
turbosquid
$1

Tetera y Galletas y Caf
... available on turbo squid, the world's leading provider of digital 3d models for visualization, films, television, and games.
3ddd
$1

Смеситель Y-CON
...смеситель y-con
3ddd
смеситель , y-con
смеситель y-con
3ddd
$1

Y-Chair
...y-chair
3ddd
tom dixon
y-chair designed by tom dixon,
3ds max + obj, corona
3ddd
$1

Y Chair compilation
....net/products/us/y-chair-sled-base
y chair swivel basehttp://www.tomdixon.net/products/us/y-chair-swivel-base
turbosquid
$190

Y-8
...y-8
turbosquid
royalty free 3d model y-8 for download as max on turbosquid: 3d models for games, architecture, videos. (1658891)
turbosquid
$7

Bench Y
...turbosquid
royalty free 3d model bench y for download as obj on turbosquid: 3d models for games, architecture, videos. (1488746)
turbosquid
$15

bonePile Y
...oyalty free 3d model bonepile y for download as blend and obj on turbosquid: 3d models for games, architecture, videos. (1546374)
turbosquid
$7

Y for Yarn
...d
royalty free 3d model y for yarn model for download as max on turbosquid: 3d models for games, architecture, videos. (1699732)
turbosquid
$2

FONT Y
...quid
royalty free 3d model font y for download as ma and obj on turbosquid: 3d models for games, architecture, videos. (1549457)
3ddd
$1

WOOD-y
...wood-y
3ddd
wooden guy