Thingiverse
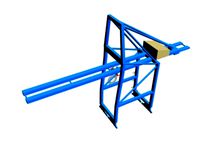
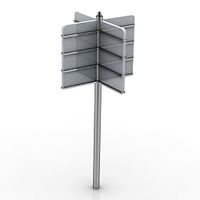
Ender 6 BIQU H2 Direct Drive Gantry Mount / Fan Duct / BLTouch / ADXL345 / Filament Guide / Extruder Filler Kit by vampyrex13
by Thingiverse
Last crawled date: 2 years, 10 months ago
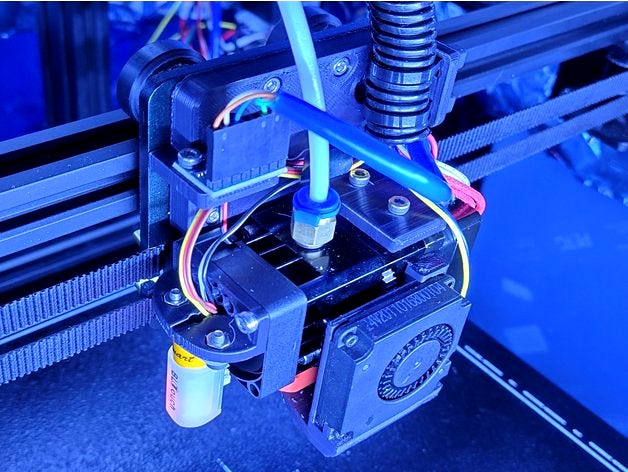
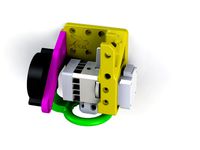
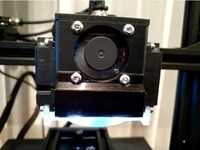
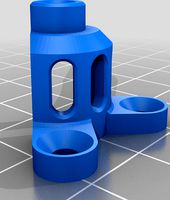
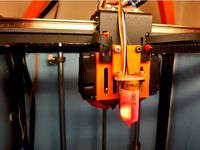
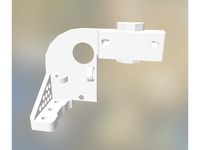
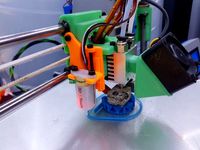
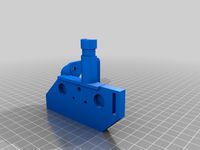
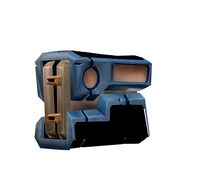
I wanted a clean and simple way to mount my BIQU H2 direct drive extruder that kept the stock blower fan, had the BLTouch close to the nozzle, and was compact.
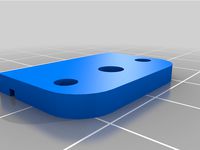
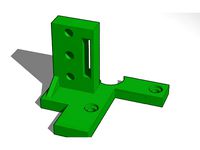
This is a complete kit which also includes a filler plate for the original extruder location and a filament guide.
This mount is compatible with the shorter silicone bed leveling columns.
Firmware Notes
• Klipper
[safe_z_home]
home_xy_position: 164.2, 130
...
[bltouch]
x_offset: 34.2
y_offset: 0
z_offset: 0 # temporarily reset to 0 to prevent smashing nozzle into bed.
...
[bed_mesh]
mesh_min: 69.2, 15
mesh_max: 294.2, 260
...
[extruder]
rotation_distance: 3.4334
...
Hardware
• You can use M3x8mm in place of M3xM6mm socket cap screws M3x20mm in place of M3xM18mm.
Ender 6 Mount:
• (3) M3x10mm socket cap screws
BIQU H2:
• (4) M3x8mm socket cap screws
• (1) M3x16mm socket cap screw
ADXL345 Accelerometer
• (2) M3x8mm socket cap screws
• (2) M3 nuts
Fan Duct:
• (2) M3x6mm socket cap screws
BLTouch Mount:
• (2) M3x18mm socket cap screws
BLTouch:
• (2) M3x8mm socket cap screws
• (2) M3 nuts
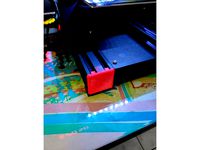
Extruder Filler
• PC4-M10 push fitting
Filament Guide:
• (1) M3x10mm socket cap screw
• (1) M3 t-slot nut
Versions
• There are two Ender 6 mounts; one with and one without the ADXL345 accelerometer mount.
• There are two Fan Ducts; one with built-in supports (inside mounting holes) and one without.
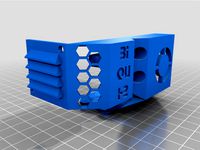
• There are two Extruder Fillers; one with built-in supports (under filler plate and inside mounting holes) and one without. If using the built in supports version, remove the bottom hole support first using a using a small screwdriver or hex key through the hole in the middle of the top hole support, then remove the top hole support.
Printing Notes
• Increase the number of walls to make the two towers the BIQU H2 mounts to stronger. I used 5 when I printed mine.
• Print the fan duct at .2 and use adaptive layers for the best success.
• The fan duct should be printed in ASA since it's sitting so close to the heat block. The other parts can be printed in ABS or PETG.
Installation Notes
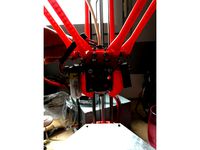
• This is very precise and will be a tight fit pressing onto the gantry plate. If your print has a large elephant's foot, you may need to file the opening that slips over the two original heat sink mounts.
• The BIQU H2 mounts on the top and bottom, but there's also an additional hole to mount an optional M3x16mm socket cap screw from behind.
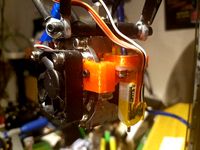
• Replace the two screws holding the hotend fan in place with (2) M3x18mm socket cap screws to attach the BLTouch mount.
• Made sure the BLTouch wires are are sitting flush in the mount and are not touching the fan.
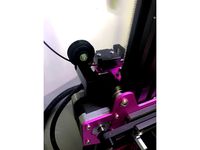
• Wires are secured at the top right corner using two zip ties. Make sure none of the wires interfere with the limit switch.
• Re-use the stock bolts for the extruder filler
• Run your reverse Bowden tube through the filament guide to the PC4-M10 push fitting on the extruder filler.
If you want, you can buy me a coffee at https://ko-fi.com/vampyrex13
This is a complete kit which also includes a filler plate for the original extruder location and a filament guide.
This mount is compatible with the shorter silicone bed leveling columns.
Firmware Notes
• Klipper
[safe_z_home]
home_xy_position: 164.2, 130
...
[bltouch]
x_offset: 34.2
y_offset: 0
z_offset: 0 # temporarily reset to 0 to prevent smashing nozzle into bed.
...
[bed_mesh]
mesh_min: 69.2, 15
mesh_max: 294.2, 260
...
[extruder]
rotation_distance: 3.4334
...
Hardware
• You can use M3x8mm in place of M3xM6mm socket cap screws M3x20mm in place of M3xM18mm.
Ender 6 Mount:
• (3) M3x10mm socket cap screws
BIQU H2:
• (4) M3x8mm socket cap screws
• (1) M3x16mm socket cap screw
ADXL345 Accelerometer
• (2) M3x8mm socket cap screws
• (2) M3 nuts
Fan Duct:
• (2) M3x6mm socket cap screws
BLTouch Mount:
• (2) M3x18mm socket cap screws
BLTouch:
• (2) M3x8mm socket cap screws
• (2) M3 nuts
Extruder Filler
• PC4-M10 push fitting
Filament Guide:
• (1) M3x10mm socket cap screw
• (1) M3 t-slot nut
Versions
• There are two Ender 6 mounts; one with and one without the ADXL345 accelerometer mount.
• There are two Fan Ducts; one with built-in supports (inside mounting holes) and one without.
• There are two Extruder Fillers; one with built-in supports (under filler plate and inside mounting holes) and one without. If using the built in supports version, remove the bottom hole support first using a using a small screwdriver or hex key through the hole in the middle of the top hole support, then remove the top hole support.
Printing Notes
• Increase the number of walls to make the two towers the BIQU H2 mounts to stronger. I used 5 when I printed mine.
• Print the fan duct at .2 and use adaptive layers for the best success.
• The fan duct should be printed in ASA since it's sitting so close to the heat block. The other parts can be printed in ABS or PETG.
Installation Notes
• This is very precise and will be a tight fit pressing onto the gantry plate. If your print has a large elephant's foot, you may need to file the opening that slips over the two original heat sink mounts.
• The BIQU H2 mounts on the top and bottom, but there's also an additional hole to mount an optional M3x16mm socket cap screw from behind.
• Replace the two screws holding the hotend fan in place with (2) M3x18mm socket cap screws to attach the BLTouch mount.
• Made sure the BLTouch wires are are sitting flush in the mount and are not touching the fan.
• Wires are secured at the top right corner using two zip ties. Make sure none of the wires interfere with the limit switch.
• Re-use the stock bolts for the extruder filler
• Run your reverse Bowden tube through the filament guide to the PC4-M10 push fitting on the extruder filler.
If you want, you can buy me a coffee at https://ko-fi.com/vampyrex13
Similar models
thingiverse
free

BiQu H2 Fan duct with sensor mount and dust cover by lightninglord88
...extruder 50x15mm fan and 12mm sensor mount,
hight is slightly adjustable to comensate for different nozzle or heat break lengths.
thingiverse
free

Hemera duct for Biqu H2 extruder by Jingerale79
...ws for the extruder and 2x m4xl35 screws and 2x m4 nut for the fan/mount.
stp file also included if you want to make adjustments.
thingiverse
free
Morninglion Mount for BIQU H2 fits 3DLS, Anet A8 and more! Optional BLTouch! by morganlowe
...qu h2 model i used this in the renders.
thank you!
any questions post them here or find me in the morninglion industries discord
thingiverse
free

Biqu H2 Mount CR10-S Pro v2 by Mike_N
... in pla except for the duct which was done with petg.
i used the fan duct from fhogphil https://www.thingiverse.com/thing:4789656
thingiverse
free

BiQu H2 Fan duct with 12mm sensor ( PINDA ) | exposed gear | reinforced mounting | no pre-supports by xcooling
... dust cover by lightninglord88 on thingiverse: https://www.thingiverse.com/thing:481613
which is a remix of the prusa mk3 shroud.
thingiverse
free

Tevo Tarantula Dual Blower Fanmount with modular Duct for Dual extruder with BLTouch support by Baalith
...rts are a bit to thight to put together (for ex the ducts to assemble on the mount) use a diamondfile to make them fit perfectly.
thingiverse
free

Bigtreetech Smart Filament Sensor Mount for BIQU H2 by zyonee
...g fit when the sensor is at the mounting height.
fasten the two screws on the extruder before mounting the sensor on the bracket!
thingiverse
free

Biqu H2 mount and fan duct for Anycubic Mega X by ngbod
... with the m3 bolts screwed directly into the printed holes or you can fit melt in brass threaded inserts.
bltouch offsets x-31 y0
thingiverse
free

Ender-3 Mellow NF BMG Wind duct for 5015 fan + BLT by robmora
...ng to your slicer, so be sure to select the bottom face in whatever slicing software you're using and lay it flat to the bed.
thingiverse
free

BIQU H2 Fan duct by fhogphil
...designed to avoid interferences on x or z
the two pieces are friction fit. takes a tiny bit of convincing but they slid together.
Vampyrex13
thingiverse
free

Delta Shower Faucet Stop Adapter for Danco Universal Handles by vampyrex13
...versal adapter and limit the handle movement to 180 degrees.
if you want, you can buy me a coffee at https://ko-fi.com/vampyrex13
thingiverse
free

Scion tC (2011-2016) Moonroof Spacer to Prevent Vibration Noise by vampyrex13
...t.
• generally, only a single clip is needed in the middle.
if you want, you can buy me a coffee at https://ko-fi.com/vampyrex13.
thingiverse
free

2011-2016 Scion tC MAF Adaptor for Spectre 8705 MAF Housing by vampyrex13
... that required this adapter at https://youtu.be/1facrfinc7e.
if you want, you can buy me a coffee at https://ko-fi.com/vampyrex13
thingiverse
free

OMTech K40 Laser Cutter Short / Flush Exhaust Vent by vampyrex13
... dimensions will vary from omtech k40 to k40, but this vent sits perfectly flush against the back of the bed frame on my machine.
thingiverse
free

Ender 6 Hot End Fan Shield by vampyrex13
... you can immediately print this in asa (this is what i did).
if you want, you can buy me a coffee at https://ko-fi.com/vampyrex13
thingiverse
free

K&N Apollo Universal Intake 3" Outlet Backing by vampyrex13
... that required this adapter at https://youtu.be/1facrfinc7e.
if you want, you can buy me a coffee at https://ko-fi.com/vampyrex13
thingiverse
free

2011-2016 Scion tC K&N Apollo Cold Air Intake Flexible Hose Guide Under Wiring Harness by vampyrex13
... that required this adapter at https://youtu.be/1facrfinc7e.
if you want, you can buy me a coffee at https://ko-fi.com/vampyrex13
thingiverse
free

K40 Laser Cutter 6mm OD Air Assist Hose Guide Mount / Stopper by vampyrex13
...per amount of slack inside the unit. you'll need to a zip tie to keep it secured.
both mounts are held in place with 3m tape.
thingiverse
free

Ender 3 Pro MeanWell LRS-350-24 Power Supply / PSU Vertical Stand
...vertical stand thingiverse this is a simple remix of vampyrex13#39;s psu cover. instead of attaching this to my ender...
thingiverse
free

Ender 3 Stock Power Supply / PSU Fan Silencer Duct
...my logo and my ham radio callsign to the vampyrex13 modified power supply silencer duct, to which the holes...
Adxl345
thingiverse
free

ADXL345 Mount by Itachai
...://www.thingiverse.com/thing:4548121
adxl345 mount (for klipper)
screws: see picture, rm3*8 to mount adxl345 on the adxl345 mount
thingiverse
free

ADXL345 mount by rg_3d
...adxl345 mount by rg_3d
thingiverse
made an adxl345 mount on my hydra fan duct for easy access
thingiverse
free

HevORT ADXL345 sensor mounter by ChipCE
...hevort adxl345 sensor mounter by chipce
thingiverse
just a simple adapter to mount the adxl345 sensor on the hevort carrier.
thingiverse
free

ADXL345 holder for MK4 header by ckam
...adxl345 holder for mk4 header by ckam
thingiverse
simple adxl345 holder for mk4 header for anycubic mega s
thingiverse
free

ADXL345 backplate remix by Daali
...s a simple remix of chipce's "hevort adxl345 sensor mounted". i needed the mount with 2 holes and no end connector
thingiverse
free

ADXL345 Y Axis Mount by djos_1475
...is mount by djos_1475
thingiverse
designed this adxl345 y-axis mount to superglue to the y-carriage at the back of your printer.
thingiverse
free

FlyingBear Ghost 5 / 4S ADXL345 Mount by Blinkii
...flyingbear ghost 5 / 4s adxl345 mount by blinkii
thingiverse
adxl345 mount for fbg 5 and klipper
thingiverse
free

ADXL345 magnetic heatbed mount by itsybitsy
...imply clamped between the magnetic surface and the metal plate. perfect for a fast mount to do the input shaper test for klipper.
thingiverse
free

Ender 3 ADXL345 Bed Mount by lKagel
...e bed under the leveling wheel on the front left side, then with 2 m3 bolts and 2 m3 nuts you can attach the adxl345 to the mount
thingiverse
free

Sapphire Pro / Plus ADXL345 mount by agrestic
...of the twotrees sapphire pro (should work on plus) to do the resonance test for the input shaper in klipper
necessary 4xm3 screws
Biqu
thingiverse
free

BIQU B1 Air Guide by BADCO2k
...biqu b1 air guide by badco2k
thingiverse
printed on biqu b1
thingiverse
free

BiQU BX Printer Upgrade by MaXx0110
...biqu bx printer upgrade by maxx0110
thingiverse
biqu bx upgrades
thingiverse
free
BiQu H2 cover by jayfraser
...by jayfraser
thingiverse
this is a cover for the biqu h2. it allows the use of a bl touch and a standard ender part cooling fan.
thingiverse
free
BIQU BX 4040 FACE by devilcorp
...biqu bx 4040 face by devilcorp
thingiverse
front face for 4040 extrusion of biqu bx
thingiverse
free
BIQU B1 COVER by milekitic
...n biqu b1 extruder that prevents light from shining directly into the eyes when looking at the first layer :)
happy printing :)
thingiverse
free
Biqu Delta Stiff Structure Upgrade by tatubias
...biqu delta stiff structure upgrade by tatubias
thingiverse
biqu delta stiff structure upgrade
thingiverse
free
Biqu B1 UM2 Nozzle box by Gekido
...biqu b1 um2 nozzle box by gekido
thingiverse
simple box for the specific biqu b1 nozzles
thingiverse
free
Biqu - Filament adjustment by Mutar
...biqu - filament adjustment by mutar
thingiverse
adjustment tool
thingiverse
free
BIQU B1 Bowden brace by _Jamesy_
... by _jamesy_
thingiverse
a simple bowden support for the biqu b1... to help prevent the ptfe tube from wiggling in the connector
thingiverse
free
Biqu B1 Filament Guide by Sentshuas04
...ntshuas04
thingiverse
...made this remix of holspeed´s filament guide for the biqu b1.
i had to grind the radius a little bit...
H2
3ddd
free

Hummer H2
...hummer h2
3ddd
hummer
hummer h2, with a medium interior, the package also included the vray shades and textures for the model
turbosquid
$3

Hidrogenium H2
...ty free 3d model hidrogenium h2 for download as 3ds and blend on turbosquid: 3d models for games, architecture, videos. (1219998)
turbosquid
$2

H2 Station
...
royalty free 3d model h2 station for download as stl and obj on turbosquid: 3d models for games, architecture, videos. (1679247)
turbosquid
$1

H2.max
... available on turbo squid, the world's leading provider of digital 3d models for visualization, films, television, and games.
3d_export
$40

Hammer H2 3D Model
...hammer h2 3d model
3dexport
hammer h2
hammer h2 3d model godzik 4386 3dexport
3ddd
$1

Hummer H2 Sut
...r h2 sut
3ddd
hummer
hummer h2 sut, with a medium interior, the package also included the vray shades and textures for the model.
3d_ocean
$89

Hummer H2 2009
...ar base. model is created accurately, in real units of measurement, qualitatively and maximally close to the original. model f...
3d_export
$8

H2 3D Model
...h2 3d model
3dexport
tv table interior hi-tech design art new lamp coffee
h2 3d model b.cube 89608 3dexport
3d_export
$42

Hummer h2 sut 3D Model
...hummer h2 sut 3d model
3dexport
hummer h2 sut american truck
hummer h2 sut 3d model stihl 349 3dexport
turbosquid
$378

Kawasaki Ninja H2
... available on turbo squid, the world's leading provider of digital 3d models for visualization, films, television, and games.
Bltouch
thingiverse
free
Support bltouch by TonyJ
...support bltouch by tonyj
thingiverse
support bltouch
thingiverse
free
BLTOUCH for MICRON3DP by lamerhouse
...bltouch for micron3dp by lamerhouse
thingiverse
bltouch for micron3dp
thingiverse
free
SapphirePro mount for Bltouch
...sapphirepro mount for bltouch
thingiverse
sapphirepro mount for bltouch
thingiverse
free
ender6 BLtouch by chimaer
...ender6 bltouch by chimaer
thingiverse
ender6 bltouch
this is an external bracket
thingiverse
free
BLTouch KP3s by 1devilman1
...bltouch kp3s by 1devilman1
thingiverse
bltouch mount for kingroon kp3s
thingiverse
free
Bltouch support adjustable
...bltouch support adjustable
thingiverse
adjustable support for bltouch, p3steel.
thingiverse
free
BMG NEREUS BLTOUCH
...bmg nereus bltouch
thingiverse
petg
m3 screws and nuts for the bltouch
thingiverse
free

BLTouch Bracket by tidh666
...bltouch bracket by tidh666
thingiverse
serves to attach the bltouch sensor to the extruders
thingiverse
free
bltouch mount by wars
...bltouch mount by wars
thingiverse
reinforced bracket for bltouch cooperates with high_clearance_cr10_oem_fang_mod
thingiverse
free

BLTouch Holder by Jonthan06
...bltouch holder by jonthan06
thingiverse
support bltouch pour wanhao d12
Filler
turbosquid
$26

Filler
... available on turbo squid, the world's leading provider of digital 3d models for visualization, films, television, and games.
3ddd
$1

Concealed Tub Filler
...concealed tub filler
3ddd
waterworks , смеситель
concealed tub filler
3d_export
$8

faucet pot filler
...faucet pot filler
3dexport
3ddd
$1

Vola BK7 Bath Filler
...vola bk7 bath filler
3ddd
vola , faucet
vola bk7 bath filler
turbosquid
$15

Metal Filler Breather.ipt
... available on turbo squid, the world's leading provider of digital 3d models for visualization, films, television, and games.
turbosquid
free
Risco301Continuous Vacuum Filler
... available on turbo squid, the world's leading provider of digital 3d models for visualization, films, television, and games.
3ddd
$1

Vola FS1 Floormount Bath Filler
...vola fs1 floormount bath filler
3ddd
vola , faucet
vola bk7 floormount tub filler
turbosquid
$20

Pot filler K431029(1)
... available on turbo squid, the world's leading provider of digital 3d models for visualization, films, television, and games.
turbosquid
$14

Bath Filler/Sink Taps
... available on turbo squid, the world's leading provider of digital 3d models for visualization, films, television, and games.
turbosquid
$9

Home and condo filler objects
... available on turbo squid, the world's leading provider of digital 3d models for visualization, films, television, and games.
Gantry
turbosquid
$349
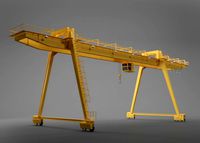
Gantry crane
...alty free 3d model gantry crane for download as ige and sldas on turbosquid: 3d models for games, architecture, videos. (1476278)
3d_export
free
firestone advertising gantry
...rs premises and<br>these advertisement gantries, were very popular in the 30-70's at grand prix races advertising tyres
turbosquid
$30
Derelict Launch Gantry
...alty free 3d model derelict launch gantry for download as fbx on turbosquid: 3d models for games, architecture, videos. (1669952)
turbosquid
$129
Gantry Crane RTG
...e 3d model gantry crane rtg for download as max, obj, and fbx on turbosquid: 3d models for games, architecture, videos. (1491933)
turbosquid
$120
Gantry stacker Assembly
...try stacker assembly for download as sldas, fbx, 3ds, and ige on turbosquid: 3d models for games, architecture, videos. (1648516)
turbosquid
$19

Train Signals Gantry
...l train signals gantry for download as 3ds, max, obj, and fbx on turbosquid: 3d models for games, architecture, videos. (1462242)
turbosquid
$5
STS Gantry Crane
... available on turbo squid, the world's leading provider of digital 3d models for visualization, films, television, and games.
turbosquid
$160

Bulk carrier with gantry crane
...carrier with gantry crane for download as lwo, obj, and blend on turbosquid: 3d models for games, architecture, videos. (1285258)
3d_export
$50

RMG Gantry Crane 3D Model
...t hoist rail rubber tyre tire rtg eot beam portal heigh tonne shipyard port
rmg gantry crane 3d model 5starsmodels 42860 3dexport
3d_export
$29
gantry crane
...istic model that will enhance the detail and realism of any of your rendering projects.<br>file formats: max, obj, fbx, 3ds
Duct
turbosquid
$19
Duct Set
...d
royalty free 3d model duct set for download as max and fbx on turbosquid: 3d models for games, architecture, videos. (1145038)
turbosquid
$10
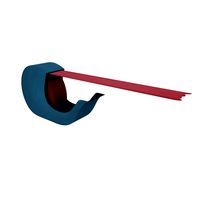
Duct Tape
...id
royalty free 3d model duct tape for download as ma and ma on turbosquid: 3d models for games, architecture, videos. (1580351)
turbosquid
free
Duct Tape
...
free 3d model duct tape for download as obj, fbx, and blend on turbosquid: 3d models for games, architecture, videos. (1486518)
3d_ocean
$7
Air-duct
... ventilation
high quality industrial air duct ventilation model. created in cinema 4d but comes in various other formats as well.
turbosquid
$20
Air ducts
...lty free 3d model air ducts for download as max, obj, and fbx on turbosquid: 3d models for games, architecture, videos. (1262476)
3d_export
$10

Supply air duct
...supply air duct
3dexport
supply air duct with two axial fans and hangers
turbosquid
$2
Duct Tape
...e 3d model duct tape for download as obj, fbx, blend, and dae on turbosquid: 3d models for games, architecture, videos. (1473972)
turbosquid
free

Duct Tape
... available on turbo squid, the world's leading provider of digital 3d models for visualization, films, television, and games.
3d_ocean
$3
Duct tape
...polys. includes: cinema 4d project. model in 3 formats (obj, fbx, 3ds). 6 .tga texture maps (albedo, ambient occlusion, diffus...
turbosquid
$40
Ventilation Duct PACK
...tion duct pack for download as ma, obj, fbx, and unitypackage on turbosquid: 3d models for games, architecture, videos. (1287068)
Ender
3ddd
$1

Enders / Elegance
...enders / elegance
3ddd
обогреватель
уличный газовый обогреватель enders elegance
высота: 2200 мм
3d_export
free

ender 3 frame cavity covers
... of the creality ender 3 - makes it look a bit more attractive it just slides into the open channels of the aluminium framework
turbosquid
$1

pen support for ender 3
...y free 3d model pen support for ender 3 for download as blend on turbosquid: 3d models for games, architecture, videos. (1611282)
3d_ocean
$9

Ender Dragon Minecraft
...ojang obj poly videogames
ender dragon minecraft created with cinema 4d r15 formats included: max 2013 – fbx 2012 – c4d r15 – obj
3d_export
free

Creality ender enclosure webcam mount
...e creality enclosure. sure is better than a tripod. change it up if it helps. i printed pla with 50% infill on my dd ender 3 pro.
3d_export
free

ender 3 enclosure corners
...er corners and 4 upper corners, using 25mmx25mm angled aluminium pieces that gets covered on inside of the frame with plexiglass
3d_export
free

ender 3 3d print bed clips
...ed + normal aluminium bed frame of the creality ender 3 = 6mm (b) these clips are designed for glass plate + aluminium bed = 4mm
3d_export
$5

GRUMPY CAT
...grumpy cat 3dexport grumpy cat to print in ender ...
3d_export
$5

Logs fire
...with one multi material for corona and vray r ender. albedo, normal, uvmap, roughness format jpg 4096x4096 models:...
3d_export
$42

excavator
...is the original size. 0.12 mm printing surface creality ender5 ...
Guide
turbosquid
$15
Guide drawer
...squid
royalty free 3d model guide drawer for download as dwg on turbosquid: 3d models for games, architecture, videos. (1261387)
turbosquid
$1
Road Guide
... available on turbo squid, the world's leading provider of digital 3d models for visualization, films, television, and games.
archive3d
free
Guide-board 3D Model
...ion sign guide sign
guide-board n170112 - 3d model (*.gsm+*.3ds) for exterior 3d visualization.
turbosquid
$2

soap cutter guide
...
royalty free 3d model soap cutter guide for download as stl on turbosquid: 3d models for games, architecture, videos. (1694030)
turbosquid
$15

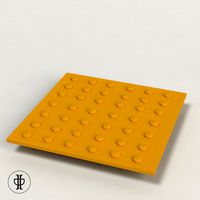
Blind Guiding tiles
...free 3d model blind guiding tiles for download as 3dm and dae on turbosquid: 3d models for games, architecture, videos. (1156598)
turbosquid
$69

Japanese Tour Guide
...d model japanese tour guide for download as max, fbx, and obj on turbosquid: 3d models for games, architecture, videos. (1614288)
turbosquid
$10
CNC Linear Guide
... available on turbo squid, the world's leading provider of digital 3d models for visualization, films, television, and games.
turbosquid
$1

Tank Model Guide
... available on turbo squid, the world's leading provider of digital 3d models for visualization, films, television, and games.
turbosquid
$1
Road Guide 2
... available on turbo squid, the world's leading provider of digital 3d models for visualization, films, television, and games.
3d_ocean
$9

Guide Books 3
...sformed separately and each have unique texture map on front and back cover. to make your work easier this model comes in thre...
Direct
design_connected
free

Compas Direction
...compas direction
designconnected
free 3d model of compas direction by vitra designed by prouvé, jean.
design_connected
$18

Direction Pivotant
...direction pivotant
designconnected
vitra direction pivotant computer generated 3d model. designed by prouvé, jean.
turbosquid
$6

not direct the front
...oyalty free 3d model not direct the front for download as max on turbosquid: 3d models for games, architecture, videos. (1213034)
turbosquid
$10

Rails Direct
... available on turbo squid, the world's leading provider of digital 3d models for visualization, films, television, and games.
3d_export
$5

Picto toilet directions
...lude 3d files next to rhino6: x3dv, step, igus, obj and stl. double-sided, flipping changes the gender directions to the toilets.
3ddd
$1

fauteuli direction
...d
chair , vitra , fauteuli
fauteuli vitra chair
design_connected
$18

Fauteuil Direction, 1951
...fauteuil direction, 1951
designconnected
vitra fauteuil direction, 1951 computer generated 3d model. designed by prouvé, jean.
3d_export
$5
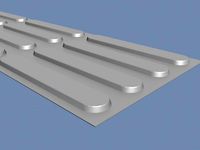
Directional tactile 3D Model
...tactile 3d model
3dexport
directional tactile braille tile flooring interior
directional tactile 3d model renob000 71068 3dexport
turbosquid
$26

Radio direction finder A
...ty free 3d model radio direction finder a for download as fbx on turbosquid: 3d models for games, architecture, videos. (1212490)
turbosquid
$7

Wooden direction signage
...ty free 3d model wooden direction signage for download as max on turbosquid: 3d models for games, architecture, videos. (1453747)
Kit
turbosquid
$3

Bathroom Kit Baño kit
... available on turbo squid, the world's leading provider of digital 3d models for visualization, films, television, and games.
turbosquid
$19

Kit
... available on turbo squid, the world's leading provider of digital 3d models for visualization, films, television, and games.
3d_export
$20

Drift Kit
...drift kit
3dexport
turbosquid
$40

BitCoin Kit
...urbosquid
royalty free 3d model bitcoin kit for download as on turbosquid: 3d models for games, architecture, videos. (1519068)
turbosquid
$9

Industrial kit
...osquid
royalty free 3d model industrial kit for download as on turbosquid: 3d models for games, architecture, videos. (1144117)
turbosquid
$6

Kit Vases
...
turbosquid
royalty free 3d model kit vases for download as on turbosquid: 3d models for games, architecture, videos. (1285114)
turbosquid
free

Survival Kit
...rbosquid
royalty free 3d model survival kit for download as on turbosquid: 3d models for games, architecture, videos. (1637721)
turbosquid
$50

Ninja Kit
...rbosquid
royalty free 3d model ninja kit for download as fbx on turbosquid: 3d models for games, architecture, videos. (1672364)
turbosquid
$35

Brushes Kit
...osquid
royalty free 3d model brushes kit for download as max on turbosquid: 3d models for games, architecture, videos. (1216721)
turbosquid
$19
Medical kit
...osquid
royalty free 3d model medical kit for download as fbx on turbosquid: 3d models for games, architecture, videos. (1486089)
Drive
turbosquid
$90
Drive
...turbosquid
royalty free 3d model drive for download as blend on turbosquid: 3d models for games, architecture, videos. (1654393)
3d_export
$10

cycloidal drive
...cycloidal drive
3dexport
cycloidal drive
3d_ocean
$5

Flash Drive
...h drive included : – materials – scene ( lighs / room ) – .c4d + .obj for any questions please feel free to contact me thank you.
3d_ocean
$5

Usb drive
...s shaders and a lighting setup. it also has a small animation of it going in and out. i saved it out as both a .blend file and...
3d_ocean
$5

Pen Drive
...est computer drive game model good low poly new pen pen drive textured unwrapped uv very low poly
a very beautiful low poly model
3d_ocean
$10

External hard drive
... is a detailed model of a trekstor external hard drive. you can easily modify the label on the top. simply edit the text objects.
turbosquid
$60

Star Drive
...squid
royalty free 3d model star drive for download as blend on turbosquid: 3d models for games, architecture, videos. (1254314)
turbosquid
$50

Star Drive
...squid
royalty free 3d model star drive for download as blend on turbosquid: 3d models for games, architecture, videos. (1263524)
turbosquid
$45

Star Drive
...squid
royalty free 3d model star drive for download as blend on turbosquid: 3d models for games, architecture, videos. (1287060)
turbosquid
$40
Star Drive
...squid
royalty free 3d model star drive for download as blend on turbosquid: 3d models for games, architecture, videos. (1261902)
Extruder
3ddd
$1

Extruded Chair
...extruded chair
3ddd
extruded , tom dixon
inspired by tom dixon extruded chair
turbosquid
$15

Extruded Table
... extruded table for download as blend, dae, fbx, obj, and stl on turbosquid: 3d models for games, architecture, videos. (1634137)
turbosquid
$2

3D Printer Extruder
...d
royalty free 3d model 3d printer extruder for download as on turbosquid: 3d models for games, architecture, videos. (1537359)
turbosquid
$1

Zombie extruded text
...oyalty free 3d model zombie extruded text for download as obj on turbosquid: 3d models for games, architecture, videos. (1322198)
turbosquid
$4

Extruder conical screw
...el extruder conical screw for download as sldpr, ige, and stl on turbosquid: 3d models for games, architecture, videos. (1524433)
turbosquid
$50

3d PRINTER - Extruder
... available on turbo squid, the world's leading provider of digital 3d models for visualization, films, television, and games.
turbosquid
$15

Extruded Table 2
...xtruded table 2 for download as blend, dae, fbx, obj, and stl on turbosquid: 3d models for games, architecture, videos. (1621846)
turbosquid
$10

Maya Extrude Tool
... available on turbo squid, the world's leading provider of digital 3d models for visualization, films, television, and games.
3d_export
$5

world earth extrude map
...world earth extrude map
3dexport
3ddd
$1

Simply Elegant Extruded Tree Coffee Table Design
...ble by link studios. the silhouette of a tree is visible at one angle, extruded from the surface to create the support structure.
Filament
3ddd
$1

Filament Cage
...filament cage
3ddd
лофт , filament cage
модель бра, делалась по фото!
turbosquid
$3

FILAMENT COUNTER
...d
royalty free 3d model filament counter for download as stl on turbosquid: 3d models for games, architecture, videos. (1563049)
3d_export
$5

Filament lamp 3D Model
...filament lamp 3d model
3dexport
filament lamp 3d model kevin 54161 3dexport
3d_export
$5

Filament bulb candle 3D Model
...filament bulb candle 3d model
3dexport
filament bulb-candle
filament bulb candle 3d model kevin 54163 3dexport
3d_export
$5

Filament led light bulb
...filament led light bulb
3dexport
realistic 3d model of filament light bulb with v-ray materials.
3d_export
$5

Filament led light bulb
...filament led light bulb
3dexport
realistic 3d model of filament light bulb with v-ray materials.
3d_export
$5

Filament led light bulb
...filament led light bulb
3dexport
realistic 3d model of filament light bulb with v-ray materials.
3d_export
$5

Filament led light bulb
...filament led light bulb
3dexport
realistic 3d model of filament light bulb with v-ray materials.
3d_export
$5

Filament led light bulb
...filament led light bulb
3dexport
realistic 3d model of filament light bulb with v-ray materials.
3ddd
$1

Factory filament metal shade
...factory filament metal shade
3ddd
restoration hardware
restoration hardware. 20th c. factory filament metal shade.
Fan
3d_export
$5

fan
...fan
3dexport
fan 3d model, table fan, fan, electric fan, ventilator
archibase_planet
free

Fan
...fan
archibase planet
fan large fan
fan out n260707 - 3d model for interior 3d visualization.
archibase_planet
free

Fan
...fan
archibase planet
fan ceiling fan ventilator
fan stealth n300615 - 3d model (*.gsm+*.3ds) for interior 3d visualization.
3d_export
$15

fan
...fan
3dexport
is an ancient fan
3ddd
$1

Fan-C-Fan by marco gallegos
...n-c-fan by marco gallegos
3ddd
вентилятор , marco gallegos
fan-c-fan by marco gallegos
3d_export
$10

fan
...fan
3dexport
a detailed fan designed for home or space blowing is now available for only 19.99!
turbosquid
$1

Fan
...fan
turbosquid
free 3d model fan for download as on turbosquid: 3d models for games, architecture, videos. (1427865)
turbosquid
$14

Fan
...fan
turbosquid
royalty free 3d model fan for download as on turbosquid: 3d models for games, architecture, videos. (1415642)
3ddd
$1

Светильник Fan
...светильник fan
3ddd
fan , italamp
светильник fan, производитель italamp
turbosquid
$25

Fan
...fan
turbosquid
royalty free 3d model fan for download as c4d on turbosquid: 3d models for games, architecture, videos. (1483246)
6
3d_export
$18

tulip 6
...tulip 6
3dexport
tulip 6
3d_export
$5
hinge 6
...hinge 6
3dexport
hinge 6
3ddd
$1

MASIERO / FLASHWOOD STL 6 + 6
...6
3ddd
masiero
торшер flashwood stl 6 + 6 фабрики masiero
http://www.masierogroup.com/c87_697/it/flashwood%20stl%206%20+%206.ashx
turbosquid
$110

Atmos Cannon 2000 6*6
...yalty free 3d model atmos cannon 2000 6*6 for download as skp on turbosquid: 3d models for games, architecture, videos. (1528591)
turbosquid
$1

ae 6 6 electric locomotive
... free 3d model ae 6 6 electric locomotive for download as obj on turbosquid: 3d models for games, architecture, videos. (1707537)
turbosquid
$39

A-6
... available on turbo squid, the world's leading provider of digital 3d models for visualization, films, television, and games.
3ddd
$1
6 ковров
...6 ковров
3ddd
ковры , ковер
6 ковров
turbosquid
$12

Calligraphic Digit 6 Number 6
...hic digit 6 number 6 for download as max, obj, fbx, and blend on turbosquid: 3d models for games, architecture, videos. (1389336)
turbosquid
$19

Case For Phone 6 Girl 6
... available on turbo squid, the world's leading provider of digital 3d models for visualization, films, television, and games.
turbosquid
$35

Iphone 6 & 6 Plus All
... available on turbo squid, the world's leading provider of digital 3d models for visualization, films, television, and games.
Mount
3d_export
free

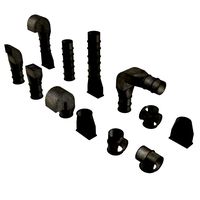
mounting bracket
...mounting plate is the portion of a hinge that attaches to the wood. mounting plates can be used indoors, cabinetry and furniture.
turbosquid
$2

MOUNTING
... available on turbo squid, the world's leading provider of digital 3d models for visualization, films, television, and games.
turbosquid
free

Mounts
... available on turbo squid, the world's leading provider of digital 3d models for visualization, films, television, and games.
turbosquid
free

Mount Fuji
...fuji
turbosquid
free 3d model mount fuji for download as obj on turbosquid: 3d models for games, architecture, videos. (1579977)
3d_export
$5

Headphone mount LR
...headphone mount lr
3dexport
headphone mount l+r
turbosquid
$39

Mount rainier
...quid
royalty free 3d model mount rainier for download as fbx on turbosquid: 3d models for games, architecture, videos. (1492586)
turbosquid
$5

pipe mounting
...quid
royalty free 3d model pipe mounting for download as obj on turbosquid: 3d models for games, architecture, videos. (1293744)
turbosquid
$3

Mounting Tires
...uid
royalty free 3d model mounting tires for download as fbx on turbosquid: 3d models for games, architecture, videos. (1708511)
3d_export
$5

Magnetic GoPro Mount
...pro mount
3dexport
cool magnetic mount for gopro. allows you to mount the camera on flat metal surfaces and get exclusive shots.
turbosquid
$5

Stone Mount
...ty free 3d model stone mount for download as ma, obj, and fbx on turbosquid: 3d models for games, architecture, videos. (1370306)