Thingiverse
Ender 5 (Pro) Electronics Box Replacement Lid with 120mm fan and 10mm more space by rmpel
by Thingiverse
Last crawled date: 3 years ago
Update Apr 1, 2021
Added a version of the left part without the PSU guard for airflow to the PSU, in case you want to remove the PSU fan and use a mesh lid; https://www.thingiverse.com/thing:4800781
Update Jan 26, 2021
Added a version of all 4 lid-halves with flush bolts
Back-story
Inspired by https://www.thingiverse.com/thing:4203653 (which I cannot select as source for Remix, but I will keep trying) and xeroxed from https://www.thingiverse.com/thing:4636181, but fully rebuilt from scratch.
This is a continuation of my previous replacement lid; https://www.thingiverse.com/thing:4761348
Description
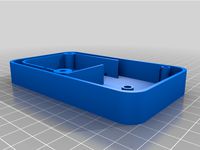
This is a three-part lid for the Ender 5 and Ender 5 Pro (as I have been told) electronics enclosure.
My goal was to create a perfectly snug fitting lid, in as little as possible parts.
Required hardware;
4x m3x16 or longer bolt for the corners, could do with M3x14 in case of the flush bolts version
3x m3x12 bolt with nut for coupling the two pieces.
4x m3x??? bolt with nuts for mounting the fan you wish.
Fan mounting
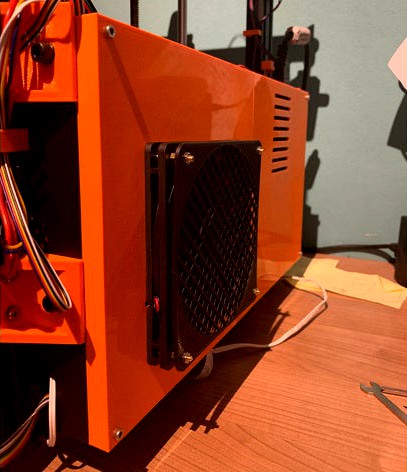
I myself mounted the fan (12 mm thick) with 4x m3x18 bolts, 4x m3x6 panel mount and 4 nuts (in order: bolt, lid, fan, panel mount, fan guard, nut)
See photo for a close-up :)
Partlist
There are 10 parts in this thing
2 left-side lids, one with a fan hole 120mm and one with a simple grill
and a variant of each with flush bolts
2 right-side lids, again, one with a fan hole 120mm and one with a simple grill
and a variant of each with flush bolts
2 fan grills, one is flush (in case you create spacing yourself like I did, see photo) and one with 1mm spacing where the fan-blades spin.
Note
I would advise against using the simple grill version on the left side, unless you plan to use a custom fan solution that pulls air across the controller board, but for symmetry, I just had to include it (OCD!)
About the left side
The left-side part with fan hole has a cut-out for cables, as I am using a RasPi with camera. Upon request I will create a version without a cut-out, but it's easily remixed by yourself. This part also has a small airflow guard to prevent the 120mm fan from pushing air through the PSU fan, which (as I am told) is bad for a fan. (A fan should always only rotate under their own power. it's a long-term-thing)
Part height
Total "height" for printing is 14mm, the lid itself is 13.3mm (because the corners are not flush, but counter-sunk in the case). As the main-lid-area is 2.3 mm thick (because, the original was). this gives 11mm extra space. But the lid is slightly recessed, (by 1mm) so the actual space gain is 10mm.
About the fan guard
The fan guard is specially crafted for 0.2 layer height, 0.4 nozzle. (0.10 layer height would work too)
it will print diagonal lines top left to bottom right on the odd layers and top right to bottom left on the even layers (or vice versa). This saves time and filament.
final note
If you like it, click the like (heart)
If you print it; post a make
If you have suggestions for improvements, questions, any kind of remarks; leave a comment
Looking at the download statistics, you guys and gals out there really like this thing :) so, leave a like, a make, a comment.
Much appreciated!
Added a version of the left part without the PSU guard for airflow to the PSU, in case you want to remove the PSU fan and use a mesh lid; https://www.thingiverse.com/thing:4800781
Update Jan 26, 2021
Added a version of all 4 lid-halves with flush bolts
Back-story
Inspired by https://www.thingiverse.com/thing:4203653 (which I cannot select as source for Remix, but I will keep trying) and xeroxed from https://www.thingiverse.com/thing:4636181, but fully rebuilt from scratch.
This is a continuation of my previous replacement lid; https://www.thingiverse.com/thing:4761348
Description
This is a three-part lid for the Ender 5 and Ender 5 Pro (as I have been told) electronics enclosure.
My goal was to create a perfectly snug fitting lid, in as little as possible parts.
Required hardware;
4x m3x16 or longer bolt for the corners, could do with M3x14 in case of the flush bolts version
3x m3x12 bolt with nut for coupling the two pieces.
4x m3x??? bolt with nuts for mounting the fan you wish.
Fan mounting
I myself mounted the fan (12 mm thick) with 4x m3x18 bolts, 4x m3x6 panel mount and 4 nuts (in order: bolt, lid, fan, panel mount, fan guard, nut)
See photo for a close-up :)
Partlist
There are 10 parts in this thing
2 left-side lids, one with a fan hole 120mm and one with a simple grill
and a variant of each with flush bolts
2 right-side lids, again, one with a fan hole 120mm and one with a simple grill
and a variant of each with flush bolts
2 fan grills, one is flush (in case you create spacing yourself like I did, see photo) and one with 1mm spacing where the fan-blades spin.
Note
I would advise against using the simple grill version on the left side, unless you plan to use a custom fan solution that pulls air across the controller board, but for symmetry, I just had to include it (OCD!)
About the left side
The left-side part with fan hole has a cut-out for cables, as I am using a RasPi with camera. Upon request I will create a version without a cut-out, but it's easily remixed by yourself. This part also has a small airflow guard to prevent the 120mm fan from pushing air through the PSU fan, which (as I am told) is bad for a fan. (A fan should always only rotate under their own power. it's a long-term-thing)
Part height
Total "height" for printing is 14mm, the lid itself is 13.3mm (because the corners are not flush, but counter-sunk in the case). As the main-lid-area is 2.3 mm thick (because, the original was). this gives 11mm extra space. But the lid is slightly recessed, (by 1mm) so the actual space gain is 10mm.
About the fan guard
The fan guard is specially crafted for 0.2 layer height, 0.4 nozzle. (0.10 layer height would work too)
it will print diagonal lines top left to bottom right on the odd layers and top right to bottom left on the even layers (or vice versa). This saves time and filament.
final note
If you like it, click the like (heart)
If you print it; post a make
If you have suggestions for improvements, questions, any kind of remarks; leave a comment
Looking at the download statistics, you guys and gals out there really like this thing :) so, leave a like, a make, a comment.
Much appreciated!
Similar models
thingiverse
free

Lid with 120mm Fan Grill for bgdog's Modular Case by mnijph
...mount point for a 120mm fan and a grill.
requires:
4x m4 30mm or 35mm screws
4x m4 hex nuts
4x m3 6mm or 8mm screws
1x 120mm fan
thingiverse
free

Ender 3 PSU Mount (80mm fan) Lack enclosure by ExquisiteCatBread
...inter.
80mm fan attachment / case: https://www.thingiverse.com/thing:3437190
fan grill: https://www.thingiverse.com/thing:2802474
thingiverse
free
Ender 3 Pro 5015 Fan PSU Mount by DanHergie
...stock fan screws to secure the lid of the mount to the 5015.
finally use 2 x m3x5mm screws to firmly secure the lid to the mount.
thingiverse
free

120mm Zia fan grill by damanbaird
...fan grill - https://www.thingiverse.com/thing:2625080
icp hatchet man 120mm fan grill - https://www.thingiverse.com/thing:2601046
thingiverse
free

Simple Fume Extractor by shred
...bon sheet for kitchen hoods
4x screws m4x50
4x washers m4
4x nuts m4
print both parts with the grill side rotated to the heatbed.
thingiverse
free

Ender 3 PSU Fan Cover by AlexanderGi
...cover by alexandergi
thingiverse
i upgraded my psu fan with a larger and quieter one, that i mounted externally to the psu case.
thingiverse
free

Fysetc Mini12864 case
...obably anywhere using t-nuts.
requires m3 screws, 4x for the board, 2x for the case.
updated, moved the screwholes to the sides.
thingiverse
free

BatFan!! Batman 120mm Fan Grill! by scootnfast
...batfan!! batman 120mm fan grill! by scootnfast
thingiverse
batman silhouette fan grill guard for 120mm case fan
thingiverse
free

Remix of Lid Covers for Psu
...ion. i didnt like the fact that the psu had no vent ports on the lids so i tinkercad the lids and added some vent grills for psu.
thingiverse
free

Ender 5 Electronics Box Lid w/ 120 mm fan by rmpel
...odel but did not bother printing it. in case i want to change more, at least i did not waste 100g of filament and 6 hours time ;)
Rmpel
thingiverse
free

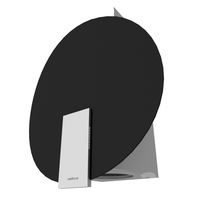
Free WiFi QR Sign by rmpel
...gn by rmpel
thingiverse
a nice, thin wifi sign, print at .2 layer height, 10 layers color 1 (white) and the rest color 2 (black)
thingiverse
free

Pi1541 Case - a remix extreme by rmpel
...as a hole, in daily use, there is not much wrong :)
the parts are heavily moodier to suit my needs. they might not be your needs.
thingiverse
free

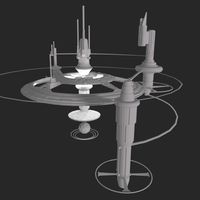
Flux Engine (Stand-alone) by rmpel
...ent for 6 months now and still will see a lot of changes of the coming months.
i plan to create a video of the complete assembly.
thingiverse
free

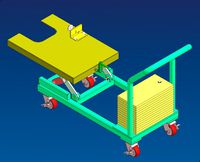
Ender-5 Electronics cover with 10mm extra room - DIY by rmpel
...ze of choice (currently included are 120mm and 80mm) as a negative and create the hole at the preferred spot.
export and print :)
thingiverse
free

Mean Well LRS-350 PSU Cover - Fanless - With logo, exact dimensions and connector indicators by rmpel
...is that my connector guard doesn't fit very well.
also i found myself missing the indicators for +/- and live/neutral/ground.
thingiverse
free

Creality Ender-5 PSU Terminal (Contacts) Guard by rmpel
...nt so this guard will not fit an original mean well.
for mean well lrs-350 series; see https://www.thingiverse.com/thing:4781360
thingiverse
free

IKEA LEDBERG Desk/Plant Lights - Remix and fix for Dioder L1327 multicolour lights by rmpel
...idge.
the rest of the files are not included here, please see the remix-base for those.
https://www.thingiverse.com/thing:4678639
thingiverse
free

Mean Well LRS-350 PSU Terminal (Contacts) guard by rmpel
...andy version. this one will not fit the stock ender 5 psu.
for ender 5 stock psu, see https://www.thingiverse.com/thing:4761289
thingiverse
free

Ender 5 - Additional electronics plate - with Raspberry Pi by rmpel
...download statistics, you guys and gals out there really like this thing :) so, leave a like, a make, a comment.
much appreciated!
thingiverse
free

Cover for Raspberry Pi 40-pin GPIO Connector - UART pins exposed - GND and Pin1 indicators by rmpel
... 6-10".
my answer is; because now i still have the option of either using or providing 5v from or to the pi on pins 4 and 6.
120Mm
turbosquid
$20

M829A3 120mm, APFSDS-T
...alty free 3d model m829a3 120mm, apfsds-t for download as obj on turbosquid: 3d models for games, architecture, videos. (1219997)
turbosquid
$79

M-75 120mm Mortar
... available on turbo squid, the world's leading provider of digital 3d models for visualization, films, television, and games.
3d_export
$5

Lian Li 120mm Spider Fan Guard 3D Model
...d 3d model
3dexport
lian li 120mm spider fan guard cooler pt-g05
lian li 120mm spider fan guard 3d model mackandco 37968 3dexport
turbosquid
$69

QF 120mm Mk VIII naval gun
...mm mk viii naval gun for download as lwo, obj, fbx, and blend on turbosquid: 3d models for games, architecture, videos. (1430519)
3d_export
$5
Ammo box tank shell 120mm
...hell 120mm
3dexport
nato box for tank ammunition caliber 120-125mm 3d format:fbx,obj,3ds max 2013 texture only diffuse 1024x1024
3ddd
$1
Черепашка
...черепашка 3ddd черепаха l-450mm,w-350mm, h-120mm ...
3d_export
$5

pantera decorativa
...pantera decorativa 3dexport pantera decorativa de 120mm de largo, 43mm de ancho y 42mm de...
3ddd
$1

Светильник точечный
...с хрустальными подвесками фирмы asfour. размеры: диаметр 77mm, высота 120mm ...
3ddd
$1

Свечи #1
...3ddd свеча производитель: - модель: свечи размеры: w-40/65mm, d-40/65mm, h-70/120mm ...
3ddd
$1
Архитектурная подсветка
...направленный светильник страна / country: китай габариты :235mm h 120mm защита...
10Mm
turbosquid
$3

10mm socket
...osquid
royalty free 3d model 10mm socket for download as skp on turbosquid: 3d models for games, architecture, videos. (1191445)
turbosquid
$5

Flower Of Life 10mm
... available on turbo squid, the world's leading provider of digital 3d models for visualization, films, television, and games.
turbosquid
$6

10mm Hex Key
...hex key for download as max, 3dm, c4d, lxo, obj, 3ds, and fbx on turbosquid: 3d models for games, architecture, videos. (1686655)
turbosquid
$2

10mm Sci-fi PDW
...odel 10mm sci-fi pdw for download as blend, obj, dae, and 3ds on turbosquid: 3d models for games, architecture, videos. (1636456)
turbosquid
$10

10mm Cd Jewel Case
... available on turbo squid, the world's leading provider of digital 3d models for visualization, films, television, and games.
3d_export
$29
Nikkor 1 10mm lens 3D Model
...te black lens digital camera lense optic nikon photo photography objective
nikkor 1 10mm lens 3d model 3dlogicline 44222 3dexport
turbosquid
$1

10mm-box CG CAD data
... dxf, ige, lwo, obj, wrl, x, rib, fbx, cob, dwg, dae, and stl on turbosquid: 3d models for games, architecture, videos. (1200349)
3d_export
$95
Nikon V1 with Nikkor 10mm and 1030mm lens 3D Model
...0mm photo mirrorless interchangeable compact new j1
nikon v1 with nikkor 10mm and 1030mm lens 3d model 3dlogicline 44587 3dexport
3d_export
$45

Nikkor 1 10mm and 1030mm lenses for Nikon V1 J1 3D Model
... nikon photo photography objective collection
nikkor 1 10mm and 1030mm lenses for nikon v1 j1 3d model 3dlogicline 44596 3dexport
3d_export
$5

Spanner 6mm-32mm 10mm spanner vs nomber
... vs nomber
3dexport
spanner 3ds max 2021 model with textures all models, formats, textures, converted formats in 1 rar. archive.
Ender
3ddd
$1

Enders / Elegance
...enders / elegance
3ddd
обогреватель
уличный газовый обогреватель enders elegance
высота: 2200 мм
3d_export
free

ender 3 frame cavity covers
... of the creality ender 3 - makes it look a bit more attractive it just slides into the open channels of the aluminium framework
turbosquid
$1

pen support for ender 3
...y free 3d model pen support for ender 3 for download as blend on turbosquid: 3d models for games, architecture, videos. (1611282)
3d_ocean
$9

Ender Dragon Minecraft
...ojang obj poly videogames
ender dragon minecraft created with cinema 4d r15 formats included: max 2013 – fbx 2012 – c4d r15 – obj
3d_export
free

Creality ender enclosure webcam mount
...e creality enclosure. sure is better than a tripod. change it up if it helps. i printed pla with 50% infill on my dd ender 3 pro.
3d_export
free

ender 3 enclosure corners
...er corners and 4 upper corners, using 25mmx25mm angled aluminium pieces that gets covered on inside of the frame with plexiglass
3d_export
free

ender 3 3d print bed clips
...ed + normal aluminium bed frame of the creality ender 3 = 6mm (b) these clips are designed for glass plate + aluminium bed = 4mm
3d_export
$5

GRUMPY CAT
...grumpy cat 3dexport grumpy cat to print in ender ...
3d_export
$5

Logs fire
...with one multi material for corona and vray r ender. albedo, normal, uvmap, roughness format jpg 4096x4096 models:...
3d_export
$42

excavator
...is the original size. 0.12 mm printing surface creality ender5 ...
Lid
3d_export
$5
plastic lid
...plastic lid
3dexport
plastic lid
turbosquid
$4

Sewer lid
...osquid
royalty free 3d model sewer lid for download as blend on turbosquid: 3d models for games, architecture, videos. (1460159)
turbosquid
$15

Lid planter
...y free 3d model lid planter for download as max, obj, and fbx on turbosquid: 3d models for games, architecture, videos. (1462865)
turbosquid
$1

Bootle (with Lid)
...e 3d model bootle (with lid) for download as ma, obj, and fbx on turbosquid: 3d models for games, architecture, videos. (1362012)
turbosquid
$7

Box Lid
... free 3d model box lid for download as fbx, stl, dae, and obj on turbosquid: 3d models for games, architecture, videos. (1694087)
turbosquid
$30

Sewer Lid
... available on turbo squid, the world's leading provider of digital 3d models for visualization, films, television, and games.
turbosquid
$29

SportsBottle4Latches-Lid
... available on turbo squid, the world's leading provider of digital 3d models for visualization, films, television, and games.
turbosquid
$20

lid dispenser.max
... available on turbo squid, the world's leading provider of digital 3d models for visualization, films, television, and games.
turbosquid
$12

Bucket with lid
... available on turbo squid, the world's leading provider of digital 3d models for visualization, films, television, and games.
turbosquid
$10

sewer lid
... available on turbo squid, the world's leading provider of digital 3d models for visualization, films, television, and games.
Electronics
turbosquid
$1

electron
...urbosquid
royalty free 3d model electron for download as max on turbosquid: 3d models for games, architecture, videos. (1157488)
turbosquid
$50

electronic
...
royalty free 3d model electronic for download as max and obj on turbosquid: 3d models for games, architecture, videos. (1289427)
turbosquid
$40

Electron
... available on turbo squid, the world's leading provider of digital 3d models for visualization, films, television, and games.
3d_ocean
$8
Electronic game
...electronic game
3docean
electronic games nu pogody wait a minute well
electronic game “well, wait a minute”, “nu pogody”
3ddd
$1
Brilux Electronic
...brilux electronic
3ddd
подвес. brilux electronic. польша. материалы настроены.
3d_export
free

electronic shop
...lectronic shop with high quality interior and exterior. it has tvs smartphone play station printer and many more electronic item.
3ddd
$1

Термостаты OJ Electronics
...ермостаты oj electronics
3ddd
oj electronics , термостат
термостаты фирмы oj electronics
3d_export
$8

electron 714
...electron 714
3dexport
game ready model for export to unreal engine soviet tv electron 714 pbr 4k
3ddd
$1

Термостат OJ Electronics
... oj electronics
3ddd
oj electronics , термостат
термостат occ2-1991 фирмы oj electronics
turbosquid
$60

Electronics Stuff
...
royalty free 3d model electronics stuff for download as max on turbosquid: 3d models for games, architecture, videos. (1624680)
Fan
3d_export
$5

fan
...fan
3dexport
fan 3d model, table fan, fan, electric fan, ventilator
archibase_planet
free

Fan
...fan
archibase planet
fan large fan
fan out n260707 - 3d model for interior 3d visualization.
archibase_planet
free

Fan
...fan
archibase planet
fan ceiling fan ventilator
fan stealth n300615 - 3d model (*.gsm+*.3ds) for interior 3d visualization.
3d_export
$15

fan
...fan
3dexport
is an ancient fan
3ddd
$1

Fan-C-Fan by marco gallegos
...n-c-fan by marco gallegos
3ddd
вентилятор , marco gallegos
fan-c-fan by marco gallegos
3d_export
$10

fan
...fan
3dexport
a detailed fan designed for home or space blowing is now available for only 19.99!
turbosquid
$1

Fan
...fan
turbosquid
free 3d model fan for download as on turbosquid: 3d models for games, architecture, videos. (1427865)
turbosquid
$14

Fan
...fan
turbosquid
royalty free 3d model fan for download as on turbosquid: 3d models for games, architecture, videos. (1415642)
3ddd
$1

Светильник Fan
...светильник fan
3ddd
fan , italamp
светильник fan, производитель italamp
turbosquid
$25

Fan
...fan
turbosquid
royalty free 3d model fan for download as c4d on turbosquid: 3d models for games, architecture, videos. (1483246)
Replacement
3d_export
$12

replaceable bristle
...replaceable bristle
3dexport
this is 3d printable replaceable bristle toothbrush.
3d_export
$34
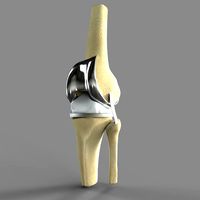
Knee Replacement
...h meets the lower leg. ... during a total knee replacement, the end of the femur bone is removed and replaced with a metal shell.
3d_export
$44
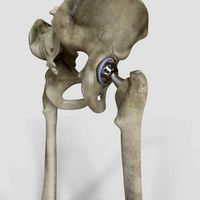
Hip Replacement
...omponents. the damaged femoral head is removed and replaced with a metal stem that is placed into the hollow center of the femur.
turbosquid
$59

Hip replacement
...el hip replacement for download as ma, c4d, lwo, lxo, and obj on turbosquid: 3d models for games, architecture, videos. (1520195)
turbosquid
$10

Module replacment station
...alty free 3d model module replacment station for download as on turbosquid: 3d models for games, architecture, videos. (1271271)
3d_export
$8
tool replacement gearbox
...tool replacement gearbox
3dexport
eccentric lifting mechanism, you can process according to available drawings.
turbosquid
$7

Globe Oil Atomizer Replacement Housing
... oil atomizer replacement housing for download as ige and stl on turbosquid: 3d models for games, architecture, videos. (1253839)
turbosquid
free

SLICE Ceramic Scapel (Replaceable Blade)
... (replaceable blade) for download as obj, fbx, blend, and dae on turbosquid: 3d models for games, architecture, videos. (1363525)
3d_export
$19
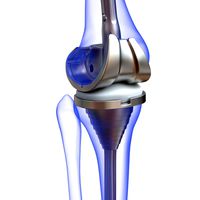
Knee Replacement Implant
...ntimeter<br>__________________________<br>poly count :<br>polygon count - 217440<br>vertex count - 108776
turbosquid
$19

(Project) Bad odor filtering sytem with support rail and pulley that assure a comfortable gel filter element replacement.
... available on turbo squid, the world's leading provider of digital 3d models for visualization, films, television, and games.
Pro
turbosquid
$29

Pro
...ree 3d model mac pro for download as obj, c4d, fbx, and blend on turbosquid: 3d models for games, architecture, videos. (1505782)
turbosquid
$15

Apple Mac Pro and Pro Display
...ee 3d model apple mac pro and pro display for download as max on turbosquid: 3d models for games, architecture, videos. (1417078)
3d_export
$5

iphone 13 pro max and pro
...3 pro max and 13 pro the model is made in four colors (graphite, gold, silver, and blue), all of which are attached in the files.
3d_export
free

sapphire pro
...sapphire pro
3dexport
sapphire pro 3d printer head mask
3d_export
$4

macbook pro
...macbook pro
3dexport
macbook pro 13" inch 2020 years model
3ddd
free

GentleLase Pro
... syneron , candela
gentlelase pro аппарат для лазерной эпиляции
turbosquid
$25

PRO frame
...rbosquid
royalty free 3d model pro frame for download as max on turbosquid: 3d models for games, architecture, videos. (1148329)
turbosquid
$5

Alien pro
...osquid
royalty free 3d model alien pro for download as blend on turbosquid: 3d models for games, architecture, videos. (1678446)
turbosquid
$5

iphone11 pro
...uid
royalty free 3d model iphone11 pro for download as blend on turbosquid: 3d models for games, architecture, videos. (1562707)
3ddd
$1

Mac Pro (appel)
...mac pro (appel)
3ddd
компьютер , apple
mac pro
Box
archibase_planet
free

Box
...box
archibase planet
box carton cardboard box
box 2 - 3d model (*.3ds) for interior 3d visualization.
archibase_planet
free

Box
...box
archibase planet
carton cardboard box box
box 1 - 3d model (*.3ds) for interior 3d visualization.
3d_export
$6

box
...box
3dexport
box
3d_export
$5

Box
...box
3dexport
box
3d_export
$5

box
...box
3dexport
box
3d_export
$5

box
...box
3dexport
box
archibase_planet
free

Box
...box
archibase planet
box box for paper notebook pencil
box - 3d model (*.gsm+*.3ds) for interior 3d visualization.
archibase_planet
free

Box
...box
archibase planet
box carton cardboard box
box n170111 - 3d model (*.gsm+*.3ds) for interior 3d visualization.
archibase_planet
free

Box
...box
archibase planet
box carton cardboard box
box n050411 - 3d model (*.gsm+*.3ds) for interior 3d visualization.
archibase_planet
free

Boxes
...boxes
archibase planet
boxes box case bin
boxes n281213 - 3d model (*.gsm+*.3ds+*.max) for interior 3d visualization.
Space
3ddd
free
Space
... space , вытяжка
вытяжка elica space, производство elica evolution
3d_ocean
$19

Space station
...space station
3docean
space station
space station
3d_ocean
$7

Space Fighter
...space fighter
3docean
fighter space
space fighter
turbosquid
$5

space
...e
turbosquid
royalty free 3d model space for download as max on turbosquid: 3d models for games, architecture, videos. (1184221)
turbosquid
$2

Space
...turbosquid
royalty free 3d model space for download as blend on turbosquid: 3d models for games, architecture, videos. (1660625)
3d_ocean
$4
Space Station
...space station
3docean
habitat low poly ship space space ship space station vehicle
space station low poly modelled, not textured.
turbosquid
$2

Space
...royalty free 3d model space for download as max, fbx, and obj on turbosquid: 3d models for games, architecture, videos. (1644726)
turbosquid
$8

Space
...ty free 3d model space for download as c4d, 3ds, fbx, and obj on turbosquid: 3d models for games, architecture, videos. (1521166)
turbosquid
$160
space
... available on turbo squid, the world's leading provider of digital 3d models for visualization, films, television, and games.
turbosquid
$5

Space
... available on turbo squid, the world's leading provider of digital 3d models for visualization, films, television, and games.
5
turbosquid
$6

Rock 5-5
...urbosquid
royalty free 3d model rock 5-5 for download as obj on turbosquid: 3d models for games, architecture, videos. (1639063)
3d_export
$5

hinge 5
...hinge 5
3dexport
hinge 5
turbosquid
$10

A-5
... available on turbo squid, the world's leading provider of digital 3d models for visualization, films, television, and games.
turbosquid
$2

A-5
... available on turbo squid, the world's leading provider of digital 3d models for visualization, films, television, and games.
turbosquid
$12

Calligraphic Digit 5 Number 5
...hic digit 5 number 5 for download as max, obj, fbx, and blend on turbosquid: 3d models for games, architecture, videos. (1389333)
3ddd
$1

5 роз
...5 роз
3ddd
5 роз в стеклянной вазе
design_connected
$11

iPhone 5
...iphone 5
designconnected
apple iphone 5 computer generated 3d model.
3ddd
$1

Lola 5
...lola 5
3ddd
miniforms
lola 5 miniforms 300*65*134
3ddd
$1

Nexus 5
...dd
nexus , phone , телефон
google nexus 5 phone
3d_ocean
$15

iPhone 5
...iphone 5
3docean
3d 4d apple cinema iphone model modeling phone screen texture
iphone 5 3d model and texture realistic iphone 5.
More
turbosquid
$15

more
... available on turbo squid, the world's leading provider of digital 3d models for visualization, films, television, and games.
3ddd
free

more
...more
3ddd
amore , шкаф
шкаф amore abj 301
turbosquid
$49

Thomas More
...osquid
royalty free 3d model thomas more for download as fbx on turbosquid: 3d models for games, architecture, videos. (1617580)
turbosquid
$15

Visign for More
... available on turbo squid, the world's leading provider of digital 3d models for visualization, films, television, and games.
turbosquid
$15

Table - Moree
... available on turbo squid, the world's leading provider of digital 3d models for visualization, films, television, and games.
3ddd
free

Glam-More Caracole
...glam-more caracole
3ddd
glam-more , тумба
размеры: 37w x 18d x 32h
design_connected
free

The More, The Merrier Candlestick
...e merrier candlestick
designconnected
free 3d model of the more, the merrier candlestick by muuto designed by campbell, louise.
turbosquid
$27

fantasy plants and more
...d model fantasy plants and more for download as blend and obj on turbosquid: 3d models for games, architecture, videos. (1711843)
3ddd
$1

Betibu Chairs & More
...betibu chairs & more
3ddd
chairs&more
.betibu chairs & more
turbosquid
$139

AW139(more accurate)
... available on turbo squid, the world's leading provider of digital 3d models for visualization, films, television, and games.