Thingiverse

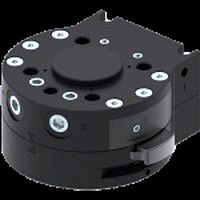
Ender 5 Mini Tool Changer by stuartofmt
by Thingiverse
Last crawled date: 3 years, 4 months ago
I wanted a tool changer and compact setup for an Ender 5. I have shamelessly repurposed / remixed pieces from several excellent contributors. Most of this should work equally well with most Creality printers.
The objective was to end up with an Ender 5 tool changing capability, provide better tool cooling, minimize loss of Y-axis, support a BLTouch, work with the standard Creality hotend as well as Microswiss / GulfCoast hotend.
Edit: - there is a prototype for Ed3V6 herehttps://www.thingiverse.com/thing:4660129
The Components for this mashup / remix are taken from these excellent things:
Quick tool change for Creality CR-10 / Ender series by ProperPrinting
Light? Quick tool change for Creality Ender3 by butt3rbr0t
MinV2 Ender 3 fan mount by ThijsOudeVrielink
Airflow Optimized Fan Mount by theduckom
My contribution was to adapt / combine / modify them for use with the Ender 5 as well as adding a little functionality along the way.
Note that this is a tool changer and means some loss of available Y-axis because of the way the Ender 5 is made. The loss is approximately 20mm. Since the Ender 5 bed is 235mm (total) the available print size is about 215 (i.e. about 5mm less than the advertised 220mm).
I have provided step and stl files for all the components. Since some of the step files were derived from stl files, the facet count will be high. Use your favorite software to create the stl files (don’t forget to repair the stl, if necessary, in your slicer).
OVERVIEW
Below is a brief description of the the results using the following component terminology; Exhange_Base_Clamp, Tool_Exchange_Base, Hotend_holder, Coolend_Fan_Duct, Tool_Fan_Duct.
A full description, printing tips, assembly etc. are in the pdf file.
I will refer to the original sourse things using these names for easier reference:
Quick Toolchanger by ProperPrinting
Lite Toolchanger by butt3rbr0t (a remix from the Toolchanger)
Mini Fan Mount by ThijsOudeVrielink
Optimized Fan Duct by theduckom ( a remix from The Mini Fan Mount)
Exchange_Base_Clamp
The Exchange_Base_Clamp comprises a Clamp Holder taken from the Lite Toolchanger and a Clamp Lever taken from the Quick Toolchanger (V2 Lever).
The Lite Toolchanger was chosen because of it’s slim (and elegant) design which minimized any reduction of space in the Y-axis. No changes were made.
Tool_Exchange_Base
The Tool_Exchange_Base was taken from the Quick Toolchanger and I incorporate a BLTouch mount from the Mini Fan Mount.
I removed a section from the BLTouch mount so that the belt attachment did not interfere with it. I also added a couple of slots for zip-ties to hold the BLTouch cable neatly. The BLTouch offset from the nozzle is X = + 40mm and Y= +2 mm.
Hotend_holder
The Hotend_holder was taken from Lite Toolchanger (so as to match the Tool_Exchange_Base).
I reduced the height of the hotend standoff and added additional elements for securing the Coolend_Fan_Duct (see below) as well as a strain relief section for the hotend heater and thermistor wires. A section at the back of the holder was removed to allow clearance for the (no longer used) Ender 5 hotend mounts on the carriage plate. I made all the holes go all the way through with hex nut slots on the back.
Coolend_Fan_Duct
During the initial prototyping – I used the Coolend_Fan_Duct from Mini Fan Duct and printed in PLA. I noticed some softening of the Hotend_holder where the hotend (standard Ender) attached. Some of this may have been because of the PLA and some due to inadequate airflow. I decided to use the Coolend_Fan_Duct from Optimized Fan Duct as it promised better airflow. In order to accommodate the Microswiss / Gulfcoast, I widened the mounting brackets a little (1.5mm), lengthened the mounting brackets (2mm) and modified the mounting holes to suit the Hotend_holder. Slots were added give a bit of adjustment.
Tool_Fan_Duct
The Tool_Fan_Duct was taken from Mini Fan Duct. It’s very thin and clips into place via a detent in the Coolend_Fan_Duct. It does wobble a little and in one of my experiments collide with the top layer during printing. I added a small mount to the front of the Tool_Fan_Duct and corresponding mount to the Coolend_Fan_Duct to help stabilize. I also created the step file so that the length of the Duct can be lengthened or (more likely) shortened.
Similar models
thingiverse
free

Ender 5 Quick Tool Changer by Agent772
...he back from the stock hotend mount)
made the levler holder smaller so the wheels can run freely (use the stock distance washers)
thingiverse
free

CR-10/Ender 3 Hotend Fan Duct BLTouch Remix by raeuberhose
... my 4020 cooltek silent fan.
printed with fan duct side facing the bed, using supports.
thanks to pixarfanatic95 for making this.
thingiverse
free

Satsana 5015 Fan Duct for Creality Ender 3 v2 with BLTouch Metal Mount by FalseAlarm
...se of the original bltouch metal mount, this design does not require a bracket print, or changing of offset settings for bltouch.
thingiverse
free

Creality Titan Aero Mount - Ender 5 duct remix by dimock
...so i added a bend to obtain full y travel. cooling airflow is likely compromised, but i haven't noticed any negative effects.
thingiverse
free

Ender 3 Fan Duct for Micro Swiss, BLTouch and 40mm fan by Dabiddosan
...nges:
added the bltouch attachment.
increase the fan size for the heatsink to 40mm.
incorporate vanes for more efficient airflow.
thingiverse
free

Creality Ender 2 direct drive and Cooling Fan Duct mount
...unt
thingiverse
creality ender 2 direct drive and cooling fan duct mount.
a remix from https://www.thingiverse.com/thing:2334407
thingiverse
free

MPSM Tool Changer by Bacon8tor
...ect the usage of the mount, besides the hotend needing a mount. i no longer have the stock hotend otherwise i would make a mount.
thingiverse
free

BTT ZSYong Mix Hotend for ProperPrinting tool change by nightilizer
...ould not commit to a non all metal hotend so i attached this using the pp tool changer. https://www.thingiverse.com/thing:3369444
thingiverse
free

Satsana Ender 3 Fan Duct remix with 12mm sensor mount by Mark456
...h 12mm sensor mounting hole. i added some fillets inside and outside on the air chamber so it doesn't block the airflow much.
thingiverse
free

Satsana Ender 3 V2 4010 & 5015 Fan Duct with BLTouch by Jargogler
...roken).
mine preserves the roundness of the left side duct and avoids x carriage wheel disassembly.
bltouch offsets are x-46 y-8.
Stuartofmt
thingiverse
free

Laser Holder Prototype WIP by stuartofmt
...lder prototype wip by stuartofmt
thingiverse
wip -
laser holder with mount for connector
mount without blt
laser holder no mount
thingiverse
free

E3DV6 Hotend Holder - Prototype by stuartofmt
...add it to the design below once it's known to be "good"
https://www.thingiverse.com/thing:4652351
thanks in advance
Changer
3d_export
free

baby changer
...baby changer
3dexport
turbosquid
$8

Furniture Baby Changer Crib Bed
...ure baby changer..crib..bed for download as c4d, 3ds, and obj on turbosquid: 3d models for games, architecture, videos. (1712493)
3d_export
$20
1600 Meltblown cloth production line set drawing CAD
...structure frame, feeding host, extrusion screw, heating system, screen changer metering pump, melting it is formed by a combination...
3d_export
$10
LAD LED Par56 Spotlight 3D Model
...3d model of l.a.d. (light audio design) led par-56 spotlight-colorchangermade in lightwave 10.archive contains 3d model (*.lwo), test scene...
3d_export
$10
MILLING MACHINE GAME READY 3D MODEL
...into machining centers: milling machines augmented by automatic tool changer, tool magazines or carousels, cnc capability, coolant systems, and...
thingiverse
free
changer joint by vladac
...changer joint by vladac
thingiverse
changer joint for heavy duty gearbox
3dfindit
free
Tool changer
...tool changer
3dfind.it
catalog: zimmer group
3dfindit
free

Tool changer
...tool changer
3dfind.it
catalog: zimmer group
3d_sky
free

Tire changer HOFMANN
...tire changer hofmann
3dsky
tire machine
tire changer hofmann. textures, materials, rezvertka.
thingiverse
free
Easy filament changer by bastoof
...easy filament changer by bastoof
thingiverse
easy filament changer
Ender
3ddd
$1

Enders / Elegance
...enders / elegance
3ddd
обогреватель
уличный газовый обогреватель enders elegance
высота: 2200 мм
3d_export
free

ender 3 frame cavity covers
... of the creality ender 3 - makes it look a bit more attractive it just slides into the open channels of the aluminium framework
turbosquid
$1

pen support for ender 3
...y free 3d model pen support for ender 3 for download as blend on turbosquid: 3d models for games, architecture, videos. (1611282)
3d_ocean
$9

Ender Dragon Minecraft
...ojang obj poly videogames
ender dragon minecraft created with cinema 4d r15 formats included: max 2013 – fbx 2012 – c4d r15 – obj
3d_export
free

Creality ender enclosure webcam mount
...e creality enclosure. sure is better than a tripod. change it up if it helps. i printed pla with 50% infill on my dd ender 3 pro.
3d_export
free

ender 3 enclosure corners
...er corners and 4 upper corners, using 25mmx25mm angled aluminium pieces that gets covered on inside of the frame with plexiglass
3d_export
free

ender 3 3d print bed clips
...ed + normal aluminium bed frame of the creality ender 3 = 6mm (b) these clips are designed for glass plate + aluminium bed = 4mm
3d_export
$5

GRUMPY CAT
...grumpy cat 3dexport grumpy cat to print in ender ...
3d_export
$5

Logs fire
...with one multi material for corona and vray r ender. albedo, normal, uvmap, roughness format jpg 4096x4096 models:...
3d_export
$42

excavator
...is the original size. 0.12 mm printing surface creality ender5 ...
Mini
turbosquid
$10

Mini Mini Luceplan
...
royalty free 3d model mini mini luceplan for download as max on turbosquid: 3d models for games, architecture, videos. (1227359)
3d_ocean
$39

Mini Cooper
...mini cooper
3docean
cabrioler cooper mini
mini cooper cabrioler
3d_export
$30

Mini lathe
...mini lathe
3dexport
mini lathe
3d_export
$5

mini mouse
...mini mouse
3dexport
mini mouse
3d_export
$5

mini house
...mini house
3dexport
mini house
3d_export
free

Mini Mecha
...mini mecha
3dexport
concept of mini mecha
3d_ocean
$20

Mini Gun
...mini gun
3docean
gatling gun gun machine gun mini gun weapon
model of a mini gatling gun.
3ddd
free

Herve mini
... кофейный , herve
http://www.mobiliavenanti.it/ru/products/hervè-mini
3d_export
$5

mini wall
...mini wall
3dexport
mini wall for living room
3d_export
$5

mini bank
...mini bank
3dexport
mini bank 3d model
Tool
turbosquid
$21

Tool box with tools
... available on turbo squid, the world's leading provider of digital 3d models for visualization, films, television, and games.
archibase_planet
free
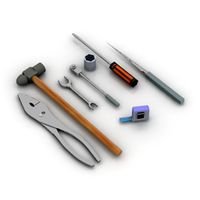
Tools
...tools
archibase planet
tools instruments implements
tools n070114 - 3d model (*.gsm+*.3ds+*.max) for interior 3d visualization.
3d_ocean
$12

Tools
...tools
3docean
hammer metal old screw tools wrench
maya
turbosquid
$6

Tool Cart / Tool Box
...
royalty free 3d model tool cart / tool box for download as on turbosquid: 3d models for games, architecture, videos. (1241859)
3d_ocean
$15

crimp tool
... tool copper cutter crimp crimp tool electrical electrical tools press tools pressing tool tools wire cutter
created in maya 2013
3d_ocean
$5

Tools
...tools
3docean
3d models paint tools work
3d,models,works,paint,art,create,working,
3d_export
free
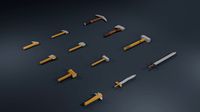
tools
...tools
3dexport
coldsteel
turbosquid
$15

Tools
...turbosquid
royalty free 3d model tools for download as blend on turbosquid: 3d models for games, architecture, videos. (1331352)
3ddd
$1
bar tool
...bar tool
3ddd
барный
bar tool
turbosquid
$35

tools
... available on turbo squid, the world's leading provider of digital 3d models for visualization, films, television, and games.
5
turbosquid
$6

Rock 5-5
...urbosquid
royalty free 3d model rock 5-5 for download as obj on turbosquid: 3d models for games, architecture, videos. (1639063)
3d_export
$5

hinge 5
...hinge 5
3dexport
hinge 5
turbosquid
$10

A-5
... available on turbo squid, the world's leading provider of digital 3d models for visualization, films, television, and games.
turbosquid
$2

A-5
... available on turbo squid, the world's leading provider of digital 3d models for visualization, films, television, and games.
turbosquid
$12

Calligraphic Digit 5 Number 5
...hic digit 5 number 5 for download as max, obj, fbx, and blend on turbosquid: 3d models for games, architecture, videos. (1389333)
3ddd
$1

5 роз
...5 роз
3ddd
5 роз в стеклянной вазе
design_connected
$11

iPhone 5
...iphone 5
designconnected
apple iphone 5 computer generated 3d model.
3ddd
$1

Lola 5
...lola 5
3ddd
miniforms
lola 5 miniforms 300*65*134
3ddd
$1

Nexus 5
...dd
nexus , phone , телефон
google nexus 5 phone
3d_ocean
$15

iPhone 5
...iphone 5
3docean
3d 4d apple cinema iphone model modeling phone screen texture
iphone 5 3d model and texture realistic iphone 5.