Thingiverse
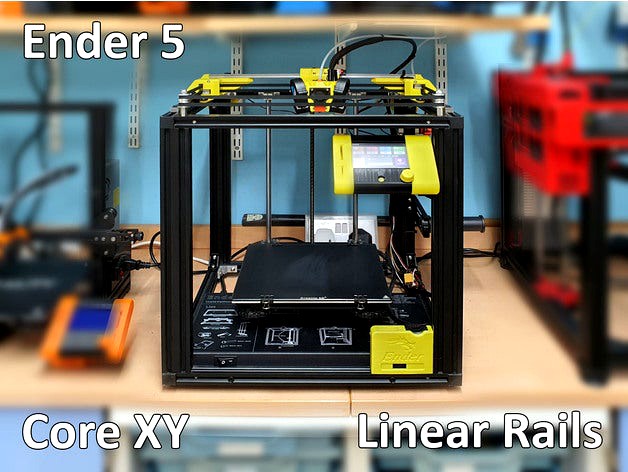
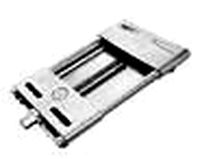
Ender 5 Core XY with Linear Rails by BoothyBoothy
by Thingiverse
Last crawled date: 3 years, 3 months ago
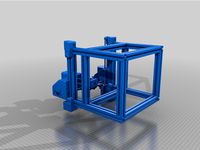
This is a Core XY conversion kit for the Ender 5 with Linear rails
Big shout out to Scott3D for his fabulous work on the Hypercube Evo which I have taken the belt tensioner detail from and a massive thanks to barnabyQ for his Ender 5 Pro 3D model over on Grabcad. This made things so much easier. Also to fellow Thingiverse member the_cook for inspiring me to use the rails.
I have spent quite a long time developing the XY joiner parts and they seem to be holding up well. One of the largest hurdles was conceiving a simple but strong assembly for the forward Idlers ( all parts are available form Amazon). I could probably tweak the belt tension further but its a balance with a Core XY machine.
I struggled with the stock stepper motors particularly with the dual Y motor which got incredibly hot , nearly to PETG melting and caused a lot of layer distortion in the first print. I have since replaced both with standard Creality 40-20 and all is good and running really cool.
The firmware changes were relatively simple, there are only a few comments to tweak. I did however have to invert the direction of the X & Y motors. Uncommenting Z_CLEARANCE_BETWEEN_PROBES & Z_HOMING_HEIGHT stopped the Z axis from trying to drop to clear when homing. I have included my config file within the upload for reference.
The hot end mounting plate is universal with 5 back fixing holes and 4 forward fixing holes. I have included also for an optical end stop which is going to be my next job to help tidy up the Ender 5s messy wire management. I have uploaded a step file of the mounting plate for ease of adaption to other hot end designs.
The conversion will easily allow for the stock 220 x220 build volume and allows for the full 235 x235 dependent on duct design (My Manta design looses about 5mm at the front and side with 5015 fans, should be Ok with 4010 fans there is plenty spare at the rear. There is also a small height gain of approximately 5mm.
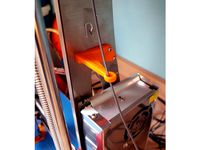
I have since attached a Optical End Stop to the X axis to tidy up all the cables. I had to extend a 1 metre cable to do this and provide a separate power feed to a spare 5v pin on my BTT E3 Mini board.
I have also remixed a fixed variant of my Slim Display Housing to sit inboard of the Ender 5 Frame here: https://www.thingiverse.com/thing:4650597
I have been printing with this for about a week now and generally the design is holding up well and the prints are good quality. Caveat, my Ender 5 printed well prior to the conversion but the new set up does appear to allow for faster print speeds whilst retaining quality. I have printed several prints in excess of 6 hours with no problems.
I do get some slight bearing noise from the Y axis from my inexpensive Aliexpress Linear Rails but this is no different from my high quality roller bearings on my HEVO due to the lateral tension of the belts. I will obviously monitor this. May have the belts a little too tight. With my brief Core XY experience I would consider this normal on the Y axis.
Installation
1.I have classed this has WIP because I have not yet been able to provide a detailed installation guide. I have however included a high res exploded infographic for the assembly and a sample BOM for the parts in the upload to get you started.
2.The Bill of Materials is only indicative and the relevant parts could be purchased much more cost effectively at the likes of Aliexpress. I had most of the parts in stock so personally this conversation cost very little.
3.The forward idlers are created by removing the front to M5 2020 frame fixings and replace them with a 80mm threaded bar. This is a very simple but strong foundation for the front idlers. I have not seen any side effect in rigidity terms but you may want to attach some additional corner brackets if concerned about the rigidity of the frame overall.
4.With XY joiners there is no perfect print orientation due to the stress by the belts on both axis. I have therefore included 2 x 50 mm long M3 tie bolts which fasten across the print grain to help reduce delamination of the layers. I have found out of experience any many prototypes with my HEVO that this little mechanical indulgence is well worth it in terms of longevity.
Printing
1.All parts print without supports. There are some sacrificial layers across some holes to help bridging which will require cleaning through.
2.If adopting the optional Optical end stop there is a bridging detail that requires trimming with a knife or hacksaw (see the infographic) - do not use side cutters it may split the part, I can confirm this from experience !
3.Due to the belt tension applied these parts need to be printed quite strongly. Therefore I have printed all parts with at least 30% infill and 3 layers. I would suggest all parts near to the hot end and bed should be printed in PETG whilst others will be fine in PLA if sufficient layers and perimeters are adopted.
4.Printed with Amazon Basics Yellow PETG @2.5 layer height, 40 mms on various
printers.
Quick Tips
1.The Belt Tensioner assembly is much easier to put together with the printer on its front and therefore facing the parts laid flat. Leave a reasonable amount of spare belt for tensioning before trimming the belt.
2.Use a M3 tap to clear all the plastic from the thread inserts prior to assembly, it makes life much easier.
3.The thermal inserts I have used have an average OD of 5.2 mm. Therefore I use a 4.7mm insertion hole. Smaller inserts may require a smaller hole size. They are listed in the BOM.
4.Do not overtighten the belts, they can stand quite a lot but it may reduce the print quality.
Test Video Here: https://youtu.be/GUwfUaiC5Nc
Update 02_01_21:
Uploaded Forward LH\RH Idler Guards.
Big shout out to Scott3D for his fabulous work on the Hypercube Evo which I have taken the belt tensioner detail from and a massive thanks to barnabyQ for his Ender 5 Pro 3D model over on Grabcad. This made things so much easier. Also to fellow Thingiverse member the_cook for inspiring me to use the rails.
I have spent quite a long time developing the XY joiner parts and they seem to be holding up well. One of the largest hurdles was conceiving a simple but strong assembly for the forward Idlers ( all parts are available form Amazon). I could probably tweak the belt tension further but its a balance with a Core XY machine.
I struggled with the stock stepper motors particularly with the dual Y motor which got incredibly hot , nearly to PETG melting and caused a lot of layer distortion in the first print. I have since replaced both with standard Creality 40-20 and all is good and running really cool.
The firmware changes were relatively simple, there are only a few comments to tweak. I did however have to invert the direction of the X & Y motors. Uncommenting Z_CLEARANCE_BETWEEN_PROBES & Z_HOMING_HEIGHT stopped the Z axis from trying to drop to clear when homing. I have included my config file within the upload for reference.
The hot end mounting plate is universal with 5 back fixing holes and 4 forward fixing holes. I have included also for an optical end stop which is going to be my next job to help tidy up the Ender 5s messy wire management. I have uploaded a step file of the mounting plate for ease of adaption to other hot end designs.
The conversion will easily allow for the stock 220 x220 build volume and allows for the full 235 x235 dependent on duct design (My Manta design looses about 5mm at the front and side with 5015 fans, should be Ok with 4010 fans there is plenty spare at the rear. There is also a small height gain of approximately 5mm.
I have since attached a Optical End Stop to the X axis to tidy up all the cables. I had to extend a 1 metre cable to do this and provide a separate power feed to a spare 5v pin on my BTT E3 Mini board.
I have also remixed a fixed variant of my Slim Display Housing to sit inboard of the Ender 5 Frame here: https://www.thingiverse.com/thing:4650597
I have been printing with this for about a week now and generally the design is holding up well and the prints are good quality. Caveat, my Ender 5 printed well prior to the conversion but the new set up does appear to allow for faster print speeds whilst retaining quality. I have printed several prints in excess of 6 hours with no problems.
I do get some slight bearing noise from the Y axis from my inexpensive Aliexpress Linear Rails but this is no different from my high quality roller bearings on my HEVO due to the lateral tension of the belts. I will obviously monitor this. May have the belts a little too tight. With my brief Core XY experience I would consider this normal on the Y axis.
Installation
1.I have classed this has WIP because I have not yet been able to provide a detailed installation guide. I have however included a high res exploded infographic for the assembly and a sample BOM for the parts in the upload to get you started.
2.The Bill of Materials is only indicative and the relevant parts could be purchased much more cost effectively at the likes of Aliexpress. I had most of the parts in stock so personally this conversation cost very little.
3.The forward idlers are created by removing the front to M5 2020 frame fixings and replace them with a 80mm threaded bar. This is a very simple but strong foundation for the front idlers. I have not seen any side effect in rigidity terms but you may want to attach some additional corner brackets if concerned about the rigidity of the frame overall.
4.With XY joiners there is no perfect print orientation due to the stress by the belts on both axis. I have therefore included 2 x 50 mm long M3 tie bolts which fasten across the print grain to help reduce delamination of the layers. I have found out of experience any many prototypes with my HEVO that this little mechanical indulgence is well worth it in terms of longevity.
Printing
1.All parts print without supports. There are some sacrificial layers across some holes to help bridging which will require cleaning through.
2.If adopting the optional Optical end stop there is a bridging detail that requires trimming with a knife or hacksaw (see the infographic) - do not use side cutters it may split the part, I can confirm this from experience !
3.Due to the belt tension applied these parts need to be printed quite strongly. Therefore I have printed all parts with at least 30% infill and 3 layers. I would suggest all parts near to the hot end and bed should be printed in PETG whilst others will be fine in PLA if sufficient layers and perimeters are adopted.
4.Printed with Amazon Basics Yellow PETG @2.5 layer height, 40 mms on various
printers.
Quick Tips
1.The Belt Tensioner assembly is much easier to put together with the printer on its front and therefore facing the parts laid flat. Leave a reasonable amount of spare belt for tensioning before trimming the belt.
2.Use a M3 tap to clear all the plastic from the thread inserts prior to assembly, it makes life much easier.
3.The thermal inserts I have used have an average OD of 5.2 mm. Therefore I use a 4.7mm insertion hole. Smaller inserts may require a smaller hole size. They are listed in the BOM.
4.Do not overtighten the belts, they can stand quite a lot but it may reduce the print quality.
Test Video Here: https://youtu.be/GUwfUaiC5Nc
Update 02_01_21:
Uploaded Forward LH\RH Idler Guards.
Similar models
thingiverse
free

Ender 5 endstop Y axis by paultsigakis
... the y axis, if you have the kay3d core xy conversion kit.
the original bracket gets too short if you use kay3d corner brackets.
thingiverse
free

Ender 3 Max Y axis Belt Tensioner by thething84
...holes in the ender 3 max 4040 y axis rail. i used fusion 360 to alter the original step file.
this now fits my ender 3 max fine.
thingiverse
free

Ender 5 Plus Y Axis Tension by Eppy6
...8980
this is a remix of files you need for ender 5 + to make a belt tensioner.
you have all the parts you need from the printer.
thingiverse
free

Ender 5 Belt Tensioning Tool by UrinalScar
...e part that fits onto the idler mounts for both the x and y axis to help you hold tension on the belts when tightening the belts.
thingiverse
free

Core XY Idler & Motor Brackets for 2020 by tempo502
...dler bracket shaft hole is now positioned better for core xy.
goes with matching x-ends http://www.thingiverse.com/thing:363034
thingiverse
free

Hypercube Evolution Nut Remix by Beezen
...e belt tensioner)
extruder mount (1 with sensor and 1 without sensor)
in case i forgot a part, please write it in the comments :)
thingiverse
free

Ender 3 V2 Linear Rail Direct Drive X-Axis Conversion V1 by VonTaube
...
crimp belt and tension
see ender 3 v2 direct drive link below for extruder install infohttps://www.thingiverse.com/thing:4621486
thingiverse
free

Mercury One X Axis Mod for maximum X Print area by SilentMobius
...n (https://zerogdesign.github.io/index.html). this allows the afterburner tool head to get as close to the y rails as is possible
thingiverse
free

Mercury One Mod Tension Towers, Clear of Toolhead Path by SilentMobius
...n (https://zerogdesign.github.io/index.html). this allows the afterburner tool head to get as close to the y rails as is possible
thingiverse
free

X axis belt tensioner with GT2 idler for Creality Cr-10 and Ender 3
... me, it is from this design :https://www.thingiverse.com/thing:2233139
i just had it laying around so i did not designed new one.
Boothyboothy
thingiverse
free

Bed Thumbwheel with M3 retention by BoothyBoothy
...bed thumbwheel with m3 retention by boothyboothy
thingiverse
yet another thumb wheel for a m3 bolt.
thingiverse
free

Simple Cable Hoops for the Zonestar P802QR2 by BoothyBoothy
...erse
simple thing to provide cables hoops above the motherboard to help tidy the various cables running vertically up the frame.
thingiverse
free
Filament Guides for the Zonestar P802QR2 by BoothyBoothy
...e the motherboard.
collection of all my upgrades for the zonestar at the following link:https://www.thingiverse.com/thing:2936870
thingiverse
free
PSU Cover for Zonestar P802QR2 by BoothyBoothy
...e psu more firmly.
collection of all my upgrades for the zonestar at the following link:https://www.thingiverse.com/thing:2936870
thingiverse
free

Picture frame for Mini Lithophane light Box - Simple by BoothyBoothy
...ht box from amazon
light box link: https://www.amazon.co.uk/gp/product/b0767lgtzm/ref=oh_aui_search_detailpage?ie=utf8&psc=1
thingiverse
free

Fire TV (2017) Simple Mounting Bracket by BoothyBoothy
...perhaps some cable management considered in the next version !
update:03_04_19 included hoop for cable tie to aid wire management
thingiverse
free

Tripod Bubble Level by BoothyBoothy
...the bubble vials on amazon:-
link: https://www.amazon.co.uk/gp/product/b01ir5ioru/ref=oh_aui_search_detailpage?ie=utf8&psc=1
thingiverse
free

Open Picture Frame for Lithophane Images by BoothyBoothy
...ck.
support\stand components are bonded to rear of frame. registration mark included within model to help align support brackets.
thingiverse
free

Bird Spikes for a Curved Ridge Tile by BoothyBoothy
...int. remodelled in fusion 360.
due to the curved base plate the thing is best printed with a raft and support to the build plate.
thingiverse
free

Wall Bracket for Nespresso Vertuo Capsules by BoothyBoothy
...ngs which can be used for bolting tiles together i have also included some countersunk holes for direct fixing to a door or wall.
Xy
3ddd
$1

Вешалка напольная XY-027
...а штанги: 171 см
диаметр основания: 38 смhttp://mebelshopos.ru/aksessuary-ofisnye/veshalka-napolnaya-xy-027-detail.html
turbosquid
$9
XY Rectangular Dining Table
... available on turbo squid, the world's leading provider of digital 3d models for visualization, films, television, and games.
3ddd
$1
holly hunt xy bench
...eight: 17.75 in
width: 45 in, 26 in
depth: 18 in
больше превьюhttps://www.behance.net/gallery/24983999/bench-3d-model?
turbosquid
$8
Xy fine tuning handle adjusts the module
...odule for download as 3ds, max, ige, obj, fbx, stl, and sldas on turbosquid: 3d models for games, architecture, videos. (1331394)
3ddd
$1

pillows bed 2
...pillows bed 2 3ddd подушка , круглая dimensions: xy ...
3ddd
$1
Honeycomb Floor
...паркет parquet with metalic honeycomb floor demensions 500x500 cm xy multitexture +...
3d_export
$7

positioning screw mechanism
...and lead screw, constitute a double displacement adjustable mechanism, xy axis double position adjustable positioning.<br>**************************************<br>files format contains<br>-solidworks 2017<br>-step<br>-iges<br>- and...
3d_export
$9
positioning mechanism of heavy-duty platform
...activity -- ball mechanism activity ---- drive heavy load xy axis movement -- positioning completed<br>**************************************<br>files format contains<br>-solidworks 2017<br>-step<br>-iges<br>- and...
3d_export
$180
optical fiber laser marking machines assembly
...fiber laser marking machine<br>automatic loading and unloading laser marking machine<br>xy platform adjustable laser marking machine<br>laser marking machine used with...
thingiverse
free
XY ROBOT by ymtlab
...xy robot by ymtlab
thingiverse
xy robot
Linear
3ddd
$1
Linear Diffusers
...linear diffusers
3ddd
диффузор
set of linear diffusers for ceiling.
design_connected
$27
Linear Sofa
...linear sofa
designconnected
scp linear sofa computer generated 3d model.
design_connected
$18

Atlantis linear
...atlantis linear
designconnected
terzani atlantis linear pendant lights computer generated 3d model. designed by barlas baylar.
3d_export
$5
light linear unit
...light linear unit
3dexport
light linear unit
turbosquid
$5
Linear Actuator
...
royalty free 3d model linear actuator for download as blend on turbosquid: 3d models for games, architecture, videos. (1589061)
turbosquid
$29
Linear panel
...oyalty free 3d model linear panel for download as max and obj on turbosquid: 3d models for games, architecture, videos. (1391254)
turbosquid
$12
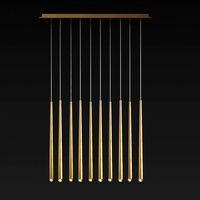
Linear Chandelier
...y free 3d model linear chandelier for download as max and obj on turbosquid: 3d models for games, architecture, videos. (1574289)
turbosquid
$10
Grohe Lineare
... available on turbo squid, the world's leading provider of digital 3d models for visualization, films, television, and games.
turbosquid
$10

Linear Axis
... available on turbo squid, the world's leading provider of digital 3d models for visualization, films, television, and games.
3d_export
$5
Linear Unit 3D Model
...linear unit 3d model
3dexport
linear unit force torque velocity
linear unit 3d model fau 71218 3dexport
Ender
3ddd
$1

Enders / Elegance
...enders / elegance
3ddd
обогреватель
уличный газовый обогреватель enders elegance
высота: 2200 мм
3d_export
free

ender 3 frame cavity covers
... of the creality ender 3 - makes it look a bit more attractive it just slides into the open channels of the aluminium framework
turbosquid
$1

pen support for ender 3
...y free 3d model pen support for ender 3 for download as blend on turbosquid: 3d models for games, architecture, videos. (1611282)
3d_ocean
$9

Ender Dragon Minecraft
...ojang obj poly videogames
ender dragon minecraft created with cinema 4d r15 formats included: max 2013 – fbx 2012 – c4d r15 – obj
3d_export
free

Creality ender enclosure webcam mount
...e creality enclosure. sure is better than a tripod. change it up if it helps. i printed pla with 50% infill on my dd ender 3 pro.
3d_export
free

ender 3 enclosure corners
...er corners and 4 upper corners, using 25mmx25mm angled aluminium pieces that gets covered on inside of the frame with plexiglass
3d_export
free

ender 3 3d print bed clips
...ed + normal aluminium bed frame of the creality ender 3 = 6mm (b) these clips are designed for glass plate + aluminium bed = 4mm
3d_export
$5

GRUMPY CAT
...grumpy cat 3dexport grumpy cat to print in ender ...
3d_export
$5

Logs fire
...with one multi material for corona and vray r ender. albedo, normal, uvmap, roughness format jpg 4096x4096 models:...
3d_export
$42

excavator
...is the original size. 0.12 mm printing surface creality ender5 ...
Core
turbosquid
$143

In the core
... available on turbo squid, the world's leading provider of digital 3d models for visualization, films, television, and games.
3ddd
$1
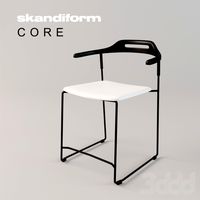
Skandiform Core
...skandiform core
3ddd
skandiform
кресло фирмы skandiform, модель core.
габаритные размеры (шхвхг): 530х700х510 мм
turbosquid
$8

Chandelier CORE
...id
royalty free 3d model chandelier core for download as max on turbosquid: 3d models for games, architecture, videos. (1673910)
turbosquid
free

Planet Core
... available on turbo squid, the world's leading provider of digital 3d models for visualization, films, television, and games.
3ddd
$1

Samsung Galaxy Core 2
...samsung galaxy core 2
3ddd
телефон
samsung galaxy core 2
turbosquid
$10

cable 2 core
... available on turbo squid, the world's leading provider of digital 3d models for visualization, films, television, and games.
turbosquid
$10

cable 1 core
... available on turbo squid, the world's leading provider of digital 3d models for visualization, films, television, and games.
3ddd
$1

Кондиционер ICE CORE
...кондиционер ice core
3ddd
кондиционер
37 000 полигонов
turbosquid
$65

Insulated Multi Core Cable
... available on turbo squid, the world's leading provider of digital 3d models for visualization, films, television, and games.
turbosquid
$29

Samsung Galaxy Core Advance
... available on turbo squid, the world's leading provider of digital 3d models for visualization, films, television, and games.
Rails
3d_ocean
$5
rails
...rails
3docean
old rails rails sleepers
old rails
archibase_planet
free
Rail
...chibase planet
rail railing handrail guard-rail
rail forged fence n310814 - 3d model (*.gsm+*.3ds) for exterior 3d visualization.
archibase_planet
free
Rail
...rail
archibase planet
handrail railing guard-rail
rail n220914 - 3d model (*.gsm+*.3ds) for interior 3d visualization.
archibase_planet
free
Rail
...rail
archibase planet
railing hand-rail banisters
rail n130309 - 3d model (*.gsm+*.3ds) for interior 3d visualization.
archibase_planet
free
Rail
...rail
archibase planet
railing hand-rail banisters
rail n270510 - 3d model (*.gsm+*.3ds) for interior 3d visualization.
archibase_planet
free
Railing
...
archibase planet
railing handrail fence guard-rail
railing n140314 - 3d model (*.gsm+*.3ds+*.max) for exterior 3d visualization.
archibase_planet
free

Railing
...railing
archibase planet
railing
railing- 3d model (*.gsm+*.3ds) for interior 3d visualization.
archibase_planet
free
Railing
...railing
archibase planet
railing enclosure barrier
light railing - 3d model for interior 3d visualization.
archibase_planet
free
Rail
...rail
archibase planet
metal railing
rail n280608 - 3d model (*.gsm+*.3ds) for interior 3d visualization.
archibase_planet
free
Railing
...railing
archibase planet
railing kitchen ware
railing 1 - 3d model (*.gsm+*.3ds) for interior 3d visualization.
5
turbosquid
$6

Rock 5-5
...urbosquid
royalty free 3d model rock 5-5 for download as obj on turbosquid: 3d models for games, architecture, videos. (1639063)
3d_export
$5

hinge 5
...hinge 5
3dexport
hinge 5
turbosquid
$10

A-5
... available on turbo squid, the world's leading provider of digital 3d models for visualization, films, television, and games.
turbosquid
$2

A-5
... available on turbo squid, the world's leading provider of digital 3d models for visualization, films, television, and games.
turbosquid
$12

Calligraphic Digit 5 Number 5
...hic digit 5 number 5 for download as max, obj, fbx, and blend on turbosquid: 3d models for games, architecture, videos. (1389333)
3ddd
$1

5 роз
...5 роз
3ddd
5 роз в стеклянной вазе
design_connected
$11

iPhone 5
...iphone 5
designconnected
apple iphone 5 computer generated 3d model.
3ddd
$1

Lola 5
...lola 5
3ddd
miniforms
lola 5 miniforms 300*65*134
3ddd
$1

Nexus 5
...dd
nexus , phone , телефон
google nexus 5 phone
3d_ocean
$15

iPhone 5
...iphone 5
3docean
3d 4d apple cinema iphone model modeling phone screen texture
iphone 5 3d model and texture realistic iphone 5.