Thingiverse

Ender 3 Pro rear mounted Raspberry Pi 4 case ( T-Nut free ) by relativeinspire
by Thingiverse
Last crawled date: 3 years, 4 months ago
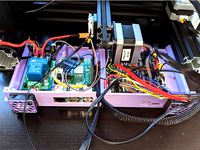
I did a remix of the popular enclosure by Teaching Tech because it didn't required T-Nut to fix it to the printer and I only needed the left part for the Raspberry Pi. I also preferred the fan blowing under the unit.
It has enough room for the 30mm fan, the step down power supply module (24v -> 5v), 2 relay on the back and the Pi 4.
UPDATE 2020-12-24
I'm quite deceived by the performance of the LM2596 DC-DC buck converter. Yes it cheap ( 5$ a piece on Amazon) but I had to crank up the voltage to 6V to keep up with the current required by the Pi. The symptom is easy to spot, the red led on the board turn off as soon as the power source cannot keep up with the load. I'm also powering a web cam so the step down from 24v to 5v with the current required seems to much for this hardware, even though it's rated at 3A!? There is no way that board will deliver 3A @ 5v from a 24v source.
And after a couple of print run, I also notice some strange flicking on the LCD screen. So I'm pretty sure the buck converter is the culprit. I did some research and instead decided to go with a more robust solution for DC-DC converter and opt for the DTJ1524S05 from XP Power (43$ on Digi-Key). I added new support post for this board (V2 version). It fit over the relay section at the back but I was not using it anyway. If your really need relay, simply swap it to where the LM2596 was sitting before.
I also made the lid 1.5 mm larger and add a small slot in the case so it support it all the way to the back.
That's it!
Similar models
thingiverse
free

Prusa i3 Mk2S/Mk2.5 Power Supply holder with USB slot for KIS3R33S DC 7V-24V to 5V Buck Converter by jgrg1
... pcb.
i did this so i could run a raspberry pi 3b+ off the prusa psu.
update - 2018-08-18
added some photos of the installation.
thingiverse
free
Raspberry Pi & SKR E3 Turbo back case for Ender 3 by JakeTri
...one for 5v (from powering 30mm fans from fan2 board connector)
two 30mm fans
customizable fan grill cover used for the 30mm fans
thingiverse
free

LM2596 Buck Converter case
...k converter for a match to yours.
if the lid wont snap and hold in place, use a little hot glue on the post and place the cover.
grabcad
free

Raspberry Pi Case with Buck Converter
...er supply/adapter
3. x1 lm2596 dc to dc 3.2-35v to 1.25-30v buck converter
please exercise caution when dealing with 120v power!
grabcad
free

Bracket for Raspberry Pi 3 with LM2596 DC-DC step down converter module
...lm2596 dc-dc step down converter module. the lm2596 module is used to supply power for raspberry from switching mode power supply
thingiverse
free

Step Down Buck Board Voltage Converter Upgrade for Prusa i3 MK3 MK3s by mcfada
...p to the power draw of your buck converter. i chose to power a raspberry pi 3 b+ and tft touchscreen running octoprint, pictured.
3dwarehouse
free

step down buck converter
...buck converter i have. item is in the link. smakn mini mp1584en step-down power dc-dc 3a ultra adjustable lm2596 step-down module
grabcad
free

5V DC-DC Step down Power Supply Buck Module
...ower supply buck module
grabcad
ams1117 6.5v-12v turn to 5v dc-dc step down power supply buck module for arduino or raspberry pi
grabcad
free

12V 24V to 5V 20A 100W DC DC Converter Buck Transformer Step Down Regulator
...ad
12v 24v to 5v 20a 100w switch power supply dc dc converter buck transformer step down regulator waterproof car voltage module
grabcad
free

USB DC-DC Power Converter 5V 3A
...usb dc-dc power converter 5v 3a
grabcad
6-24v -> 5v 3a
Raspberry
3d_export
free

raspberry
...raspberry
3dexport
3d model of a raspberry. i tried to make it realistic.
turbosquid
$27
Raspberries
...y free 3d model raspberries for download as max, obj, and stl on turbosquid: 3d models for games, architecture, videos. (1354176)
turbosquid
$14

Raspberries
...y free 3d model raspberries for download as max, obj, and fbx on turbosquid: 3d models for games, architecture, videos. (1364663)
3d_export
$5
raspberry pi
...raspberry pi
3dexport
carcasa para la raspberry pi
turbosquid
$99

Raspberry
... available on turbo squid, the world's leading provider of digital 3d models for visualization, films, television, and games.
turbosquid
$10

raspberries
... available on turbo squid, the world's leading provider of digital 3d models for visualization, films, television, and games.
archive3d
free

Raspberries 3D Model
...raspberries 3d model archive3d raspberries raspberry raspberries n300911 - 3d model (*.3ds) for interior 3d...
3d_export
$5

raspberry fruit
...raspberry fruit
3dexport
3d_export
$5

raspberry
...y different sizes. their color ranges from light burgundy to pink. there are formats: obj, 3ds, blend, dae, fbx, mtl.<br>:)
evermotion
$12

raspberries 23 am130
...evermotion raspberries 23 am130 evermotion key 23 food fruit raspberry fruits am130 raspberries highly detailed 3d model of raspberries...
Ender
3ddd
$1
Enders / Elegance
...enders / elegance
3ddd
обогреватель
уличный газовый обогреватель enders elegance
высота: 2200 мм
3d_export
free
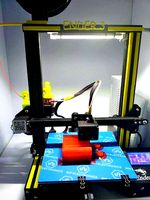
ender 3 frame cavity covers
... of the creality ender 3 - makes it look a bit more attractive it just slides into the open channels of the aluminium framework
turbosquid
$1

pen support for ender 3
...y free 3d model pen support for ender 3 for download as blend on turbosquid: 3d models for games, architecture, videos. (1611282)
3d_ocean
$9
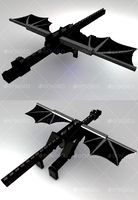
Ender Dragon Minecraft
...ojang obj poly videogames
ender dragon minecraft created with cinema 4d r15 formats included: max 2013 – fbx 2012 – c4d r15 – obj
3d_export
free
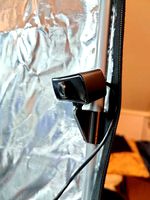
Creality ender enclosure webcam mount
...e creality enclosure. sure is better than a tripod. change it up if it helps. i printed pla with 50% infill on my dd ender 3 pro.
3d_export
free
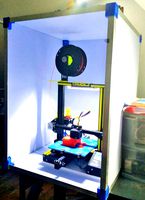
ender 3 enclosure corners
...er corners and 4 upper corners, using 25mmx25mm angled aluminium pieces that gets covered on inside of the frame with plexiglass
3d_export
free
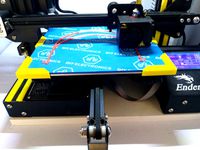
ender 3 3d print bed clips
...ed + normal aluminium bed frame of the creality ender 3 = 6mm (b) these clips are designed for glass plate + aluminium bed = 4mm
3d_export
$5
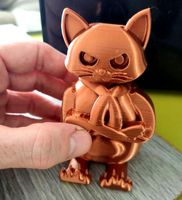
GRUMPY CAT
...grumpy cat 3dexport grumpy cat to print in ender ...
3d_export
$5

Logs fire
...with one multi material for corona and vray r ender. albedo, normal, uvmap, roughness format jpg 4096x4096 models:...
3d_export
$42

excavator
...is the original size. 0.12 mm printing surface creality ender5 ...
Pi
design_connected
$11

Pi
...pi
designconnected
ligne roset pi chairs computer generated 3d model. designed by thibault desombre.
3d_export
$5

raspberry pi
...raspberry pi
3dexport
carcasa para la raspberry pi
turbosquid
$18
pied
... available on turbo squid, the world's leading provider of digital 3d models for visualization, films, television, and games.
3ddd
$1
Emme pi light
...emme pi light
3ddd
emme pi light
люста emme pi light
3ddd
$1
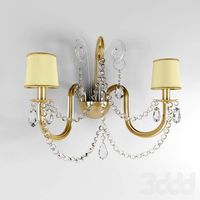
Emme pi light
...emme pi light
3ddd
emme pi light
бра классическое emme pi light
3ddd
$1
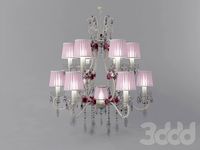
Emme Pi Light
...emme pi light
3ddd
emme pi light
3ddd
$1
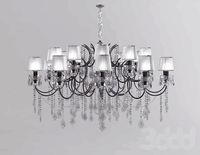
Emme Pi Light
...emme pi light
3ddd
emme pi light
design_connected
$16
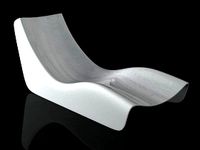
Pi-Air
...pi-air
designconnected
living divani pi-air lounge chairs computer generated 3d model. designed by harry & camila.
3d_ocean
$15

Manneken Pis
...picting a naked little boy urinating into a fountain’s basin. (wikipedia) the model was sculpted in blender 2.70a rendered wit...
3ddd
$1
Emme pi light
...emme pi light
3ddd
emme pi light
люстра классическая фирма: emme pi light
артикул: 3595/5/cot/12/wh
Rear
3d_export
$48
engine case rear
...re efficient as it eliminates the need for the propeller shaft while the differential merges with the transmission to save space.
turbosquid
$39
rear rim
... available on turbo squid, the world's leading provider of digital 3d models for visualization, films, television, and games.
3d_export
$5
Rear Suspension 3D Model
... suspension 3d model
3dexport
rear suspension spring sport car disc brake chasis
rear suspension 3d model bayazoff 30675 3dexport
turbosquid
$20

Rear sport wheel
...del rear sport wheel for download as ige, obj, stl, and sldas on turbosquid: 3d models for games, architecture, videos. (1227527)
turbosquid
$99

Rear tyre set
... available on turbo squid, the world's leading provider of digital 3d models for visualization, films, television, and games.
turbosquid
$49
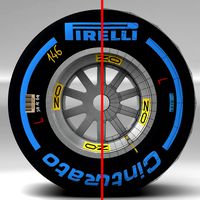
Wet Rear tyre
... available on turbo squid, the world's leading provider of digital 3d models for visualization, films, television, and games.
turbosquid
$49
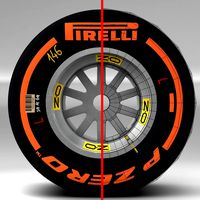
Hard rear tyre
... available on turbo squid, the world's leading provider of digital 3d models for visualization, films, television, and games.
turbosquid
$49
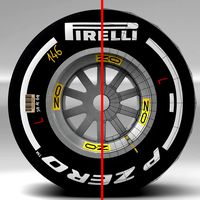
Medium Rear tyre
... available on turbo squid, the world's leading provider of digital 3d models for visualization, films, television, and games.
turbosquid
$49

Supersoft Rear tyre
... available on turbo squid, the world's leading provider of digital 3d models for visualization, films, television, and games.
turbosquid
$39
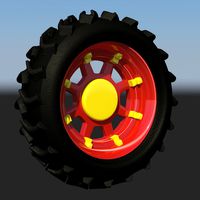
tractor rim rear
... available on turbo squid, the world's leading provider of digital 3d models for visualization, films, television, and games.
Nut
3d_export
free
nut
...nut
3dexport
low poly
turbosquid
$13
Nut
...
royalty free 3d model nut for download as max, obj, and fbx on turbosquid: 3d models for games, architecture, videos. (1227126)
turbosquid
$12

nut
...
royalty free 3d model nut for download as max, obj, and fbx on turbosquid: 3d models for games, architecture, videos. (1175191)
3d_export
$5
nut handle
...nut handle
3dexport
nut handle
3d_export
$5
nut anchor
...nut anchor
3dexport
nut anchor
3d_export
$5
wing nut
...wing nut
3dexport
wing nut
3d_export
$5

butterfly nut
...butterfly nut
3dexport
butterfly nut
3d_export
$5
special nut
...special nut
3dexport
special nut
3d_export
$5

nut hook
...nut hook
3dexport
nut hook
3d_export
$5

nut ring
...nut ring
3dexport
nut ring
Pro
turbosquid
$29

Pro
...ree 3d model mac pro for download as obj, c4d, fbx, and blend on turbosquid: 3d models for games, architecture, videos. (1505782)
turbosquid
$15

Apple Mac Pro and Pro Display
...ee 3d model apple mac pro and pro display for download as max on turbosquid: 3d models for games, architecture, videos. (1417078)
3d_export
$5

iphone 13 pro max and pro
...3 pro max and 13 pro the model is made in four colors (graphite, gold, silver, and blue), all of which are attached in the files.
3d_export
free
sapphire pro
...sapphire pro
3dexport
sapphire pro 3d printer head mask
3d_export
$4

macbook pro
...macbook pro
3dexport
macbook pro 13" inch 2020 years model
3ddd
free

GentleLase Pro
... syneron , candela
gentlelase pro аппарат для лазерной эпиляции
turbosquid
$25

PRO frame
...rbosquid
royalty free 3d model pro frame for download as max on turbosquid: 3d models for games, architecture, videos. (1148329)
turbosquid
$5

Alien pro
...osquid
royalty free 3d model alien pro for download as blend on turbosquid: 3d models for games, architecture, videos. (1678446)
turbosquid
$5

iphone11 pro
...uid
royalty free 3d model iphone11 pro for download as blend on turbosquid: 3d models for games, architecture, videos. (1562707)
3ddd
$1

Mac Pro (appel)
...mac pro (appel)
3ddd
компьютер , apple
mac pro
Case
3d_export
$1
case
...case
3dexport
case
archibase_planet
free

Case
...case
archibase planet
showcase show-case glass case
glass-case + cakes - 3d model for interior 3d visualization.
archibase_planet
free
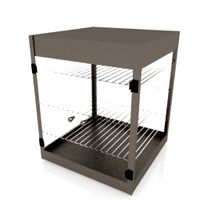
Case
...case
archibase planet
showcase show-case glass case
glass-case for chips - 3d model for interior 3d visualization.
archibase_planet
free
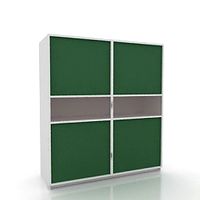
Case
...case
archibase planet
case shelving drawer
case - 3d model for interior 3d visualization.
archibase_planet
free

Case
...case
archibase planet
case rack locker
case - 3d model for interior 3d visualization.
archibase_planet
free

Case
...case
archibase planet
case drawer kitchen furniture
case - 3d model for interior 3d visualization.
archibase_planet
free
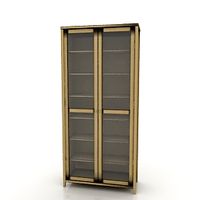
Case
...case
archibase planet
case cupboard shelving
glass case - 3d model for interior 3d visualization.
archibase_planet
free
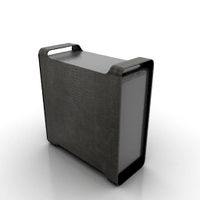
Case
...case
archibase planet
case handbag suitcase
case - 3d model (*.gsm+*.3ds) for interior 3d visualization.
archibase_planet
free
Case
...case
archibase planet
case suitcase
case 5 - 3d model (*.gsm+*.3ds) for interior 3d visualization.
archibase_planet
free
Case
...case
archibase planet
locker case dresser
case - 3d model (*.gsm+*.3ds) for interior 3d visualization.
Mounted
3d_export
free

mounting bracket
...mounting plate is the portion of a hinge that attaches to the wood. mounting plates can be used indoors, cabinetry and furniture.
turbosquid
$2

MOUNTING
... available on turbo squid, the world's leading provider of digital 3d models for visualization, films, television, and games.
turbosquid
free

Mounts
... available on turbo squid, the world's leading provider of digital 3d models for visualization, films, television, and games.
turbosquid
free

Mount Fuji
...fuji
turbosquid
free 3d model mount fuji for download as obj on turbosquid: 3d models for games, architecture, videos. (1579977)
3d_export
$5

Headphone mount LR
...headphone mount lr
3dexport
headphone mount l+r
turbosquid
$39

Mount rainier
...quid
royalty free 3d model mount rainier for download as fbx on turbosquid: 3d models for games, architecture, videos. (1492586)
turbosquid
$5

pipe mounting
...quid
royalty free 3d model pipe mounting for download as obj on turbosquid: 3d models for games, architecture, videos. (1293744)
turbosquid
$3

Mounting Tires
...uid
royalty free 3d model mounting tires for download as fbx on turbosquid: 3d models for games, architecture, videos. (1708511)
3d_export
$5

Magnetic GoPro Mount
...pro mount
3dexport
cool magnetic mount for gopro. allows you to mount the camera on flat metal surfaces and get exclusive shots.
turbosquid
$5

Stone Mount
...ty free 3d model stone mount for download as ma, obj, and fbx on turbosquid: 3d models for games, architecture, videos. (1370306)
4
turbosquid
$9

Office Chair 4-4
... available on turbo squid, the world's leading provider of digital 3d models for visualization, films, television, and games.
3d_export
$5

doors- 4
...doors- 4
3dexport
doors 4
3d_export
$5
hinge 4
...hinge 4
3dexport
hinge 4
3ddd
$1

Штора №4
...штора №4
3ddd
штора №4
3d_export
free
playstation 4
...playstation 4
3dexport
playstation 4
turbosquid
$1

re 4-4 electric locomotive
... free 3d model re 4 4 electric locomotive for download as obj on turbosquid: 3d models for games, architecture, videos. (1707845)
3ddd
$1

nexus 4
...nexus 4
3ddd
lg , телефон
nexus 4
3ddd
$1

4 Poufs
...4 poufs
3ddd
пуф
4 soft poufs
turbosquid
$12

Calligraphic Digit 4 Number 4
...hic digit 4 number 4 for download as max, obj, fbx, and blend on turbosquid: 3d models for games, architecture, videos. (1389332)
3ddd
$1

Dauphin 4+
...dauphin 4+
3ddd
кресло
dauphin 4+ конференц кресло
T
design_connected
$11
T & T
...t & t
designconnected
dark t & t computer generated 3d model. designed by de ryck, christophe.
3d_export
$5

t-800
...t-800
3dexport
t-800
3ddd
$1
Table T
...table t
3ddd
журнальный
table t
3ddd
free

T-Rex
...t-rex
3ddd
t-rex
rrrrrr
3d_export
$5
t-virus
...t-virus
3dexport
it's t-virus
3d_export
$5

T-26T
...t-26t
3dexport
artillery tractor on the t-26 chassis ussr
3ddd
$1
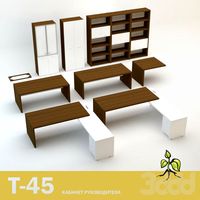
T 45
...t 45
3ddd
t-45
кабинет руководителя t 45
12 предметов
подробнее:http://www.prezident-mebel.ru/index.php?productid=1541
3ddd
free

SAFE T
...safe t
3ddd
огнетушитель
креативные огнетушители от компании safe t
3d_export
free
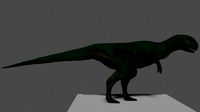
t-rex
...t-rex
3dexport
t-rex have normal map and base color textures
3d_export
$75

T-55
...nally, but these improvements made the tank more efficient and lethal. the t-55 was officially adopted by the soviet army in 1958
3
turbosquid
$10
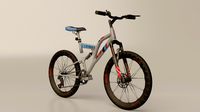
Mountain Bike 3 -3 of 3
...model mountain bike 3 (#3 of 3) for download as fbx and blend on turbosquid: 3d models for games, architecture, videos. (1438752)
turbosquid
$6

Rock 3-3
...urbosquid
royalty free 3d model rock 3-3 for download as obj on turbosquid: 3d models for games, architecture, videos. (1628065)
turbosquid
$29

Books 150 pieces 3-3-3
...books 150 pieces 3-3-3 for download as max, obj, fbx, and stl on turbosquid: 3d models for games, architecture, videos. (1384033)
turbosquid
$3

Genesis 3 Clothing 3
... available on turbo squid, the world's leading provider of digital 3d models for visualization, films, television, and games.
3d_export
$5
hinge 3
...hinge 3
3dexport
hinge 3
3ddd
$1
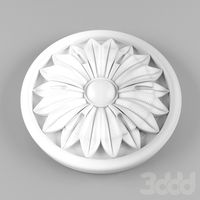
Розетка 3
...розетка 3
3ddd
розетка
розетка 3
turbosquid
$50

is-3
... available on turbo squid, the world's leading provider of digital 3d models for visualization, films, television, and games.
turbosquid
$10
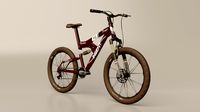
Mountain Bike 3 -2 of 3
...model mountain bike 3 (#2 of 3) for download as fbx and blend on turbosquid: 3d models for games, architecture, videos. (1438750)
turbosquid
$10
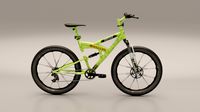
Mountain Bike 1 -3 of 3
...model mountain bike 1 (#3 of 3) for download as fbx and blend on turbosquid: 3d models for games, architecture, videos. (1438743)
3d_export
$5

3 CATS
...3 cats
3dexport
3 cats pen holder
Free
design_connected
$13

Free
...free
designconnected
parri design free armchairs computer generated 3d model. designed by marco maran.
turbosquid
$5
free
... available on turbo squid, the world's leading provider of digital 3d models for visualization, films, television, and games.
turbosquid
$5

Free
... available on turbo squid, the world's leading provider of digital 3d models for visualization, films, television, and games.
turbosquid
free
Free
... available on turbo squid, the world's leading provider of digital 3d models for visualization, films, television, and games.
design_connected
free
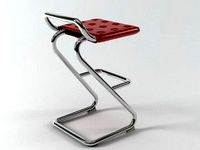
Free barstool
...free barstool
designconnected
free 3d model of free barstool by kristalia designed by graffeo, monica.
3d_export
$5

free mixamo
...free mixamo
3dexport
free mixamo
3d_export
free

free rocks
...free rocks
3dexport
free price rock
turbosquid
free

Free Free Standing Punching Bag
... available on turbo squid, the world's leading provider of digital 3d models for visualization, films, television, and games.
turbosquid
free

Hamburger Free
...urbosquid
free 3d model hamburger free for download as blend on turbosquid: 3d models for games, architecture, videos. (1592262)
turbosquid
free
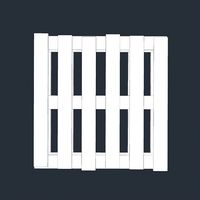
Pallet Free
...ree
turbosquid
free 3d model pallet free for download as fbx on turbosquid: 3d models for games, architecture, videos. (1156509)

