Thingiverse

Ender 3 Motherboard 80mm Top LED fan Case (Improved Design) by Champ4981
by Thingiverse
Last crawled date: 3 years, 4 months ago
Update (Oct. 15, 2020)
Added top with LED spacing around fan. Also improved the design with some bevels where the wires go into the buck converted. Also added a bit more edge to the sides so the light doesn't shine through the cracks. The other models this won't be an issue but with more LED's you will see the cracks where the light shines through. This is probably my last and final iteration of this thing. I added some extra space around the fan for LED's. The LED's I used for this:https://www.amazon.ca/gp/product/B01CDTED80/ref=ppx_yo_dt_b_asin_title_o06_s00?ie=UTF8&psc=1
Wired a strip and a bit more around the edges into the SKR mini E3 v2.0 neopixel pins.
Your wiring may be different but see picture below for some ideas.
Update (Oct. 13, 2020)
Sorry, forgot to add back the slot for the head of the M3 bolt for the back mount hole for the nuclear symbol stl. Replaced the stl with the corrected one.
Update (Oct. 12, 2020)
Thought I would have some fun out of it so I made one with a fan cover with a nuclear symbol. For this one I would print the first layer as slow as possible. I printed the intitial layer at 10mm/s which is really slow but it helps the honeycomb pattern to stick better to the bed.
Update (Oct. 11, 2020)
Added a fan cover for the top case. Without the fan cover there were absolutely no issues. But for those concerned I added one.
For the motherboard honestly even without the fan cover debris just doesn't get into enclosure through the fan. Based on how the bed is right above the fan and the extruder itself is usually situated over the bed. Only time is when it homes. Mine homes to the center of the bed anyways. Some may have it home at 0,0. But even then, unless you are extruding filament right over the fan. But this can at least protect your fingers in case you mistakenly stick it in there.
Summary:
This is a "remix" but the file is "clean" in that I ended up making this from the ground up on Fusion 360. I really liked this design mainly for the buck converter slot that can allow you to neatly wire in buck converter needs into one spot of the motherboard enclosure. Also that you can have more options for an 80mm LED fan as the original fan was making strange noises and I felt like I needed to replace it anyway.
I thought the idea was great from Joulz but after printing there were some major flaws:
1) The mount holes did not line up (Main part of case and buck converter I was using )
2) The Y-axis groove for the wheels did not extend all the way to the end. This causes
issues as some users may be using a belt tightener for the Y axis where the wheels
would get stuck on the tensioner and cause motor grinding.
3) The case was a too thick. There was barely enough clearance from the top of the
case to the Y axis wheels and it looked precarious.
Spacing dimensions between mount holes may not be exact for all Ender 3 printers so I made the mount holes a bit wider to allow enough margin for inconsistencies. It should fit fine for most users now.
Similar models
thingiverse
free

Ender 3 V2 Mainboard cover for 80x80 Fan by LionelDagon
...5) screw the fan with the supplied screws
6) be sure your printer is turned off and wired the buck converter to mainboard supply.
thingiverse
free

Arduino Mega 2560 Snug Case with mount holes by xaybiz
... holes by xaybiz
thingiverse
added holes to mount the case onto whatever
i also removed some holes on the top cover for the leds
thingiverse
free

MKS Gen L v1.0 Board Case by JamesK1
...a cover for the 92mm fan.
update - case cover v2 was missing a hole. :)
i'd recommend petg as the board does get pretty warm.
thingiverse
free

Voxelab Aquila 92mm fan motherboard cover by Cronicus
...off automaticlly from the motherboard cooling fan port when using a buck converter. refer to the picture above on how to wire it.
thingiverse
free

OctoPi Case for Creality Ender 3 (Pro) by Floo33R
...s much better.
top version 3.0
added a fan cover, so the parts get cool air for cooling instead of the hot air under the heatbet.
thingiverse
free

LK4 Pro Electronics Cover by Indian_Villager
...tional info.
it did take me a bit to design this. if this helped you feel free to toss up a like or post your make.
happy modding
thingiverse
free

Ender 3 v2 Motherboard cover for 92 x 25 fan no buck mounting by bryfdir
...ath the printer with thick 'car trim' double sided tape, they seem to be fine, this file might be handy for someone else.
thingiverse
free

Smoothieboard beetle case by pinkbeetle
...eded, and added a beetle :)
plenty of room for all of your wires under the top of this case, and smoothieboard stays very cool.
thingiverse
free

Arduino Uno + Buck converter Case by ERDesigns
...temprature and everything else i will add in the future :)
there are holes for easy acces for the wires (temp, leds, screen etc).
thingiverse
free

2020 Extrusion electronics case MKS 1.4 by nightpanda2810
...8&psc=1
autek dc buck converter - https://www.amazon.com/gp/product/b00bmivfk8/ref=oh_aui_search_detailpage?ie=utf8&psc=1
Champ4981
thingiverse
free

Cold Beer LED sign by Champ4981
...is no up to date without the gap.
this is a cold beer sign for decoration purposes. place this in your bar area, room, wherever.
thingiverse
free

Adjustable Universal Mobile Phone Stand by Champ4981
...things can be improved. the original was non-adjustable and was a bit too steep, as sometimes i needed to have the phone tilted.
thingiverse
free

BLtouch Standard mount to fit 5020 fans for Hero Me gen3/4 base by Champ4981
... want 5020 dual ducts this mount will allow you to fit it. you will also need to use hero me bltouch wide wing with this to fit.
thingiverse
free

Hero Me LED Bar to fit 5015/5020 Separate Dual Fan by Champ4981
... 3d printing let alone fusion 360 so the modifications were very basic but it printed well and looked very clean as the original.
thingiverse
free

Ender 3/Pro Raspberry Pi4 Complete Enclosure w/Fan Mount & Secure Pi4 Mount Holes by Champ4981
...s that will secure d rocks case to the extrusion. you will only need a m3 nut and bolt.https://www.thingiverse.com/thing:3050607
Motherboard
turbosquid
free

motherboard
... available on turbo squid, the world's leading provider of digital 3d models for visualization, films, television, and games.
3d_ocean
$25
Motherboard
...el with great shaders (mental ray). created in 3ds max 2011 but opens in older versions. it’s textured with mental ray materials.
3d_export
free

motherboard gaming
...motherboard gaming
3dexport
<br>your model for your future gaming motherboard is now available for free, download and try.
turbosquid
$30

Realistic Motherboard
...ee 3d model realistic motherboard for download as obj and fbx on turbosquid: 3d models for games, architecture, videos. (1394853)
turbosquid
$15

UFO MOTHERBOARD
... available on turbo squid, the world's leading provider of digital 3d models for visualization, films, television, and games.
turbosquid
$200
High detailed motherboard
... available on turbo squid, the world's leading provider of digital 3d models for visualization, films, television, and games.
turbosquid
$60

Motherboard Asus-like
... available on turbo squid, the world's leading provider of digital 3d models for visualization, films, television, and games.
3d_export
$35

Motherboard computer desktop 3D Model
...e computer tecnologies electronics pc hp hd 3d mouse audio screen
motherboard computer desktop 3d model master3d96 74133 3dexport
turbosquid
$52

M2N61 LA Nyssa Motherboard With 8GB DDR3 Ram
... available on turbo squid, the world's leading provider of digital 3d models for visualization, films, television, and games.
3d_export
$55

ASUS Maximus VIII Extreme Z170 Motherboard 3D Model
...b
asus maximus viii extreme z170 motherboard 3d model download .c4d .max .obj .fbx .ma .lwo .3ds .3dm .stl kint3d 109003 3dexport
80Mm
3d_export
$15

mortar 80mm
...mortar 80mm
3dexport
mortar 4k textures uvw
3ddd
$1

Faucet Leva 80mm Basin
...faucet leva 80mm basin
3ddd
смеситель , leva
faucet leva 80mm basin
3d_ocean
$45

RED DRAGON 6K + Angenieux Optimo DP 30-80mm T2.8
...ighly detailed cinema camera. made in blender 2.69 for cycles rendering.format like *.max was basically tuned with the materials.
3ddd
$1

Светильник точечный
...светильник с хрустальными подвесками фирмы asfour. размеры: 80mm x 80mm высота 35...
3ddd
$1

Thermometer round
...thermometer round 3ddd термометр diameter: 80mm ...
3ddd
$1

Римские шторы
...римская производитель: - модель: римские шторы размеры : w-980mm, d-80mm h-...
3d_export
$12
emu36 train
...emu36 train 3dexport train size 450mm x 80mm x 100mm<br>assembled 3...
3d_export
$5

empty glass - medium size
...subdivision surface modifier for high resolution render.<br> x = 80mm y = 80mm, z=136mm<br>226<br> 256<br> .blend, .fbx, .obj,...
3ddd
$1

DelightFULL Coltrane
...delightfull коллекция: coltrane модель: suspension размеры: 1000mm х diam 80mm ...
3ddd
free

DelightFULL Coltrane
...delightfull коллекция: coltrane модель: wall размеры: 1000mm х diam 80mm ...
Ender
3ddd
$1

Enders / Elegance
...enders / elegance
3ddd
обогреватель
уличный газовый обогреватель enders elegance
высота: 2200 мм
3d_export
free

ender 3 frame cavity covers
... of the creality ender 3 - makes it look a bit more attractive it just slides into the open channels of the aluminium framework
turbosquid
$1

pen support for ender 3
...y free 3d model pen support for ender 3 for download as blend on turbosquid: 3d models for games, architecture, videos. (1611282)
3d_ocean
$9

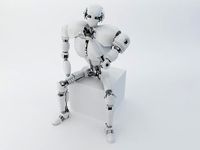
Ender Dragon Minecraft
...ojang obj poly videogames
ender dragon minecraft created with cinema 4d r15 formats included: max 2013 – fbx 2012 – c4d r15 – obj
3d_export
free

Creality ender enclosure webcam mount
...e creality enclosure. sure is better than a tripod. change it up if it helps. i printed pla with 50% infill on my dd ender 3 pro.
3d_export
free

ender 3 enclosure corners
...er corners and 4 upper corners, using 25mmx25mm angled aluminium pieces that gets covered on inside of the frame with plexiglass
3d_export
free

ender 3 3d print bed clips
...ed + normal aluminium bed frame of the creality ender 3 = 6mm (b) these clips are designed for glass plate + aluminium bed = 4mm
3d_export
$5

GRUMPY CAT
...grumpy cat 3dexport grumpy cat to print in ender ...
3d_export
$5

Logs fire
...with one multi material for corona and vray r ender. albedo, normal, uvmap, roughness format jpg 4096x4096 models:...
3d_export
$42

excavator
...is the original size. 0.12 mm printing surface creality ender5 ...
Improved
cg_studio
$49
Robot Z300 (improved version)3d model
...o
.3ds .fbx .max .obj - robot z300 (improved version) 3d model, royalty free license available, instant download after purchase.
3d_export
$39
Robot Z300 improved version 3D Model
...fantasy sci-fi robots bot humanoid droid sci fi materials character
robot z300 improved version 3d model alekrazum 55067 3dexport
3d_export
$75

CV-90 Improved
...nnon. export versions are fitted with hägglunds e-series turrets, armed with either a 30 mm mk44 or a 35 mm bushmaster autocannon
turbosquid
$55
(Important textures coming back soon after improvements)Cuboid gazebo bench area
... available on turbo squid, the world's leading provider of digital 3d models for visualization, films, television, and games.
3d_export
$15

COMPLETE AUDI 80-100 SHIFT LEVER REPAIR KIT WITH IMPROVED BUSHING
...dexport
• sleeve - 1 pc. • elastic band - 1 pc. • hinge - 1 pc. audi 100c3 audi 100 c4 audi 80 b3 (checked) audi 80 b4 (checked)
3d_export
$7

REPAIR KIT FOR GEARSHIFT LEVER AUDI 80-100 IMPROVED
...ar of the gum is excluded. - rusk - 1 pc. - elastic band - 1 pc. audi 100c3 audi 100 c4 audi 80 b3 (checked) audi 80 b4 (checked)
3d_export
$30
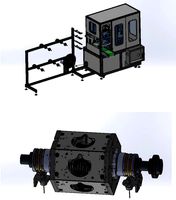
cup mask machine front section stereo mask manufacturing machine improved version
...ing rack cad outsourcing list. the drawings are mature drawings that have been produced.<br>drawing version solidworks 2018
3d_export
free
oven - forno
...oven - forno
3dexport
gradually i'm trying to improve my 3d.
3d_export
$75
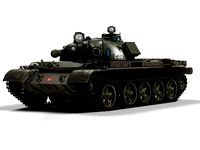
T-55
...nally, but these improvements made the tank more efficient and lethal. the t-55 was officially adopted by the soviet army in 1958
3d_export
$5
civil registration authorities
...civil registration authorities
3dexport
city wedding square. the model can be used for projects, to improve the project, etc.
Led
3d_export
$5

led
...led
3dexport
the led is cut with all the parts.
3ddd
$1

Monacor / PARL56DMX / LED-320RGBW / LED-345RGBW / LED-300RGB
... прожектор
http://www.monacor.dk/
parl56dmx
led-320rgbw
led-345rgbw
led-300rgb
turbosquid
$10

LED
...led
turbosquid
free 3d model led for download as blend on turbosquid: 3d models for games, architecture, videos. (1691856)
3d_export
$5

led lamp
...led lamp
3dexport
led lamp, brightness animation
3ddd
free

leds-c4
...leds-c4
3ddd
leds-c4
современный торшер
3ddd
free

leds-c4
...leds-c4
3ddd
leds-c4
настольный лампа
turbosquid
$19

LED
... available on turbo squid, the world's leading provider of digital 3d models for visualization, films, television, and games.
turbosquid
$12

Led
... available on turbo squid, the world's leading provider of digital 3d models for visualization, films, television, and games.
turbosquid
free

LED
... available on turbo squid, the world's leading provider of digital 3d models for visualization, films, television, and games.
turbosquid
free

LED
... available on turbo squid, the world's leading provider of digital 3d models for visualization, films, television, and games.
Fan
3d_export
$5

fan
...fan
3dexport
fan 3d model, table fan, fan, electric fan, ventilator
archibase_planet
free

Fan
...fan
archibase planet
fan large fan
fan out n260707 - 3d model for interior 3d visualization.
archibase_planet
free

Fan
...fan
archibase planet
fan ceiling fan ventilator
fan stealth n300615 - 3d model (*.gsm+*.3ds) for interior 3d visualization.
3d_export
$15

fan
...fan
3dexport
is an ancient fan
3ddd
$1

Fan-C-Fan by marco gallegos
...n-c-fan by marco gallegos
3ddd
вентилятор , marco gallegos
fan-c-fan by marco gallegos
3d_export
$10

fan
...fan
3dexport
a detailed fan designed for home or space blowing is now available for only 19.99!
turbosquid
$1

Fan
...fan
turbosquid
free 3d model fan for download as on turbosquid: 3d models for games, architecture, videos. (1427865)
turbosquid
$14

Fan
...fan
turbosquid
royalty free 3d model fan for download as on turbosquid: 3d models for games, architecture, videos. (1415642)
3ddd
$1

Светильник Fan
...светильник fan
3ddd
fan , italamp
светильник fan, производитель italamp
turbosquid
$25

Fan
...fan
turbosquid
royalty free 3d model fan for download as c4d on turbosquid: 3d models for games, architecture, videos. (1483246)
Case
3d_export
$1

case
...case
3dexport
case
archibase_planet
free

Case
...case
archibase planet
showcase show-case glass case
glass-case + cakes - 3d model for interior 3d visualization.
archibase_planet
free

Case
...case
archibase planet
showcase show-case glass case
glass-case for chips - 3d model for interior 3d visualization.
archibase_planet
free

Case
...case
archibase planet
case shelving drawer
case - 3d model for interior 3d visualization.
archibase_planet
free

Case
...case
archibase planet
case rack locker
case - 3d model for interior 3d visualization.
archibase_planet
free

Case
...case
archibase planet
case drawer kitchen furniture
case - 3d model for interior 3d visualization.
archibase_planet
free

Case
...case
archibase planet
case cupboard shelving
glass case - 3d model for interior 3d visualization.
archibase_planet
free

Case
...case
archibase planet
case handbag suitcase
case - 3d model (*.gsm+*.3ds) for interior 3d visualization.
archibase_planet
free

Case
...case
archibase planet
case suitcase
case 5 - 3d model (*.gsm+*.3ds) for interior 3d visualization.
archibase_planet
free

Case
...case
archibase planet
locker case dresser
case - 3d model (*.gsm+*.3ds) for interior 3d visualization.
Top
archibase_planet
free
Top
...top
archibase planet
top
top - 3d model (*.gsm+*.3ds) for interior 3d visualization.
3ddd
free
Range Top V36C top
...range top v36c top
3ddd
гриль
проф. гриль range top v36c top
archibase_planet
free
Top
...top
archibase planet
dresser kitchen furniture
top - 3d model (*.gsm+*.3ds) for interior 3d visualization.
archibase_planet
free
Top
...top
archibase planet
bracket bar furniture
bar top - 3d model (*.gsm+*.3ds) for interior 3d visualization.
turbosquid
$5
Top
...lty free 3d model top for download as ma, max, blend, and obj on turbosquid: 3d models for games, architecture, videos. (1579951)
turbosquid
$39
Top
... available on turbo squid, the world's leading provider of digital 3d models for visualization, films, television, and games.
turbosquid
$30
Top
... available on turbo squid, the world's leading provider of digital 3d models for visualization, films, television, and games.
3d_export
$15

top knifle
...top knifle
3dexport
top knifle
design_connected
$11
Drop Top
...drop top
designconnected
plumen drop top computer generated 3d model.
3d_export
$245
top of the material
...top of the material
3dexport
top of the material,commercial ceiling ceiling material, metal material
3
turbosquid
$10

Mountain Bike 3 -3 of 3
...model mountain bike 3 (#3 of 3) for download as fbx and blend on turbosquid: 3d models for games, architecture, videos. (1438752)
turbosquid
$6

Rock 3-3
...urbosquid
royalty free 3d model rock 3-3 for download as obj on turbosquid: 3d models for games, architecture, videos. (1628065)
turbosquid
$29

Books 150 pieces 3-3-3
...books 150 pieces 3-3-3 for download as max, obj, fbx, and stl on turbosquid: 3d models for games, architecture, videos. (1384033)
turbosquid
$3

Genesis 3 Clothing 3
... available on turbo squid, the world's leading provider of digital 3d models for visualization, films, television, and games.
3d_export
$5

hinge 3
...hinge 3
3dexport
hinge 3
3ddd
$1

Розетка 3
...розетка 3
3ddd
розетка
розетка 3
turbosquid
$50

is-3
... available on turbo squid, the world's leading provider of digital 3d models for visualization, films, television, and games.
turbosquid
$10

Mountain Bike 3 -2 of 3
...model mountain bike 3 (#2 of 3) for download as fbx and blend on turbosquid: 3d models for games, architecture, videos. (1438750)
turbosquid
$10

Mountain Bike 1 -3 of 3
...model mountain bike 1 (#3 of 3) for download as fbx and blend on turbosquid: 3d models for games, architecture, videos. (1438743)
3d_export
$5

3 CATS
...3 cats
3dexport
3 cats pen holder
Design
3ddd
$1
LINE DESIGN (Doors Design)
...line design (doors design)
3ddd
дверь
modern doors design - line design concept
turbosquid
$5

designer
...alty free 3d model designer for download as max, obj, and fbx on turbosquid: 3d models for games, architecture, videos. (1422665)
3ddd
$1
VER DESIGN
...ver design
3ddd
ver design
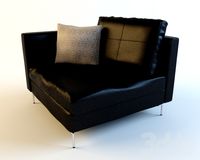
кресло ver design
3ddd
$1
VER DESIGN
...ver design
3ddd
ver design
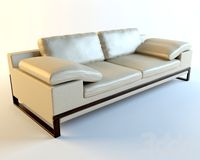
диван ver design
3ddd
$1
Bagno design
...bagno design
3ddd
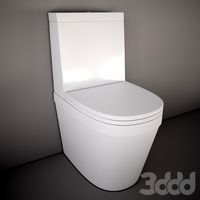
bagno design , унитаз
санитария bagno design
3ddd
free
VER DESIGN
...ver design
3ddd
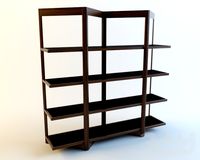
ver design , стеллаж
полка ver design
3ddd
$1
VER DESIGN
...ver design , лежак , шезлонг
шезлонг ver design
3d_export
free
designer
..., trees and much more. the model has 3 types of parts: - 4 cells - 6 cells - 8 cells the *.max file contains 5 colored materials.
3d_export
$19

level design
...level design
3dexport
you can use this design (level design) in your own game.
3d_export
$7
Crusher design
...crusher design
3dexport
crusher design