Thingiverse

Elegoo Mars/Mars Pro FEP Tool by PhoenixBlueStudios
by Thingiverse
Last crawled date: 3 years, 4 months ago
Update 18-11-2020
v0.3 has been added! This includes thinner arms, while increasing the bump in the center to 8mm as the previous 6mm was quite difficult to screw in at times.
I've also provided split versions of the frame. There are two versions, FDM and SLA. FDM have a 0.1mm tolerance at the seam for a friction fit. The SLA version doesn't have this tolerance as I found in testing that it didn't need it. The 2 split will fit angled on the bed of a Mars 2, while the 4 split will fit a regular Mars/Mars Pro. FDM versions were provided for smaller printers as well.
2 Split: Print two of the file with the desired tolerance. They can be slotted together temporarily or glued together permanently.
4 Split: Print two each of the top and bottom of the file with the desired tolerance. They can be slotted together temporarily or glued together permanently.
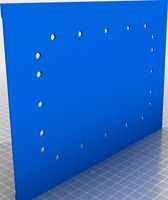
This tool is designed to help tension FEP film properly while holding both halves of the FEP frame in place.
To use:
place the bottom half of the frame in the tool, with the counter sunk holes for the M4 screws facing down.
place your FEP film on top of bottom frame, as close to centered as possible.
place top half of FEP frame over top of FEP film, ensuring the M3 counter sunk holes are facing up.
poke holes in the four corners of the frame in the screw holes.
tighten the four corners down.
Repeat for other holes.
Remove frame from tool. Poke holes in larger M4 screw holes to make frame installation into vat easier.
Warning
Re-installation into the vat will be a bit tough, this tool sets the film to be quite tight when reinstalled.
If you're concerned about scratching your FEP film, I would suggest covering the center with kapton tape.
v0.3 has been added! This includes thinner arms, while increasing the bump in the center to 8mm as the previous 6mm was quite difficult to screw in at times.
I've also provided split versions of the frame. There are two versions, FDM and SLA. FDM have a 0.1mm tolerance at the seam for a friction fit. The SLA version doesn't have this tolerance as I found in testing that it didn't need it. The 2 split will fit angled on the bed of a Mars 2, while the 4 split will fit a regular Mars/Mars Pro. FDM versions were provided for smaller printers as well.
2 Split: Print two of the file with the desired tolerance. They can be slotted together temporarily or glued together permanently.
4 Split: Print two each of the top and bottom of the file with the desired tolerance. They can be slotted together temporarily or glued together permanently.
This tool is designed to help tension FEP film properly while holding both halves of the FEP frame in place.
To use:
place the bottom half of the frame in the tool, with the counter sunk holes for the M4 screws facing down.
place your FEP film on top of bottom frame, as close to centered as possible.
place top half of FEP frame over top of FEP film, ensuring the M3 counter sunk holes are facing up.
poke holes in the four corners of the frame in the screw holes.
tighten the four corners down.
Repeat for other holes.
Remove frame from tool. Poke holes in larger M4 screw holes to make frame installation into vat easier.
Warning
Re-installation into the vat will be a bit tough, this tool sets the film to be quite tight when reinstalled.
If you're concerned about scratching your FEP film, I would suggest covering the center with kapton tape.
Similar models
thingiverse
free

Elegoo Saturn FEP Tool by PhoenixBlueStudios
... when reinstalled.
if you're concerned about scratching your fep film, i would suggest covering the center with kapton tape.
thingiverse
free

Elegoo Mars Resin Vat Bottom FEP Protector by COSE_JERRY
...
designed to protect the bottom of the fep sheet when the resin vat is not in use. both plain and logoed versions are available.
thingiverse
free

Elegoo Mars all in one Vat Cover / Stacker / Fep Protector
...t vat. push fit with enough resistance to not fall off.
prints flat and unsupported on one of those new fangled fdm type things.
thingiverse
free

LCD SLA VAT pool by erdemerciyas
...lcd sla vat pool by erdemerciyas
thingiverse
for 7" lcd
25% pla printing
you need m3 screw & nuts and fep film...
thingiverse
free

FEP Spacer (Elegoo Specs) by fraley1701
...cure the steel gasket to the resin tank. be sure to tighten the screws evenly and make sure your fep sheet is sufficiently taunt.
thingiverse
free

fep sh!t holder tool for phrozen sonic mini vat by RZprime
...
thingiverse
you clamp the fep sheet between the two tools to retain tension over the vat. held together with four paper clamps.
thingiverse
free

Elegoo Mars Resin Vat Cover by corefusion
...le case. the bottom has a cavity so the fep film is protected from scratches. the top prevents dust and light to reach the resin.
grabcad
free

"Anycubic Photon Mono 4k" resin vat bottom frame for FEP film
... - added pdf files for drawings;
- parts were divided into two types: for cnc milling and for 3d printing.
grabcad
free

M3 Max - FEP Spacer Pucks
...tion and the risk of fep scarring during installation.
tested with anycubic fep for the m3 max, with both sla and fdm versions.
thingiverse
free

Vat holder for Elegoo Mars by Almucantarat
...n this way the fep will not touch the table and will not be scratched
it can accommodate any vat with dimensions 177 mm x 120 mm.
Phoenixbluestudios
thingiverse
free

Ender-2 Low Profile Control Box by PhoenixBlueStudios
...read into the plastic including the lcd board. it's recommended to assemble the whole unit before mounting it to the printer.
thingiverse
free
Elegoo Saturn FEP Tool by PhoenixBlueStudios
... when reinstalled.
if you're concerned about scratching your fep film, i would suggest covering the center with kapton tape.
thingiverse
free

Elegoo Mars Pro Thin Grid Lens Array - Multiple Sizes by PhoenixBlueStudios
...nting it in abs or asa if possible.
26.5mm is stock height, 25.5mm gives you 1mm of room to shim to a different height if needed.
thingiverse
free

Elegoo Saturn Screwless Build Plate Hanger by PhoenixBlueStudios
...ty of the stls i upload, especially with the level of detail resin printers are able to produce. i hate seeing noticeable facets.
thingiverse
free

Elegoo Mars/Pro/2/2 Pro Screwless Build Plate Hanger by PhoenixBlueStudios
...ty of the stls i upload, especially with the level of detail resin printers are able to produce. i hate seeing noticeable facets.
Fep
thingiverse
free

No Nonsense Fep Helper - Elegoo Saturn by _ARt
...nsense fep helper - elegoo saturn by _art
thingiverse
no nonsense fep helper for installing a new fep sheet on the elegoo saturn
3dfindit
free

120-FEP-311
...120-fep-311
3dfind.it
catalog: weco electrical connectors
3dfindit
free

110-FEP-111
...110-fep-111
3dfind.it
catalog: weco electrical connectors
thingiverse
free

MOAI FEP Vat Spacer by Framingr
...moai fep vat spacer by framingr
thingiverse
a spacer for the fep vat to try reduce suction
thingiverse
free

Elegoo VAT/FEP protector by aour
...elegoo vat/fep protector by aour
thingiverse
it will protect the fep when the vat is removed from the printer.
thingiverse
free
FEP Spacer (Elegoo Specs) by fraley1701
...cure the steel gasket to the resin tank. be sure to tighten the screws evenly and make sure your fep sheet is sufficiently taunt.
thingiverse
free

FEP Cleaner by stefanjsimons
... of it as a brazilian for your fep.
designed for 0.05mm layers.
scale to fit if your print volume is different
117x 66x 0.5+ text
thingiverse
free

Photon Zero Resin FEP Seal by Kanawati
...photon zero resin fep seal by kanawati
thingiverse
anycubic photon zero resin vat fep seal.
thingiverse
free

D7 FEP Stretcher by macdarren
... glass before i fill the vat...it does maybe help with resin levels a bit and resin flow back simply by taking space in the vat.
thingiverse
free
Template for Sovol FEP Film by Sovol
...e
on the sovol fep film, you need to drip holes, this template will help you and give you the correct position of all the holes.
Elegoo
3d_export
free

baby yoda cinco de mayo
...together to make a nice holiday print for my elegoo mars resin printer. my friends seem to love it....
3d_export
$8

Ken Kaneki - tokyo ghoul
...to take down enemies.<br>i printed it personally with my elegoo saturn at 50 microns ... a...
thingiverse
free

Porte clef Elegoo / Elegoo Keychain by Blink60
...porte clef elegoo / elegoo keychain by blink60
thingiverse
perfectly join my saturn's usb key.
thingiverse
free

Asas Elegoo by Nandito
...asas elegoo by nandito
thingiverse
asa para tapas de la linea elegoo resina
thingiverse
free

Elegoo Mars Tankstop
...oo mars tankstop
thingiverse
-elegoo mars tankstop-
i designed this to make it easier to
replace the tank in the right position.
thingiverse
free

Elegoo Mercury support by RoadArk
...elegoo mercury support by roadark
thingiverse
wall support for elegoo mercury
thingiverse
free

Molette M10 for Elegoo Mars
...molette m10 for elegoo mars
thingiverse
molette m10 for elegoo mars
thingiverse
free

Elegoo Mars Test Rook
...elegoo mars test rook
thingiverse
this is the elegoo test print for anyone interested.
thingiverse
free

Elegoo Display Ersatzstift by oobdoo
...elegoo display ersatzstift by oobdoo
thingiverse
ein ersatzstift für das elegoo display.
thingiverse
free

Manopola coperchio Elegoo Mars
...manopola coperchio elegoo mars
thingiverse
stampata con elegoo mars altezza layer 0.05 resina nera
Mars
3d_ocean
$10

Mars
...tar stars system universal way world
this is the mars with atmosphere. the textures file including 4 maps. thank you for looking.
turbosquid
$2

MARS
...
turbosquid
royalty free 3d model mars for download as blend on turbosquid: 3d models for games, architecture, videos. (1170651)
3ddd
free

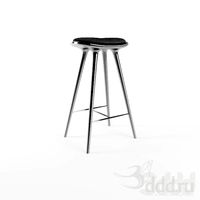
ClassiCon Mars
...classicon mars
3ddd
classicon , mars
стул mars от classicon.
3ds max 2011 + fbx. vray.
turbosquid
$12

Mars
...id
royalty free 3d model mars for download as blend and gltf on turbosquid: 3d models for games, architecture, videos. (1659040)
turbosquid
$1

the mars
...oyalty free 3d model the mars for download as blend and blend on turbosquid: 3d models for games, architecture, videos. (1704346)
turbosquid
free

mars
...squid
royalty free 3d model mars for download as max and obj on turbosquid: 3d models for games, architecture, videos. (1355198)
turbosquid
$59

Mars
...
royalty free 3d model mars for download as max, obj, and fbx on turbosquid: 3d models for games, architecture, videos. (1259238)
turbosquid
$12

Mars
...lty free 3d model mars for download as 3ds, max, obj, and fbx on turbosquid: 3d models for games, architecture, videos. (1152228)
turbosquid
$5

Mars
...y free 3d model mars for download as obj, fbx, blend, and dae on turbosquid: 3d models for games, architecture, videos. (1292956)
3d_export
free

mars landscape
...mars landscape
3dexport
mars landscape made with word machine.
Tool
turbosquid
$21
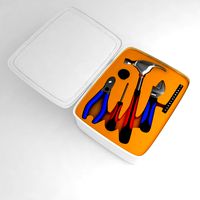
Tool box with tools
... available on turbo squid, the world's leading provider of digital 3d models for visualization, films, television, and games.
archibase_planet
free
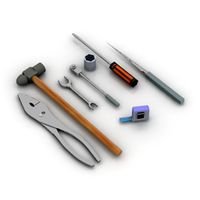
Tools
...tools
archibase planet
tools instruments implements
tools n070114 - 3d model (*.gsm+*.3ds+*.max) for interior 3d visualization.
3d_ocean
$12

Tools
...tools
3docean
hammer metal old screw tools wrench
maya
turbosquid
$6

Tool Cart / Tool Box
...
royalty free 3d model tool cart / tool box for download as on turbosquid: 3d models for games, architecture, videos. (1241859)
3d_ocean
$15

crimp tool
... tool copper cutter crimp crimp tool electrical electrical tools press tools pressing tool tools wire cutter
created in maya 2013
3d_ocean
$5

Tools
...tools
3docean
3d models paint tools work
3d,models,works,paint,art,create,working,
3d_export
free

tools
...tools
3dexport
coldsteel
turbosquid
$15

Tools
...turbosquid
royalty free 3d model tools for download as blend on turbosquid: 3d models for games, architecture, videos. (1331352)
3ddd
$1
bar tool
...bar tool
3ddd
барный
bar tool
turbosquid
$35

tools
... available on turbo squid, the world's leading provider of digital 3d models for visualization, films, television, and games.
Pro
turbosquid
$29

Pro
...ree 3d model mac pro for download as obj, c4d, fbx, and blend on turbosquid: 3d models for games, architecture, videos. (1505782)
turbosquid
$15

Apple Mac Pro and Pro Display
...ee 3d model apple mac pro and pro display for download as max on turbosquid: 3d models for games, architecture, videos. (1417078)
3d_export
$5

iphone 13 pro max and pro
...3 pro max and 13 pro the model is made in four colors (graphite, gold, silver, and blue), all of which are attached in the files.
3d_export
free

sapphire pro
...sapphire pro
3dexport
sapphire pro 3d printer head mask
3d_export
$4

macbook pro
...macbook pro
3dexport
macbook pro 13" inch 2020 years model
3ddd
free

GentleLase Pro
... syneron , candela
gentlelase pro аппарат для лазерной эпиляции
turbosquid
$25

PRO frame
...rbosquid
royalty free 3d model pro frame for download as max on turbosquid: 3d models for games, architecture, videos. (1148329)
turbosquid
$5

Alien pro
...osquid
royalty free 3d model alien pro for download as blend on turbosquid: 3d models for games, architecture, videos. (1678446)
turbosquid
$5

iphone11 pro
...uid
royalty free 3d model iphone11 pro for download as blend on turbosquid: 3d models for games, architecture, videos. (1562707)
3ddd
$1

Mac Pro (appel)
...mac pro (appel)
3ddd
компьютер , apple
mac pro