Thingiverse
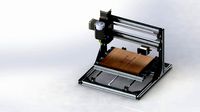
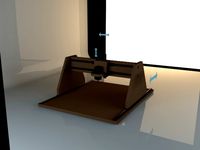
Drawing Robot - Arduino Uno + CNC Shield + GRBL by henryarnold
by Thingiverse
Last crawled date: 3 years ago
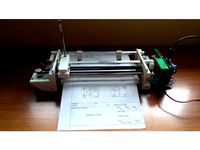
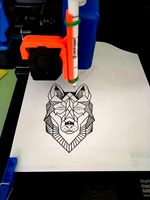
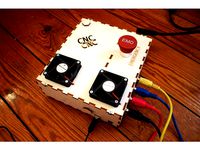
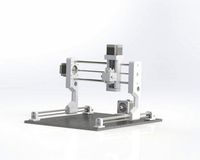
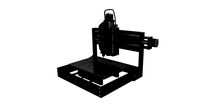
The DrawBot is similar to the commercially available AxiDraw. It is powered by an Arduino Uno controller, uses a CNC Shield, and GRBL firmware. The approximate cost to build the DrawBot is $100.
If you decide to build this robot, make sure you check the following things before reporting that it doesn't work.
Make sure you have Python 3.X installed on your computer. Python is needed in order to use the Universal G-Code Sender and the MI GRBL Extension in Inkscape. Python errors usually mean that you either don't have Python or you have version 2.X instead of 3.X. If you still have a py error, copy the supplied to servo.py file to the extension directory.
If your robot draws at a 45 degree angle, read this whole description before reporting this problem. Please read this description.
Make sure you have set the GRBL parameters in the Universal G Code Sender and that you have zeroed the X and Y axis.
Make sure you have the jumpers under the stepper drivers installed.
Make sure you have adjusted the stepper drive current for your brand of driver
If you decide to change the version of GRBL or Inkscape you are using, I can't troubleshoot your NEW setup. Newer versions of GRBL don't have the servo code for the Z axis and newer versions Inkscape may not work with the MI Extension.
You must read this description and the documentation to get the robot to work correctly. It isn't hard but you can't wing it. Have fun!
Here's what is new for DrawBot Version 1.1
I've improved many parts but all new parts are compatible with all of the old robot parts. Here's what has changed:
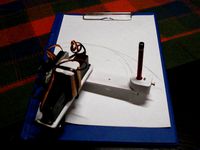
There's a new Pen Holder which is sturdier but still maintains the ability to hold a pen at an angle. The new pen holder works with the current robot.
Stronger version of the pen sliding mechanism. It is compatible with the original pen holder and robot. The extra strength will hold the pen more firmly and allow more accurate movement of the pen.
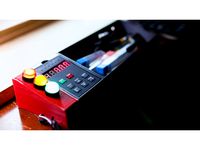
User Gspt pointed out that Arduino Vin can't handle more than 1A. There is a new slide showing how to connect power from the Arduino barrel connector to the CNC Shield.
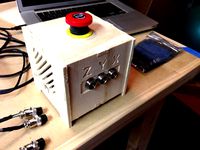
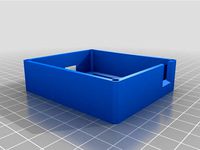
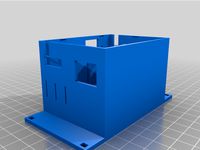
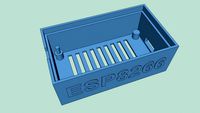
There's a new bracket designed to attach the Arduino enclosure to the right hand of the robot. See the new front page photo! The bracket uses existing holes so no other parts need to be modified.
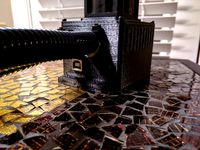
I have designed a cable management system that uses a 500 mm x 9mm large wire tie to support the Z axis servo wiring.
I just found out that the DrawBot works with some of the AxiDraw software. I will document what works and how to use it. This is really cool and will make the DrawBot even more useful.
All new parts will have a newer suffix to the old part name (V4 becomes V5, etc..). You may use the new design or you are welcome to print the older versions.
Documentation can be found in the Files section. Thanks to Jonathan K for creating this documentation.
After assembly use the Install and Use document which explains how to install Inkscape, the MI GRBL extension, and the Universal G-Code Sender. It also guides you through three example projects and can be found in the Files section of this Thing.
If you run into a problem building this Drawing Robot, please carefully read this description, the provided documentation, and the comments. More than likely your question or problem has been addressed already.
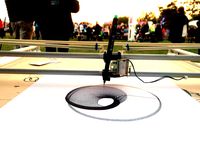
This drawing robot allows you to draw things in Inkscape and then plot them out. The drawing robot receives G Code commands that are created inside an Inkscape extension called MI. Below are the links to the software used. There's a document in the Files section explaining how to install and use the software.
Print all the parts. Assemble them using the assembly guide and then use the installation and use guide to start using your Draw Robot.
Troubleshooting: Please check the following if you are having problems:
Be sure to install 3 jumpers on the CNC Shield for each stepper driver. There's a photo showing the jumpers.
You must use the GRBL version pointed to in the link below. Replace the "config.h" file with the one provided which has the correct features enabled before you compile and download from the Arduino IDE. IF YOU FAIL TO PERFORM THIS STEP, the robot will draw at a 45 degree angle. The library config.h file you should replace is in the PC directory .......Documents/Arduino/libraries/grbl-servo-master/config.h. I don't know which directory for Apple users. Double check this step when your robot prints at 45 degrees.
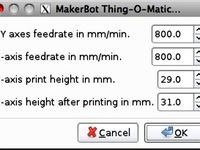
Set the GRBL parameters to the settings that are provided in one of the photos. Use the Universal G Code Sender. You must do this or the robot will not work correctly.
Be sure to set the correct MI Extension parameters the first time you get the MI extension pop up. The extension sets the robot speed, delay for pen up/down, and the commands for pen up and down.
If you have problems with your stepper motors moving and you believe everything else above is OK, check that the small current adjustments on your stepper drivers are set mid point and also set the drive current to 0.8 amps using the correct procedure for your driver.
New error as of Dec. 2019: Users are getting Python errors from the MI GRBL Extension. This error is caused by a change in Inkscape and the Python language reporting an error on the servo.py module. IF YOU GET ANY PYTHON ERRORS, MAKE SURE THAT YOU HAVE PYTHON 3.X INSTALLED ON YOUR COMPUTER. Next replace the C:\ProgramFiles\Inkscape\share\extensions\servo.py file with the one I have supplied in the files of this thing. Thanks to Fabian1905 for documenting this problem.
I have posted all the parts needed from the two source designs.
There are only 15 parts to print and none of them are very large. I added a stronger pen slider and a controller enclosure. There is an even better pen holder in the remix section. I also clarified the names that were in Spanish. I have posted all needed files so that there isn't confusion regarding which parts are needed from each of the original designs.
My drawing robot is modified version of this onehttps://www.thingiverse.com/thing:2058866
I suggest using the stronger pen holder I have included or the one posted as a remix.
Here's the pulley idler some users are printing instead of running the belts on just the plain bearings. My Draw Bot uses plain bearings without the pulley and it works fine.https://www.thingiverse.com/thing:2424284
Place this version of GRBL Firmware for the Arduino on your computer. You must use this version of GRBL. Other GRBL versions do not have the control code for the Z axis servo.https://github.com/robottini/grbl-servo
Replace the default config.h file in GRBL with the one supplied in the "Thing Files" section
Upload GRBL to your Arduino Uno using these instructionshttps://github.com/grbl/grbl/wiki/Compiling-Grbl
(Ignore references to GRBL V1.1)
You must copy the config.h which I supply here to the directory where GRBL resides and then do the upload. The new config.h will be used for the compile of the GRBL code. Failure to copy this file will result in your robot plotting at a 45 degree angle. Seems like I said that doesn't it? Well I get messages weekly from people wondering why this design doesn't work and why it prints at a 45 degree angle. I'm getting old.......
Inkscape Drawing Software V0.92 !!!https://inkscape.org/en/
Universal G-Code Senderhttps://winder.github.io/ugs_website/download/
Use the Inkscape MI Extension to generate G Code:http://www.mediafire.com/file/ae0wquqornzc3o2/MI+Inkscape+Extension.zip
Newer MI Extension with scaling problem fixed ( i haven't test yet but it is reported to work)
Use instead of the Media Fire extension above
Jtechphotonics Inkscape Laser Plug-Inhttps://jtechphotonics.com/?page_id=2012
There is a tutorial in the Files section on how to use the software.
If you get any errors with xxx.py in the message, be sure that you have Python 3.X installed. Check here:https://www.python.org/downloads/
If you still get errors, replace servo.py in the extension directory with the servo.py I provide. Copy servo.py to here: C:\Program Files\Inkscape\share\extensions
HARDWARE NEEDED
2x Nema 17 Stepper Motors
2x Linear bearing rod M8 x 450mm, X Axis
2x Linear bearing rod M8 x 350mm, Y axis
2x Linear rod M3 x 75mm, Z Axis
(You can find them in any old CDROM or purchase on EBay)
1x M8x480mm threaded rod (5/16" x 18.75" will also work)
8x LM8UU linear bearings or printed bearings
1x sg90 Servo
2x GT2 Pulley 16 teeth
5x Bearing 624zz
1x 2000mm GT2 belt
misc M3 and M4 screws and nuts
M8 nuts
ELECTRONICS
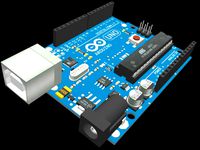
Arduino Uno
CNC Shield
2 A4988 Stepper Drivers plus jumpers
12V 2A Wall Transformerhttps://www.amazon.com/Adapter-100-240V-Transformers-Switching-Adaptor/dp/B019Q3U72M
Wire to extend the servo connection to the CNC shield
2-4 limit switches ( optional. I suggest you leave them off and add later if you want them)
SOFTWARE
Inkscape which is the graphics design software (draw or import graphics)
Inkscape MI GRBL Extension (convert graphics to G-Code)
Universal G Code Sender (sends the G-Code to the robot causing drawing motion)
GRBL which is the Arduino firmware (programmed into the Arduino Uno)
I have supplied a few G Code files that work with this drawing robot. If your drawing robot is built identical to this design, the G Code files will also work with yours.
Here are a couple of my videos of the Draw Bot in action:https://youtu.be/vTD7USqdXJI
https://youtu.be/kpTIFBDcTaY
Here's an excellent video by User MoustafaElkady (Thank you Moustafa!)https://www.youtube.com/watch?v=u26Wt8eY5zc
Update 6-15-2017: I added the limit switches about 10 days ago and they don't add much to the functionality. When GRBL sees a limit switch hit, it just stops with an alarm condition. You must soft reset the robot and your drawing cannot be continued. The homing feature doesn't seem to work. I read in another persons post that they could not get home to work in GRBL 0.9. At this point I suggest building the drawing robot without the limit switches. As long as your drawing does not exceed the envelope of the robot, you won't need the limit switches.
Update 6-19-2017: My friend found a better Inkscape Extension for generating G Code.
I think the MI Extension is easier to use and generates better G Code:http://www.mediafire.com/file/ae0wquqornzc3o2/MI+Inkscape+Extension.zip
Update 6-26-2017: I added the config.h file needed for GRBL for this machine. With this file and the GRBL parameter settings in the screen shot, you should be able to easily get your machine up and running. Don't forget to install the stepper driver jumpers.
Update 7-4-2017:
The top and bottom clam shells did not fit without pushing the LM8UU bearings slightly out of alignment. I removed a small amount of material from the top clamshell to allow clearance for the bottom clamshell posts. The old Top_XY_clamshell.stl file has been removed and replaced with the Top_XY_clamshell_V4.stl file. Thanks to rocketmannate who caught this problem.
Update 11-18-2017
Jonathan K. provided assembly documentation. Thanks you so much. I appreciate your efforts. Checkout the great PDF with excellent photos.
Update 3-11-2018
I have had some questions from people whose drawing robots didn't work.
Here are some things to check If your robot doesn't work:
Make sure you have the correct version of GRBL (the one pointed to in the description)
Make sure you copied the config.h file to your GRBL directory
.......Documents/Arduino/libraries/grbl-servo-master/config.h
Check your CNC jumpers. All three should be installed
Check that you entered the GRBL parameters using Universal G-Code sender. Each parameter must be saved one by one (not all changes at the end)
If your Z axis motor isn't working, make sure you have the correct version of GRBL and that you wired your servo to the correct pins.
Make sure you used the MI extension parameters shown in screenshot specifically M3 and M5 for up and down on Z servo. Use the UGS macro for up and down to test your servo.
Update: Sept. 18, 2018:
If you have problems with your stepper motors moving and you believe everything else above is OK, check that the small current adjustment on your driver is set mid point and then set the drive current to 1 amp using the correct procedure for your driver.
Thanks to Ashkangh for catching this possible issue. In general everyone should set their stepper driver current. Do an internet search on A4988 driver current if you don't know what this is.
Update: January 4, 2019:
A few people have run into software errors when using the GRBL MI Extension. This extension depends on a software package called Python. Your computer may not have this package or it may have one that is older or newer than the one this robot was tested with. I suggest that you do a Google search if you get a xxxx.py" error and follow the instructions for correcting code or installation of Python.
Update: May 26, 2019:
There are various Stepper Motor drivers that are slightly different. in some cases the current adjust pot is on the opposite end of the module which can be confusing when trying to plug it in based on my photos. Be sure to check the pin names and plug your module in with the pin names that match. I'm sorry but I don't have time to figure out your individual hardware configuration problems. This design works but it can require some troubleshooting if software or hardware is different than what I happened to use. When you figure out your problem, be sure to post the solution in the comments so that others may benefit from your experience.
Update 11-9-2019:
If your robot prints reversed or mirrored, try changing GRBL parameter $3 to 1 or 2 or 3 from 0. This reverses motor direction. It will not cure 45 degree printing. If you have that, you need to fix your config.h file and make sure it is in the correct Arduino library directory.
If that doesn't fix it, flip the connectors on your stepper motors; either one or both connectors. Flipping the connector reverses the direction of the motor
Update 12-31-2019:
I revised the assembly instructions to remove old software installation. There is now an assembly guide and a separate software install and user guide. Happy New Year!!!
Update 1-12-2020:
I've posted the upgraded parts which are the base of the pen slider, the pen slider, the pen holder, a cable support anchor point, and the Arduino enclosure mount. All parts are backwards compatible with the originals. The new parts make a neater and stronger Drawing Robot.
Update 1-23-2020:
Here's an interesting replacement for the MI GRBL Extension. Its an Inkscape plugin that generates G-Code for laser cutters. It should work with this Drawing Robot. I haven't tried it but it looks good. Let me know if you are willing to test it and maybe we can switch this Thing over to using it.https://jtechphotonics.com/?page_id=2012
Update 1-28-2020:
Lots of updates lately. A couple of people have reported that the drawings created in Inkscape are not drawn to the correct size on the Drawing Robot. This is caused by a bug between the scaling on Inkscape and the scaling on the MI Extension. There is no bug in the robot firmware. One fix is to change the drawing properties to have a scaling of 3.5433. I've attached a screen shot that shows this fix. This bug could be fixed in the MI extension but I'm not comfortable in modifying the Python code. If someone else wants to take a try, I would appreciate it. To save the new scaling between sessions, save the changes to the default.svg file within Inkscape.
Update 3-11-2020:
Fixed links in documentation and did a small amount of editing. Removed old docs to avoid confusion. New document has assembly, software installation, and using robot.
Update 6-8-2020
The original MI Extension has a scaling issue. A user provided me with a fix which is included in the servo.py file I supply. You may use the MI Extension with the corrected servo,py or use the newer Extension from JTech Photonics.
Update 11-30-2020
User jbooblian has created an updated Inkscape Extension that fixes problems with the original MI extension. If you would like to try it out, check this remixhttps://www.thingiverse.com/thing:4654007
Update 1-30-2021
I've had some questions on how to set the stepper drive current to the motors.
This video shows how:https://www.youtube.com/watch?v=E6RWysjlaP4
Update 4-26-2021
I know. This solution has many software issues. I created this solution but what I really did was clean up an original hardware design and test it with one set of Inkscape + Python + Extension versions. (Inkscape 0.92, Python 3.7.X, and MI GRBL Extension) At the time, this configuration worked fine. Since then some older and newer versions of Python have caused Inkscape Extensions to stop working and then Inkscape completely changed their Extension support for versions starting at 1.X. There is not much I can do short of creating my own Extension that is so smart that it detects whether Inkscape 0.9X or 1.X is being used and whether Python 2.X, 3.X, or 3.9X is being used. I believe that it is possible to do that but I don't have time to work on it. That leaves people using this drawing robot struggling to understand why they have errors. Your best bet is to install Inkscape 0.92 and Python 3.7.X with the MI GRBL Extension. Do the servo.py upgrade I describe above and everything will work. Any other versions of components may cause problems.
Print Settings
Printer:
HyperCube
Rafts:
No
Supports:
No
Resolution:
0.1mm
Infill:
75%
Filament_brand:
HatchBox
Filament_material:
PLA
Notes:
PLA is fine for this design. I print at 200C on BuildTak. None of the parts require rafts or brims. I suggest supports only for the pen holder and the Z axis end plate which is standing up.
If you decide to build this robot, make sure you check the following things before reporting that it doesn't work.
Make sure you have Python 3.X installed on your computer. Python is needed in order to use the Universal G-Code Sender and the MI GRBL Extension in Inkscape. Python errors usually mean that you either don't have Python or you have version 2.X instead of 3.X. If you still have a py error, copy the supplied to servo.py file to the extension directory.
If your robot draws at a 45 degree angle, read this whole description before reporting this problem. Please read this description.
Make sure you have set the GRBL parameters in the Universal G Code Sender and that you have zeroed the X and Y axis.
Make sure you have the jumpers under the stepper drivers installed.
Make sure you have adjusted the stepper drive current for your brand of driver
If you decide to change the version of GRBL or Inkscape you are using, I can't troubleshoot your NEW setup. Newer versions of GRBL don't have the servo code for the Z axis and newer versions Inkscape may not work with the MI Extension.
You must read this description and the documentation to get the robot to work correctly. It isn't hard but you can't wing it. Have fun!
Here's what is new for DrawBot Version 1.1
I've improved many parts but all new parts are compatible with all of the old robot parts. Here's what has changed:
There's a new Pen Holder which is sturdier but still maintains the ability to hold a pen at an angle. The new pen holder works with the current robot.
Stronger version of the pen sliding mechanism. It is compatible with the original pen holder and robot. The extra strength will hold the pen more firmly and allow more accurate movement of the pen.
User Gspt pointed out that Arduino Vin can't handle more than 1A. There is a new slide showing how to connect power from the Arduino barrel connector to the CNC Shield.
There's a new bracket designed to attach the Arduino enclosure to the right hand of the robot. See the new front page photo! The bracket uses existing holes so no other parts need to be modified.
I have designed a cable management system that uses a 500 mm x 9mm large wire tie to support the Z axis servo wiring.
I just found out that the DrawBot works with some of the AxiDraw software. I will document what works and how to use it. This is really cool and will make the DrawBot even more useful.
All new parts will have a newer suffix to the old part name (V4 becomes V5, etc..). You may use the new design or you are welcome to print the older versions.
Documentation can be found in the Files section. Thanks to Jonathan K for creating this documentation.
After assembly use the Install and Use document which explains how to install Inkscape, the MI GRBL extension, and the Universal G-Code Sender. It also guides you through three example projects and can be found in the Files section of this Thing.
If you run into a problem building this Drawing Robot, please carefully read this description, the provided documentation, and the comments. More than likely your question or problem has been addressed already.
This drawing robot allows you to draw things in Inkscape and then plot them out. The drawing robot receives G Code commands that are created inside an Inkscape extension called MI. Below are the links to the software used. There's a document in the Files section explaining how to install and use the software.
Print all the parts. Assemble them using the assembly guide and then use the installation and use guide to start using your Draw Robot.
Troubleshooting: Please check the following if you are having problems:
Be sure to install 3 jumpers on the CNC Shield for each stepper driver. There's a photo showing the jumpers.
You must use the GRBL version pointed to in the link below. Replace the "config.h" file with the one provided which has the correct features enabled before you compile and download from the Arduino IDE. IF YOU FAIL TO PERFORM THIS STEP, the robot will draw at a 45 degree angle. The library config.h file you should replace is in the PC directory .......Documents/Arduino/libraries/grbl-servo-master/config.h. I don't know which directory for Apple users. Double check this step when your robot prints at 45 degrees.
Set the GRBL parameters to the settings that are provided in one of the photos. Use the Universal G Code Sender. You must do this or the robot will not work correctly.
Be sure to set the correct MI Extension parameters the first time you get the MI extension pop up. The extension sets the robot speed, delay for pen up/down, and the commands for pen up and down.
If you have problems with your stepper motors moving and you believe everything else above is OK, check that the small current adjustments on your stepper drivers are set mid point and also set the drive current to 0.8 amps using the correct procedure for your driver.
New error as of Dec. 2019: Users are getting Python errors from the MI GRBL Extension. This error is caused by a change in Inkscape and the Python language reporting an error on the servo.py module. IF YOU GET ANY PYTHON ERRORS, MAKE SURE THAT YOU HAVE PYTHON 3.X INSTALLED ON YOUR COMPUTER. Next replace the C:\ProgramFiles\Inkscape\share\extensions\servo.py file with the one I have supplied in the files of this thing. Thanks to Fabian1905 for documenting this problem.
I have posted all the parts needed from the two source designs.
There are only 15 parts to print and none of them are very large. I added a stronger pen slider and a controller enclosure. There is an even better pen holder in the remix section. I also clarified the names that were in Spanish. I have posted all needed files so that there isn't confusion regarding which parts are needed from each of the original designs.
My drawing robot is modified version of this onehttps://www.thingiverse.com/thing:2058866
I suggest using the stronger pen holder I have included or the one posted as a remix.
Here's the pulley idler some users are printing instead of running the belts on just the plain bearings. My Draw Bot uses plain bearings without the pulley and it works fine.https://www.thingiverse.com/thing:2424284
Place this version of GRBL Firmware for the Arduino on your computer. You must use this version of GRBL. Other GRBL versions do not have the control code for the Z axis servo.https://github.com/robottini/grbl-servo
Replace the default config.h file in GRBL with the one supplied in the "Thing Files" section
Upload GRBL to your Arduino Uno using these instructionshttps://github.com/grbl/grbl/wiki/Compiling-Grbl
(Ignore references to GRBL V1.1)
You must copy the config.h which I supply here to the directory where GRBL resides and then do the upload. The new config.h will be used for the compile of the GRBL code. Failure to copy this file will result in your robot plotting at a 45 degree angle. Seems like I said that doesn't it? Well I get messages weekly from people wondering why this design doesn't work and why it prints at a 45 degree angle. I'm getting old.......
Inkscape Drawing Software V0.92 !!!https://inkscape.org/en/
Universal G-Code Senderhttps://winder.github.io/ugs_website/download/
Use the Inkscape MI Extension to generate G Code:http://www.mediafire.com/file/ae0wquqornzc3o2/MI+Inkscape+Extension.zip
Newer MI Extension with scaling problem fixed ( i haven't test yet but it is reported to work)
Use instead of the Media Fire extension above
Jtechphotonics Inkscape Laser Plug-Inhttps://jtechphotonics.com/?page_id=2012
There is a tutorial in the Files section on how to use the software.
If you get any errors with xxx.py in the message, be sure that you have Python 3.X installed. Check here:https://www.python.org/downloads/
If you still get errors, replace servo.py in the extension directory with the servo.py I provide. Copy servo.py to here: C:\Program Files\Inkscape\share\extensions
HARDWARE NEEDED
2x Nema 17 Stepper Motors
2x Linear bearing rod M8 x 450mm, X Axis
2x Linear bearing rod M8 x 350mm, Y axis
2x Linear rod M3 x 75mm, Z Axis
(You can find them in any old CDROM or purchase on EBay)
1x M8x480mm threaded rod (5/16" x 18.75" will also work)
8x LM8UU linear bearings or printed bearings
1x sg90 Servo
2x GT2 Pulley 16 teeth
5x Bearing 624zz
1x 2000mm GT2 belt
misc M3 and M4 screws and nuts
M8 nuts
ELECTRONICS
Arduino Uno
CNC Shield
2 A4988 Stepper Drivers plus jumpers
12V 2A Wall Transformerhttps://www.amazon.com/Adapter-100-240V-Transformers-Switching-Adaptor/dp/B019Q3U72M
Wire to extend the servo connection to the CNC shield
2-4 limit switches ( optional. I suggest you leave them off and add later if you want them)
SOFTWARE
Inkscape which is the graphics design software (draw or import graphics)
Inkscape MI GRBL Extension (convert graphics to G-Code)
Universal G Code Sender (sends the G-Code to the robot causing drawing motion)
GRBL which is the Arduino firmware (programmed into the Arduino Uno)
I have supplied a few G Code files that work with this drawing robot. If your drawing robot is built identical to this design, the G Code files will also work with yours.
Here are a couple of my videos of the Draw Bot in action:https://youtu.be/vTD7USqdXJI
https://youtu.be/kpTIFBDcTaY
Here's an excellent video by User MoustafaElkady (Thank you Moustafa!)https://www.youtube.com/watch?v=u26Wt8eY5zc
Update 6-15-2017: I added the limit switches about 10 days ago and they don't add much to the functionality. When GRBL sees a limit switch hit, it just stops with an alarm condition. You must soft reset the robot and your drawing cannot be continued. The homing feature doesn't seem to work. I read in another persons post that they could not get home to work in GRBL 0.9. At this point I suggest building the drawing robot without the limit switches. As long as your drawing does not exceed the envelope of the robot, you won't need the limit switches.
Update 6-19-2017: My friend found a better Inkscape Extension for generating G Code.
I think the MI Extension is easier to use and generates better G Code:http://www.mediafire.com/file/ae0wquqornzc3o2/MI+Inkscape+Extension.zip
Update 6-26-2017: I added the config.h file needed for GRBL for this machine. With this file and the GRBL parameter settings in the screen shot, you should be able to easily get your machine up and running. Don't forget to install the stepper driver jumpers.
Update 7-4-2017:
The top and bottom clam shells did not fit without pushing the LM8UU bearings slightly out of alignment. I removed a small amount of material from the top clamshell to allow clearance for the bottom clamshell posts. The old Top_XY_clamshell.stl file has been removed and replaced with the Top_XY_clamshell_V4.stl file. Thanks to rocketmannate who caught this problem.
Update 11-18-2017
Jonathan K. provided assembly documentation. Thanks you so much. I appreciate your efforts. Checkout the great PDF with excellent photos.
Update 3-11-2018
I have had some questions from people whose drawing robots didn't work.
Here are some things to check If your robot doesn't work:
Make sure you have the correct version of GRBL (the one pointed to in the description)
Make sure you copied the config.h file to your GRBL directory
.......Documents/Arduino/libraries/grbl-servo-master/config.h
Check your CNC jumpers. All three should be installed
Check that you entered the GRBL parameters using Universal G-Code sender. Each parameter must be saved one by one (not all changes at the end)
If your Z axis motor isn't working, make sure you have the correct version of GRBL and that you wired your servo to the correct pins.
Make sure you used the MI extension parameters shown in screenshot specifically M3 and M5 for up and down on Z servo. Use the UGS macro for up and down to test your servo.
Update: Sept. 18, 2018:
If you have problems with your stepper motors moving and you believe everything else above is OK, check that the small current adjustment on your driver is set mid point and then set the drive current to 1 amp using the correct procedure for your driver.
Thanks to Ashkangh for catching this possible issue. In general everyone should set their stepper driver current. Do an internet search on A4988 driver current if you don't know what this is.
Update: January 4, 2019:
A few people have run into software errors when using the GRBL MI Extension. This extension depends on a software package called Python. Your computer may not have this package or it may have one that is older or newer than the one this robot was tested with. I suggest that you do a Google search if you get a xxxx.py" error and follow the instructions for correcting code or installation of Python.
Update: May 26, 2019:
There are various Stepper Motor drivers that are slightly different. in some cases the current adjust pot is on the opposite end of the module which can be confusing when trying to plug it in based on my photos. Be sure to check the pin names and plug your module in with the pin names that match. I'm sorry but I don't have time to figure out your individual hardware configuration problems. This design works but it can require some troubleshooting if software or hardware is different than what I happened to use. When you figure out your problem, be sure to post the solution in the comments so that others may benefit from your experience.
Update 11-9-2019:
If your robot prints reversed or mirrored, try changing GRBL parameter $3 to 1 or 2 or 3 from 0. This reverses motor direction. It will not cure 45 degree printing. If you have that, you need to fix your config.h file and make sure it is in the correct Arduino library directory.
If that doesn't fix it, flip the connectors on your stepper motors; either one or both connectors. Flipping the connector reverses the direction of the motor
Update 12-31-2019:
I revised the assembly instructions to remove old software installation. There is now an assembly guide and a separate software install and user guide. Happy New Year!!!
Update 1-12-2020:
I've posted the upgraded parts which are the base of the pen slider, the pen slider, the pen holder, a cable support anchor point, and the Arduino enclosure mount. All parts are backwards compatible with the originals. The new parts make a neater and stronger Drawing Robot.
Update 1-23-2020:
Here's an interesting replacement for the MI GRBL Extension. Its an Inkscape plugin that generates G-Code for laser cutters. It should work with this Drawing Robot. I haven't tried it but it looks good. Let me know if you are willing to test it and maybe we can switch this Thing over to using it.https://jtechphotonics.com/?page_id=2012
Update 1-28-2020:
Lots of updates lately. A couple of people have reported that the drawings created in Inkscape are not drawn to the correct size on the Drawing Robot. This is caused by a bug between the scaling on Inkscape and the scaling on the MI Extension. There is no bug in the robot firmware. One fix is to change the drawing properties to have a scaling of 3.5433. I've attached a screen shot that shows this fix. This bug could be fixed in the MI extension but I'm not comfortable in modifying the Python code. If someone else wants to take a try, I would appreciate it. To save the new scaling between sessions, save the changes to the default.svg file within Inkscape.
Update 3-11-2020:
Fixed links in documentation and did a small amount of editing. Removed old docs to avoid confusion. New document has assembly, software installation, and using robot.
Update 6-8-2020
The original MI Extension has a scaling issue. A user provided me with a fix which is included in the servo.py file I supply. You may use the MI Extension with the corrected servo,py or use the newer Extension from JTech Photonics.
Update 11-30-2020
User jbooblian has created an updated Inkscape Extension that fixes problems with the original MI extension. If you would like to try it out, check this remixhttps://www.thingiverse.com/thing:4654007
Update 1-30-2021
I've had some questions on how to set the stepper drive current to the motors.
This video shows how:https://www.youtube.com/watch?v=E6RWysjlaP4
Update 4-26-2021
I know. This solution has many software issues. I created this solution but what I really did was clean up an original hardware design and test it with one set of Inkscape + Python + Extension versions. (Inkscape 0.92, Python 3.7.X, and MI GRBL Extension) At the time, this configuration worked fine. Since then some older and newer versions of Python have caused Inkscape Extensions to stop working and then Inkscape completely changed their Extension support for versions starting at 1.X. There is not much I can do short of creating my own Extension that is so smart that it detects whether Inkscape 0.9X or 1.X is being used and whether Python 2.X, 3.X, or 3.9X is being used. I believe that it is possible to do that but I don't have time to work on it. That leaves people using this drawing robot struggling to understand why they have errors. Your best bet is to install Inkscape 0.92 and Python 3.7.X with the MI GRBL Extension. Do the servo.py upgrade I describe above and everything will work. Any other versions of components may cause problems.
Print Settings
Printer:
HyperCube
Rafts:
No
Supports:
No
Resolution:
0.1mm
Infill:
75%
Filament_brand:
HatchBox
Filament_material:
PLA
Notes:
PLA is fine for this design. I print at 200C on BuildTak. None of the parts require rafts or brims. I suggest supports only for the pen holder and the Z axis end plate which is standing up.
Similar models
thingiverse
free
Writing & Drawing Robot Arduino Uno + CNC Shield + GRBL OPEN SOURCE by dxim
...open source by dxim thingiverse this drawing robot is similar to the commercially available axidraw. it is powered by...
thingiverse
free

Mini CNC Plotter by tomasbarthalot
...motors
3d printed parts
software:
arduino
grbl library
im grbl z-axis servo (inkscape extension)
universal g-code sender
inkscape
thingiverse
free
(Mostly) Recycled Drawing Robot by ijmclinden
... draws on sticky notes. it runs on an arduino uno. you send the arduino g-code instructions, and it moves a pen around and draws.
thingiverse
free
DrawingBot with improved head and rotate pen (for fountain pen) by avanhanegem
... that can rotate and lock for a fountain pen (45c angle)
stuck? just send me a message if you have any question about this build!
thingiverse
free
Carrier Pigeon Unicorn Illustration by mifga
...g on -- and i will continue to experiment with forms of hatching and crosshatching to give this little drawing tone and dynamics.
thingiverse
free
A4 Pen Plotter by JuanGg
...on a4 paper sheets. it is intended to be similar to the aritma amagraph pen plotter, be as compact...
thingiverse
free
drawing machine by ikosen
... convert curves into arc movements in g-code. i will publish if anybody wants to have a look.
videohttps://youtu.be/88mfmanekfy
thingiverse
free
Thing-O-Matic G-Code Extension for Inkscape by UechiMike
... once again.
i take no credit for the original code was all done by marty mcguire - see the original thing for all the details.
thingiverse
free
Artillery Sidewinder / Genius Pen Plotter Holder by DannyckCZ
...our pen doesn't crash into the printer bed while homing z axis. save the gcode file.
now you're ready to print your code!
thingiverse
free
Robot Arm by Sembot
...n arduino, sorry i'm just a beginner in programmer
i want to see if it works well, who can help with the program
kind regards
Henryarnold
thingiverse
free

E3D Inductive Sensor Mount by henryarnold
...e3d inductive sensor mount by henryarnold
thingiverse
i made the original mount a little taller and the ring a little thicker.
thingiverse
free

Pierced Bangle Bracelet by henryarnold
...ngiverse
just a cool bracelet. 100% print size = 65 mm inside diameter 78 mm outside diameter
print with supports for the holes.
thingiverse
free
Samsung S3 Phone Stand by henryarnold
...
thingiverse
i liked the original design so i added the usb connector block, larger hole for cable block and rails on the stand.
thingiverse
free

LCD Graphic Display Bracket by henryarnold
...hat allows this lcd graphics case to be mounted on a prusa i3 printer with aluminum frame.http://www.thingiverse.com/make:199068
thingiverse
free
Ball Tie Down and Bracket by henryarnold
... attach ball tie downs to. includes the bracket, ball to make bungee from elastic cord and the end caps for 1" roller shades
thingiverse
free
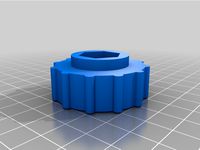
CNC 6040 Axis Knob by henryarnold
...e source design and made the nut hole a little bit bigger. thanks to the source designer selphb. the knob matches my other knobs.
thingiverse
free

Toothed Belt Idler Pulley by henryarnold
...ing this drawing bot for a 4h class. i also added an enclosed foot in case you want to put rubber feet on the bottom of the legs.
thingiverse
free
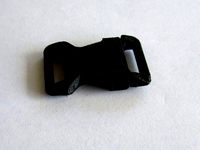
Survival Bracelet Buckle by henryarnold
...rts.
pla
extruder 210c
bed 60c
0.1mm
40mm/s
see my complete design for the bracelet here:http://www.thingiverse.com/thing:1614456
thingiverse
free
Fun Print by henryarnold
...an example 3d print. i've included a larger size which is just scaled up version. the photo is of the regular size fun print.
thingiverse
free
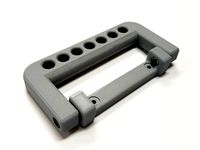
Suitcase/Box/Case Handle by henryarnold
... redesigned the base to be stronger and to receive a 5mm nyloc nut. i needed the extra strength for use with a heavy wooden box.
Grbl
thingiverse
free
grbl Enclosure - Shapeoko2 by danaspisak
...isak
thingiverse
enclosure for the grbl shield based on a design from the shapeoko blog.
http://www.shapeoko.com/archives/1102
thingiverse
free
CNC - GRBL Case Lasercutter by newnoise
...e for an arduino based grbl-cnc control unit. it fits the power unit, the arduino and grbl-shield, an emergency off and two fans.
thingiverse
free
GRBL Enclosure by janapriya
... power the fan).
m3x6mm screws 6
m4x8mm screws 7
update: minor issues are fixed. this is no longer "work in progress".
thingiverse
free
Arduino GRBL Box with Fan by Th0mU
...thingiverse
this an box for an arduino uno with attached grbl board, with cable openings and fan for cooling the stepper driver.
thingiverse
free
keye-studio cnc grbl shield case by TK_DESIGN
...keye-studio cnc grbl shield case by tk_design
thingiverse
ebay grbl shield case
thingiverse
free

Box for Ron's GRBL to DB25 CNC Shield
...r ron's grbl to db25 shield + arduino uno (https://www.tindie.com/products/ron/grbl-to-db25-cnc-shield-with-arduino-uno-r3/).
thingiverse
free
GRBL enclosure by matthewpeterson418
...t auto stores and anywhere that sells car radios. makes everything look clean. request changes in the comments if any are needed.
thingiverse
free
Case for GRBL CNC Arduino Nano Board by sg_dev
...e
here is the case for the grbl cnc arduino nano board i created [1].
[1] https://github.com/sg-dev1/grbl-cnc-arduino-nano-board
thingiverse
free
GRBL MPCNC sindle VFD and tool holder
...a grbl controller (stop, pause and go). my vfd housing and a small tool tray. enjoy
don't for get to like and thank creators.
thingiverse
free
GRBL CNC Enclosure For Laser by largeformat3dprinter
...d.
for use with 50mm fan
work in progress needs to have a terminal block added in or exit holes for the motor wires and or plugs.
Uno
3ddd
$1

FORMA / UNO
...forma / uno
3ddd
forma
кресло uno фабрики forma
3ddd
$1
Dellarovere UNO
...dellarovere uno
3ddd
dellarovere , стол
стол рабочий dellarovere uno (220x100x74)
3ddd
$1

DIAZ UNO GREEN
...diaz uno green
3ddd
meridiani
diaz uno green by meridiani
turbosquid
$1
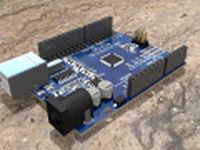
Arduino UNO
...alty free 3d model arduino uno for download as , stl, and wrl on turbosquid: 3d models for games, architecture, videos. (1515932)
turbosquid
$25

zero uno
... available on turbo squid, the world's leading provider of digital 3d models for visualization, films, television, and games.
turbosquid
$9

FORMA UNO
... available on turbo squid, the world's leading provider of digital 3d models for visualization, films, television, and games.
3ddd
$1
стеллаж Smania Eclectic-Uno
... smania , eclectic-uno
стеллаж smania eclectic-uno
turbosquid
$7

Uno board
...r download as 3ds, dxf, obj, xsi, wrl, fbx, dwg, dae, and skp on turbosquid: 3d models for games, architecture, videos. (1366181)
3d_export
$12

fiat uno s
...fiat uno s
3dexport
3d_export
$14

trames uno
...borán fastferry. it is modeled for the "accidentes marítimos" serie in youtube. v-ray rendering. formats: fbx, obj, mtl
Arduino
turbosquid
$7
Arduino
...turbosquid
royalty free 3d model arduino for download as max on turbosquid: 3d models for games, architecture, videos. (1197165)
turbosquid
$3
Arduino
...turbosquid
royalty free 3d model arduino for download as c4d on turbosquid: 3d models for games, architecture, videos. (1305484)
3d_export
$5
arduino satellite
...rt
this model is the exact arduino based satellite model with some basic sensors and camera modules and also includes batteries.
turbosquid
$1
Arduino UNO
...alty free 3d model arduino uno for download as , stl, and wrl on turbosquid: 3d models for games, architecture, videos. (1515932)
3d_export
$5
esp8266 box arduino
...esp8266 box arduino
3dexport
box for esp8266 module with wire hole. inside dimensions: 49x26 mm. height 15 mm.
3d_export
$60
Arduino Uno Rev3 Microcontroller 3D Model
...mega328p circuit board spark cable wire 5v 74v 9v 111v
arduino uno rev3 microcontroller 3d model danielgarnier4403 97237 3dexport
3d_export
free
arduino rover kit
...no!!! materials: no!!! rigged: no animated: no uv mapped: no it is not an exact copy of the original! not subject to 3d printing!
3d_ocean
$7
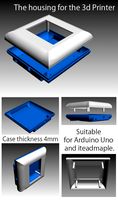
The housing for the 3d Printer
...the housing for the 3d printer 3docean arduino device housing stl the housing consists of two portions:...
3d_export
$5
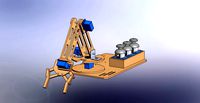
arm 4 axis
...uno -4 servo motor 180° -3 joystick (x,y) for arduino -mdf wood -some wires -cnc laser cut...
3d_export
$5

solar tracker
...machine for the frame . list of material : -arduino uno -2 step motor with driver -4 ldr sensor...
Shield
3d_export
$5

shield
...shield
3dexport
shield
3d_export
$5
Shield
...shield
3dexport
shield and a spear
3d_ocean
$6
Shield
...shield
3docean
game shield low polygon mei evil shild old shield shield
2048 texture obj,fbx,blend game ready.
3d_export
$5
Shield
...shield
3dexport
a shield that hasn't been made of materials will be available to everyone
3d_ocean
$4
Round Shield
...round shield
3docean
ancient battle fantasy knight medieval shield shields warrior
nice model of round shield.
3d_export
$5

shield
...shield
3dexport
old shield, damaged and covered in mold. every file have a zip folder in with textures.
3d_export
free
metal shield
...metal shield
3dexport
russian metal shield - anti-riot shield.
turbosquid
free

Shield
...shield
turbosquid
free 3d model shield for download as c4d on turbosquid: 3d models for games, architecture, videos. (1164800)
3d_export
$5

fire shield
...fire shield
3dexport
fire shield
turbosquid
$10

SHIELD
...
turbosquid
royalty free 3d model shield for download as obj on turbosquid: 3d models for games, architecture, videos. (1273553)
Drawing
archibase_planet
free
Drawing
...drawing
archibase planet
cooking hood kitchen furniture
drawing air - 3d model for interior 3d visualization.
3d_export
$35

house drawing
...house drawing
3dexport
house drawing
3d_export
$5
drawing of planter
...drawing of planter
3dexport
drawing of planter
turbosquid
$15
Draws
... available on turbo squid, the world's leading provider of digital 3d models for visualization, films, television, and games.
turbosquid
$15

draws
... available on turbo squid, the world's leading provider of digital 3d models for visualization, films, television, and games.
design_connected
$13
Draw Table
...draw table
designconnected
rex kralj draw table computer generated 3d model. designed by studio rex kralj.
3d_export
$22
750x1060 jaw crusher set drawing 105 CAD drawings
...750x1060 jaw crusher set drawing 105 cad drawings
3dexport
750x1060 jaw crusher set drawing (105 cad drawings)
turbosquid
$5

Table with draw
...id
royalty free 3d model table with draw for download as max on turbosquid: 3d models for games, architecture, videos. (1232200)
turbosquid
$2
Drawing Wire
...uid
royalty free 3d model drawing wire for download as blend on turbosquid: 3d models for games, architecture, videos. (1462970)
turbosquid
$1

Drawing Table
...quid
royalty free 3d model drawing table for download as 3ds on turbosquid: 3d models for games, architecture, videos. (1310235)
Cnc
3d_export
$35

Cnc
...cnc
3dexport
the cnc machine is unfinished
3d_export
$10
cnc router
...cnc router
3dexport
prototipe cnc router
3d_export
$10
cnc machine
...cnc machine
3dexport
cnc machine model with individual model files with assembly
3d_export
$5
Cnc 3D Model
...cnc 3d model
3dexport
cnc
cnc 3d model csiszar 61289 3dexport
turbosquid
$10

cnc bedroom
...osquid
royalty free 3d model cnc bedroom for download as max on turbosquid: 3d models for games, architecture, videos. (1494981)
turbosquid
$9
cnc(wood)
...rbosquid
royalty free 3d model cnc(wood) for download as max on turbosquid: 3d models for games, architecture, videos. (1189189)
turbosquid
$1

CNC Frame
...rbosquid
royalty free 3d model cnc frame for download as stl on turbosquid: 3d models for games, architecture, videos. (1371706)
turbosquid
free
cnc table
...rbosquid
royalty free 3d model cnc table for download as max on turbosquid: 3d models for games, architecture, videos. (1500926)
turbosquid
$30

CNC Lathe
...
royalty free 3d model cnc lathe for download as max and obj on turbosquid: 3d models for games, architecture, videos. (1284634)
turbosquid
$25
CNC Machine
...
royalty free 3d model cnc machine for download as ma and fbx on turbosquid: 3d models for games, architecture, videos. (1307199)
Robot
3d_ocean
$20

Robot
...robot
3docean
character metal robot robot robotic white
robot model for 3dsmax 2009 and greater
3d_ocean
$45
Robot
...robot
3docean
fighing machine robot
a fighting robot from the scrapyard.
3d_ocean
$18
Robot
...robot
3docean
machin robot science fiction
high poly robot.
3d_export
$7

Robot
...robot
3dexport
robot
3d_export
$5
robot
...robot
3dexport
robot
3d_export
free

Robot
...robot
3dexport
robot
turbosquid
$10

Robot/ Alien Robot
...
royalty free 3d model robot/ alien robot for download as max on turbosquid: 3d models for games, architecture, videos. (1442828)
3d_export
$5

robot
...robot
3dexport
robot in blender
3ddd
$1

robot
...robot
3ddd
робот
robot
3ddd
$1

Robot
...robot
3ddd
робот
robot