Thingiverse

Drawers for Ikea Table Norråker by jacksalici
by Thingiverse
Last crawled date: 3 years, 1 month ago
Please read carefully the parts in italic.
My main desk where I spend several hours per day is the Ikea Table Norråker. It's a good desk, it's minimal, solid but has a little flaw: it has no drawers. Luckily there about 12 cm from the apron (the wooden panel that connects the legs and the top) to the edge of the surface, so I designed several drawers to put in that space.
If you don't have the Norråker but a similar table, chances are that these drawers are still perfect (if the differences are minimal, you can just scale all the objects with the same multiplier).
ATTENTION. As you probably have noticed, this isn't a project that you can only print and use. You will need to screw in several screws, make a lot of measurements if you want a precise job and maybe use a bit of sandpaper if the drawer offers some resistance. In conclusion, I suggest this only if you are a bit experienced in DIY projects. (If you are a newbie you can still try and enjoy the adventure!)
REQUIREMENTS:
You will need 2 wood screws (⌀3.5mm) for each slider. The length should be 20/25 mm, keep in mind that one of them has to be longer because of the drawer's stopping mechanism.
CONTENT:
Standard drawer without handle
Standard drawer with handle
Right angular drawer without handle
Right angular drawer withs handle
Slider
Stopping piece for the slider
Big and small handles
You can choose to print the version with or the one without the handle, according to your preference and the ability of your printer (see How To Print).
For my Ikea Table Norråker, 4 standard drawers and 2 angular drawers fit perfectly on the length of the apron. In this case, you'll need also 7 slider and 5 stopping parts. For the left angular drawers, you can just mirror the object along the X-axis.
HOW TO PRINT:
This depends on your printer. I've printed all the drawers upside down so that the handle can be printed perfectly and the bottom of the drawers has no sticking problem with the hotbed (because of the humidity large surfaces could create some bubbles). However, this position needs a lot of supports, so I don't like it much due to the waste of filament. If you don't have any problems with printings, I recommend you to print all the drawers normally and without the handles. You can still print that separately and then glue it to the bottom of the drawers. It's up to you.
Moreover, I suggest you print with a very low resolution (.28mm), and a high fill density (60/100%). The parts to fill are a few, so this should change very little the amount of plastic need, but at the same time, it increases the strength of the pieces. Remember also to opt-in the option "Print tiny walls", if your slicer has that.
ASSEMBLY INSTRUCTIONS:
After having printed all the necessary parts, you have to measure where to screw in the sliders. This part is very hard because you have to assure that drawers can slide smoothly but they shouldn't keep much backlash. At this point, set in place the shorter screw in the middle hole of each slider, and also the second one in the front hole of the sliders that will sustain the lateral drawers. Then, insert all the drawers and, using a long screwdriver, screw in the remaining screws in the front holes of the central sliders, remembering to screw also the stopping pieces under each slider (the last image should help you to understand). The third hole can remain without a screw.
LICENCE AND CREDITS
Designed by jacksalici under Creative Commons BY-NC-SA 4.0
I hope you enjoyed doing this project! If you found this so useful you could also donate me a coffee bucks (just click on the button above)! Thank you!
Similar models
thingiverse
free

Customizable storage/components drawer by DonJuanito
.../sanding.
the source file is (heavily) commented...
note: i still haven't printed this, but i cannot see why it would fail...
thingiverse
free

IKEA Trofast drawer stopper for the pine wood version or bracket or corner piece by MSpencer
...a printed it nice and easy without any problems.
you may want to under-extrude (reduce flow) so that the 3mm screw fits in there.
thingiverse
free

Ikea drawer runner/slider/glider replacement by Nanocube
...them in place too. the 3d printed pins wont be strong enough in the long term so you will need to plan on some additional fixing.
thingiverse
free

Cable holder (wire organizer) With Screw Holes by Catsrules
...from the original for a working product, you can find the original with more details here
http://www.thingiverse.com/thing:322895
thingiverse
free

Drawer Pull Drilling Jig (file included to modify centers) by SpeedMaker
...modify centers) by speedmaker thingiverse drawer pull drilling jig, similar to the rockler jig it, which is designed to...
thingiverse
free

Outdoor Faucet Handle by pipakin
... so the overhang will have something to print on. also, i don't have a printer yet so this is definately a work in progress.
thingiverse
free

Heavy Duty drawer handle by dikodahan
...re printing the hole. this avoids the need for supports but will require you to manually cut it out and drill through it to open.
grabcad
free

Accessibility Door Stop
...39;t need to bend down to remove the stop. this is good for people with bad backs or knees who can't bend over or squat well.
thingiverse
free

Typewriter Ribbon Spool Winder by chmax65
...htened with the knob so that is turn with the handle; the other one needs the knurly know just to avoid running out of the screw.
thingiverse
free

Losi Mini-B Camber Block by Rileyvano1
...e original part has, just the ones that i needed. it doesn't use the factory nuts, but you can still use all factory screws.
Norråker
cg_trader
$10

KOPARDAL Bed
...kopardal bed cg trader bed:kopardal night complements:granboda, norråker ...
cg_trader
$12

NORRAKER Bar table and chairs
...norraker bar table and chairs cg trader norråker bar table length: 74 cm width: 74 cm height:...
3dwarehouse
free

NORRÅKER Sideboard
...norråker sideboard
3dwarehouse
code: 102.928.66 120x50x85 cm
3dwarehouse
free

NORRÅKER table / mesa IKEA
...norråker table / mesa ikea
3dwarehouse
longitud / length: 74 cm ancho / width: 74 cm altura / height: 74 cm
Ikea
3ddd
$1
IKEA
...ikea
3ddd
ikea , стеллаж
ikea
3ddd
$1
IKEA
...ikea
3ddd
ikea
кухня ikea
3ddd
$1
IKEA
...ikea
3ddd
ikea
осторожно, тяжелая модель
ikea
3ddd
$1
IKEA
...ikea
3ddd
ikea
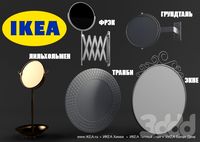
5 зеркал от ikea
3ddd
$1
IKEA
...ikea
3ddd
ikea , бойа
ikea светильник потолочный
3ddd
$1
IKEA
...ikea
3ddd
ikea , барный
bar stool ikea
3ddd
$1

IKEA
...ikea
3ddd
ikea , зубная щетка , косметика
ikea
3ddd
free
IKEA
...ikea
3ddd
ikea , трюмо
дамский столик ikea.
3ddd
$1
IKEA
...3ddd
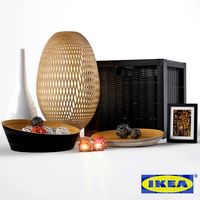
ps , декоративный набор , ikea
ikea decor
3ddd
$1

Ikea
...ikea
3ddd
ikea , lagra
модель лампы от ikea
Drawers
3d_export
$5

chest of drawers with drawers sonata
...chest of drawers with drawers sonata
3dexport
chest of drawers with drawers sonata
archibase_planet
free

Drawer
...drawer
archibase planet
drawer case locker
drawer - 3d model for interior 3d visualization.
archibase_planet
free
Drawer
...drawer
archibase planet
drawer dathroom furniture
drawer 896410 - 3d model for interior 3d visualization.
archibase_planet
free
Drawer
...drawer
archibase planet
drawer shelving case
drawer - 3d model (*.3ds) for interior 3d visualization.
archibase_planet
free
Drawer
...drawer
archibase planet
locker bureau drawer
drawer - 3d model (*.gsm+*.3ds) for interior 3d visualization.
archibase_planet
free

Drawer
...drawer
archibase planet
case drawer locker
drawer - 3d model (*.gsm+*.3ds) for interior 3d visualization.
archibase_planet
free
Drawer
...drawer
archibase planet
locker drawer case
drawer - 3d model (*.gsm+*.3ds) for interior 3d visualization.
archibase_planet
free

Drawer
...drawer
archibase planet
drawer case bathroom furniture
drawer 896411 - 3d model for interior 3d visualization.
archibase_planet
free
Drawer
...drawer
archibase planet
locker drawer case
drawer - 3d model (*.gsm+*.3ds) for interior 3d visualization.
archibase_planet
free

Drawer
...drawer
archibase planet
locker case drawer
drawer - 3d model (*.gsm+*.3ds) for interior 3d visualization.
Table
3ddd
free
Table
...table
3ddd
table
table
archibase_planet
free
Table
...table
archibase planet
table glass-table round table glass table
table n240311 - 3d model (*.3ds) for interior 3d visualization.
archibase_planet
free
Table
...e
archibase planet
table dining-room table dinner table round table
table - 3d model (*.gsm+*.3ds) for interior 3d visualization.
3d_export
$5

table
...table
3dexport
table classic-table
archibase_planet
free
Table
...se planet
table glass table round table glass-table
table tonin habitat n280111 - 3d model (*.3ds) for interior 3d visualization.
archibase_planet
free

Table
...table
archibase planet
table dining-room table dinner table
table - 3d model (*.3ds) for interior 3d visualization.
archibase_planet
free
Table
...table
archibase planet
table coffee table glass table
table - 3d model (*.gsm+*.3ds) for interior 3d visualization.
archibase_planet
free
Table
...table
archibase planet
table glass-table coffee table
table - 3d model (*.gsm+*.3ds) for interior 3d visualization.
archibase_planet
free
Table
...table
archibase planet
table writing table office table
table - 3d model (*.gsm+*.3ds) for interior 3d visualization.
3d_ocean
$5
Table
...table
3docean
dining table furniture home kitchen table
simple wooden table.