Thingiverse
Don't forget your Towel - Kitchen Towel Holder (version B) by MyStoopidStuff
by Thingiverse
Last crawled date: 3 years ago
This is version B of my "Don't forget your Towel - Kitchen Towel Holder" (this is not better, just different). First version which I prefer is linked below:https://www.thingiverse.com/thing:2882740
There is also a remix of the version here, called version C which is probably better and does not have the twist this one has, though I have not printed it:https://www.thingiverse.com/thing:2884315
Updated 9-10-2018: fixed a curve in the original model which caused it to not print flat. Also added a small hole which may help with assembly (getting the rubber band installed).
Same pretty much applies for this version so I will just copy/paste from the other version (with some minor edits):
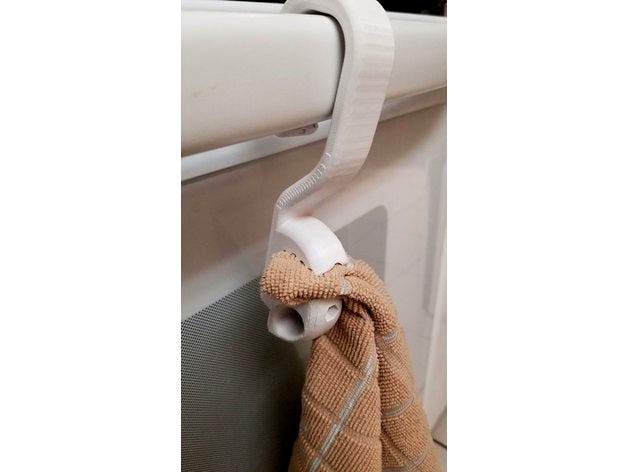
Having the kitchen towel flopping on the floor 5 seconds after it is put over the oven door handle is a problem that has been plaguing mankind for at least as long as we have had oven doors with handles, thus I present the kitchen towel clip (verison B).
Some notes:
First, the only one I printed so far was a pain to get the rubber band in. Post printing, please make sure to get all the supports out from the area where it seats.
Thinner rubber bands work better than the thicker ones, and tweezers help/are required to install it.
The included tool may save some time and cursing, it also works with the plastic-wrap holder I remixed so if you printed that already, it is the same part. However on this version I found it easier to loop the ends on the larger (oven door hook part) first and then around the post on the smaller part.
This will require a M4x16 or 20mm socket head screw and a M4 locknut. These hold it together and the socket head screw is needed as it slides in an enclosed slot, so it needs to be low profile (cap or hex head screws won't work).
Putting this together is possible, but requires the patience of somebody who grew up with a disorganized Lego collection stored in one big sack (if you know what I mean then you should be qualified to assemble this).
Assembly:
I added some pics of the original model to show how the rubber band attaches. I doubled it over and looped it around one post on the base, then loop the two ends one at a time around the post on the top. The parts are slid together and then the M4 locknut and M4 socket head screw are installed - the nut goes in the hexagonal shaped hole and the bolt goes through to meet it from the other end. The M4 nut and bolt are there to hold the parts together, and keep them from getting slid apart easily.
There is also a remix of the version here, called version C which is probably better and does not have the twist this one has, though I have not printed it:https://www.thingiverse.com/thing:2884315
Updated 9-10-2018: fixed a curve in the original model which caused it to not print flat. Also added a small hole which may help with assembly (getting the rubber band installed).
Same pretty much applies for this version so I will just copy/paste from the other version (with some minor edits):
Having the kitchen towel flopping on the floor 5 seconds after it is put over the oven door handle is a problem that has been plaguing mankind for at least as long as we have had oven doors with handles, thus I present the kitchen towel clip (verison B).
Some notes:
First, the only one I printed so far was a pain to get the rubber band in. Post printing, please make sure to get all the supports out from the area where it seats.
Thinner rubber bands work better than the thicker ones, and tweezers help/are required to install it.
The included tool may save some time and cursing, it also works with the plastic-wrap holder I remixed so if you printed that already, it is the same part. However on this version I found it easier to loop the ends on the larger (oven door hook part) first and then around the post on the smaller part.
This will require a M4x16 or 20mm socket head screw and a M4 locknut. These hold it together and the socket head screw is needed as it slides in an enclosed slot, so it needs to be low profile (cap or hex head screws won't work).
Putting this together is possible, but requires the patience of somebody who grew up with a disorganized Lego collection stored in one big sack (if you know what I mean then you should be qualified to assemble this).
Assembly:
I added some pics of the original model to show how the rubber band attaches. I doubled it over and looped it around one post on the base, then loop the two ends one at a time around the post on the top. The parts are slid together and then the M4 locknut and M4 socket head screw are installed - the nut goes in the hexagonal shaped hole and the bolt goes through to meet it from the other end. The M4 nut and bolt are there to hold the parts together, and keep them from getting slid apart easily.
Similar models
thingiverse
free

Don't forget your Towel - Kitchen Towel Holder (Version C) by MyStoopidStuff
...t it from the other end. the m4 nut and bolt are there to hold the parts together, and keep them from getting slid apart easily.
thingiverse
free

Don't forget your Towel - Kitchen Towel Holder by MyStoopidStuff
...ere is also a remix of version b which i called version c, though i have not printed it.https://www.thingiverse.com/thing:2883057
thingiverse
free

Adjustable ^2 Plastic Wrap Pantry Door Shelf by MyStoopidStuff
...l ride in the channel.
repeat for the 2nd mount and that's it.
the rest of these mounts work the same way as the original.
thingiverse
free

Ender 3 Pro M4 Locknut Bed Screw
... original part from which i remixed this supported m5 locknuts, but my ender 3 pro uses m4 screws. so this will hold m4 locknuts.
thingiverse
free

HOLDER FOR PAPER TOWELS by efliq
... can use only shorts profile - looks better.
http://www.instructables.com/member/jean-paule/https://www.facebook.com/3d.obiecto/
thingiverse
free

Better canopy (use without magnets) by Giwix
...rinting the whole thing as one part.
it fits much better and won't move around. to secure it you just need some rubber bands.
thingiverse
free

Hand cuffs 50x60mm by whitesocksgirl
...printed in one piece without support and seperated after printing. a gentle wiggle and pull on the hinges wil seperate the parts.
thingiverse
free

Ankle/leg cuffs 65x78 mm by whitesocksgirl
...printed in one piece without support and seperated after printing. a gentle wiggle and pull on the hinges wil seperate the parts.
thingiverse
free

MTX Rack Mount (Topeak) by JacobChrist
...picture shown is of version 4 which doesn't clip.
do not print posted version 4 if you are the one person that downloaded it!
thingiverse
free

Rubber Band Loom by zen13
... band loom that i 3d-modelled for my daughter for printing.
update: added longer post version. the posts are now taller by 3mm.
Mystoopidstuff
thingiverse
free

Eye Roll Emoticon by MyStoopidStuff
... the person who is just sooo cool they can't be bothered with a discussion of the finer points of 3d fused filament printing.
thingiverse
free

Pegboard webcamera holder 41mm x 7mm by MyStoopidStuff
... of strange for a webcam holder but it works for mine. the inside dimensions are:
41mm x 7mm and it is about 41mm tall (inside).
thingiverse
free

Modular Mounting System - 2020 mount by MyStoopidStuff
...his for m4 and use it with another thing i am working on (a filament runout sensor mount), but thought this could be useful also.
thingiverse
free

spacer for ender 2 ender 3 cr10 - 2.5mm (remix) by MyStoopidStuff
... 2.5mm spacer remixed from the "spacer for ender 2 ender 3 cr10" by raffosan:
https://www.thingiverse.com/thing:2526607
thingiverse
free

Dog paw imprint and heart by MyStoopidStuff
... on them. i've uploaded the step files so these can be re-mixed if you want to add a name or add them to some other project.
thingiverse
free

Pegboard remote control holder 60mm x 30mm (with STEP file) by MyStoopidStuff
...tall (inside)
this was made for a whirlpool ac unit but will probably work with others.
uploaded the step file for easy remixing.
thingiverse
free

LoD (Look of Disapproval) by MyStoopidStuff
...characters" pop from the background color.
update 2/22/2020: see the remix of this thing which is split for easier printing.
thingiverse
free

Shruggie Desk Thing by MyStoopidStuff
... keyed to be printed a bit easier and then glued together. it can be found here:
https://www.thingiverse.com/thing:4130898/files
thingiverse
free

BOITIER TL SMOOTHER HelloBeePrusa SFX (remix) - Heatsink Lid by MyStoopidStuff
...w.amazon.com/easycargo-heatsink-anodized-25x25x10mm-25mmx25mmx10mm/dp/b07b642856
update jan 18, 2019 - step file is now uploaded.
thingiverse
free

Gazebo Cover End Point by MyStoopidStuff
...nd printing the small one first to test and then you can scale up or down from there to get the right fit with your gazebo frame.
Towel
archibase_planet
free

Towels
...towels
archibase planet
towels towel bath towel face towel
towels n040914 - 3d model (*.gsm+*.3ds) for interior 3d visualization.
archibase_planet
free

Towels
...towels
archibase planet
towels towel bath towel
towels - 3d model (*.3ds) for interior 3d visualization.
archibase_planet
free

Towel
...towel
archibase planet
towel jack-towel bath towel
towel - 3d model (*.gsm+*.3ds) for interior 3d visualization.
archibase_planet
free

Towel
...towel
archibase planet
towel bath towel face towel
towel - 3d model (*.gsm+*.3ds) for interior 3d visualization.
archibase_planet
free

Towel
...towel
archibase planet
towel bath towel jack-towel
rail towel - 3d model (*.gsm+*.3ds) for interior 3d visualization.
archibase_planet
free

Towel
...towel
archibase planet
towel bath towel face towel
towel n111007 - 3d model (*.gsm+*.3ds) for interior 3d visualization.
archibase_planet
free

Towel
...towel
archibase planet
towel bath towel face towel
towel 2 - 3d model (*.gsm+*.3ds) for interior 3d visualization.
archibase_planet
free

Towel
...towel
archibase planet
towel bath towel face towel
towel n180512 - 3d model (*.gsm+*.3ds) for interior 3d visualization.
archibase_planet
free

Towel
...towel
archibase planet
towel bath towel face towel
towel n120612 - 3d model (*.gsm+*.3ds) for interior 3d visualization.
archibase_planet
free

Towel
...towel
archibase planet
towel bath towel face towel
towel n190913 - 3d model (*.gsm+*.3ds) for interior 3d visualization.
Forget
3ddd
$1

Forget-me-not
...forget-me-not
3ddd
цветы , ваза
also save for 3ds max 2011
turbosquid
$15

Forget bathroom furniture
...forget bathroom furniture for download as obj, fbx, and blend on turbosquid: 3d models for games, architecture, videos. (1164198)
turbosquid
$9

Dinner table Forget
... available on turbo squid, the world's leading provider of digital 3d models for visualization, films, television, and games.
turbosquid
$15

Forget bathroom furniture Marokko
...om furniture marokko for download as obj, fbx, blend, and dae on turbosquid: 3d models for games, architecture, videos. (1166411)
turbosquid
$9

Low poly+normal forget table iron age
... available on turbo squid, the world's leading provider of digital 3d models for visualization, films, television, and games.
3d_export
$7

decorative set forget-me-nots
...er, it is recommended to install a version of at least 1.5, since the glossiness of materials is adjusted taking into account pbr
3d_export
$10

Leather bench Forget collection
...her information, or you want to change something, or create a completely different model, you can contact me in private messages.
3d_export
$5

Low poly tree
...it is a simple but nice low poly tree.<br>don't forget to rate...
archive3d
free

Sofa 3D Model
...sofa 3d model archive3d sofa couch settee sofa forget n241112 - 3d model (*.gsm+*.3ds) for interior 3d...
3d_export
$6

manchester bedroom
...bedroom 3dexport hi,<br>thanks for use this model, please don't forget rate it and sent your...
B
3ddd
$1
B&B
...b&b
3ddd
b&b italia
statue b&b italy
3ddd
$1
B&B Italia
...b&b italia
3ddd
b&b italia
b&b; italia
3ddd
$1

b&b italia
...b&b italia
3ddd
b&b italia
b&b; italia
3ddd
$1
B&B LAZY
...b&b lazy
3ddd
b&b italia
b&b; lazy
3ddd
$1
B&B Italy
...b&b italy
3ddd
b&b italia
диван b&b; italy
3ddd
$1
b&b RAY
...b&b ray
3ddd
b&b italia , угловой
диван b&b; ray
3ddd
$1
B&B Beverly
... b&b italia , beverly
cтул beverly от b&b.; текстуры в архиве
3ddd
$1

B&B ITALIA
...lia , журнальный , круглый
стол b&b; italia
3ddd
$1
шезлонг B&B
...шезлонг b&b
3ddd
b&b italia , шезлонг
шезлонг b&b; terminal 1
3ddd
$1

B&B J.J
...b&b j.j
3ddd
b&b italia , журнальный
b&b;
j.j
45x40x49 cm
Don
turbosquid
$15

Don
... available on turbo squid, the world's leading provider of digital 3d models for visualization, films, television, and games.
3ddd
$1

Don Vino
... don vino.
винный столик don vino. высота стола 53 сантиметра, диаметр 83 сантиметра, вместительность 16 бутылок.
design_connected
$4

Don Cavalletto
...cavalletto
designconnected
glas italia don cavalletto writing desks computer generated 3d model. designed by jean-marie massaud.
turbosquid
$2

Don chair
... available on turbo squid, the world's leading provider of digital 3d models for visualization, films, television, and games.
3ddd
$1

Камин Don Bar 9600C
...камин don bar 9600c
3ddd
камин
камин don bar 9600c
3ddd
$1

Don Corleone Uli G136 Bretz
...don corleone uli g136 bretz
3ddd
bretz
don corleone uli g136 bretz
3d_export
$35
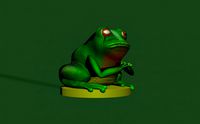
don frog
.... the standard zbrush material is used. textures are alpha brushes standard in zbrush. background-photoshop. she also has a scar.
turbosquid
$10

Industrial lift - Don Bosco
...industrial lift - don bosco for download as max, obj, and fbx on turbosquid: 3d models for games, architecture, videos. (1453151)
turbosquid
$99

Horse Don Chestnut (Fur)
... available on turbo squid, the world's leading provider of digital 3d models for visualization, films, television, and games.
3ddd
free

Poltrona Frau DON'DO
...ww.poltronafrau.com/portal/page/portal/new/webpages/poltronafrau/catalogue/product?p=code:pf_5345;is_finder_result:1⟨=en
Kitchen
3d_ocean
$29
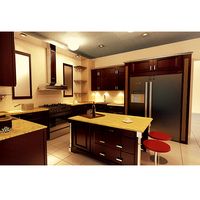
Kitchen
...tchen interior kitchen interior rendering kitchen rendering
kitchen interior,kitchen,kitchen rendering,kitchen interior rendering
archibase_planet
free
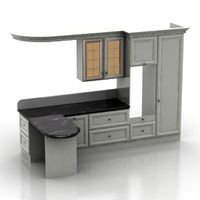
Kitchen
...net
kitchen kitchen furniture kitchen table kitchen cabinet
kitchen table - 3d model (*.gsm+*.3ds) for interior 3d visualization.
archibase_planet
free
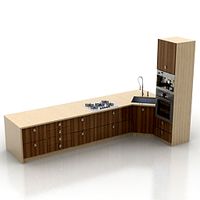
Kitchen
...kitchen
archibase planet
kitchen kitchen cabinet kitchen furniture
kitchen - 3d model (*.3ds) for interior 3d visualization.
archibase_planet
free
Kitchen
...kitchen
archibase planet
kitchen furniture kitchen cabinet kitchen equipment
kitchen - 3d model for interior 3d visualization.
archibase_planet
free
Kitchen
...itchen
archibase planet
kitchen kitchen cabinet kitchen furniture
kitchen - 3d model (*.gsm+*.3ds) for interior 3d visualization.
archibase_planet
free
Kitchen
...chen
archibase planet
kitchen kitchen cabinet kitchen furniture
kitchen n020315 - 3d model (*.3ds) for interior 3d visualization.
archibase_planet
free
Kitchen
...itchen
archibase planet
kitchen kitchen cabinet kitchen furniture
kitchen - 3d model (*.gsm+*.3ds) for interior 3d visualization.
archibase_planet
free

Kitchen
...itchen
archibase planet
kitchen kitchen furniture kitchen cabinet
kitchen - 3d model (*.gsm+*.3ds) for interior 3d visualization.
archibase_planet
free

Kitchen
...kitchen
archibase planet
kitchen kitchen furniture kitchen table
kitchen - 3d model (*.gsm+*.3ds) for interior 3d visualization.
archibase_planet
free

Kitchen
...itchen
archibase planet
kitchen kitchen furniture kitchen cabinet
kitchen - 3d model (*.gsm+*.3ds) for interior 3d visualization.
Holder
archibase_planet
free

Holder
...holder
archibase planet
holder toilet paper holder
holder paper n070712 - 3d model (*.gsm+*.3ds) for interior 3d visualization.
archibase_planet
free

Holder
...e planet
holder rack toilet paper holder
holder toilet roll n240715 - 3d model (*.gsm+*.3ds+*.max) for interior 3d visualization.
archibase_planet
free

Holder
...holder
archibase planet
pen holder support prop
pen holder - 3d model for interior 3d visualization.
archibase_planet
free

Holder
...holder
archibase planet
pole post holder
сhurch cross pole holder - 3d model for interior 3d visualization.
archibase_planet
free

Holder
...holder
archibase planet
holder bathroom ware
shower holder - 3d model (*.gsm+*.3ds) for interior 3d visualization.
archibase_planet
free

Holder
...oilet paper holder
holder paper devon&devon; time black n241113 - 3d model (*.gsm+*.3ds+*.max) for interior 3d visualization.
archibase_planet
free

Holder
...holder
archibase planet
holder hanger hanger for towel
holder 7 - 3d model (*.gsm+*.3ds) for interior 3d visualization.
archibase_planet
free

Holder
...holder
archibase planet
holder hanger hanger for towel
holder 3 - 3d model (*.gsm+*.3ds) for interior 3d visualization.
archibase_planet
free

Holder
...holder
archibase planet
holder towel rack towel-horse
holder - 3d model (*.gsm+*.3ds) for interior 3d visualization.
archibase_planet
free

Holder
...lder
archibase planet
holder hanger hanger for towel
holder towel n250912 - 3d model (*.gsm+*.3ds) for interior 3d visualization.
Version
3ddd
$1
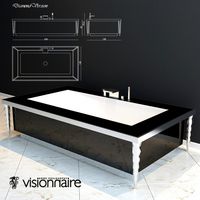
Diamond version
...nd , version , ванна
visionnaire - diamond bath
turbosquid
$50
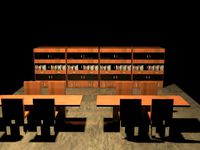
LibraryMini Version
...free 3d model librarymini version for download as max and jpg on turbosquid: 3d models for games, architecture, videos. (1617724)
design_connected
$34
Barocco Version 01
...barocco version 01
designconnected
zanotta barocco version 01 computer generated 3d model. designed by progetti, emaf.
design_connected
$27

Barocco Version 02
...barocco version 02
designconnected
zanotta barocco version 02 computer generated 3d model. designed by progetti, emaf.
turbosquid
free
![Door [2 versions]](/t/13243146.jpg)
Door [2 versions]
...rbosquid
free 3d model door [2 versions] for download as fbx on turbosquid: 3d models for games, architecture, videos. (1223985)
turbosquid
$2
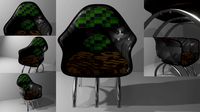
seat version 0.1
...
royalty free 3d model seat version 0.1 for download as blend on turbosquid: 3d models for games, architecture, videos. (1432653)
turbosquid
$12
Chip Version 03
...lty free 3d model chip version 03 for download as c4d and fbx on turbosquid: 3d models for games, architecture, videos. (1241145)
3d_export
$10

magnolia grandiflora mature version
...magnolia grandiflora mature version
3dexport
magnolia grandiflora mature version
3d_export
$8
room assets and voxel version
...room assets and voxel version
3dexport
room assets and voxel version
turbosquid
$35

Zil Civilian version
... model zil civilian version for download as cgf, fbx, and obj on turbosquid: 3d models for games, architecture, videos. (1639420)
T
design_connected
$11
T & T
...t & t
designconnected
dark t & t computer generated 3d model. designed by de ryck, christophe.
3d_export
$5

t-800
...t-800
3dexport
t-800
3ddd
$1
Table T
...table t
3ddd
журнальный
table t
3ddd
free
T-Rex
...t-rex
3ddd
t-rex
rrrrrr
3d_export
$5

t-virus
...t-virus
3dexport
it's t-virus
3d_export
$5

T-26T
...t-26t
3dexport
artillery tractor on the t-26 chassis ussr
3ddd
$1
T 45
...t 45
3ddd
t-45
кабинет руководителя t 45
12 предметов
подробнее:http://www.prezident-mebel.ru/index.php?productid=1541
3ddd
free

SAFE T
...safe t
3ddd
огнетушитель
креативные огнетушители от компании safe t
3d_export
free
t-rex
...t-rex
3dexport
t-rex have normal map and base color textures
3d_export
$75

T-55
...nally, but these improvements made the tank more efficient and lethal. the t-55 was officially adopted by the soviet army in 1958