Thingiverse

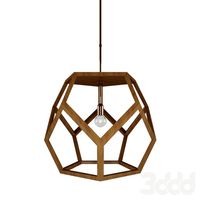
Dodecahedron Lamp by IliasBarthelemy
by Thingiverse
Last crawled date: 3 years ago
Dodecahedron lamp made using a laser cutter. (Hanging or desk lamp)
Made using Fusion 360
Source file: http://a360.co/2pf1Mle
Required materials:
Wood glue or glue gun for wood, or acrylic glue if you are using acyl.
3 mm (1/8 inch) wood or acrylic sheet of your choice.
Sanding paper (Grid 160 or higher).
Power cable.
E14 socket of your choice.
Use some latex gloves if you are working with acrylic glue.
5x 3mm/10mm screw
Optional: Switch and / or wall socket.
Required tools:
Screwdriver set.
Laser cutter. (40w or higher)
Specifications:
Dimensions: 375mm x375mm x 375mm.
Faces: 12
Parts: 163
Socket: E14
Number of vertices: 20
Number of faces: 12
Number of edges: 30
Step 1: Cutting the Parts
First we need to cut all the required parts in the laser cutter.
We us Visicut at our local makerspace to create the gcode for the laser cutter.
I took the liberty to create 3 nested files containing all required parts.
They are made for 450mmx600 3mm sheet material. (nested450-600sheet1.dxf, nested450-600sheet2.dxf, nested450-600sheet3.dxf )
If you have another laser bed size you will need the following files to be cut.
150x link.dxf
11x side.dxf
1x er27.dxf (e14)
1x top.dxf
Step 2: Preparation
Wood: Use some sanding paper with fine grit (160 or higher) to clean up burn marks from the laser cutter. make sure you don't take away to much material.
Acryl: Remove protective foil and clean with soap / water mix if required.
Painting wood: You can use wood paint to give your lamp a color or some protection against the elements.
Don't use oils because it could cause you glue to loosen over time. It is also recommended to use a spray can as the finish will be much more even than using a brush.
Step 3: Assembly
The easiest way to assemble the lamp is to create 4 sets of 3 sides. Use some glue to fix the links in the edge of each side. After creating the 4 sets and letting them dry first you can proceed to assemble the hole lamp.
I hope you like the build. Feel free to comment if you have any suggestions. Made in the Walking Robot Makerspace (Belgium Antwerp). Visit http://www.walkingrobot.be for more info.
Similar models
thingiverse
free

Dodecahedron Shadow Lamp by michael3
... socket. in "lamp_socket.dxf" is a prototype.
the light source should be as small as possible to obtain a sharp shadow.
thingiverse
free

Flat Pack Ring Lamp by joehughes
... to make a final product. the idea is that you can have led strip on the inside of each ring that faces out through the acryllic.
thingiverse
free

*Box made of 3mm acrylic sheet by imaicom
...eet by imaicom
thingiverse
this is a box made of 3mm acrylic sheet. you will need a laser cutter. it also glues to the assembly.
thingiverse
free

*Box made of 3mm acrylic sheet 3 by imaicom
...mbly.
normally 3 kinds of files for cutting were needed. this time, you can make a box by combining 6 pieces of one kind of file.
thingiverse
free

Laser cut lamp by Ariehh
...h the top holes of the lamp, so make sure to insert the cable terminal from the bottom first.
video: https://youtu.be/x0gv3iejqfi
grabcad
free

Plano Model 3600 Stacker
...plano model 3600 stacker
grabcad
dxf files for laser cutting in 3mm (1/8") wood. assembly required; glue.
thingiverse
free

Laser cut test tube holder for 16mm tubes. Using 3mm material by IliasBarthelemy
...loaded .dxf files and use some wood glue to piece everything together.
customizable fusion360 source file: http://a360.co/2mozp4u
thingiverse
free

Laser cut Forest Frame w/ Deer by West3DP
...cture frame in 3 mm wood with overlapping and engraved art (two colors for cut out and engraving). no glue required for assembly.
thingiverse
free

Japanese lantern laser cutting by PolyForge
...od but there is a step, stl and obj if you want modify.
for the "glass", i used recycled paper.
dxf are a 2004 version.
thingiverse
free

Dodecahedron Lamp Shade by g_tobet
...cket and is available in 3 different sizes. this allows you to use it as a wall lamp, table lamp, floor lamp or for the ceiling.
Iliasbarthelemy
thingiverse
free

Loxberry DIN case by IliasBarthelemy
...by iliasbarthelemy
thingiverse
assembled example in 3d: https://a360.co/2l2pgvp
all parts on one ground: https://a360.co/2jueaee
thingiverse
free

Udoo X86 Case by IliasBarthelemy
...dle.dxf
cut the following files for the optional vesa mount:
1x vesa.dxf
2x vesa-side.dxf
fusion 360 file: http://a360.co/2pxikgq
thingiverse
free

Loxone touch pure costum/replacement front by IliasBarthelemy
...e of my loxone touch interfaces. so i designed a new one. feel free to costumize !
fusion 360 3d model: https://a360.co/2nxuabn
thingiverse
free

Laser cut cable holder using 3mm material by IliasBarthelemy
...llowing files:
back.dxf => 1 time
rack.dxf => 1 time
insert.dxf => 3 times
source fusion360 file: http://a360.co/2ms9lla
thingiverse
free

Leapfrog E3D V6 Printing head by IliasBarthelemy
...tl
1x body.stl (with or without extra support)
2x cableholder.stl
1x e3dholder.stl
fusion 360 source file: http://a360.co/2qsbx19
thingiverse
free
Laser cut test tube holder for 16mm tubes. Using 3mm material by IliasBarthelemy
...loaded .dxf files and use some wood glue to piece everything together.
customizable fusion360 source file: http://a360.co/2mozp4u
Dodecahedron
turbosquid
$5

Dodecahedron Tetartoid
...alty free 3d model dodecahedron tetartoid for download as stl on turbosquid: 3d models for games, architecture, videos. (1433097)
turbosquid
$6

Dodecahedron star
... for download as 3ds, dxf, obj, wrl, fbx, blend, dae, and stl on turbosquid: 3d models for games, architecture, videos. (1208256)
turbosquid
$13

Dodecahedron cube puzzle
...ron cube puzzle for download as 3ds, obj, fbx, blend, and dae on turbosquid: 3d models for games, architecture, videos. (1164893)
3ddd
$1
Dustin Dodecahedron by Ralph Lauren
... from circa lighting.http://www.houzz.com/photos/2389670/large-dustin-dodecahedron-wood-pendant-modern-pendant-lighting
turbosquid
$60

Dodecahedron Wonder
...
royalty free 3d model dodecahedro wonder for download as stl on turbosquid: 3d models for games, architecture, videos. (1460578)
turbosquid
$26

Drilled Perforated Dodecahedron Flower
...er for download as 3ds, max, dxf, obj, wrl, fbx, dwg, and stl on turbosquid: 3d models for games, architecture, videos. (1489315)
turbosquid
$6

Dodecahedron Deco Geometric Decor Ball
...decor ball for download as obj, wrl, fbx, blend, dae, and stl on turbosquid: 3d models for games, architecture, videos. (1374307)
turbosquid
free

Flower pot dodecahedron with saucer base
...er base for download as skp, stl, dwg, dxf, fbx, ige, and obj on turbosquid: 3d models for games, architecture, videos. (1626531)
turbosquid
free

Flower pot dodecahedron with saucer base
...se for download as ipt, skp, obj, stl, dwg, dxf, fbx, and ige on turbosquid: 3d models for games, architecture, videos. (1708431)
3d_export
$14

Escher Spheres animated
...tetrakis hexahedron<br>lizards sphere - rhombic dodecahedron<br>fishes sphere - regular dodecahedronlt;br>[video=https://sketchfab.com/marcosfaci/models] ...
Lamp
archibase_planet
free
Lamp
...lamp
archibase planet
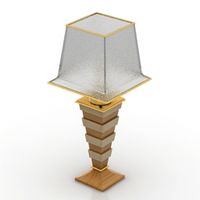
lamp reading lamp table lamp
lamp - 3d model (*.gsm+*.3ds) for interior 3d visualization.
archibase_planet
free
Lamp
...lamp
archibase planet
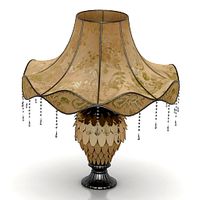
lamp reading lamp table lamp
lamp - 3d model (*.gsm+*.3ds) for interior 3d visualization.
archibase_planet
free

Lamp
...lamp
archibase planet
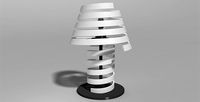
lamp table lamp reading lamp
lamp - 3d model (*.gsm+*.3ds) for interior 3d visualization.
archibase_planet
free

Lamp
...lamp
archibase planet
lamp table lamp reading lamp
lamp - 3d model (*.gsm+*.3ds) for interior 3d visualization.
archibase_planet
free

Lamp
...lamp
archibase planet
lamp reading lamp table lamp
lamp - 3d model (*.gsm+*.3ds) for interior 3d visualization.
archibase_planet
free
Lamp
...lamp
archibase planet
lamp reading lamp table lamp
lamp - 3d model (*.gsm+*.3ds) for interior 3d visualization.
archibase_planet
free
Lamp
...lamp
archibase planet
lamp table lamp reading lamp
lamp - 3d model (*.gsm+*.3ds) for interior 3d visualization.
archibase_planet
free

Lamp
...lamp
archibase planet
lamp table lamp reading lamp
lamp - 3d model (*.gsm+*.3ds) for interior 3d visualization.
archibase_planet
free
Lamp
...lamp
archibase planet
lamp reading lamp table lamp lantern
lamp - 3d model (*.3ds) for interior 3d visualization.
3d_ocean
$6
Lamp
...lamp
3docean
lamp
a high quality lamp.