Thingiverse

Docky - Pocket Sized Nintendo Switch Dock V3 by benmarte
by Thingiverse
Last crawled date: 3 years, 1 month ago
Disclaimer
I am not responsible if you cause any damage to your Nintendo Switch or your dock, so proceed at your own risk. With that out of the way.
What is Docky?
Update: 10/24/2020
Fixed docky bottom as the PCB post holes were too big
Re-exported full docky with new docky bottom
Thanks to kelevandos for reporting the issue, much appreciated kind, sir.
Update: 8/12/2020
Fully redesigned in Fusion 360 better dimensions/tolerances all-around.
Added USB-C support to the bottom cover
Increase the size of the light fixture for easier installation
Added metroid, paper mario, splatoon squid, and a few zelda logo designs
Included full docky plain which is how I normally print this with supports at 20% infill, pillar resolution is at 4mm and overhang is at 45deg.
Important
Extruded and Plain body models differ in size and the lids for these are also different sizes for each of these so make sure you print the correct lid based on the body model you choose.
Plain & Recessed Body Lids are to be used with the docky plain and docky recessed body models.
The Extruded Body Lids are to be used with the Extruded Body dockies.
The bottom lid is universal for all docky variants.
Update 12/23/2018:
Uploaded all new files I made a mistake and uploaded the wrong files in my previous update the only file that had the correct dimensions was the smash bros docky, my apologies.
Update 12/09/2018:
Fixed size tolerance on all ports for an easier installation and better fit
made it a bit taller to relieve stress on the usb-c cable
added usb-c support to the bottom of the lid to relieve stress on the port, no screws required on the port now
Added a few themed dockys: Smash, Triforce, Triforce Bird, Shieka and Nintendo Switch logos in both extruded and carved versions
Update 5/17/2017:
Check out Docky review via youtuber and thingiverse user Rawdilz: https://www.youtube.com/watch?v=jU5JQAN596U
Update 5/9/2017:
Added Docky no cover versions, Docky with no hinges and no need to use the cover. (This was a user request I'm not sure about stability of this model and I have not printed it, use at your own risk)
Update 5/1/2017:
Added power led indicator and front bevel to switch docking area, rebuilt 3D model from scratch with better proportions.
Docky is a pocket size custom 3D model you can print and use as an enclosure for the internal components of your OEM Nintendo Switch Dock.
Dimensions are as follows:
Docky Body Plain & Recessed:
Width: 69.09mm
Height: 24.55mm
Depth: 104.29mm
Docky Lid Plain & Recessed Body:
Width: 71.09mm
Height: 24.55mm
Depth: 36.05mm
Docky Lid Extruded Body:
Width: 71.09mm
Height: 26.01mm
Depth: 36.55mm
Docky Bottom:
Width: 61.56mm
Height: 12.02mm
Depth: 99.20mm
What did you use to build this model?
I used Blender to make this 3D model.
Files for 3D Printing
Files for 3D printing are in the STL folder:
docky-bottom.stl
docky-cover-beveled.stl (Docky cover is beveled)
docky-cover-embossed.stl (Docky logo is embossed)
docky-cover.stl (No logo)
docky-top-beveled.stl (Nintendo Switch logo beveled)
docky-top-embossed.stl (Nintendo Switch logo embossed)
docky-top.stl (No logo, add your own if you want)
docky-top-no-cover.stl (No logo and no cover hinges, add your own if you want)
docky-top-no-cover-beveled.stl (Nintendo Switch logo beveled and no cover hinges)
docky-top-no-cover-embossed.stl (Nintendo Switch logo embossed and no cover hinges)
Tools and Items Needed
Tri-Point Screwdriver - I recommend this kit
1 Nintendo Switch Dock
9 OEM Nintendo Dock Screws
2 USB-C OEM Nintendo Dock Screws
Docky STL files
Instructions on how to open your Nintendo Switch Dock
Installing the Motherboard in Docky
You should have all 3 Docky components
Place the motherboard and fold a piece of the ribbon and put it under the usb ports so when you secure the motherboard the pressure keeps the ribbon in place. Secure the motherboard in the bottom Docky component with 5 screws.
Place the led board into the crevice in the bottom component and apply some pressure until it's pretty firm.
Place usb-c port and tighten the 2 screws.
With the bottom component fully assembled insert the side with the HDMI, usb and power ports into the top Docky component first, apply a little pressure.
Proceed to insert the other side with the 2 usb ports by lifting a bit the plastic so you can slide the bottom Docky component into the top component.
Tighten the bottom Docky component with 4 screws.
Install the cover by placing one end into the top Docky component and then sliding the other end until it seats firmly.
Your shiny new pocket size Docky is ready to go.
I want one but I don't have a 3D printer
You can use one of these online services to print your Docky and have it mailed to you.
Shapeways
i.materialise
Sculpteo
3D Hubs
I want to make changes/improvements to Docky what do I do?
Awesome, I am not a professional 3D artist so I'm sure there's a lot of improvement that can be made to the model so any help is appreciated.
How can I contact you?
Your best bet is twitter: @benmarte
Similar models
thingiverse
free

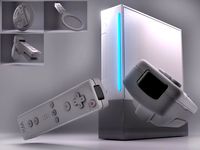
Compact Nintendo Switch Dock
...he dock if you aren't using your switch for a long time.
i added a lid version with a bigger hole around the usb-c connector.
thingiverse
free

Nintendo Switch Modular Dock by jousis
...uilt (cartridge/sd and logos).
finally, i will upload the joint(s) specification so you can make a compatible module on your own.
grabcad
free

Lithophane Add-on for Nintendo Switch Dock
... control that comes with the led light strips. also you can 3d print your own lithophane designs to insert into the front cover.
thingiverse
free

Nintendo Switch Dock by BillyJo182
... or travel. it's uses the original circuit board and usb mount from your switch, without the need for a separate usb-c cable.
thingiverse
free

Power Supply cover by squishypurple
...t,i also added the files so you can customize it to you're hearts dezire,and don't forget to share youre projects with me
thingiverse
free

Nintendo Switch dock charging USB HDMI adapter by ekyzlopez
...nintendo switch dock charging usb hdmi adapter by ekyzlopez
thingiverse
base for nintendo switch dock for usb hdmi addapter.
thingiverse
free

Nintendo Switch Dock Front Panel With Logo
...do switch dock front panel with logo
thingiverse
i moved the logo to the right and extended it with "nintendo switch".
thingiverse
free

Nintendo switch Dock front panel remix with logo by Georgeous87
...ock front panel remix with logo by georgeous87
thingiverse
remixed version with the matching screw posts and the switch logo. :)
thingiverse
free

Nintendo Switch Dock Wall Mount by HaughtyGrayAlien
...supports (did for me, anyway).
attaches to the wall with 2 screws.
it's a snug fit (deliberately), so calibrate your printer!
cults
$2

Wall bracket Nintendo Switch
... cabinet holder for nintendo switch dock. keep the dock of your nintendo switch always pre-connected and in the place you prefer.
Benmarte
thingiverse
free

Joybox by benmarte
...ment as possible so if you have any feedback or suggestions as always feel free to voice them out in the comments section.
enjoy!
thingiverse
free

Voltaic Mini Solar Panel Box by benmarte
... / 6v box
i made this box for my solar-powered raspberry pi zero w camera
the box fits a voltaic systems v25 6,400mah power bank.
thingiverse
free

60mm Anycubic 4Max Classic Cooling Fan by benmarte
...s just print with supports from the bed no need to do any post-processing to clean the vents etc.
just print and mount it, enjoy.
thingiverse
free

Anycubic Photon S Z limit spacer for wham bam FBS magnetic plate by benmarte
....6mm as recommended by wham bam print in your favorite material and install and remember to re-level your printers z-axis.
enjoy.
thingiverse
free

Jolder - Nintendo Switch Joycon Holder by benmarte
... let me know your thoughts, thanks to both other creators for sharing their files without them this would not be possible.
enjoy.
thingiverse
free

Raspberry Pi Vilros Clear Case holder for Monoprice Select V2/Wanhao D13 by benmarte
...older to attach to those slots and place it on the side of the printer and still be able to access all ports and slots of the pi.
thingiverse
free

SwitchRest - Nintendo Switch Headrest by benmarte
...r best durability since these can be a bit tight when placing them on the switch and need a decent amount of force to be removed.
thingiverse
free

Anycubic 4Max Flexion HT X-Carriage by benmarte
...ny questions or comments let me know, i hope you enjoy this model and can now print some exotic filaments using a flexion ht kit.
thingiverse
free

SwitchGrip - Nintendo Switch Multi-Function Grip v2 by benmarte
...jgr526 the creator of the comfort handles which i used to create this remix, without his initial work this would not be possible.
Docky
thingiverse
free

Docky-bottom added width by Chaosghoul
... completely printed :)
part may need a little bit of force to push into the top part. printing this right now to test the result.
thingiverse
free

Galaxy Nexus Dock Enhanced by JinxTheRabbit
...problem #3: my phone doesn't do anything cool and "dockyquot; when i dock my phone!!! i want dock mode!!!...
thingiverse
free
SwitchGrip - Nintendo Switch Multi-Function Grip v2 by benmarte
...with the oem dock and with my dock replacement docky https://www.thingiverse.com/thing:2258301 what did you use to build this model?...
thingiverse
free

nintendo switch mini dock by Cryzzgrantham
...first i want to thank benmarte for the original docky he created, that dock he started with was incredible,...
thingiverse
free

Nintendo Switch Dock by Ponut64
...was not updated as i used reference data from "dockyquot;, another design here on thingiverse. thank you for reading....
grabcad
free

Docky
...docky
grabcad
i would like to have a dock like that ;)
your comment please !
grabcad
free

i-Docky
...i-docky
grabcad
iphone-this is my entry to i-phone dock competitoin for prius ip,
grabcad
free

i-Docky 3.0 (version 3)
...i-docky 3.0 (version 3)
grabcad
my 3rd entry to iphone dock challenge
grabcad
free

i-Docky 2.0 (version 2)
...i-docky 2.0 (version 2)
grabcad
its my second entry to iphone dock competition.
Dock
design_connected
$20
Docks
...docks
designconnected
gandia blasco docks computer generated 3d model. designed by romero vallejo.
turbosquid
$5

Dock
...squid
royalty free 3d model dock for download as 3ds and fbx on turbosquid: 3d models for games, architecture, videos. (1159328)
turbosquid
$20

Dock
... available on turbo squid, the world's leading provider of digital 3d models for visualization, films, television, and games.
turbosquid
$10
Dock
... available on turbo squid, the world's leading provider of digital 3d models for visualization, films, television, and games.
turbosquid
$10
Dock
... available on turbo squid, the world's leading provider of digital 3d models for visualization, films, television, and games.
turbosquid
$2
dock
... available on turbo squid, the world's leading provider of digital 3d models for visualization, films, television, and games.
3d_export
$65

dock
...dock
3dexport
simple rendering of the scene file
design_connected
$16

Dry-Dock
...dry-dock
designconnected
restoration hardware dry-dock computer generated 3d model.
3d_ocean
$6
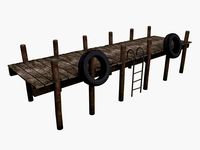
The Boat Dock
...s you see are separate, so you can remove the tyres and ladder and extend out the main section of the dock to make a long section
3ddd
$1
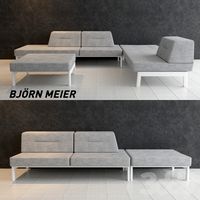
Bjorn Meier docks
... docks , модульный
bjorn meier docks
vray+corona
Nintendo
turbosquid
$25

Nintendo
...del super nintendo/ tv for download as 3ds, max, obj, and fbx on turbosquid: 3d models for games, architecture, videos. (1213066)
3d_export
$40

nintendo switch
...nintendo switch
3dexport
3d model of nintendo switch, made in blender.
3d_ocean
$18

Nintendo Wii
...h quality renders, close ups and animations. the polycount is manualy optimized so it’s not hardware intensive when importing ...
3d_export
$25

The heart of nintendo
...the heart of nintendo
3dexport
do you need to know how nintendo is inside? that's it!
turbosquid
$10
SUPER NINTENDO
...uid
royalty free 3d model super nintendo for download as c4d on turbosquid: 3d models for games, architecture, videos. (1291068)
turbosquid
$19
Nintendo Switch
...ree 3d model nintendo switch for download as ma, obj, and fbx on turbosquid: 3d models for games, architecture, videos. (1169424)
turbosquid
$8

Nintendo Switch
...ee 3d model nintendo switch for download as fbx, dae, and obj on turbosquid: 3d models for games, architecture, videos. (1617647)
turbosquid
$200
Nintendo Wii
... available on turbo squid, the world's leading provider of digital 3d models for visualization, films, television, and games.
turbosquid
$99
Nintendo Wii
... available on turbo squid, the world's leading provider of digital 3d models for visualization, films, television, and games.
turbosquid
$99

Nintendo 3DS
... available on turbo squid, the world's leading provider of digital 3d models for visualization, films, television, and games.
3d_export
$12

pocket stove
...pocket stove
3dexport
pocket stove
3d_ocean
$6

Pocket Watch
...calendar chain clock gear gold golden jewelry luxury old-fashioned pocket pocket watch time watch
pocket watch on a 2009 calendar
3d_export
$5

Pocket Watch
...pocket watch
3dexport
pocket watch old style
3d_ocean
$15

pocket watch
... calendar chain clock gear gold golden jewelry luxury old-fashioned pocket pocket watch time watch
high poly ancient pocket watch
3d_export
$8

Pocket watch
...pocket watch
3dexport
pocket watch with a photo of new york in the 1900s
turbosquid
$5

Pocket flashlight
...uid
royalty free 3d model pocket flashlight for download as on turbosquid: 3d models for games, architecture, videos. (1271804)
3d_export
free

Pocket flashlight
...this is a 3d model of a pocket flashlight. it is quite realistic and you can add this model to your project and enjoy the result.
archive3d
free

Pocket 3D Model
...e3d
bag pocket paper bag
pocket n040608 - 3d model (*.gsm+*.3ds) for interior 3d visualization.
turbosquid
$29

Pocket Watch
...squid
royalty free 3d model pocket watch for download as max on turbosquid: 3d models for games, architecture, videos. (1346695)
turbosquid
$20

Pocket Watch
...squid
royalty free 3d model pocket watch for download as c4d on turbosquid: 3d models for games, architecture, videos. (1352289)
V3
3d_export
$5

Poison-v3
...poison-v3
3dexport
poison-v3
3ddd
$1

Curtain v3
...curtain v3
3ddd
полупрозрачная штора v3
turbosquid
free
v3
... available on turbo squid, the world's leading provider of digital 3d models for visualization, films, television, and games.
3d_export
$5

potato v3
...potato v3
3dexport
turbosquid
$69

Skeletor v3
...royalty free 3d model skeletor v3 for download as ztl and obj on turbosquid: 3d models for games, architecture, videos. (1712713)
turbosquid
$49

Zombie v3
...
royalty free 3d model zombie v3 for download as obj and ztl on turbosquid: 3d models for games, architecture, videos. (1342458)
turbosquid
$2

Bitcoin v3
...
royalty free 3d model bitcoin v3 for download as c4d and prj on turbosquid: 3d models for games, architecture, videos. (1182845)
turbosquid
$29
Turret V3
...alty free 3d model turret v3 for download as ma, obj, and fbx on turbosquid: 3d models for games, architecture, videos. (1217498)
turbosquid
$20
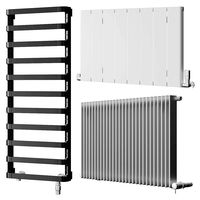
Radiators v3
... free 3d model radiators v3 for download as max, max, and obj on turbosquid: 3d models for games, architecture, videos. (1607437)
turbosquid
$10
Wheel V3S
...e 3d model wheel v3s for download as 3ds, obj, fbx, and blend on turbosquid: 3d models for games, architecture, videos. (1344250)
Switch
archibase_planet
free
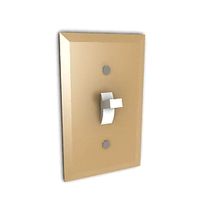
Switch
...switch
archibase planet
switch cluster switch
light switch 1 - 3d model for interior 3d visualization.
archibase_planet
free
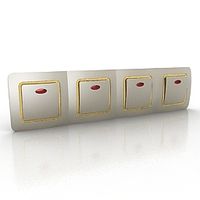
Switch
...switch
archibase planet
switches switch
switch 1 - 3d model (*.gsm+*.3ds) for interior 3d visualization.
archibase_planet
free
Switch
...switch
archibase planet
closer button switch cluster switch
switch - 3d model (*.3ds) for interior 3d visualization.
archibase_planet
free
Switch
...switch
archibase planet
switch closer
light switch 2 - 3d model for interior 3d visualization.
archibase_planet
free
Switch
...switch
archibase planet
closer button switch
switch n300808 - 3d model (*.gsm+*.3ds) for interior 3d visualization
archibase_planet
free
Switch
...switch
archibase planet
closer button switch
switch n141108 - 3d model (*.gsm+*.3ds) for interior 3d visualization.
archibase_planet
free

Switch
...switch
archibase planet
cluster switch closer
switch n260609 - 3d model (*.gsm+*.3ds) for interior 3d visualization.
archibase_planet
free

Switch
...switch
archibase planet
button switch closer
switch 2 - 3d model (*.gsm+*.3ds) for interior 3d visualization.
archibase_planet
free

Switch
...switch
archibase planet
button switch closer
switch n070510 - 3d model (*.gsm+*.3ds) for interior 3d visualization.
3d_export
$5

switch
...switch
3dexport
3d model of a low-poly switch
Sized
3d_export
$7

shoes size from 5 inch size to 11 inch
...shoes size from 5 inch size to 11 inch
3dexport
shoes design women model sizing from 5 inch to 11 inch
turbosquid
$15

Closet-small size
...
royalty free 3d model closet-small size for download as max on turbosquid: 3d models for games, architecture, videos. (1186088)
turbosquid
$5
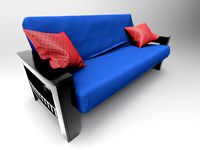
Full size Futon
...id
royalty free 3d model full size futon for download as max on turbosquid: 3d models for games, architecture, videos. (1339638)
turbosquid
$4
mid size sword
...d
royalty free 3d model mid size sword for download as blend on turbosquid: 3d models for games, architecture, videos. (1160246)
turbosquid
$3

Mid size hammer
...
royalty free 3d model mid size hammer for download as blend on turbosquid: 3d models for games, architecture, videos. (1160647)
turbosquid
$19
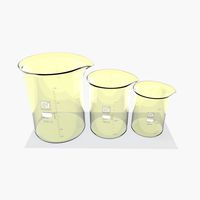
Beaker 3 Sizes
...yalty free 3d model beaker 3 sizes for download as ma and obj on turbosquid: 3d models for games, architecture, videos. (1645955)
turbosquid
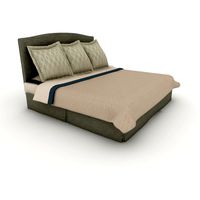
$20

Full Sized Bed
...d model full sized bed for download as max, 3ds, fbx, and obj on turbosquid: 3d models for games, architecture, videos. (1547542)
turbosquid
$45
King Size Bed
... available on turbo squid, the world's leading provider of digital 3d models for visualization, films, television, and games.
turbosquid
$15

Queen size bed
... available on turbo squid, the world's leading provider of digital 3d models for visualization, films, television, and games.
turbosquid
$14

Bed - Full Size
... available on turbo squid, the world's leading provider of digital 3d models for visualization, films, television, and games.