Thingiverse

DM Screen with Dice Tower by thsturgill
by Thingiverse
Last crawled date: 3 years ago
DM SCREEN AND DICE TOWER
7 Mar 2018
Missing Dice tray STL file added back in.
14 FEB 2018 ADDED PARTS!!
At the insistance of a grandson I added a roof and it needed to be raised, so hoarding which gives an additional storage area. Fixed some minor issues with the the tower where ramps extending above the top crenellations and of the crenellations being too thin.
Talking about storage, I modified the base to extend under the dice tray to double that storage - it will now hold pens or more dice. Mainly it prevents someone from overturning the set by proessing down on the tray.
The entire system as shown used just under a 1Kg roll of grey PLA, plus some black.
The tower can be printed with or without the attachment for the screen. Printing it without provides a standalone tower that could be used by the players.
Everything can be printed without supports as the only required supports are built in. However, supports may improve a few areas like the drawer opening for the base and the arms on the dice tray. If you would prefer to use the supports generated by your slicer for the frames, separate the parts (split command in Slic3r) and delete the two support pieces. The current design does need a razor knife to remove the supports, but they leave a clean surface which is important as it is a mating surface.
The base has a top mainly for when it is separated and if used to store parts or dice in. It is a tight fit and I used a bit of superglue from the inside. This is the only part that is glued, everything else is either attached with screws and nuts, or is simply a snap fit.
When assembling the frames, notice that the sides have a small "L" and "R" near the bottom on one side. This will help you to orient the pieces so that the block lines all line up. If the pencil holders are not used, you may need to print more than one set of the "small parts" to get more end caps although you can assemble without them. I printed the wall art on colored card stock. I recommend card stock for both the inside and outside. I also used a commercial service (Staples) to print the inside pages on a color laser. That cost about $3 on card stock, $1.50 on plain paper. Laminators are cheap - Walmart sells a laminator made by Scotch brand which comes with the pockets for less than $20. That is probably less than it would cost to take the pages to Staples and I ended up with my own laminator. I laminated the pieces together and then trimmed to the paper edge which separated the parts.
Once the frames are assembled into left and right wings with the tower adapters attached, the best way to assemble them to the tower is to push them down onto the short base. Once they are in place the tower should easily will slide down between them. the adapters keep the base and tower aligned. The adapters should push on/pull off also but sliding down from the top was far easier for me.
The Dicetower Door is a small insert that blocks the opening and is held by the dice tray when raised. That allows the tower to be used for storage as well as the base with its drawer.
27 Jan 2018 - added parts Pencil stand (for players?), added pencil holder which replaces the small links with a post with a pencil holder - adds 2/3 holders and can be used to eliminate the tower if it is not wanted (not tested, but should print without supports). Also a pencil holder that will slide into the tower adapters if you sometimes want to use the tower, but not always. This last piece needs supports.
29 Jan 2018 Increased spacing on links for TowerAdapter and ExtraPencilHolder parts for ease of assembly.
========== PARTS ==============
D&D 5e DM SCREEN: There are many available. the one shown is this:https://drive.google.com/drive/u/0/folders/0B2EITM0tspCEc05veURKU0Q0a0U
I used the top pdf version. The A4 version could be used IF you generate the files from the OpenSCAD source and comment out the current paper variable and uncomment the A4 version. You will need a print bed larger than the MK42 bed on the Original Prusa I3 MK2(s). Not this change applies to both the ScreenHolder_v5.scad file and the TowerScreenAdapter.scad file.
Square nuts: I bought these from Amazon:https://www.amazon.com/M3x5-5mmx2mm-Plated-Square-Bronze-100pcs/dp/B018503K94/ref=sr_1_5?ie=UTF8&qid=1521466372&sr=8-5&keywords=3mm+square+nuts
The link seems to no longer take you to the correct page. Search M3 square nuts and get the M3x5.5 zinc plated nuts (cheap) or the A2 stainless steel DIN562. These are both thin and flat, most other square nuts are more rounded on the corners and are thicker.
3mm socket head screws: available from numerous vendors. Various sizes, but 20mm will do for most if not all. 4 required per screen.
White board: common galvanized sheet metal bought at Home Depot and cut with a razor knife using this instructable:http://www.instructables.com/id/How-to-cut-thin-sheet-metal-and-keep-it-flat/
Painted with White Epoxy Appliance Paint (Rattle Can from Home Depot). This makes for a magnetic board that should work well with dry erase markers. I painted both sides, so i can reverse it if needed.
Similar models
thingiverse
free

D&D DM Dice Tower Tray Crenelated
... designed by athex (https://www.thingiverse.com/thing:3003948) for this this tower. i just added little "style" to it.
thingiverse
free

Dice Tower DM Screen by bigunwhistle
...#39;ve adjusted the side of the dice catch and removed the top angle and added a slot for a foam board insert to save on plastic.
thingiverse
free

Dice Tray with built in Tower
... 4 sets if double stacked). the lid has a built in "tower" so you can roll dice into the main compartment of the base.
thingiverse
free

Elder Sign dice tower by Agent45
...e of a shake. i'm sure you could use it without the module. fits the dice from the elder sign game, which are 16mm squared.
3dwarehouse
free

Lachelt Dice Tower
...le" with magnets. this is still a work in progress... just putting it in the warehouse for collaboration with my friend.
thingiverse
free

D&D Dice Tray With Dice Holder Tower
...t; x 10" x 4.5" dice tray with two sets of towers made for holding each of the 7 dice. i hope you enjoy this design. :)
thingiverse
free

Quarriors Dice Game - Lazy Susan Inlay by Miciro
...san
1x score card and dice holder
1x score card and dice holder support
13x card and dice holder
13x card and dice holder support
thingiverse
free

DM Screen Support by ilcceyren
...orners, allowing up to 90° bends in either direction. for use with dm screen dice tray. https://www.thingiverse.com/thing:4751141
thingiverse
free

Dice Box with Built In Tower
... look bad.
redesigns can be requested.
please feel free to tip or support me on patreon https://www.patreon.com/austincooperrider
thingiverse
free

DICE / PENCIL HOLDER / ROLLER (WITH LID) by bluegeargames
...encil-holder-roller-lid-opening.stl
note: i've yet to print these thingies, let me know if there is an issue with the prints.
Thsturgill
thingiverse
free

MK2 filament holder & guide by thsturgill
...e reason or another - too tall or too wide... openscad files included so you can tweak. print the filament holder with support.
thingiverse
free

Bondhous Metric Driver holder by thsturgill
...my enclosure. i printed 3 perimeters, 10% gyroid infill. and attched using 3m command strips. screw holes provided for 6 mm dia.
thingiverse
free

Raspberry PI case for Prusa Mini base by thsturgill
...h a rpi b+ case for octoprint integration. screws needed for case and fan. snaps into new version psu case from prusa mini base.
thingiverse
free

XBOX controller wall bracket by thsturgill
...rounded_cube.scad" is a library file used to parametrically create cubes with rounded sides and is used by the primary file.
thingiverse
free

Raspberry Pi case for Prusa MK2(s) with header access by thsturgill
... to header, recess for screw head inside case. scad file allows choice of which item to render, original files slightly renamed.
thingiverse
free

YACO - Yet another Christmas Ornament by thsturgill
...ave also printed in pla. use zero infill to create a light ornament and glue the three parts together.
openscad source included.
thingiverse
free

Prusa Mini Base leg extension by thsturgill
... https://www.thingiverse.com/thing:495821 (shown).
three heights: 7mm, 15mm, and 25mm all but shortest have insets on the bottom.
thingiverse
free

YAPB (Yet Another PokeBall) by thsturgill
...ring so that there are two pieces of filament holding them so they can not rotate. ball can be completely assembled without glue.
thingiverse
free

YAFR - Yet Another Filament Reel (Parametric) by thsturgill
...nge 200mm hub 55 mm by 60mm wide to match hatchbox reels and 120mm flange with 60mm hub 30mm wide for small remnants or samples.
thingiverse
free

MK2 Frame upgrade by thsturgill
...extrusions. hole sizes are 3.1mm (1/8") and 5.1mm (3/16"). https://github.com/prusa3d/original-prusa-i3/tree/mk3/frame
Dm
3ddd
$1

dreambox dm-500
...dreambox dm-500
3ddd
dreambox dm-500
turbosquid
$105

robot dm
... available on turbo squid, the world's leading provider of digital 3d models for visualization, films, television, and games.
turbosquid
$80

DM-12
... available on turbo squid, the world's leading provider of digital 3d models for visualization, films, television, and games.
turbosquid
$9

White sofa DM
...free 3d model white sofa dm for download as max, fbx, and obj on turbosquid: 3d models for games, architecture, videos. (1641020)
turbosquid
$50

helicopter dm v01
... available on turbo squid, the world's leading provider of digital 3d models for visualization, films, television, and games.
turbosquid
$22

Ring-DM Pearl
... available on turbo squid, the world's leading provider of digital 3d models for visualization, films, television, and games.
turbosquid
$30

Collection Tanks DM Abrams US
... free 3d model collection tanks dm abrams us for download as on turbosquid: 3d models for games, architecture, videos. (1302342)
turbosquid
$120

Gaz Tiger-M / Arbalet-DM
...ty free 3d model gaz tiger-m / arbalet-dm for download as 3ds on turbosquid: 3d models for games, architecture, videos. (1196942)
3ddd
$1

Kandela Mozaik DM-PS/15T
... восток
настенный светильник kandela mozaik, модель dm-ps/15t. текстуры в архиве.http://moesia.ru/catalog/variant/606/
turbosquid
$140

P32AC-DM Metro-North Locomotive
... available on turbo squid, the world's leading provider of digital 3d models for visualization, films, television, and games.
Dice
3d_export
$5

dice
...dice
3dexport
dice geometry
3d_export
$5
Dice
...dice
3dexport
a dice for poker
3d_ocean
$4

Dices
...dices
3docean
dice dices
this was created 3ds max 2014. file contains obj, 3ds, max, fbs file types.
3ddd
$1
dice+
...tic dice on electronic devices, in addition to technology.
everything made in 3ds max + vray blend material with light number.
3d_ocean
$2
dice
...dice
3docean
3ds arman3dg dice games low max poly
dice [2 texture color 512-128, 1024-256] (3ds max file- 2010, 2011, 2012)
turbosquid
free

Dice
...dice
turbosquid
free 3d model dice for download as blend on turbosquid: 3d models for games, architecture, videos. (1393051)
turbosquid
free
Dice
...dice
turbosquid
free 3d model dice for download as obj on turbosquid: 3d models for games, architecture, videos. (1310801)
turbosquid
free

Dice
...dice
turbosquid
free 3d model dice for download as blend on turbosquid: 3d models for games, architecture, videos. (1250342)
3d_export
$5

rol dice
...rol dice
3dexport
rol dices
3d_ocean
$3
Dice+Cards
...dice+cards
3docean
dice+cards
Screen
archibase_planet
free
Screen
...screen radiator screen radiator enclosure lattice
screen radiator n120315 - 3d model (*.gsm+*.3ds) for interior 3d visualization.
archibase_planet
free

Screen
...screen
archibase planet
screen group display
movie screen - 3d model for interior 3d visualization.
3ddd
$1
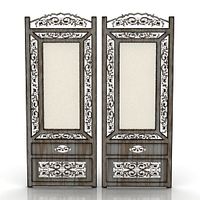
Screen
...screen
3ddd
screen
modern dressing wall partition
3d_ocean
$15

HP Screen
...test hp screen. it is has different object, so you can use it as a wall mounted screen or a stand on table. hope you all like it.
3d_export
$10
Accessories screen LCD screen 3D Model
...d screen 3d model
3dexport
accessories screen lcd 3d model interior
accessories screen lcd screen 3d model sunupcg 17831 3dexport
turbosquid
$25
SCREEN
... available on turbo squid, the world's leading provider of digital 3d models for visualization, films, television, and games.
turbosquid
$2
Screen
... available on turbo squid, the world's leading provider of digital 3d models for visualization, films, television, and games.
3d_export
$10
Screen metal screen microwave 3D Model
...ave 3d model
3dexport
screen metal microwave oven 3d model interior
screen metal screen microwave 3d model sunupcg 17847 3dexport
3d_ocean
$5
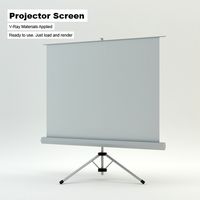
Projector Screen
...hat have presentations. the projector screen consists of an alluminum structure that holds the canvas up. this model can be us...
archive3d
free
Screen 3D Model
...rchive3d
screen folding screen
screen n020811 - 3d model (*.3ds) for interior 3d visualization.
Tower
archibase_planet
free
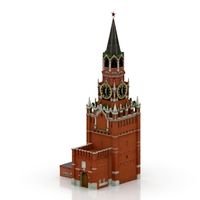
Tower
...kremlin tower spasskaya tower
tower kremlin spasskaya tower n120615 - 3d model (*.gsm+*.3ds+*.max) for exterior 3d visualization.
archibase_planet
free
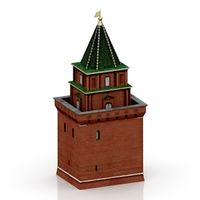
Tower
...r kremlin tower petrovskaya tower
tower petrovskaya kremlin n120615 - 3d model (*.gsm+*.3ds+*.max) for exterior 3d visualization.
archibase_planet
free
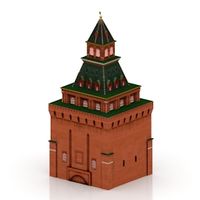
Tower
...ino-eleninskaya tower
tower constantino eleninskaya kremlin n120615 - 3d model (*.gsm+*.3ds+*.max) for exterior 3d visualization.
archibase_planet
free
Tower
...tower
archibase planet
tower statuette eiffel tower
tower decor n180914 - 3d model (*.gsm+*.3ds) for interior 3d visualization.
archibase_planet
free
Tower
...lanet
tower construction building
tower polices post street tower n110913 - 3d model (*.gsm+*.3ds) for exterior 3d visualization.
3d_export
$5
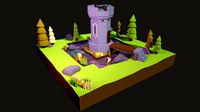
tower
...tower
3dexport
a fortified tower with a moat.
archibase_planet
free
Tower
...tower
archibase planet
building tower construction
tower n300712 - 3d model (*.gsm+*.3ds) for exterior 3d visualization.
archibase_planet
free
Tower
...uilding kremlin construction
tower 2 vtoraya bezymyannaya kremlin n100914 - 3d model (*.gsm+*.3ds) for exterior 3d visualization.
archibase_planet
free
Tower
...tower
archibase planet
forcetower tower
forcetower - 3d model for interior 3d visualization.
archibase_planet
free
Transmission tower
...lectricity pylon lattice tower framework tower
transmission tower n121015 - 3d model (*.gsm+*.3ds) for exterior 3d visualization.