Thingiverse
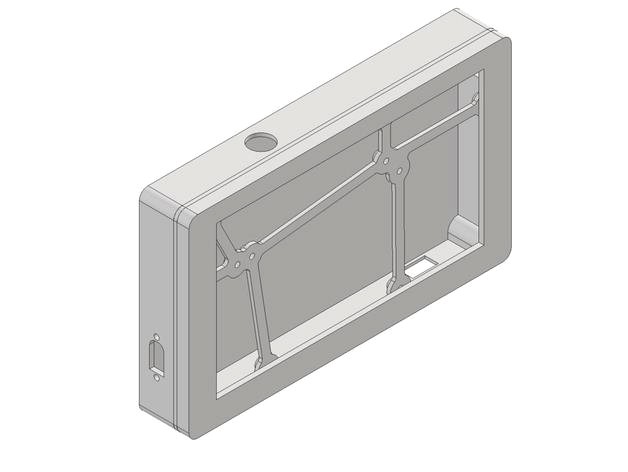
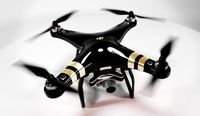
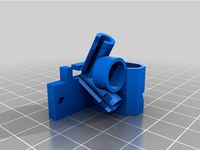
DJI FPV Video Out Monitor by shnlls_fpv
by Thingiverse
Last crawled date: 2 years, 12 months ago
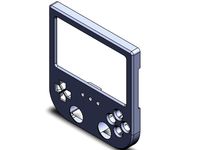
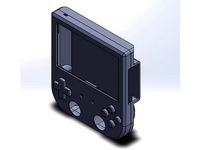
DIY Screen for the DJI Digital FPV System
I only designed a case for the components I used. This design is a WIP and will be updated with pictures.
The software/project used can be found on these sites:https://github.com/fpvout/DigiView-SBC/releaseshttps://fpvout.com/
Prints:
1x Frontplate
1x Middleplate
1x Backplate_XT60 or Backplate_DC
Materials:
Raspberry Pi zero
7" 1024x600 IPS Screen/Monitor with HDMI out
DC-DC Stepdown Converter
Either a XT60E-M or a DC Power Jack
4x M3 threaded inserts
4x M3x20 screws
10x M3x5 scews
Momentary Switch (12mm)
Short HDMI Kabel
Mini HDMI to HDMI adapter
Micro USB OTG Adapter
Tools:
Soldering Iron
Hot Glue Gun
Double Sided Tape
Instructions:
Mount the threaded inserts with a soldering iron into the frontplate.
Use some double sided tape to fix the screen to the Frontplate.
Mount the Raspberry Pi, the Board of the Screen and the StepDown Converter to the Middle Board. Feed the Ribbon cabel between the middleplate and the board and plug it in.
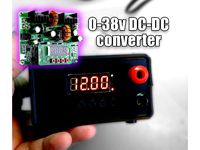
Mount the XT60E-M or DC Jack into the backpanel. Wire it to the Input of the DC-DC Converter and check the Output Voltage with a Multimeter. Adjust the Potentiometer on the converter till you see 5V.
Moun the momentary switch into the housing. Wire one cable to the GPIO 26 (Pin 37) and one to Ground (Pin 39) on the Raspberry Pi.
Connect the Outputs of the DC-DC Converter to the 5V (Pin 2) and Ground (Pin 6) of the Raspberry P Zero.
Connect the Outputs of the DC-DC Converter to the Power Input of the Monitor board.
Plug in the HDMI Adapter and OTG Adapter to the Raspberry Pi.
Glue the OTG Adpater in place. Connect HDMI to the screen.
Close the Unit with 4x M3 Screws. Be careful not to pinch the ribbon cable.
Write the files to the SD Card as written on the Project page and insert to the Raspberry PI.
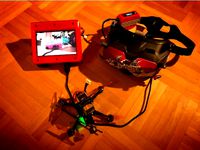
You can now use a Lipo to power the unit. After it has booted up you power up your Quadcopter (AirUnit/Vista) and your DJI FPV Goggles. After you see the image in your Goggles you can plug in your USB-C cable and you should see your image on your screen.
UPDATE:
V1.2
Changed the wallthickness of the Backplate as it was interfering with the Raspberry PI.
V1.1
Changed the postition for the On/Off Switch and the USB OTG output in the Backplate.
If you have any suggestions or questions please let me know!
I only designed a case for the components I used. This design is a WIP and will be updated with pictures.
The software/project used can be found on these sites:https://github.com/fpvout/DigiView-SBC/releaseshttps://fpvout.com/
Prints:
1x Frontplate
1x Middleplate
1x Backplate_XT60 or Backplate_DC
Materials:
Raspberry Pi zero
7" 1024x600 IPS Screen/Monitor with HDMI out
DC-DC Stepdown Converter
Either a XT60E-M or a DC Power Jack
4x M3 threaded inserts
4x M3x20 screws
10x M3x5 scews
Momentary Switch (12mm)
Short HDMI Kabel
Mini HDMI to HDMI adapter
Micro USB OTG Adapter
Tools:
Soldering Iron
Hot Glue Gun
Double Sided Tape
Instructions:
Mount the threaded inserts with a soldering iron into the frontplate.
Use some double sided tape to fix the screen to the Frontplate.
Mount the Raspberry Pi, the Board of the Screen and the StepDown Converter to the Middle Board. Feed the Ribbon cabel between the middleplate and the board and plug it in.
Mount the XT60E-M or DC Jack into the backpanel. Wire it to the Input of the DC-DC Converter and check the Output Voltage with a Multimeter. Adjust the Potentiometer on the converter till you see 5V.
Moun the momentary switch into the housing. Wire one cable to the GPIO 26 (Pin 37) and one to Ground (Pin 39) on the Raspberry Pi.
Connect the Outputs of the DC-DC Converter to the 5V (Pin 2) and Ground (Pin 6) of the Raspberry P Zero.
Connect the Outputs of the DC-DC Converter to the Power Input of the Monitor board.
Plug in the HDMI Adapter and OTG Adapter to the Raspberry Pi.
Glue the OTG Adpater in place. Connect HDMI to the screen.
Close the Unit with 4x M3 Screws. Be careful not to pinch the ribbon cable.
Write the files to the SD Card as written on the Project page and insert to the Raspberry PI.
You can now use a Lipo to power the unit. After it has booted up you power up your Quadcopter (AirUnit/Vista) and your DJI FPV Goggles. After you see the image in your Goggles you can plug in your USB-C cable and you should see your image on your screen.
UPDATE:
V1.2
Changed the wallthickness of the Backplate as it was interfering with the Raspberry PI.
V1.1
Changed the postition for the On/Off Switch and the USB OTG output in the Backplate.
If you have any suggestions or questions please let me know!
Similar models
grabcad
free

HDMI Adapter
...hdmi adapter
grabcad
hdmi to micro hdmi for raspberry pi board to monitor adapter
thingiverse
free
DJI FPV 5-inch spectator monitor based on a Raspberry Pi by TheRealFcKw
....de/gp/product/b071zrxkjy/
usb to 2 micro-usb y-cable
hdmi cable
software used: https://cosmostreamer.com/products/djifpvgoggles/
thingiverse
free

Raspberry Pi power supply for fischertechnik by harbaum
...r adapter case uses a ubuquitous lm2596 based dc-dc converter board to power a raspberry pi from fischertechnik compatible 9v dc.
thingiverse
free
Raspi_boy by darevix
...ca plug 3.5 jack stereo headset (https://goo.gl/1h8agd)
2x momentary tactile switch smd 4 pin 6 x 6 x 8mm (https://goo.gl/snj7at)
thingiverse
free
4x DC/DC Stepdown Converter with mount by toolson
...fan
1x hotend cooling fan
1x lights
1x reserve
one picture shows the converter board in comparison with a a4988 stepper driver.
thingiverse
free

RomTaStick Mini MK I by zippy1978
...l mount
1x hdmi panel mount
1x micro usb a male tu usb a female panel mount
4x m3x6mm screw
12x 3.5mmx19mm screw countersunk head
grabcad
free

PCI-E USB 3.0 Express 1x~16x Extender Riser Board Card Adapter SATA Power Cable
...is compatible with 1x, 2x, 4x, 8x, 16x(1-16x and 16-16x can be used). circuit board pci-e adapter. ! power connector: sata 15 pin
thingiverse
free
D3806 DC-DC Buck Boost Converter 38v - Power Supply - Box by paul0
...able
female socket
3d printing
1x front panel
1x back panel
1x top
1x bottom
4x foot
4x button
note: you need to glue the buttons
thingiverse
free
Gameboy PI Ps3 pad (raspberry PI 1, 2 or 3 ) by Vall3design
...pi adaptando un pad de ps3 raspberry y un monitor 5 pulgadas hdmi
game pi adapting a ps3 raspberry pad and a 5 inch hdmi monitor
thingiverse
free
Gameboy PI v2.1 Ps3 pad (raspberry PI 1, 2 or 3 ) by Vall3design
...pi adaptando un pad de ps3 raspberry y un monitor 5 pulgadas hdmi
game pi adapting a ps3 raspberry pad and a 5 inch hdmi monitor
Dji
3ddd
free
Подвес DJI Zenmuse
... подвес
подвес dji zenmuse z15-5d для canon 5d mark ii/iiihttp://www.rcteam.ru/dji/zenmuse-z15-5d.html
3ddd
$1
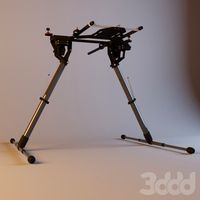
шасси для рамы DJI S800
...еся шасси для рамы dji s800
dji s800 retractable landing skidhttp://www.rcteam.ru/dji/s800-retracting-landing-gear.html
3ddd
$1
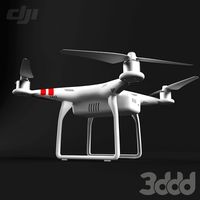
DJI Phantom 2
... dji
450000 polys
швы корпуса могут показаться ошибкой моделинга, но это не совсем так!)
3d_ocean
$39

DJI Phantom3 Professional
...540 highly detailed model of the dji phantom3 professional quadcopter. the model is very highpoly (collapsed meshes, no modifi...
turbosquid
$1

dji osmo pocket
...
royalty free 3d model dji osmo pocket for download as blend on turbosquid: 3d models for games, architecture, videos. (1613550)
turbosquid
$98
DJI Inspire 1
... available on turbo squid, the world's leading provider of digital 3d models for visualization, films, television, and games.
turbosquid
$9
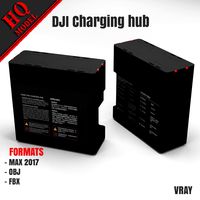
DJI Charging hub
... available on turbo squid, the world's leading provider of digital 3d models for visualization, films, television, and games.
cg_studio
$39
DJI Phantom3 Professional3d model
... model
cgstudio
.max .obj - dji phantom3 professional 3d model, royalty free license available, instant download after purchase.
cg_studio
$39
DJI Inspire1 quadcopter3d model
...3d model
cgstudio
.max .obj - dji inspire1 quadcopter 3d model, royalty free license available, instant download after purchase.
3d_ocean
$39

DJI Inspire 1 quadcopter
...rtexcount: 270883 the model comes in the following formats: -max 2012 -obj (no materials), exported with blender preset includ...
Fpv
turbosquid
$1
FPV VTX Antenna
...e 3d model fpv vtx antenna for download as obj, fbx, and stl on turbosquid: 3d models for games, architecture, videos. (1230317)
3d_export
$9

Fpv logo 3D Model
...onogram vehicle part of auto transport 3d model logo emblem detailed high quality badge
fpv logo 3d model rmodeler 59628 3dexport
3d_export
$8
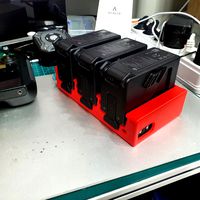
dji fpv battery slot holder
...er for 3 dji fpv batteries. holds perfectly without shaking. need 1 m3 countersunk head bolt. need to print 6 pin, 1 case, 1 cap.
3d_export
$10
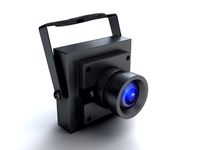
fpv camera hd 700tvl
...aterials are logically named<br>the main format is in 3ds max 2009.<br>satisfcation garranteed..<br>thank you !
thingiverse
free
FpV Mount (SOPORTE FPV) by elborjas1987
...fpv mount (soporte fpv) by elborjas1987
thingiverse
this is a fpv mount with the same holes of naza base.
thingiverse
free
fpv by tbutera
...fpv by tbutera
thingiverse
fpv
thingiverse
free
fpv by tbutera
...fpv by tbutera
thingiverse
fpv
thingiverse
free
FPV DRONE ROOSTER DJI FPV PART
...fpv drone rooster dji fpv part
thingiverse
fpv drone rooster dji fpv install part
thingiverse
free
FPV monitor
...tml?rmmds=myorder&cur_warehouse=cn
link for download : https://cults3d.com/fr/mod%c3%a8le-3d/divers/fpv-monitor-ecran-fpv-faf
thingiverse
free
FPV receiver mount for FPV display by petrex
...eceiver mount for fpv display by petrex
thingiverse
aomway receiver mount for field view 777 fpv monitor. with small cable tray.
Monitor
3d_ocean
$5

Monitor
...monitor
3docean
computer desktop monitor screen
a computer monitor
3d_export
free
monitor
...monitor
3dexport
monitor
archibase_planet
free
Monitor
...monitor
archibase planet
monitor lcd monitor pc equipment
monitor - 3d model (*.gsm+*.3ds) for interior 3d visualization.
3d_export
$5
monitor
...monitor
3dexport
monitor or pc.
3d_ocean
$5
Monitor
...monitor
3docean
computer desktop monitor screen windows work
a monitor with windows desktop
archibase_planet
free

Monitor
...r
archibase planet
monitor lcd monitor pc equipment
monitor mouse n120614 - 3d model (*.gsm+*.3ds) for interior 3d visualization.
archibase_planet
free
Monitor
...archibase planet
monitor lcd monitor pc equipment
monitor samsung n090714 - 3d model (*.gsm+*.3ds) for interior 3d visualization.
archibase_planet
free
Monitor
...r pc equipment
monitor samsung 27'' led monitor 7 t27b750 n200315 - 3d model (*.gsm+*.3ds) for interior 3d visualization.
archibase_planet
free
Monitor
...monitor
archibase planet
monitor apple
monitor-apple - 3d model for interior 3d visualization.
archibase_planet
free
Monitor
...monitor
archibase planet
monitor display
monitor sony - 3d model for interior 3d visualization.
Video
3d_export
$10
video room
...video room
3dexport
video room
turbosquid
$8
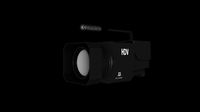
video camera
...squid
royalty free 3d model video camera for download as c4d on turbosquid: 3d models for games, architecture, videos. (1212530)
turbosquid
$2

Video Card
...bosquid
royalty free 3d model video card for download as max on turbosquid: 3d models for games, architecture, videos. (1690247)
turbosquid
$10
Video Game
...ty free 3d model video game for download as max, obj, and fbx on turbosquid: 3d models for games, architecture, videos. (1365498)
3d_ocean
$5
Video Player Texture
...entalcenter.com/0/0/0/0/0/video/index.html video player texture … buttons: play, pause, stop video texture – “folder”...
3d_ocean
$5
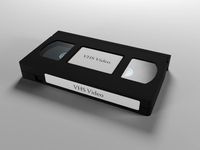
VHS Video Cassette
...vhs video cassette
3docean
media vhs video
vhs video cassette. labels included.
turbosquid
$99

Video Camea
... available on turbo squid, the world's leading provider of digital 3d models for visualization, films, television, and games.
turbosquid
$15
Pillet-video
... available on turbo squid, the world's leading provider of digital 3d models for visualization, films, television, and games.
turbosquid
$10
video cam
... available on turbo squid, the world's leading provider of digital 3d models for visualization, films, television, and games.
turbosquid
$5

Video Card
... available on turbo squid, the world's leading provider of digital 3d models for visualization, films, television, and games.