Thingiverse
DIY 24VDC laptop power supply by taxilian
by Thingiverse
Last crawled date: 3 years ago
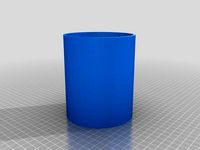
I run the solar power system in my trailer on 24VDC; while I have a converter to let me use 12VDC stuff in it, it's nice to be able to run things off of the 24VDC without using the converter. This is an enclosure that you can use with a few things off of Amazon to make a laptop power supply that works off of 24V. You could probably swap around components and tweak the design to make one that would work off of 12VDC as well -- you'd just need a boost circuit instead of a buck circuit.
Anyway, get one of these:
http://smile.amazon.com/DROK-Converter-Transformer-Synchronous-Adjustable/dp/B00C9UUFHC
or
http://smile.amazon.com/dp/B00C4QVTNU
Then get a plug for it: http://smile.amazon.com/Ksmile%C2%AE-Female-2-1x5-5mm-Adapter-Connector/dp/B015OCV5XO
Connect the power on the "in" and use a voltmeter to measure the voltage on the "out" -- use a screwdriver to adjust the blue potentiometer (next to the "out") until the voltage is where you want it. 19V is probably safe for about anything; if you want, though, look at your laptop power supply and see what the output voltage of that is and adjust it to that voltage. My macbook pro magsafe 2 power supply says 20V on it, so I set it to that. YMMV and use at your own risk =]
You'll need one pair of wires for input power -- 24VDC. Run it in through the hole on one end of the box and then connect it to the "in" terminals on the stepdown converter. Tie a knot in the wire close enough to the regulator board that it will fit in the case, but far enough to provide stress relief (the knot won't go through the hole).
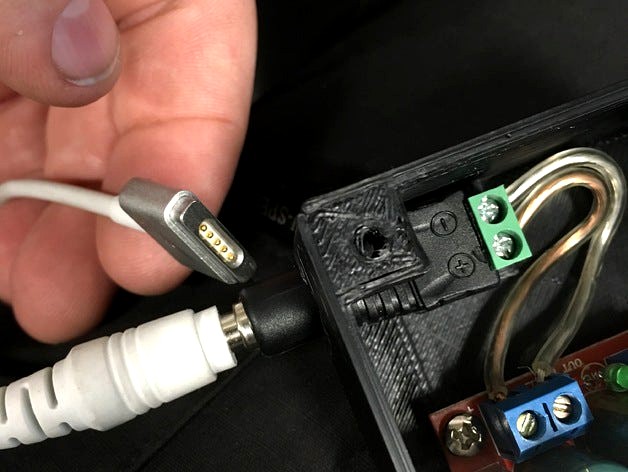
Take one of the plug / receiver parts from the second link above and connect ~4 inch long wires from + to + and - to -. Make sure you don't cross them! That would be bad.
You may have to use a razor knife to open up the hole on the side a bit, but at this point stick the narrowest part of the plug out through the hole and push all the way through until you can push it down so it is held by the small protrusion from the bottom of the case. It should be directly below the green plugs and will hold it in place (see the pictures).
Screw down the board using standard computer hard drive screws or similar (those just happen to fit -- adjust the size in the openscad file if you need to) so it doesn't go anywhere.
Test everything before you install the lid; I used #6-19 1/2" long screws (http://smile.amazon.com/Thread-Rolling-Plastic-Finish-Phillips/dp/B00GDXT716) to attach the lid.
There are a few ways to get the adapters from this box to your laptop. If you need a magsafe 2 plug, get one of these: http://smile.amazon.com/Connector-DC-MagSafe-Cable-5-5x2-5mm/dp/B00JQ4I4D6
If you have a jump start battery, such as http://smile.amazon.com/Emergency-Road-Battery-Starter-Charger/dp/B016KVONGY, the laptop power adapters from those will work. You can probably find them singly somewhere as well; I haven't needed to look, 'cause I have 4 of those type of batteries and each came with adapters =]
Good luck!
Anyway, get one of these:
http://smile.amazon.com/DROK-Converter-Transformer-Synchronous-Adjustable/dp/B00C9UUFHC
or
http://smile.amazon.com/dp/B00C4QVTNU
Then get a plug for it: http://smile.amazon.com/Ksmile%C2%AE-Female-2-1x5-5mm-Adapter-Connector/dp/B015OCV5XO
Connect the power on the "in" and use a voltmeter to measure the voltage on the "out" -- use a screwdriver to adjust the blue potentiometer (next to the "out") until the voltage is where you want it. 19V is probably safe for about anything; if you want, though, look at your laptop power supply and see what the output voltage of that is and adjust it to that voltage. My macbook pro magsafe 2 power supply says 20V on it, so I set it to that. YMMV and use at your own risk =]
You'll need one pair of wires for input power -- 24VDC. Run it in through the hole on one end of the box and then connect it to the "in" terminals on the stepdown converter. Tie a knot in the wire close enough to the regulator board that it will fit in the case, but far enough to provide stress relief (the knot won't go through the hole).
Take one of the plug / receiver parts from the second link above and connect ~4 inch long wires from + to + and - to -. Make sure you don't cross them! That would be bad.
You may have to use a razor knife to open up the hole on the side a bit, but at this point stick the narrowest part of the plug out through the hole and push all the way through until you can push it down so it is held by the small protrusion from the bottom of the case. It should be directly below the green plugs and will hold it in place (see the pictures).
Screw down the board using standard computer hard drive screws or similar (those just happen to fit -- adjust the size in the openscad file if you need to) so it doesn't go anywhere.
Test everything before you install the lid; I used #6-19 1/2" long screws (http://smile.amazon.com/Thread-Rolling-Plastic-Finish-Phillips/dp/B00GDXT716) to attach the lid.
There are a few ways to get the adapters from this box to your laptop. If you need a magsafe 2 plug, get one of these: http://smile.amazon.com/Connector-DC-MagSafe-Cable-5-5x2-5mm/dp/B00JQ4I4D6
If you have a jump start battery, such as http://smile.amazon.com/Emergency-Road-Battery-Starter-Charger/dp/B016KVONGY, the laptop power adapters from those will work. You can probably find them singly somewhere as well; I haven't needed to look, 'cause I have 4 of those type of batteries and each came with adapters =]
Good luck!
Similar models
thingiverse
free

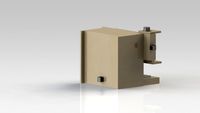
DROK DC Buck Converter (step-down regulator) enclosure by taxilian
... just a case to put it in with vents on the side and holes for power in and out.
should fit http://smile.amazon.com/dp/b00c4qvtnu
thingiverse
free

12VDC or 24VDC universal laptop power supply w/ anderson powerpole connectors by taxilian
...or-macbook/dp/b016odo8dg
apple magsafe 2: http://smile.amazon.com/i-smile%c2%ae-connector-magsafe-macbook-5-5x2-5mm/dp/b00ol9qo6u
thingiverse
free

Removeable coaxial power plug Emergency Stop 3018 by wildfang
... and don't ever let mains voltage run through a coaxial plug!
edit: in v2 the holes should match up with the 20x20 extrusion.
thingiverse
free

DPS5005 adjustable power supply case (DPSXXXX) by luisanllo
...q
-power supply: https://goo.gl/k8n7ev (using this the output voltage will be limited to 24v)
-banana plug: https://goo.gl/jnepx2
thingiverse
free

Lithobase with plug by muldaddy
...oding=utf8&psc=1
switches: https://smile.amazon.com/dp/b07pyvbz99/ref=cm_sw_em_r_mt_dp_b9gpfbmdav1bs?_encoding=utf8&psc=1
thingiverse
free

Simple Adjustable Voltage Power Supply by MechEngineerMike
... switching regulator at amazon:https://amzn.to/2wwjkeo
(make sure to choose the option that has the led display & heatsink!)
thingiverse
free

24VDC 20Amp Power Supply End Cover
...used if the power supply is mounted on a metal bracket as i have done.
mini-calliope part 11 - blowerhttps://youtu.be/jpysouoofdm
grabcad
free

DPS-50S
...dps-50s
grabcad
power supply 24vdc
thingiverse
free

Ryobi One+ Bench Power Supply by lilmikey
...of the leads so just wire like poles together. similary the power supply outputs will attach to the matching...
thingiverse
free

DPS-1200FB Power Supply Mounting Brackets by jcwren
...will keep the adapter card (dps-1200fb pcie power supply adapter breakout board adapter from merc*01 on ebay) from moving around.
Taxilian
thingiverse
free
Ottoscope toy by taxilian
... ottoscope i made for my 18 month old daughter. nothing really special about it, but easy to print so i thought i'd share =]
thingiverse
free
Filabracket for 10mm rods by taxilian
...lian
thingiverse
all credit to the original, i just made the holes smaller to fit the 10mm rods i happen to have sitting around.
thingiverse
free
Small Christmas Tree Stand by taxilian
...ll (roughly 1' tall) christmas tree at a local thrift store. only problem? the stand was broken.
tinkercad to the rescue....
thingiverse
free

Corner brackets for 2020 extrusions by taxilian
... vulcaman i made my own; i did both a tricorner and a dual corner.
the original file is included so that the openscad files work.
thingiverse
free

ID-5100 radio mounting bracket by taxilian
...hick perimeters for strength! i recommend https://smile.amazon.com/gp/product/b01f5coc42 for mounting hardware, they work great.
thingiverse
free

Lulzbot taz 5 custom print-head plate by taxilian
...g a custom printhead.
note that this is likely completely useless to everyone!
... but if it's useful to you, then great. :-p
thingiverse
free

Leatherman Charge case for wider belt with reinforced handle holster by taxilian
...dle holster with the belt loop hole widened for a larger belt and i reinforced the handle holster a bit since mine keep breaking.
thingiverse
free
Combination coin savings bank by taxilian
... fixed a few mesh issues that the old had. some of my fixes add a slight roughness in places, but i think they're acceptable.
thingiverse
free
DROK DC Buck Converter (step-down regulator) enclosure by taxilian
... just a case to put it in with vents on the side and holes for power in and out.
should fit http://smile.amazon.com/dp/b00c4qvtnu
thingiverse
free

10-30 volt DC laptop power supply by taxilian
...n; most will want the 12v version which has a normal powerpole configuration (you can still put 5-32 volts in and it should work)
24Vdc
thingiverse
free

24VDC 400W Power supply cover by tinoyster
...24vdc 400w power supply cover by tinoyster
thingiverse
24vdc 400w power supply cover
thingiverse
free

Shapeoko/XCarve 24VDC/48VDC Mount by CheesyGrin
...d similar) power supplies: http://www.amazon.com/gp/product/b005clbzro?psc=1&redirect=true&ref_=oh_aui_detailpage_o03_s00
thingiverse
free

24VDC Power supply mount by canneddirt
...o the power supply and then later screwing to a surface after removal from the supply. this is useful if positioning is critical.
thingiverse
free

DC2412 - VAC to 24VDC Power Supply Enclosure by anhtien
...s and 5% infill, no support needed.
update: added boxandlid-dc2412-v1.scad to make the "all parts" selection printable.
thingiverse
free
24VDC 20Amp Power Supply End Cover
...used if the power supply is mounted on a metal bracket as i have done.
mini-calliope part 11 - blowerhttps://youtu.be/jpysouoofdm
thingiverse
free

Prusa Mini PSU Holder Mean Well 24VDC/6.67A by onkelpit
...esign of a psu holer for the prusa mini.
mounted the psu on my ikea lack enclosure.
could be used as holder for many more things.
thingiverse
free

Dimmer Box by magatronskilz
...by magatronskilz thingiverse box for mounting circuit board for 24vdc dimmer...
thingiverse
free

DC motor holder by kpr
...dc motor holder by kpr thingiverse holder for bigger 12v/24vdc motors, e.g. from hand drill or handy vacuum...
thingiverse
free

MY1018-1 500W 24VDC gear motor mounting plate evil-rover04 by evil_k
...inum plates without having to remove the sprocket. the sprocket will need to be removed to mount the gear motors to the adapters.
Laptop
3d_export
$5

Laptop
...laptop
3dexport
laptop
archibase_planet
free

Laptop
...laptop
archibase planet
notebook laptop pc
laptop - 3d model for interior 3d visualization.
archibase_planet
free

Laptop
...laptop
archibase planet
notebook laptop pc
laptop asus - 3d model for interior 3d visualization.
3d_export
$5

Laptop
...laptop
3dexport
laptop with good typeboard. will be happy if it will be usefull for someone
3d_ocean
$19

laptop
...d com computer dell electronic high poly inspiron lap lapi laptop material model new tab usb
high poly uv unwrap, textured laptop
3d_export
$6

Laptop
...it your taste. the model consists lot of meshs. laptop body laptop cap buttons speaker cabinet speakers table table legs sul etc
3d_ocean
$8

Office Laptop
...rings.obj blender_rings.obj //////////////////////////////////////////////////////////////////////////////////////////////////...
turbosquid
$7

Laptop
...top
turbosquid
royalty free 3d model laptop for download as on turbosquid: 3d models for games, architecture, videos. (1488076)
turbosquid
$2

laptop
...laptop
turbosquid
free 3d model laptop for download as max on turbosquid: 3d models for games, architecture, videos. (1618080)
turbosquid
$10

Laptop
...
turbosquid
royalty free 3d model laptop for download as skp on turbosquid: 3d models for games, architecture, videos. (1375855)
Diy
3d_export
free
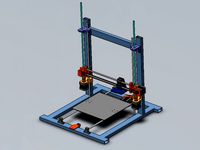
DIY 3D Printer
...diy 3d printer
3dexport
diy 3d printer model
turbosquid
$10

Diy tiered
...l diy tiered for download as max, max, max, max, fbx, and obj on turbosquid: 3d models for games, architecture, videos. (1603709)
turbosquid
$3
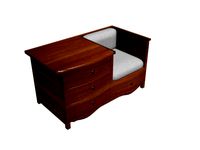
Diy Desk to Bench
...odel diy desk to bench for download as 3ds, max, obj, and fbx on turbosquid: 3d models for games, architecture, videos. (1506589)
turbosquid
$2

DIY Moon Light
...model diy moon light for download as obj, fbx, blend, and dae on turbosquid: 3d models for games, architecture, videos. (1501170)
3d_export
$8
DIY CNC Router 3D Model
...diy cnc router 3d model
3dexport
cnc; router; diy; homemade
diy cnc router 3d model maikeru86 58463 3dexport
turbosquid
$5

Diy Kitchen Cabinets
...itchen cabinets for download as 3ds, obj, fbx, blend, and dae on turbosquid: 3d models for games, architecture, videos. (1197373)
3d_export
free

Download free Diying Plant 3D Model
...download free diying plant 3d model
3dexport
diying plant blender
diying plant 3d model visitorsama 98607 3dexport
3ddd
$1
DIY coffee table + decor
... рамка для фото
кофейный столик diy 400х350х600(h) мм. моделился по фото. внимание: материалы - corona.
turbosquid
$3
Diy Wire Lamp Shade
...free 3d model diy wire lamp shade for download as 3ds and fbx on turbosquid: 3d models for games, architecture, videos. (1347605)
cg_studio
$12

DIY MONGOLIAN LAMB STOOLS3d model
... hair soft pile white
.max - diy mongolian lamb stools 3d model, royalty free license available, instant download after purchase.
Supply
turbosquid
$1

supplies
... available on turbo squid, the world's leading provider of digital 3d models for visualization, films, television, and games.
3d_export
$5

black supply
...black supply
3dexport
black supply size: 57.9 x 29.2 x 34 sm
turbosquid
$20

Office Supplies
...lty free 3d model office supplies for download as max and obj on turbosquid: 3d models for games, architecture, videos. (1273636)
3d_export
free

office supplies
...office supplies
3dexport
turbosquid
$8

Supply Drop
...e 3d model supply drop for download as fbx, obj, dae, and stl on turbosquid: 3d models for games, architecture, videos. (1663721)
turbosquid
$75

Supply Helicopter
... available on turbo squid, the world's leading provider of digital 3d models for visualization, films, television, and games.
turbosquid
$65
Supply Ship
... available on turbo squid, the world's leading provider of digital 3d models for visualization, films, television, and games.
turbosquid
$29

Village Supplies
... available on turbo squid, the world's leading provider of digital 3d models for visualization, films, television, and games.
turbosquid
$19

Power Supply
... available on turbo squid, the world's leading provider of digital 3d models for visualization, films, television, and games.
turbosquid
$5

school supplies
... available on turbo squid, the world's leading provider of digital 3d models for visualization, films, television, and games.
Power
turbosquid
$100

power
...ower
turbosquid
royalty free 3d model power for download as on turbosquid: 3d models for games, architecture, videos. (1421990)
3d_export
$5

Power
...power
3dexport
3d_export
$5

power outlets
...power outlets
3dexport
power outlets
3ddd
$1

lion power
...lion power
3ddd
лев , статуя
lion power gold sculpture
3ddd
$1

Sea Power
...
компас , море , часы
часы с компасом sea power
3ddd
free

Meridiani / Power
...power
3ddd
meridiani , круглый
стол power производитель meridiani, диаметр 120,высота 67
3d_export
$5

Power Surge
...power surge
3dexport
the power surge is a all mesh carnival ride to lower in game part count and lag
turbosquid
$8

Airport Ground Power Unit (AXA Power )
... available on turbo squid, the world's leading provider of digital 3d models for visualization, films, television, and games.
turbosquid
$50

Power Houser
...rbosquid
royalty free 3d model power houser for download as on turbosquid: 3d models for games, architecture, videos. (1333800)
3d_export
$5

power outlet
...power outlet
3dexport
power outlet<br>format file maya 2018, 3d max 2017, obj, fbx