Thingiverse
DingbOtto by Squeack
by Thingiverse
Last crawled date: 3 years ago
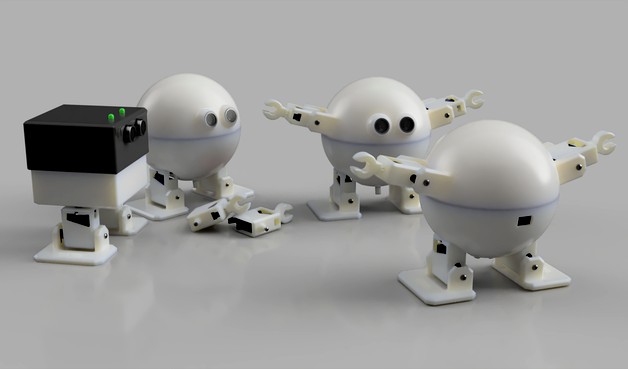
When an Otto robot (https://www.ottodiy.com/) meets a dingbot (https://www.girlgeniusonline.com/) the result can only be a DingbOtto.
The internal mountings allow for:
1x power button (8.5mm square)
1x additional button (same)
1x piezo buzzer (12mm diameter, 9mm deep)
1x MAX2719 8x8 LED matrix (controller board under matrix, not adjacent)
1x CC2541 bluetooth module
1x TTP223 touch sensor
1x LM393 based sound sensor
1x HC-SR04 ultrasonic distance sensor
1x MPU-6050 IMU
2x LED (5mm)
1x Arduino Nano on a sensor shield
1x Dual 18650 battery holder providing regulated 5V output
There is sufficient room between internal components to allow push-on Dupont connectors to be used rather than having to solder directly to the boards.
Assembly and example programming can be copied from the Otto Humanoid project at https://store.ottodiy.com/product/humanoid. Download link goes to https://uploads.strikinglycdn.com/files/14ccd14c-51a8-43b4-a3ce-8ca2de4b5afd/OttoDIYHumanoid.zip.
I use clips intended for LED strip lighting to hold various components in place. An STL file for these is included, but moulded plastic ones are stronger.
There are three variations of many components, sized to hold the common servo sizes of MG90S, MG90D or SG92R. There is also an armless version, where arduino pins 6 and 7 can drive LEDs instead of the arm servos.
March 17th update:
The head and body hemisphere files have been updated to fix some issues with some of the clip positioning. The body is also available in a pole and equator version, where the pole can be printed with the outside upwards, then the two pieces glued together. This means more tidying up of supports on the inside, but a better outside appearance. The body equator piece should not need supports. The 'whole hemisphere' body and head now have designed in supports, which can be tricky to remove (use a very sharp scalpel) but lead to a better surface finish than Cura autogenerated supports. You might need to enable 'Print thin walls' under Cura, or the equivalent in other slicers. The matrix test item is for trying out post-printing finishes (fillers, paints, etc) to check that the LEDs can still shine through without having to print a large slow item.
The pole and equator version of the head hemisphere will be along in a while, at which point I will also update the Fusion 360 and STP files.
Similar models
thingiverse
free

Zowi DIY build your own robot with Arduino by miaoichi
...or, touch sensor, etc.
and some bonus conveniences: can use remaining screws in servo pack to fix arduino board and power switch.
thingiverse
free

Otto Tall Boy by tvollaro
... more compact max 7219 component with the chip underneath the leds. you can use the same legs from the original otto diy project.
thingiverse
free

Otto DIY robot stuff by AnnDee
...os, but for my daughter i had to build a version that works with 4xaa batteries so i had to remove the arms (print with 0.2, 20%)
thingiverse
free

Otto DIY++ all in one by Phuc_D_Doan
...ottodiy_vbot/tree/master/examples/hc06_bt_config
firmware: github.com/stembotvn/ottodiy_vbot/tree/master/examples/otto_bt_zowiapp
thingiverse
free

Otto robot Head for Uno + matrix by Zagdima
...ly because servos are tight inside. and added 2 back holes for additional buttons for whose who want to use zowi soft and sketch.
thingiverse
free

otto_body_led_matrix by adonlin
...t foot.4
left arm.6
right leg.3
right foot.5
right arm.7
ultrasound:
trig.8 echo.9
speaker:10
8x8 led matrix:
din.11
cs.12
clk.13
thingiverse
free

Otto DIY+ Arduino Touch Sensor by Bhm93
... robot to reproduce different movements and sounds every time it is touched.
you can see the result: https://youtu.be/dczpfhoodje
thingiverse
free

Knob door opener v.2 by PiotrChr
...otor driver
1x servo disc
4x m3 bolts and nuts
arduino nano
1x red led
1x blue led
2x 1kohm resistor
1x 10kohm resistor
1x button
thingiverse
free

BQ Advanced Kit Components and BQ ZUM by Jkutkut
...ing components:
bq zum board
servo
mini-servo
buzzer
led
ultrasound sensor
ldr sensor
button
ir sensor
potenciometer
battery pack
thingiverse
free

Emoji Dog with Arduino LED matrix
...trix with max7219, tp4056 charging board, 18650 battery with case, 3d printed body using pla.
video: https://youtu.be/uxzqexqwgnw