Thingiverse
Dell Latitude rack cluster
by Thingiverse
Last crawled date: 4 years, 1 month ago
Why
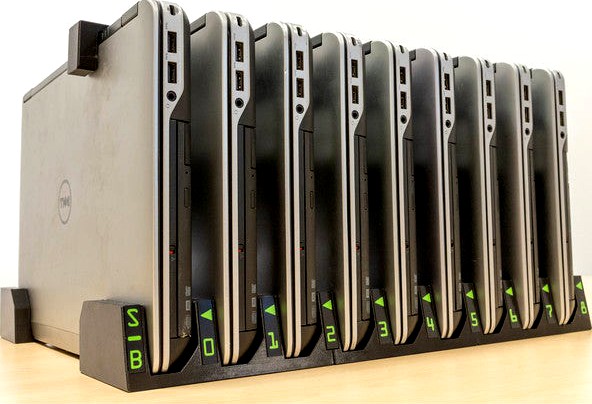
Imagine a company that is periodicaly upgrading and replacing laptops. The old ones are still fully functional and with decent performance (i5 4th gen, 8 Gb RAM, SSD), but there is no legal process to give them away or sell to employees. So you can either scrap them or figure out what can you do with all that computational power laying around.
Thus, the idea was born. Lets dedicate an empty networking rack and build a computational cluster out of them.
Design
The general idea had to comply with following constraints:
thermal design - hot air must be flowing correctly within the cabinet
fit on a standard 19'' rack shelf - no additional construction, mounts, support, assembly
hot swap - blade design allowing to take a laptop out without disassembling the whole unit
half-depth rack - only one block per shelf. Two blocks on one shelf in full depth rack would have thermal/hot air distribution issues
The models
The overall shelf is split into three parts: Front, Back, Top.
Back and Front components are responsible for holding the laptops upright. Back has a slight bump to make sure laptops are not pushed too far. Front has a slot for ID tags.
Top component ensures the laptops stay parallel to each other and also has a slot for UTP cable routing. It is designed to fit just right between power connector and laptop with extended battery (if present).
Each component was divided into 3 sections (left, center, right) due to printer bed constraints and later connected together via dovetail joints.
One model is provided. Import it into Slic3r and "Split into objects". Then pick the parts you want to print and delete the rest.
Original plan included stand also for power supplies (see photos) but the idea was scrapped due to multitude of their form factors.
Models for the labels/tags
The text is based on OCR-A font.rackCluster_insertable_tag - single tagrack_labels_text - the text on the tagsrack_labels_tabs - tabs with embossed holes for the text
You can print them on MMU printer, print two colors within one layer using this approach or just use the ColorChanger 2 layers (front facing) black, 2 layers in color, two in black.
When printing MMU, make sure to print the front side of the label facing the print bed. The colors will nicely blend into one solid layer.
Slicing / Print setting
top layers: 4
infill: cubic, 10%
8mm high slab infill modifier: 15%
The slab modifier improves rigidity in the bottom 8mm of the model.
Result
Print times
Commonly printed in groups of three - 1 top, 1 front, 1 back.
Printers were set to print around 120% speed and average time to print one set was around 12-13 hours.
Material consumption
Approximately 1 kg PETG per shelf (incl. some trials and failed models)
Similar models
thingiverse
free

Label Roll Adapter - 3 inch to 1 inch by SKG
...ur thermal printer.
print one side and check the fit. you can scale up or down by around 1% to make the fit tighter or looser.
thingiverse
free

smsbox by meiniKi
...r. additionally, the number of received messages is displayed on the front. (i was a bit optimistic using an 8 digit display :d )
thingiverse
free

Together Strong Medal by DjViper1974
...together strong medal by djviper1974
thingiverse
medal 1 - front text
medal 2 - front and back text
maybe hard to print.
thingiverse
free

Ultimaker S5 Risers by MakerBeck
... not just one when you look at the files. the sides of the printer extend past the front and rear pieces.
print two of each part.
thingiverse
free

OrangePI Plus2E Cluster Rack by ewoutp
...a 25% infill.
note: the stl contains both parts. use separate connected surfaces or edit the scad file to print only one of them.
thingiverse
free

Commodore 64 label
...u cant do them at the same time. so print the color one with each color, then glue it. looks alright.
let me know what you think
3dwarehouse
free

Barcode Scanner and Lable Printer
...speeds and connectivity options as the others. barcode scanner by benjamin h. #barcode #desktop #label #printer #scanner #thermal
thingiverse
free

Commodore Vic 20 Rainbow label
...ou cant do them at the same time. so print the color one with each color, then glue it. looks alright.
let me know what you think
3dwarehouse
free

Bottle
...you can build a bottle of your liking. for quick usage simply edit group and remove back label and all around label #bottle #wine
thingiverse
free

Hot Bed Enclosure by xavan
...sions are for my p3steel printer.
this principle can be adapted to other printers . . .
see video: https://youtu.be/wsdy4zyvi4e
Latitude
design_connected
$13

Latitude
...d
photo-realistic 3d models of the latitude light pendant from innermost for 3d architectural and interior design presentations.
3ddd
$1

Консоль Latitude
...нсоль , latitude , тумба
размеры 1630х510х860мм
3ddd
$1

LATITUDE Saga
...
стеллаж latitude saga состоит из соответствующих друг другу элементов, которые позволяют моделировать его в различных вариантах.
3d_export
$22

Cessna Citation Latitude
...cessna citation latitude
3dexport
cessna citation latitude
3ddd
$1

Комод Latitude Low FS
... latitude , low , fs
комод latitude low fs
turbosquid
$49

Renault Latitude
... available on turbo squid, the world's leading provider of digital 3d models for visualization, films, television, and games.
3d_export
$19

LATITUDE CROSS Tire
...latitude cross tire
3dexport
turbosquid
$99

2011 Renault Latitude
... available on turbo squid, the world's leading provider of digital 3d models for visualization, films, television, and games.
3d_ocean
$89

Renault Latitude 2011
...y, in real units of measurement, qualitatively and maximally close to the original. model formats: - *.max (3ds max 2008 scanl...
3d_export
$19

LATITUDE TOUR HP Tire
...latitude tour hp tire
3dexport
Dell
3ddd
$1

Dell U2312HM
...dell u2312hm
3ddd
dell
dell u2312hm
3ddd
$1
Dell U2412M
...dell u2412m
3ddd
dell , монитор
монитор dell u2412m
3ddd
$1
Монитор DELL
...монитор dell
3ddd
монитор , dell
просто монитор
3ddd
$1
dell
...dell
3ddd
монитор
good luck
3ddd
$1
Dell U2711
...dell u2711
3ddd
dell , монитор
модель сделана очень подробно.
3ddd
$1
DELL U2410
... монитор
монитор dell lcd 24 ultrasharp u2410 [ips, 1920x1200, 800001, 178гор178вер, dvi, hdmi, pip, cardreader, tco03]
3ddd
$1

Dell XPS
... монитор , моноблок
подумал что apple уже слишком много.)
turbosquid
$10
Dell Monitor
...osquid
royalty free 3d model dell monitor for download as ma on turbosquid: 3d models for games, architecture, videos. (1152872)
3ddd
free
Monitor Dell ST2310
... dell
монитор dell st2310инфо: http://www.3dnews.ru/news/monitori_dell_st2310_st2210_dlya_lubitelei_full_hd/
turbosquid
$24

Dell Monitor
...ree 3d model dell monitor for download as obj, fbx, and blend on turbosquid: 3d models for games, architecture, videos. (1437518)
Cluster
3d_ocean
$4

Cluster Missile
...cluster missile
3docean
cluster missile missile weapon
cluster missile
turbosquid
$3

cluster
...turbosquid
royalty free 3d model cluster for download as stl on turbosquid: 3d models for games, architecture, videos. (1345475)
3d_ocean
$10

Litter Clusters
...are a low polygonal models, easy to animate. 4 different clusters including : cans, bottle, bullets and paper clusters. - poly...
design_connected
$13

28.19 Cluster
...28.19 cluster
designconnected
bocci 28.19 cluster computer generated 3d model. designed by arbel, omer.
design_connected
$13

28.37 Cluster
...28.37 cluster
designconnected
bocci 28.37 cluster computer generated 3d model. designed by arbel, omer.
turbosquid
$5

Fruit cluster
...bosquid
royalty free 3d model fruit cluster for download as on turbosquid: 3d models for games, architecture, videos. (1683789)
turbosquid
$20

Coronavirus Cluster
...royalty free 3d model coronavirus cluster for download as max on turbosquid: 3d models for games, architecture, videos. (1653616)
turbosquid
$10

Asteroid Cluster
...d
royalty free 3d model asteroid cluster for download as max on turbosquid: 3d models for games, architecture, videos. (1321978)
3d_export
$0

crystal cluster
...crystal cluster
3dexport
turbosquid
free

Rock Cluster
... available on turbo squid, the world's leading provider of digital 3d models for visualization, films, television, and games.
Rack
archibase_planet
free
Rack
...ack
archibase planet
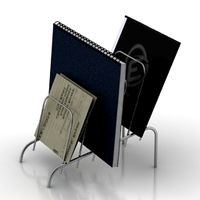
rack paper rack rack for paper
rack 6 office n060914 - 3d model (*.gsm+*.3ds) for interior 3d visualization.
archibase_planet
free
Rack
...ack
archibase planet
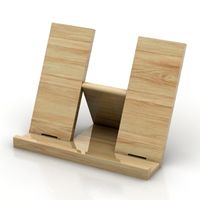
rack paper rack rack for paper
rack 3 office n060914 - 3d model (*.gsm+*.3ds) for interior 3d visualization.
archibase_planet
free
Rack
...ack
archibase planet
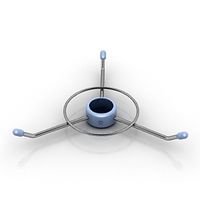
rack paper rack rack for paper
rack 5 office n060914 - 3d model (*.gsm+*.3ds) for interior 3d visualization.
archibase_planet
free
Rack
...ack
archibase planet
rack paper rack rack for paper
rack 7 office n060914 - 3d model (*.gsm+*.3ds) for interior 3d visualization.
archibase_planet
free
Rack
...for magazines rack for notebooks notebooks notebook
rack notebook n120614 - 3d model (*.gsm+*.3ds) for interior 3d visualization.
archibase_planet
free

Rack
...rack
archibase planet
rack umbrella umbrella rack
rack n180811 - 3d model (*.3ds) for interior 3d visualization.
archibase_planet
free
Rack
...rack
archibase planet
rack book rack stand
rack - 3d model (*.gsm+*.3ds) for interior 3d visualization.
archibase_planet
free

Rack
...rack
archibase planet
rack rack for glasses
rack 1 - 3d model (*.gsm+*.3ds) for interior 3d visualization.
archibase_planet
free
Rack
...rack
archibase planet
rack rack for glasses
rack 2 - 3d model (*.gsm+*.3ds) for interior 3d visualization.
3d_export
free
rack
...rack
3dexport
rack