Thingiverse
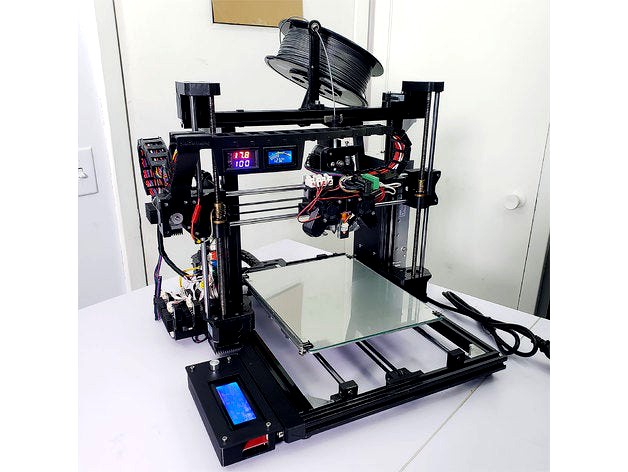
DDW Ronin 3D Printer (Hictop 3DP-12) by DarkDragonWing
by Thingiverse
Last crawled date: 3 years ago
UPDATE 11/13/20Every file is now up to date. Only some parts are new like the X carriage parts, the TL-Smoothers holder, and the LCD cover. I'm 99% sure that this is it for this printer.
Website http://www.DarkDragonWing.comYouTube https://bit.ly/YouTubeDDWFacebook http://bit.ly/FacebookDDWOnline Store http://bit.ly/eBayDDWProduct Recommendations http://bit.ly/amznDDW
Ronin 3D Printer
24V
Bed size 210x270x225mm (XYZ)
Integrated lead screw Z stepper motors
Filament run out sensor
BL-Touch sensor
TL-Smoother
Auto bed leveling
Auto cool down when the heat sink fan fails
Auto shutdown after the print is done
Ambient temperature monitor
Strong 75% infill ABS Parts
Spool holder with ball bearings
Easy cable chain system
Latest video: 3D Printer Modify 3 | Hictop 3DP-12 Version 3 https://youtu.be/PUxXG3LxabM
This printer is now very stiff, fairy accurate, and has little to no play. However, there is a flaw in this style of 3D printer. With the increasing weight on the Y axis, there will be more ringing artifacts on the print. You can avoid ringing artifacts by printing slower on the skin, 15mm/s or less for this printer, but when the print gets heavier, the ringing artifacts may be more visible.
Software: CuraLayer Height: 0.2mmInfill Density: 75%Materials: ABSWall Thickness: 1.2mm, 4mmTop/Bottom Thickness: Same as Wall ThicknessFilter Out Tiny Gaps: ☑ or ☐ as you see fit
Print with AMZ3D ABS. https://amzn.to/3epdKjL
Nozzle Temp: 250°C
Bed Temp: 110°C
Bed Adhesion: Like PLA, use glue sticks. https://amzn.to/3jYqIGr
Enclosure: Temperature inside the box will be about 60°C after printing for a while.
Infill Density 5%, Wall Thickness 1.2mm, Top/Bottom Thickness 1.2mm for this file only:
DDW_RN-3DP27_Filament_Holder_50-55mm.stl
The only cable carrier file that needs brim:
DDW_RN-3DP34_X_Cable_Carrier_4.stl
Duplicate these:
2x DDW_RN-3DP22_Z_Nuts_Holder.stl
34x DDW_RN-3DP30_X_Cable_Carrier_Insert.stl
18x DDW_RN-3DP32_X_Cable_Carrier_2.stl
14x DDW_RN-3DP38_Y_Cable_Carrier_Insert.stl
12x DDW_RN-3DP40_Y_Cable_Carrier_2.stl
12x DDW_RN-3DP44_Frame_Cable_Clip.stl
3x DDW_RN-3DP45_Frame_Cable_Clip_For_Ribbons.stl
2x DDW_RN-3DP50_GT2_Belt_Tensioner.stl
2x DDW_RN-3DP51_GT2_Belt_Tensioner_Pusher.stl
Must do:
Move Z axis frame assembly from 165mm(default) to 155mm.
Adjust the stepper motor current on the main board to X=0.8, Y=0.8, Z=1.0V, and E0=0.8V. Watch how to adjust the current here. https://youtu.be/8K3m6-kOoWw
After updating firmware, go to Control, Restore settings, and then Store memory.
Use some foam from the foam brush for the dust filter.
Use soldering iron to press in the brass nuts.
Must use BL-Touch sensor.
Must use filament run out sensor.
Must use 324MM integrated lead screw Z stepper motors.
Set Auto Cool Down:
Press and hold Set button.
Press Set button again 1 more time to get to P1.
Press both Set and C/F buttons at the same time.
Keep pressing C/F button until you get to 0.1.
Wait 5 seconds.
Press Set button, then press and hold Set button until you get to 100.
Wait 5 seconds and then you're done! The printer will stop printing and cool down when the temperature reaches 100°C at the heat sink.
Printer Info:
E-Steps: 94.4962144403
Width: 210
Depth: 270
Height: 225
Firmware: Marlin RC8
Software:
Arduino (for updating firmware) https://www.arduino.cc/en/Main/Software
Cura 3.6 (for generating 3D printing codes) https://ultimaker.com/en/products/cura-software/list
FreeCAD (for designing 3D parts) https://www.freecadweb.org/wiki/Download
Pick one 3D printer to start off with:
HICTOP 3D Printer Aluminum Frame 24V https://ebay.to/2Du3ENW https://amzn.to/2OPz43r
Athorbot A01 3D Printer Aluminum Frame 24V https://www.gearbest.com/3d-printers-3d-printer-kits/pp_929496.html?lkid=79772709
Required Items:Z Sensor
1x BLTouch Sensor With 1 Meter Extension https://ebay.to/2DarRrU https://amzn.to/2G64akT
Plugs
3x 2p Spring Connector (for quick fan replacement) https://ebay.to/2S7ElIh http://amzn.to/2oyZ9IA
1x 6 Pins Screw Terminal Block https://ebay.to/357uCXm https://amzn.to/2RdUcpe
Z Axis
2x 17HS4401S M8x8 324MM Integrated Lead Screw Z Stepper Motor http://s.click.aliexpress.com/e/aemq7QJ
2x T8 Anti-Backlash Spring Loaded Nut https://ebay.to/2A1aeIC http://amzn.to/2rZ6dCu
2x 8x12x3.5mm Bearing MR128-ZZ (for Z lead screw top mounts) https://ebay.to/2SaXiK6 https://amzn.to/3eQT2ZN
Extruder
1x V6 Heat Sink Short Distance 1.75mm M7 (for direct drive) https://ebay.to/2OYcebJ
1x V6 Throat 4.1mm Through (M7 throat, M6 heat block) https://ebay.to/2VDTcvS http://amzn.to/2toFqS3
1x PTFE Teflon Tube 2MM ID 4MM OD For 1.75MM Filament https://ebay.to/2DLCUto https://amzn.to/2VB9cPm
1x Extruder 0.4mm Nozzle 1.75mm https://amzn.to/3mJobl4
4x 30mm x 10mm 24V Fan https://ebay.to/2Fve8iZ https://amzn.to/2Q0l8ID
1x 2M NTC 100K Thermistor https://ebay.to/3eSRxdt https://amzn.to/3aE1JDi
Bed
1x 3/32" T x 10" W x 12" L Clear Glass Sheet https://bit.ly/2zyC5mZ
1x Aluminum Y Carriage Anodized Plate Upgrade V2 https://ebay.to/3cKXKqa http://amzn.to/2HdEMJa
7x SC8AJ 8mm Adjustable Bearing (for both X and Y carriage, don't compress these bearings too tight, in fact you don't have to tight them much at all) https://ebay.to/2QgCNro https://amzn.to/3bPE8RT
4x M3 Thumb Nut https://ebay.to/2SnPjcP http://amzn.to/2oLaCa0
4x 15mm 5/8" Binder Clip https://amzn.to/3prXpzH
Wires
1x 800mm Stepper Motor Cable Extension (for X motor) https://ebay.to/2OQa4sI https://amzn.to/2DtQ6SC
1x 1500mm Stepper Motor Cable Extension for E motor https://ebay.to/2OQa4sI https://amzn.to/2BeeWnT
1x 1500mm 24V Heater Extension https://ebay.to/2KcE7KD https://amzn.to/3cKNlL9
1x 24 AWG Wire Extension (for fans) https://ebay.to/3eL5B97 https://amzn.to/2S2exx5
Thermostats
1x Digital Computer Thermometer https://ebay.to/2zqvcDT https://amzn.to/2Sdb0dn
1x Digital LED Microcomputer Thermostat https://ebay.to/2Bwa6Sb
1x NTC 10K Thermistor (for microcomputer thermostat) https://ebay.to/3bE7TF3
Heat Sinks
11x 9x9x12mm Heat Sink (for stepper drivers) https://ebay.to/2ScmgGT https://amzn.to/2xZYRn1
26x 20x20x10mm Heat Sink (16 for TL-Smoother, 9 for stepper motors, and 1 for the mainboard) https://ebay.to/2VzZXiu https://amzn.to/2SgpHMI
4x 40x40x11mm Heat Sink (for stepper motors) https://ebay.to/2PTtXj6 https://amzn.to/2QHVCsx
1x 25x20x0.20mm Thermal Tape https://ebay.to/3cKPCWH https://amzn.to/2UZmz9Q
Others
8x M2x12 Hex Socket Screw (for belt tensioners, filament stand runout sensor mount, filament runout sensor case) https://ebay.to/2xbVv00 https://amzn.to/2V0NvWM
17x M3x6 Set Screw (for locking XYZ rods, Teflon tube, the plug on the X carriage, bed plug, belt tensioners, and shutdown switch) https://ebay.to/2BdPpLP https://amzn.to/2KbfSwp
19x M3x12 Hex Socket Screw https://ebay.to/2A1H0Jx https://amzn.to/2KbGQUw
10x M3x20 Hex Socket Screw https://ebay.to/2A1H0Jx https://amzn.to/2qSjF99
15x M3x25 Hex Socket Screw https://ebay.to/2A1H0Jx https://amzn.to/2DHC0y9
9x M3x30 Hex Socket Screw https://ebay.to/2A1H0Jx https://amzn.to/2DHC0OF
1x M4x10 Hex Socket Screw (for extruder X lever bearing) https://ebay.to/2KqWH1A https://amzn.to/2DHgecJ
12x M2x3x3.2 Brass Insert Nut https://ebay.to/2Y5bec5 https://amzn.to/2VASGyX
40x M3x3x4.3 Brass Insert Nut https://ebay.to/2VWwu13 https://amzn.to/2ztkrkh
31x M3x3x5.3 Brass Insert Nut https://amzn.to/2KxA2S2
2x GT2 3mm Bore 20Teeth Aluminum Toothed Timing Belt Idler https://ebay.to/3eU61Kb https://amzn.to/2Sj5ndO
1x GE4E 4x12x5mm Spherical Bearing https://goo.gl/nFMwNq http://amzn.to/2xOT5zi
1x MR52ZZ 2x5x2.5mm Bearing (for runout sensor) https://ebay.to/2zq5H5G https://amzn.to/2Y9vklB
2x 6902 2RS 15x28x7MM Bearing (for filament holder) https://ebay.to/2CscpY1 https://amzn.to/3aCplZf
4x TL-Smoother Plus https://ebay.to/3ld1LbK https://amzn.to/2SdFFHz
1x Aluminum Tape (use this as a heat shield for the fan ducts and BL-Touch cover)https://ebay.to/3cQGW18 https://amzn.to/2zBkU4d
1x Super Glue 33106 (glue the aluminum tape to prevent it from pealing off) https://ebay.to/3cKTU0e https://amzn.to/2S7xVsG
Optional Items:
1x 16 AWG Wire Extension (for converter and heated bed) https://ebay.to/2Dx2eCu https://amzn.to/2VAoEeB
4x Linear Bearings LM8UU 8MM (good ones will not feel rough when sliding, most of them in the market are pretty bad) https://ebay.to/2DrobTs https://amzn.to/2znrqLx
1x GT2 Belt https://ebay.to/2EC4vwM https://amzn.to/2Kycuwx
1x SanDisk Extreme 16GB SDHC UHS-I Card https://ebay.to/2Bx0RRv https://amzn.to/2EHBr82
1x 3D Printer ID5mm OD11mm 26 Tooth Half Linear Stainless Extruder Drive Gear https://ebay.to/2Uy5tn1
1x 8 x 3 mm Round Magnet (for easy/removable AC-DC power cover fan replacement) https://ebay.to/2Y812zE https://amzn.to/2pEzoeC
1x 3M Mounting Tape https://goo.gl/gXDStt http://amzn.to/2p65Lx8
Tools:
X-Acto X3201 Knife https://ebay.to/2Y6Nogm https://amzn.to/2S3gtmF
X-Tronic 3020-XTS Soldering Iron https://ebay.to/3p3Nzny https://amzn.to/355AqCw
Soldering Wire 63-37 1mm https://ebay.to/3l1YX0O https://amzn.to/2IbiUE8
Desoldering Bulb https://ebay.to/3kaW2l3 https://amzn.to/3ezCRjJ
Heat Shrink Assorted https://ebay.to/35cIFuQ https://amzn.to/35chWP4
4 Pc Adjustable Wrench Set http://www.harborfreight.com/4-piece-steel-adjustable-wrench-set-903.html
5 in. Curved Jaw Locking Pliers http://www.harborfreight.com/5-inch-curved-jaw-locking-pliers-39666.html
WONDER MASTER 4.2V Electric Screwdriver Kit https://amzn.to/32wR10m
36 Pc 3 in. Screwdriver Bit Set http://www.harborfreight.com/36-pc-3-in-screwdriver-bit-set-68817.html
Glass Cutter http://www.harborfreight.com/glass-cutter-96032.html
Snap Ring Pliers https://ebay.to/2xdEMcM https://amzn.to/2Lsnjjt
Note: You're already getting these in the "Machine Settings RN-3DP Cura 3.6" file.
;Start G-code
M107 ;Start with the fan off
G21 ;Metric values
G90 ;Absolute positioning
G28 ;Homing
M117 Auto X leveling... ;Put message on LCD screen
G1 Z15 F1800 ;--Level X rods (F value is mm/minute)
G0 X210 Y265 F15000 ;--Level X rods
G1 Z235 F1800 ;--Level X rods
G1 Z15 F1800 ;--Level X rods
G0 X25 Y68 F15000 ;Coming back for homing fast
G28 ;Homing
G92 Z0. ;Z offset lower = Z pos, lift = Z neg
M117 Auto bed leveling... ;Put message on LCD screen
G29 ;Run auto bed level during cool bed tempersture
G1 Z150 F1800 ;Move Z up
M104 S{material_print_temperature_layer_0} ;Start heating extruder
M140 S{material_bed_temperature_layer_0} ;Start heating bed
G4 P2000 ;Delay 2 seconds for LCD message
M109 S{material_print_temperature_layer_0} ;Wait for extruder to reach temp before proceeding
G4 P2000 ;Delay 2 seconds for LCD message
M190 S{material_bed_temperature_layer_0} ;Wait for bed to reach temp before proceeding
G4 P2000 ;Delay 2 seconds for LCD message
M25 ;Wait for user
M117 Ready to print? ;Put message on LCD screen
G0 X105 F15000 ;Move X to center
G92 E0 ;Zero the extruder
G1 E10 F250 ;Extrude filament to nozzle
G92 E0 ;Zero the extruder
M117 Printing... ;Put message on LCD screen
;End G-code
M104 S0 ;Extruder heater off
M140 S0 ;Heated bed heater off
G91 ;Relative positioning
G1 E-10 F30000 ;Retract the filament a bit before lifting the nozzle, to release some of the pressure
G1 Z+15 F1800 ;Move Z up a bit
G90 ;Absolute positioning
G0 X210 Y265 F15000 ;--Auto shutdown - Move bed to the front
G1 Z235 F1800 ;--Auto shutdown - Move move Z up all the way
M117 Auto shutdown... ;--Auto shutdown - Put message on LCD screen
G4 P600000 ;--Auto shutdown - Delay 5 minutes for the hotend to cool down
G1 X215 ;--Auto shutdown - Move X to trigger the power switch
M84 ;Steppers off
Weird Moves
Problem: Printer keeps making random moves during print using SD Card.
Solution 1: Try using a new eBay Amazon SanDisk Extreme 16GB SDHC SD Card.
Solution 2: Try using shorter 10 pin ribbon cables. 45CM or shorter is a safe length. The longer the cable, the more errors you will get.
Solution 3: The SD card reader might be bad. Buy a new eBay Amazon 2004 LCD SD Card Reader.
Problem: If your HICTOP printer is making random weird moves and shutting down when using SD card, it means that part of the LCD screen is touching the metal piece that is touching the Y step motor. If you have the old LCD screen that is all metal, you will have this problem. For your information, HICTOP now provides the metal cover that comes with plastic nuts to separate the LCD screen and the metal cover to fix this problem.
Solution: Remove the LCD screen from the printer frame and put it aside. Avoid the LCD ribbon wires touching the step motor wires.
Main Board & SD Card Reader
Problem: From April 2017, HICTOP now has a built-in SD card reader on the main board. Thus, the SD card reader on the LCD is no longer usable.
Solution: Buy an Amazon MKS Base V1.6 3D Printer Controller Board to replace it.
LCD Doesn't Work
Problem: LCD doesn't work when plugging in to the main board.
Solution: Some Chinese MKS Base V1.4 or V1.5 main boards have the EXP2 and EXP1 upside down, so just flip the EXP2 and EXP1 plugs upside down and force plug in accordingly.
Loud Converter
If your converter's fan is making a loud noise, simply replace the fan with a new one here eBay Amazon 24V 60x60x15mm Fan.
Uneven Bed ABS
Problem: If you experience uneven bed when printing ABS out of nowhere, in this case the proximity sensor's temperature matters. If the sensor is cool during the preheat, given that the X carriage is 100mm or more above the bed, when the sensor is doing G29 or probing the bed, the cool sensor will get warmer and warmer throughout the bed and the sensor will give out inaccurate numbers as its temperature changes.
Solution: Do Auto Home, and then preheat ABS. In this case the sensor should be about 15mm above the bed and getting warmed up by the bed's temperature. Once the sensor starts to prob the bed, its temperature shouldn't change wildly and it should give out accurate numbers.
Solution: Or always do G29 or probing the bed before heating the bed.
Solution: Make sure the countersinks on the bed are good so the screws won't be pushing the glass up causing uneven bed.
ABS Bubbling
Problem: ABS filament is bubbling when extruding.
Solution: Bake the ABS filament in the oven at 175F for 1 hour or 2 hours and then try printing. It really depends on how much moisture is in the filament. The more moisture, the longer the bake time will have to be.
Solution: If you don't have an oven, buy a eBay Amazon dehydrator and dehydrate the ABS filament overnight with 158F or 70C. Cut big enough hole on 3 trays, and you should be able to fit 2 1kg spools in there.
PLA Clogging Nozzle, Heat Creep
Problem: PLA keeps clogging at the throat even with new nozzle and new throat.
Solution 1: Check the heat sink cooling fan, you may need to replace it.
Solution 2: If it's still clogging, try increase the extruder spring tension.
Solution 3: If it's still clogging, try blowing cool air through the printer.
Solution 4: If it's still clogging, try printing at a lower temperature like 200C or 190C.
Solution 5: If it's still clogging, throw away your filament, and buy a better quality filament.
Proximity Sensor
Problem: Proximity sensor wire(s) get broken inside. After a while these wires do get broken especially around the extruder flexing (the first curve).
Problem: It might even be serious like it would actually blow up your main board.
Solution: Buy new proximity sensor.
Heat Drops Randomly
Problem: Heat drops and the printer stops.
Solution: Check the heat sensor wires, they might be broken inside somewhere. Just replace the sensor would be the best solution.
Weak Z Motors, Repeat or Dipping on First Layer
Problem: Z motors keep dropping on first layer.
Solution: Check to see if the fan for the TL-Smoother boards is still working. Also, clean up any build up dust on the boards by using an electrical cleaner spray https://amzn.to/3kLw5Kb and blow them off again with compressed air.
Random Over Extrusion
Problem: Random over extrusion on some layers at the same spots every print.
Solution 1: Try different filament from different brand, the one you're using might have an inconsistency problem.
Solution 2: Try printing using USB cable and see if the over extrusion will still occur. If it does, then there is possibly a problem with SD card, SD card reader or the main board.
Nozzle Keeps Clogging
Problem: Nozzle keeps clogging, the drive gear keeps spinning, and the filament doesn't move.
Solution: The extruder spring lost its tension, maybe due to a deformed extruder X lever. Increase the extruder spring tension, replace the nozzle, and start printing.
Solution: Also check for unstable temperature. It may just got too cold to extrude, then got clogged, and then back to normal temp.
⚠️ Disclaimer: This section contains affiliate links to products. We may receive a commission for purchases made through these links.
Similar models
thingiverse
free
ANET A6 UPGRADE to SKYNET 2.3.2 AUTO for CURA 2.6.2 by Sirassassin
...140 e-3 x+1 y+200 f9000 ;move z up a bit and retract filament even more
m84 ;steppers off
g90 ;absolute positioning
red no coping
thingiverse
free
Box Switch auto ShutDown by P69Greco
...olute positioning
m107 ;turn the fan off; -- end of end gcode --
g4 s120; attendi 2 minuti
g1 x0 y210 f2000; turn off print
thingiverse
free

CR-10 v3 Hermera + BLTouch + Filament sensor by f3bandit
... ;move to side a little
g1 x10.4 y20 z0.28 f1500.0 e30 ;draw the second line
g92 e0 ;reset extruder
g1 z2.0 f3000 ;move z axis up
thingiverse
free

Simplify3D Snapmaker 2.0 A350 Profile by CarvedArt
...rformed a backlash calibration and use the numbers from your test. simply add the gcode to the beginning of your starting script.
thingiverse
free

CR-200B extruder and filament sensor relocation braces by pienjo
...ing holes for the stepper motor and the extruder.
this requires extending the cables for the stepper motor and filament detector.
grabcad
free

3D Printer Mod Cubepro 3D systems Retrofit
... plate. filament runout sensors. 500 watt enviroment heater. dei thermal insulated enclosure. and of custom paint and vinyl wrap.
thingiverse
free
Anet A8 auto off by JUHHisi
... the top
g1 x198 f3600 ; move 198mm to the right
g1 x-10 f3600 ; move 8mm to the left
m84 ;steppers off
g90 ;absolute positioning
thingiverse
free

SN04 Sensor holder for ANET A8 by AUREL_14
...is command: m851 z-x.xx where x.xx is the noted value.
in a terminal, send this command: m500 (to sauve the offset in the eeprom)
thingiverse
free

DDW 1/10 RC M-Drift 1 RWD Chassis by DarkDragonWing
...isclaimer: this section contains affiliate links to products. we may receive a commission for purchases made through these links.
thingiverse
free
Anet A8 Profile
...g90 ;absolute positioning
g1 y190 f9000 ;use this line if you want the bed to move to the front. delete if not.
m84 ;steppers off
Darkdragonwing
thingiverse
free

Servo Switch 5A by DarkDragonWing
...isclaimer: this section contains affiliate links to products. we may receive a commission for purchases made through these links.
thingiverse
free

Servo Rev Box by DarkDragonWing
...isclaimer: this section contains affiliate links to products. we may receive a commission for purchases made through these links.
thingiverse
free

DDW RC Door Hinge by DarkDragonWing
...isclaimer: this section contains affiliate links to products. we may receive a commission for purchases made through these links.
thingiverse
free

Xpresso K1 Parts by DarkDragonWing
...isclaimer: this section contains affiliate links to products. we may receive a commission for purchases made through these links.
thingiverse
free

DDW RC Hood Hinges by DarkDragonWing
...isclaimer: this section contains affiliate links to products. we may receive a commission for purchases made through these links.
thingiverse
free

DDW RC Door Lock by DarkDragonWing
...isclaimer: this section contains affiliate links to products. we may receive a commission for purchases made through these links.
thingiverse
free

Axial SCX10 Dodge Ram Front Bumper Bar by DarkDragonWing
...isclaimer: this section contains affiliate links to products. we may receive a commission for purchases made through these links.
thingiverse
free

DDW RC Mesh Mount by DarkDragonWing
...isclaimer: this section contains affiliate links to products. we may receive a commission for purchases made through these links.
thingiverse
free

DDW RC Door Lock Adjustable by DarkDragonWing
...isclaimer: this section contains affiliate links to products. we may receive a commission for purchases made through these links.
thingiverse
free

1/10 1970 Dodge Challenger Parts by DarkDragonWing
...isclaimer: this section contains affiliate links to products. we may receive a commission for purchases made through these links.
Ddw
thingiverse
free

Another DDW m-Drift 1 floor by matteobedon
...tteobedon
thingiverse
made another floor for ddw m-drift 1 rwd drift chassis.
made this because i don't need a larger floor.
thingiverse
free

DDW RC Door Hinge by DarkDragonWing
...isclaimer: this section contains affiliate links to products. we may receive a commission for purchases made through these links.
thingiverse
free

DDW RC Hood Hinges by DarkDragonWing
...isclaimer: this section contains affiliate links to products. we may receive a commission for purchases made through these links.
thingiverse
free

DDW RC Door Lock by DarkDragonWing
...isclaimer: this section contains affiliate links to products. we may receive a commission for purchases made through these links.
thingiverse
free

DDW RC Mesh Mount by DarkDragonWing
...isclaimer: this section contains affiliate links to products. we may receive a commission for purchases made through these links.
thingiverse
free

DDW RC Door Lock Adjustable by DarkDragonWing
...isclaimer: this section contains affiliate links to products. we may receive a commission for purchases made through these links.
thingiverse
free

DDW RC Continuous 4.3G Servo Bottom Case by DarkDragonWing
...isclaimer: this section contains affiliate links to products. we may receive a commission for purchases made through these links.
thingiverse
free

DDW RC MG996R Servo ESC Switch Case by DarkDragonWing
...isclaimer: this section contains affiliate links to products. we may receive a commission for purchases made through these links.
thingiverse
free

DDW RC Wooden Military Crate Box by DarkDragonWing
...isclaimer: this section contains affiliate links to products. we may receive a commission for purchases made through these links.
thingiverse
free

DDW 1/10 RC M-Drift 1 RWD Chassis by DarkDragonWing
...isclaimer: this section contains affiliate links to products. we may receive a commission for purchases made through these links.
Ronin
turbosquid
$1

Black Ronin Tomahawk
... available on turbo squid, the world's leading provider of digital 3d models for visualization, films, television, and games.
3d_export
$10

33 ronin SAI 3D Model
...33 ronin sai 3d model
3dexport
sai sword ninja weapons
33 ronin sai 3d model taneugene934 79107 3dexport
turbosquid
free

Black Ronin Battle Knife
... available on turbo squid, the world's leading provider of digital 3d models for visualization, films, television, and games.
turbosquid
$7

Holly Hunt Ronin Table Lamp
...holly hunt ronin table lamp for download as 3ds, obj, and fbx on turbosquid: 3d models for games, architecture, videos. (1680711)
3d_export
$5

ronin - avengers endgame
...s endgame
3dexport
excellent for small size 3d printing.<br>simple sketchup modeling.<br>ideal model for papercraft.
turbosquid
$6

Ronin LED Table Lamp by Wade Logan
...amp by wade logan for download as mat, 3ds, max, obj, and fbx on turbosquid: 3d models for games, architecture, videos. (1513289)
3d_export
$6

Black Widow and Ronin - avengers endgame
...s endgame
3dexport
excellent for small size 3d printing.<br>simple sketchup modeling.<br>ideal model for papercraft.
3d_export
$12

Katana 3D Model
...ninja blade knife sword stand display long warrior shogun ronin ancient traditional antique katana 3d model firdz3d 73142...
unrealengine
$27

Bandit Ronin
...bandit ronin
unreal engine marketplace
medieval japan style bandit/ronin ready to be a part of your projects.
sketchfab
$4

Ronin
...d this motion to give your character some personality!
duration: 10 seconds - ronin - buy royalty free 3d model by wondarstudios
Hictop
thingiverse
free

Hictop - Adjustable z Endstop by ptk21
...hictop - adjustable z endstop by ptk21
thingiverse
adjustable z endstop for hictop
thingiverse
free

Hictop 3d LCD Befestigung by festus402
...hictop 3d lcd befestigung by festus402
thingiverse
hictop 3d lcd befestigung
thingiverse
free

Cable chain HICTOP by Insani3D
...cable chain hictop by insani3d
thingiverse
iniciando la modificación de nuestra hictop, se diseña una eslabón a medida.
thingiverse
free

hictop y belt mount by polpetras
...hictop y belt mount by polpetras
thingiverse
hictop aluminum prusa y belt mount
thingiverse
free

Pen Holder for Hictop ender by basolur
...pen holder for hictop ender by basolur
thingiverse
this is a simple pen holder to use a hictop ender as a plotter.
thingiverse
free

remix for hictop mount by chibi_hero
...iverse
edit. made recesses for mounting deeper.
remixed this with http://www.thingiverse.com/thing:1323225
for my hictop 3dp-11.
thingiverse
free

Hictop 3DP-17 Parts by Adranovik
...hictop 3dp-17 parts by adranovik
thingiverse
printed parts for the hictop prusa eds-17 with auto level
thingiverse
free

Hictop xaxis clamp by Gen0idea
...oken x-axis belt clamp on the hictop printer.
printed in a different colour to the original to differentiate it as a replacement.
thingiverse
free

Hictop xaxis clamp by Gen0idea
...oken x-axis belt clamp on the hictop printer.
printed in a different colour to the original to differentiate it as a replacement.
thingiverse
free

Hictop i3 RAMPS Board Cover
...hictop i3 ramps board cover
thingiverse
cover for the stock ramps 1.3 board on the hictop i3 clone (2015 model).
3Dp
turbosquid
$15

ELEPHANT / / 3DP Animation Studio
... available on turbo squid, the world's leading provider of digital 3d models for visualization, films, television, and games.
turbosquid
$15

GOAT / / 3DP Animation Studio
... available on turbo squid, the world's leading provider of digital 3d models for visualization, films, television, and games.
turbosquid
$100

Gandhi Salt March 3DP
...ds, dxf, lwo, obj, wrl, x, c4d, fbx, 3dm, blend, lxo, and dae on turbosquid: 3d models for games, architecture, videos. (1447208)
3d_export
free
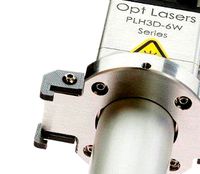
z-morph 3dp rear hook opt lasers
...also accessible on:<br>to find out more about the functionality of laser 3d printers, take a look at the following webpage:
3d_export
free
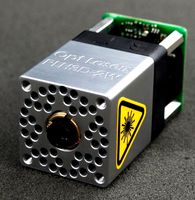
cnc 3dp laser engraving head opt lasers
...n also be found for free at:<br>if you want to take a look at the specifications of this laser head, please visit the link:
3d_export
free
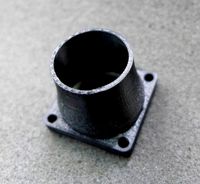
cnc 3dp laser nozzle for 2w laser opt lasers
...logy that gave birth to cutting and engraving laser heads this laser nozzle was designed for, read the article in the link below:
3d_export
free
z-morph 3dp front hook opt lasers
...k is also available from:<br>to find out more about the 3d laser printer engraver technology, you can visit the link below:
3d_export
free
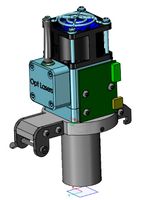
z-morph 3dp 6w engraving laser head
...e via:<br>if you want to learn the specifications of the 6w opt lasers cutting and engraving laser head, visit the website:
3d_export
$5

katar
...occlusion, curvature, world space normals, thickness, position.<br>fbx, obj, blend, 3dp 3ds, glb, ply, stl, usdc, x3d, mtl, dae,...
thingiverse
free
Robotics Feed 3DP
...ector-2
side wall extrusion 3dp connector-2
bevel box -1
l dt connector 1-2
l dt connector 2-2
arc and back plate 3dp connector-1
12
3ddd
free

декор№12
...декор№12
3ddd
декор№12
turbosquid
$25

12
... available on turbo squid, the world's leading provider of digital 3d models for visualization, films, television, and games.
turbosquid
free

bed 01 12/12/2019
...rbosquid
free 3d model bed_01_12/12/2019 for download as max on turbosquid: 3d models for games, architecture, videos. (1482189)
3d_export
$5

12
...12
3dexport
карабин сайга с рожком и патроном
turbosquid
$24

Chandelier MD 89330-12+12 Osgona
... chandelier md 89330-12+12 osgona for download as max and fbx on turbosquid: 3d models for games, architecture, videos. (1222937)
design_connected
$29

Nuvola 12
...nuvola 12
designconnected
gervasoni nuvola 12 computer generated 3d model. designed by navone, paola.
design_connected
$25

Kilt 12
...kilt 12
designconnected
zanotta kilt 12 computer generated 3d model. designed by progetti, emaf.
design_connected
$11

Domino 12
...domino 12
designconnected
zanotta domino 12 computer generated 3d model. designed by progetti, emaf.
design_connected
$9

Croco 12
...croco 12
designconnected
gervasoni croco 12 computer generated 3d model. designed by navone, paola.
design_connected
$16

X.12
...x.12
designconnected
bernini x.12 chairs computer generated 3d model. designed by franco poli.
Printer
archibase_planet
free
Printer
...inter
archibase planet
printer laser printer pc equipment
printer n120614 - 3d model (*.gsm+*.3ds) for interior 3d visualization.
archibase_planet
free
Printer
...rchibase planet
laser printer office equipment computer equipment
printer - 3d model (*.gsm+*.3ds) for interior 3d visualization.
turbosquid
$100
Printer
...er
turbosquid
royalty free 3d model printer for download as on turbosquid: 3d models for games, architecture, videos. (1487819)
turbosquid
$3
Printer
...turbosquid
royalty free 3d model printer for download as max on turbosquid: 3d models for games, architecture, videos. (1670230)
turbosquid
$1
printer
...turbosquid
royalty free 3d model printer for download as max on turbosquid: 3d models for games, architecture, videos. (1595546)
turbosquid
$1
printer
...turbosquid
royalty free 3d model printer for download as max on turbosquid: 3d models for games, architecture, videos. (1595105)
turbosquid
$10
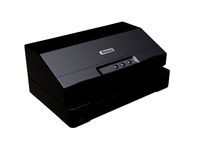
Printer
...id
royalty free 3d model printer for download as max and 3dm on turbosquid: 3d models for games, architecture, videos. (1607146)
turbosquid
$7
Printer
...royalty free 3d model printer for download as ma, ma, and obj on turbosquid: 3d models for games, architecture, videos. (1644580)
turbosquid
$30
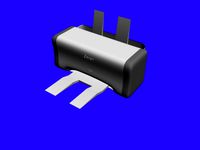
Printer
... available on turbo squid, the world's leading provider of digital 3d models for visualization, films, television, and games.
turbosquid
$20
Printer
... available on turbo squid, the world's leading provider of digital 3d models for visualization, films, television, and games.
