Thingiverse
Davis VantageVue Aspirated Solar Radiation Shield by Sparekey159
by Thingiverse
Last crawled date: 2 years, 10 months ago
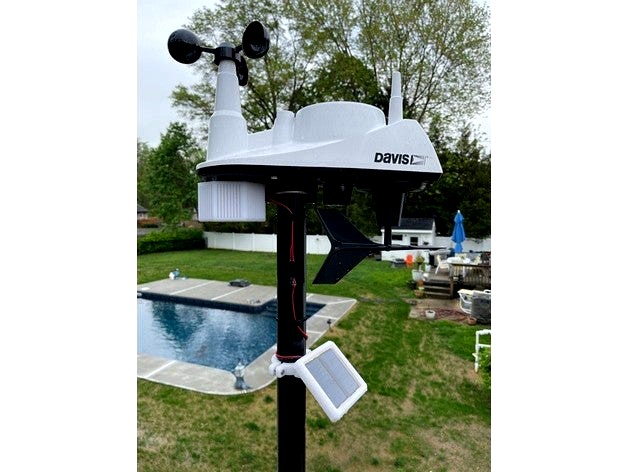
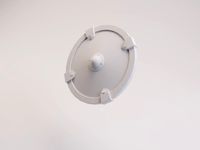
An aspirated radiation shield uses a fan to circulate fresh air over the temperature and humidity sensor during sunny conditions to mitigate the effects of sunlight heating the air within the shield. This project consists of two parts: the radiation shield with fan and the solar panel to power it. This project is designed for a Davis VantageVue sensor suite mounted on a 1-5/8" pole.
Parts Needed
You will need some additional parts, listed below:
Fan - 25mm 5V Fanhttps://www.amazon.com/gp/product/B08D8VNLHD/ref=ppx_yo_dt_b_search_asin_image?ie=UTF8&psc=1
Solar panels - 68mmx37mm / 2.67"x1.45" 5V Solar Cellshttps://www.amazon.com/gp/product/B0736W4HK1/ref=ppx_yo_dt_b_search_asin_image?ie=UTF8&psc=1
Outdoor Silicone Sealant/caulkhttps://www.amazon.com/DAP-M90015-10-1OZ-Wind-Seal/dp/B003YHEB4W/ref=sr_1_9?dchild=1&keywords=silicone+caulk+outdoor&qid=1625113550&s=hi&sr=1-9
Plexi-glass, lexan or glass sheet 2mm/.080in thick
Wire - 22AWG about 1ft/33cm
Resistor 5Ohm, 0.5watt
Solder and Heat-shrink tubing
M3x12mm bolts and nuts - 4X
M4x14mm bolts and nuts - 2x
Zip ties - 2x
Wire Connector - Recommended but optionalhttps://www.amazon.com/gp/product/B081JG4KR5/ref=ppx_yo_dt_b_search_asin_image?ie=UTF8&psc=1
Printing and Assembly Instructions
All parts should be printed in a material that can withstand the abuse it is likely to see being outdoors 24/7. I can make no suggestion as to what is the best material to use in your environment. I printed mine in white PETG but I do not expect it to last forever. All parts can be printed without support except for the radiation shield. Whichever material you choose, it should be white as it is the best color for reflecting solar radiation, and that is exactly what we are trying to do.
The radiation shield should only need support under the side vent. The fan can be mounted with the screws supplied with the fan by inserting the screws through the access holes on the shield and using a nut on the inside. The fan should blow inwards, towards the sensor, sucking in air from the vent that points downward. Solder enough wire on the fan leads as needed to reach the desired solar panel mounting location. The fan wire can be routed through the small hole at the end nearest the pole. The shield is mounted using the two screws that hold the original shield in place.
Solar panel assembly animation - https://youtu.be/qUbgcXARDko
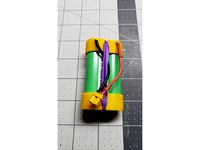
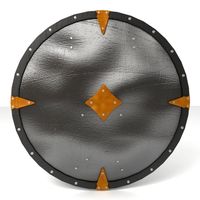
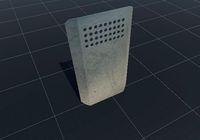
Once you have printed all of the solar panel parts, solder two 5v solar cells in parallel(+ to + and - to -). Pay attention to how they will sit in the base part and make sure your wires will fall into the wire grooves. Solder one leg of the 5Ohm resistor to one of the (+) pads on the solar cells. Attach the red wire to the other leg of the resistor and the black wire to (-) pad on the solar cells. If you are using the connectors I suggested above, you can feed the wire through the hole near the pole mount and attach a connector. If you are not using connectors, be sure to feed the wire from the shield through the access hole near the pole mount before you solder it to the solar panels! Also note, the access hole goes through both the base part and the mount part so it is best to have them assembled using 4x M3x12 bolts and nuts before feeding the wire through. Once you have the wire fed through the hole and everything is tucked in, you can use a dot of adhesive to hold them centered in place to make the rest of the assembly a little easier. next, cut a piece of lexan to a 77mmx83mm rectangle and place it on top of the solar panels. Put a bead of sealant on the inside lip of the lid ring and place it on top, wipe off any excess on the glass. Fill the gap between the base and the lid ring with sealant and allow it to cure (be sure to position the part so it is level while it cures.) Fill the wire hole with sealant. Fill the four screw access holes in the shield vent with sealant(careful, not too much!)
Mount the solar panel to the pole, once it is fully cured, about a foot below the sensor suite. Be sure it is facing the south sky if you live in the northern hemisphere or the north sky if you live in the southern hemisphere(your wx station should already be oriented north-south so this should be easy). I stuffed my wire connectors with silicone based dielectric grease paste to prevent water ingress and corrosion. Zip tie the wire to the pole and let it whirrrrrrrrr!
Notes for improvement
In hindsight, I'm not particularly keen on the solar panel being assembled entirely with sealant. It should work fine under most circumstances however, if the plastic starts to warp at some point, it won't likely last much longer. You can add some small plastic screws around the sides of the ring lid to attach it to the base a little better.
The fan I listed is not waterproof. Under most conditions, it shouldn't get too wet but it is out there in all the elements all year so I am not too sure how long it will last. I tried to find 25mm waterproof fans that run on 5v but didn't have much luck. If you can find a fan that fits the bill, please share in the comments.
If it is worth the work for you, you can drill holes in the mounting pole to hide the wire inside the pole for a cleaner look.
The fan really requires full direct sunshine to operate properly, that darn hindsight is telling me this may work better with three or even four solar cells instead of two. My thinking was that it's sole purpose is to run when the unit is in full direct sunlight so two would be sufficient.
Parts Needed
You will need some additional parts, listed below:
Fan - 25mm 5V Fanhttps://www.amazon.com/gp/product/B08D8VNLHD/ref=ppx_yo_dt_b_search_asin_image?ie=UTF8&psc=1
Solar panels - 68mmx37mm / 2.67"x1.45" 5V Solar Cellshttps://www.amazon.com/gp/product/B0736W4HK1/ref=ppx_yo_dt_b_search_asin_image?ie=UTF8&psc=1
Outdoor Silicone Sealant/caulkhttps://www.amazon.com/DAP-M90015-10-1OZ-Wind-Seal/dp/B003YHEB4W/ref=sr_1_9?dchild=1&keywords=silicone+caulk+outdoor&qid=1625113550&s=hi&sr=1-9
Plexi-glass, lexan or glass sheet 2mm/.080in thick
Wire - 22AWG about 1ft/33cm
Resistor 5Ohm, 0.5watt
Solder and Heat-shrink tubing
M3x12mm bolts and nuts - 4X
M4x14mm bolts and nuts - 2x
Zip ties - 2x
Wire Connector - Recommended but optionalhttps://www.amazon.com/gp/product/B081JG4KR5/ref=ppx_yo_dt_b_search_asin_image?ie=UTF8&psc=1
Printing and Assembly Instructions
All parts should be printed in a material that can withstand the abuse it is likely to see being outdoors 24/7. I can make no suggestion as to what is the best material to use in your environment. I printed mine in white PETG but I do not expect it to last forever. All parts can be printed without support except for the radiation shield. Whichever material you choose, it should be white as it is the best color for reflecting solar radiation, and that is exactly what we are trying to do.
The radiation shield should only need support under the side vent. The fan can be mounted with the screws supplied with the fan by inserting the screws through the access holes on the shield and using a nut on the inside. The fan should blow inwards, towards the sensor, sucking in air from the vent that points downward. Solder enough wire on the fan leads as needed to reach the desired solar panel mounting location. The fan wire can be routed through the small hole at the end nearest the pole. The shield is mounted using the two screws that hold the original shield in place.
Solar panel assembly animation - https://youtu.be/qUbgcXARDko
Once you have printed all of the solar panel parts, solder two 5v solar cells in parallel(+ to + and - to -). Pay attention to how they will sit in the base part and make sure your wires will fall into the wire grooves. Solder one leg of the 5Ohm resistor to one of the (+) pads on the solar cells. Attach the red wire to the other leg of the resistor and the black wire to (-) pad on the solar cells. If you are using the connectors I suggested above, you can feed the wire through the hole near the pole mount and attach a connector. If you are not using connectors, be sure to feed the wire from the shield through the access hole near the pole mount before you solder it to the solar panels! Also note, the access hole goes through both the base part and the mount part so it is best to have them assembled using 4x M3x12 bolts and nuts before feeding the wire through. Once you have the wire fed through the hole and everything is tucked in, you can use a dot of adhesive to hold them centered in place to make the rest of the assembly a little easier. next, cut a piece of lexan to a 77mmx83mm rectangle and place it on top of the solar panels. Put a bead of sealant on the inside lip of the lid ring and place it on top, wipe off any excess on the glass. Fill the gap between the base and the lid ring with sealant and allow it to cure (be sure to position the part so it is level while it cures.) Fill the wire hole with sealant. Fill the four screw access holes in the shield vent with sealant(careful, not too much!)
Mount the solar panel to the pole, once it is fully cured, about a foot below the sensor suite. Be sure it is facing the south sky if you live in the northern hemisphere or the north sky if you live in the southern hemisphere(your wx station should already be oriented north-south so this should be easy). I stuffed my wire connectors with silicone based dielectric grease paste to prevent water ingress and corrosion. Zip tie the wire to the pole and let it whirrrrrrrrr!
Notes for improvement
In hindsight, I'm not particularly keen on the solar panel being assembled entirely with sealant. It should work fine under most circumstances however, if the plastic starts to warp at some point, it won't likely last much longer. You can add some small plastic screws around the sides of the ring lid to attach it to the base a little better.
The fan I listed is not waterproof. Under most conditions, it shouldn't get too wet but it is out there in all the elements all year so I am not too sure how long it will last. I tried to find 25mm waterproof fans that run on 5v but didn't have much luck. If you can find a fan that fits the bill, please share in the comments.
If it is worth the work for you, you can drill holes in the mounting pole to hide the wire inside the pole for a cleaner look.
The fan really requires full direct sunshine to operate properly, that darn hindsight is telling me this may work better with three or even four solar cells instead of two. My thinking was that it's sole purpose is to run when the unit is in full direct sunlight so two would be sufficient.
Similar models
thingiverse
free

Weather Station Shield with Fan by UptonAK
... and create distance from whatever is supporting it. feel free to make a remix. there is a nice flat surface to add things on to!
thingiverse
free

XT60 connector panel mount by grafalex
...s so that you can adjust models if needed.
upd: i re-printed covers and added new photos of the result. photos match models now
thingiverse
free

DIY 6w Solar Charger by EpicHardware
...d in parallel and the maximum they can supply is about 550ma at 9v which then you can use a dc to dc step down converter to 5v.
thingiverse
free

Raspberry Pi 40mm Fan Mount / Bracket by Keshyden
...boost converter increasing the pi's 5v to 12v. i only had 12v fans. if you have a 5v fan, you can wire it straight to the pi.
thingiverse
free

MPSMv2 Rewire Panel by DivePADI
...://www.thingiverse.com/thing:2370329
back adapter (i used screws instead of the clips): https://www.thingiverse.com/thing:2817319
thingiverse
free
18650 holder 1S / 2S
...make sure they are correctly oriented. 1s instructions follow similar steps as described in the2s construction, however: solder two...
grabcad
free

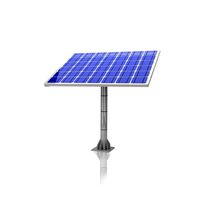
3W Solar Panel Mount
...3w solar panel mount
grabcad
solar panel mount on pole for a 3w solar panel
easy assembly using 2 metal clips
thingiverse
free

Iron soldering vacuum fan by Batubanze
...tors ( you can use jumper cables )
if you have any questions or the slddrt format please contact with me :)
batuhncbk@hotmail.com
thingiverse
free

PC Fan SSD Mount
...g screws don't interfere with the fan blades. if they do, let me know, and i can make a version with countersunk screw holes.
thingiverse
free

Solar garden light by Tmg425
... and 2 18650 batteries to run 5 led lights. lid uses m3 bolt
solar panels i used.. https://www.amazon.com/gp/product/b01dcnszbc
Sparekey159
thingiverse
free

Hot Wheels Track Jump Ramp by Sparekey159
...ramp with built-in connector and solid base. it should print a lot easier with support only needed under the connector tab edges.
thingiverse
free

Squash Ball Feet for Artillery Sidewinder X1 by Sparekey159
...ly without using support. i suggest printing with the screw side on the build plate and using a brim if you need better adhesion.
thingiverse
free

Hot Wheels track Y-splitter Track by Sparekey159
...d in the original. support is only needed under the connector tab edges. i also flattened the top knife edges on the track walls.
thingiverse
free

Artillery Sidewinder X1 Enclosure Vents by Sparekey159
...sing manual supports for the side vents, only under the very top, flat section. i had no issue printing the rest without support.
Davis
3ddd
$1

Davis speakers
... delta , домашний кинотеатр
a set of speakers. brand - davis, model - delta
3ddd
$1

frigerio Davis
... плед
frigerio davis
ширина - 3200 мм.
глубина - 1060 мм.
высота - 780 мм.
max файл - 2010 версия!
design_connected
$13

Davis Drum
...davis drum
designconnected
minotti davis drum computer generated 3d model. designed by dordoni, rodolfo.
turbosquid
$9

Eadie Davies
...oyalty free 3d model eadie davies for download as max and fbx on turbosquid: 3d models for games, architecture, videos. (1682185)
turbosquid
$15

sofa Davis
...ee 3d model sofa davis for download as 3ds, max, obj, and fbx on turbosquid: 3d models for games, architecture, videos. (1158133)
design_connected
$27

Davis Free set01
...davis free set01
designconnected
frigerio davis free set01 computer generated 3d model.
3ddd
$1

Lamp MILES DAVIS
...nish
ø60 x h.40-160 cmhttp://www.eichholtz.com/lamp-miles-davis-0084002887114.aspx
corona mat
3dsmax 2014 / obj / fbx
turbosquid
$11

frigerio Davis
... available on turbo squid, the world's leading provider of digital 3d models for visualization, films, television, and games.
3ddd
$1

стул от Davis Lipse
...т davis lipse
3ddd
davis
качесвенная модель (без текстур) от davis lipse для кафе и баров подойдет для современных интерьеров ;-)
turbosquid
$4

Pouf Minotti Davis
...id
royalty free 3d model pouf minotti davis for download as on turbosquid: 3d models for games, architecture, videos. (1516426)
Aspirated
3d_export
$5

Aspirator bundle
...aspirator bundle
3dexport
aspirator bundle 3d model
turbosquid
$17

Aspire Chair
...squid
royalty free 3d model aspire chair for download as max on turbosquid: 3d models for games, architecture, videos. (1597494)
turbosquid
$15

Aspire Settee
...quid
royalty free 3d model aspire settee for download as max on turbosquid: 3d models for games, architecture, videos. (1597810)
3d_export
free

nose aspirator
...nose aspirator
3dexport
more info and files here:
3d_export
$99

aspire masjid in doha qatar
...aspire masjid in doha qatar
3dexport
aspire masjid in doha qatar
3d_export
$99

aspire tower in doha qatar
...aspire tower in doha qatar
3dexport
aspire tower in doha qatar
turbosquid
$10

Aspirator APRO-110
...3d model aspirator apro-110 for download as max, fbx, and obj on turbosquid: 3d models for games, architecture, videos. (1633733)
turbosquid
$3

VECTRIC ASPIRE MODEL1
... available on turbo squid, the world's leading provider of digital 3d models for visualization, films, television, and games.
turbosquid
$199

Aspire Mosque, Doha, Qatar
...l aspire mosque, doha, qatar for download as ma, obj, and fbx on turbosquid: 3d models for games, architecture, videos. (1419177)
3d_export
$5

Acer Aspire 5050 3D Model
...acer aspire 5050 3d model
3dexport
bun makara computer latop acer
acer aspire 5050 3d model bunjan 10998 3dexport
Radiation
archibase_planet
free

Radiator
...radiator
archibase planet
radiator central heating radiator
radiator - 3d model (*.gsm+*.3ds) for interior 3d visualization.
archibase_planet
free

Radiator
...rchibase planet
radiator heater central heating radiator
radiator n191015 - 3d model (*.gsm+*.3ds) for interior 3d visualization.
archibase_planet
free

Radiator
...rchibase planet
radiator heater central heating radiator
radiator n310815 - 3d model (*.gsm+*.3ds) for interior 3d visualization.
archibase_planet
free

Radiator
...rchibase planet
radiator heater central heating radiator
radiator n151115 - 3d model (*.gsm+*.3ds) for interior 3d visualization.
archibase_planet
free

Radiator
...rchibase planet
radiator heater central heating radiator
radiator n290116 - 3d model (*.gsm+*.3ds) for interior 3d visualization.
archibase_planet
free

Radiator
...rchibase planet
radiator heater central heating radiator
radiator n200314 - 3d model (*.gsm+*.3ds) for interior 3d visualization.
archibase_planet
free

Radiator
...rchibase planet
radiator heater central heating radiator
radiator n160414 - 3d model (*.gsm+*.3ds) for interior 3d visualization.
archibase_planet
free

Radiator
...rchibase planet
radiator heater central heating radiator
radiator n110514 - 3d model (*.gsm+*.3ds) for interior 3d visualization.
archibase_planet
free

Radiator
...se planet
radiator heater central heating radiator
radiator n130115 - 3d model (*.gsm+*.3ds+*.max) for interior 3d visualization.
archibase_planet
free

Radiator
... planet
radiator heater central heating radiator
radiator arbonia n010715 - 3d model (*.gsm+*.3ds) for interior 3d visualization.
Solar
3d_ocean
$4

Solar Panel
...solar panel
3docean
cell panel solar
fully textured solar panel with scaleable solar cells.
3ddd
$1
solar cell
...solar cell
3ddd
солнечная батарея
solar cell
3d_export
$7

Solar Panel
...solar panel
3dexport
perfect solar panel for roof, modular, extensible.
3d_export
$5

solar system
...solar system
3dexport
solar system in c4d, with 8k nasa textures
3d_export
$15

solar system
...nd the other the sun, the earth and the moon, the latter has an animation with camera movement included, the files are in spanish
3ddd
$1
Zumtobel Solar II
...obel solar ii
3ddd
zumtobel , solar
модель направленного светильника solar 2 от zumtobel
3d_ocean
$14
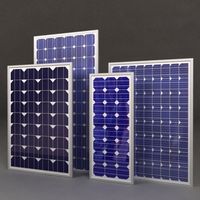
Solar Panels
... materials, hdri map, vray gi setup. four solar panels: type1: 1849 – poly, 2035 – vert. type2: 954 – poly, 1051 – vert. type3...
turbosquid
$29

Solar System
...squid
royalty free 3d model solar system for download as fbx on turbosquid: 3d models for games, architecture, videos. (1236050)
turbosquid
$25
Solar Panel
...osquid
royalty free 3d model solar panel for download as max on turbosquid: 3d models for games, architecture, videos. (1516562)
turbosquid
$25

Solar System
...uid
royalty free 3d model solar system for download as blend on turbosquid: 3d models for games, architecture, videos. (1314058)
Shield
3d_export
$5

shield
...shield
3dexport
shield
3d_export
$5
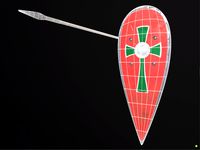
Shield
...shield
3dexport
shield and a spear
3d_ocean
$6
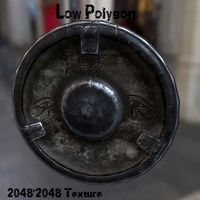
Shield
...shield
3docean
game shield low polygon mei evil shild old shield shield
2048 texture obj,fbx,blend game ready.
3d_export
$5
Shield
...shield
3dexport
a shield that hasn't been made of materials will be available to everyone
3d_ocean
$4
Round Shield
...round shield
3docean
ancient battle fantasy knight medieval shield shields warrior
nice model of round shield.
3d_export
$5

shield
...shield
3dexport
old shield, damaged and covered in mold. every file have a zip folder in with textures.
3d_export
free
metal shield
...metal shield
3dexport
russian metal shield - anti-riot shield.
turbosquid
free

Shield
...shield
turbosquid
free 3d model shield for download as c4d on turbosquid: 3d models for games, architecture, videos. (1164800)
3d_export
$5

fire shield
...fire shield
3dexport
fire shield
turbosquid
$10

SHIELD
...
turbosquid
royalty free 3d model shield for download as obj on turbosquid: 3d models for games, architecture, videos. (1273553)