Thingiverse

Cybersword Mega Man Battle Network by Snoopy3195
by Thingiverse
Last crawled date: 3 years, 1 month ago
This is a scale prop of the cybersword from the Mega Man Battle Network series on the Gameboy Advance designed with led lighting of the blade in mind. Note: Currently I have not printed the whole blade so I can't 100% confirm that there won't be changes need, but the 3 segments so far work.
You will need to print two of these parts: upper core left and right, lower core left and right, core top, either side, side upper and lower, and button holder. Side upper and lower are the side part split into two. You will need to print 7 copies of the blade segment part. To aid in the alignment of the parts, there is a 5mm diameter and 6mm diameter pin. For this pin to fit, you will need to scale it down in your slicer of choice, I scaled my pins to 90% for a snug but removable pin. Parts like the handle and the blade pieces may require some sanding to fit, the part "blade sanding support block" can be slid into a blade piece to keep it in shape.
Printed assembly:
My recommended order of assembly is to combine the upper core pieces and the handle, and tape them tightly together. Use this assembly to align the four lower core pieces together and glue the lower core together. Then glue a upper core left and right together twice, so the upper core is in two pieces and glue the handle to one of them. Glue your two buttons and the switch to their holders and figure out where you want them on the handle. Glue the 12 magnets into the upper core, making sure all the magnets are in the same direction. Do any other mounting of parts you want to do know as once it is glued together, it will be much more difficult to do. Glue the two upper core pieces and the lower core together at the same time. Glue the side upper and lower together for each side, and then glue them to the core. Then glue the two core tops on to the core.
Now onto the blade. Glue the 12 magnets into the blade base and sand the core tops, until the blade base can slide between them. Your two 860mm led strips should be joined by wire at the top at this point. Start by gluing the strips down, starting with the blade tip part. Then glue the next segment to the tip and the leds to the segment. Continue this process from tip to base, until the blade is assembled and the leds are in place.
Electronic assembly:
Note: if you use a different feather, the pins may be different.
Solder the headers to the featherwing and the feather. Solder jumper cables to the featherwing to pins G and EN (next to the speaker and reset switch), a y splitter to gnd (longer row of pins, fourth from the side with the reset button), and to pins A1 and A2 (same side as GND, 5 and 6 from the side with the reset button. Solder two jumper cables to each button and the switch and connect the switch to G and EN and both buttons to gnd with one going to A1 and the other to A2. You may need to make an adapter for the led using a connector that came with the strip and a 3-pin jst-ph connector. Once everything is plugged in, connect the feather to your computer and upload the program. The button to A1 will turn the leds on and off, the button to A2 will cycle between blade modes. The blade modes are remembered and can be cycled with the blade off. The switch will turn the feather on and off, but what mode is set is not remembered. Currently there are three modes: normal, protoman, and darksword. I will add how to add additional modes later.
Parts needed:
Feather M4 express, other feather boards may work
Feather wing propmaker
2m of leds 3.3-5v and neopixel compatible, I used 60 led/m but you can use 144. 144 leds will require editing the program, but is easy to do.
2x 6mm tactile button switches
spdt slide switch- not essential, allows the feather to go into a low power mode
male-female jumper/dupont cables
Headers- male and female to mount the featherwing to the feather
PS: I have almost certainly forgotten something, I will reply to comments and update this if you find anything. Pictures of the completed print will be added later.
Similar models
thingiverse
free

Switch Blade Symmetrical Halves - No Flat Side by Palmtopper
... no flat side for the switch. uses the original covers from the orginal file.
just print two halves and super glue them together!
thingiverse
free

Butterfly Knife Pen by Justdatguy227
...ving when the blade is out.
if you have any troubles, you may need to sand parts down, glue them together, or use common sense.
thingiverse
free

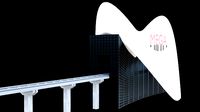
Bitflame Fireplace by miaucl
...th you table-sized fireplace :)
(this is my first thing, please provide feedback and how to improve my contributions, thank you!)
thingiverse
free

Cherry Switch Fidget Gadget w/ LED by lejoiedevivre
... case like these.
step3. assemble them together.
simple! soldering is also optional if it works well.https://youtu.be/ae5ch18vbao
thingiverse
free

Collapsing Darksaber
...s then glue the grips together. the lower part of the has some space left so maybe someone can remix place a light at the bottom.
thingiverse
free

Iron Giant by mckinneyj
...y:
do a dry fit. alignment is crucial if you want it to stand on it's own two feet. then glue them up.
you are done! enjoy
thingiverse
free

Adafruit Feather HUZZAH + Neopixel FeatherWing enclosure by seajseven
...se two modules attached, you can build a wifi arduino-based led display board.
battery pass-through is blocked, usb is available.
thingiverse
free

Burial Blade by HeadlessMoose
...uch as the tolerances will get too small. i have no printed it yet i can not guarantee it will function properly.
-headless moose
cg_trader
$3

Bait rocket | 3D
... the easiest to solve, which is also worth greasing. use instant glue to glue the tube. if the button breaks, use a stronger bar.
thingiverse
free

Laptop Stand by NamNam
...once printed, assemble, the 4 pieces of each side, and glue them together
3) use three ø5mm tube to attach the two sides together

Snoopy3195
thingiverse
free

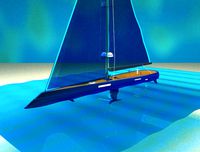
Falcon 9 Horizontal Stand by Snoopy3195
... horizontal stand by snoopy3195
thingiverse
stand for displaying jrad's remix of chemteacher628's falcon 9 horizontally.
thingiverse
free

Handheld Stand by Snoopy3195
...ps vita consoles. by default it will not fit the original gameboy, but it would probably work if you scaled it up in your slicer.
thingiverse
free

AEP7 remix for 120mm printers by Snoopy3195
...nt muzzle1, and front brace pieces. for the other pieces you should get them from here: https://www.thingiverse.com/thing:925847
thingiverse
free

Plotter Attachment for MP Select Mini by Snoopy3195
...s only been tested on a v2. will be updated with pictures of how it goes on, results, and how to convert an image to an stl file.
thingiverse
free

Internal light and power for moon lamp by Snoopy3195
...aa battery holders, 4 aa, one switch, 8 white leds, and 16 1x2mm round magnets. i will update this with the exact parts i bought.
thingiverse
free

Mjolnir Hammer Bic Pen Split for better inscription and 120mm printers by Snoopy3195
...emix. each end does have two alignment holes that use 10cm pins, but are not necessary if you can align them well enough by hand.
thingiverse
free

Star Lord Gun for 120mm printers by Snoopy3195
...s
attach knob a part 1 to part 2 and attach the knob to 9
attach a knob b to both 1 and 5
attach trigger to part 4 if you want it
Network
3ddd
$1
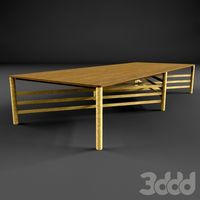
Network table by Henge
...network table by henge
3ddd
henge
network table by henge
3d_export
$35

network office design
...network office design
3dexport
network office 3d model design
turbosquid
$120

Global Network
... available on turbo squid, the world's leading provider of digital 3d models for visualization, films, television, and games.
turbosquid
$40

Road Network
... available on turbo squid, the world's leading provider of digital 3d models for visualization, films, television, and games.
turbosquid
$4

social Network
... available on turbo squid, the world's leading provider of digital 3d models for visualization, films, television, and games.
design_connected
$16
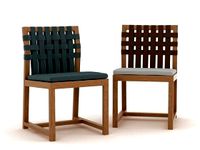
Network 149 chair
...network 149 chair
designconnected
roda network 149 chair computer generated 3d model. designed by dordoni, rodolfo.
design_connected
$16
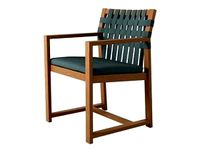
Network 159 armchair
...twork 159 armchair
designconnected
roda network 159 armchair armchairs computer generated 3d model. designed by rodolfo dordoni.
3d_ocean
$15
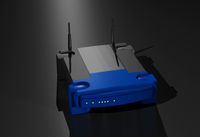
Wireless Broadband Network Router
... computer networking. similar to popular styles of wireless routers. this model was created in 3d studio max 2008 and has a ma...
3d_export
$30

Road Network 3D Model
...
3dexport
roads network highway
road network 3d model download .c4d .max .obj .fbx .ma .lwo .3ds .3dm .stl msaeed 103734 3dexport
turbosquid
$3

DOUBLE NETWORK PLUG
...d model double network plug for download as max, obj, and fbx on turbosquid: 3d models for games, architecture, videos. (1370379)
Mega
3ddd
$1
BoConcept / Mega
...boconcept / mega
3ddd
boconcept
boconcept mega
3ddd
free

Angelo - Mega shoin
... mega shoin , shoin
angelo - mega shoin - 3dmax 2008
3ddd
$1
Комод MEGA
...вана по фото с учетом реальных размеров.
стек не сколапсен, есть возможность регулировки уровня сглаживания.
текстуры в архиве.
3ddd
$1
Hulsta / Mega-design
...hulsta / mega-design
3ddd
hulsta
hulsta mega-design
design_connected
$18
Tolomeo Mega
...
photo-realistic 3d models of the tolomeo mega floor lamps from artemide for 3d architectural and interior design presentations.
turbosquid
$119

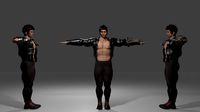
Mega Soldier
... free 3d model mega soldier for download as obj, c4d, and fbx on turbosquid: 3d models for games, architecture, videos. (1148568)
turbosquid
$100
Mega Yacht
... free 3d model mega yacht for download as obj, fbx, and blend on turbosquid: 3d models for games, architecture, videos. (1368903)
3ddd
$1

Massproductions Mega
... massproductions , mega
ширина: 180 см
глубина: 90 см
высота: 79 см
3d_export
$4
mega metro station
...mega metro station
3dexport
mega metro station. ready to game. thanks all downloaders!!
3ddd
$1

BAS Mega
...bas mega
3ddd
bas , ванна
ванна
Battle
3d_export
$5

Battle Hammer
...battle hammer
3dexport
battle war hammer, gameready
3d_export
free

Battle ax
...battle ax
3dexport
double-sided battle ax
3d_export
$5

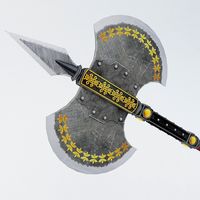
the battle axe
...the battle axe
3dexport
the battle axe is a formidable combat that crushes light and medium armor.
3d_ocean
$5
Battle Axe
...an
army axe battle fight knight low lowpoly melee military poly sword war weapon
3d model battle axe by alexrazum v-ray materials
3d_export
free

battle scythe
...battle scythe
3dexport
turbosquid
free

battle machine
...ine
turbosquid
free 3d model battle machine for download as on turbosquid: 3d models for games, architecture, videos. (1245542)
turbosquid
free

battle axe
... axe
turbosquid
free 3d model battle axe for download as fbx on turbosquid: 3d models for games, architecture, videos. (1504027)
3d_export
$5

battle axe
...battle axe
3dexport
formats
turbosquid
$65

Battle Axe
...bosquid
royalty free 3d model battle axe for download as fbx on turbosquid: 3d models for games, architecture, videos. (1257697)
turbosquid
$65

Battle Sute
...quid
royalty free 3d model battle sute for download as blend on turbosquid: 3d models for games, architecture, videos. (1230145)
Man
3d_export
$5

Man
...man
3dexport
man
3d_export
$5
man
...man
3dexport
man obj
3d_export
$10

man
...man
3dexport
this is an man for 3d games.
archibase_planet
free

Man
...man
archibase planet
people man
man - 3d model (*.gsm+*.3ds) for interior 3d visualization.
archibase_planet
free

Man
...man
archibase planet
people man
man - 3d model (*.gsm+*.3ds) for interior 3d visualization.
3d_export
$15

Man
...man
3dexport
download man model enjoy....
3d_ocean
$10
Man
...man
3docean
detailed highly layout man uv with
detailed polygon model of a man, with complete uv layout
archibase_planet
free

Man
...man
archibase planet
man people
man sitting n070814 - 3d model (*.gsm+*.3ds) for 3d visualization.
archibase_planet
free

Man
...man
archibase planet
man people
man keyboard n080814 - 3d model (*.gsm+*.3ds) for 3d visualization.
archibase_planet
free
Man
...man
archibase planet
man people
man n060215 - 3d model (*.gsm+*.3ds+*.max) for 3d visualization.