Thingiverse

Customizable midway breaker for Ford Ecosport swinging tailgate by trungtt3
by Thingiverse
Last crawled date: 3 years ago
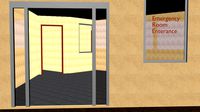
Many versions of Ford Ecosport, since 2013, have the swinging tailgate that, once open, will open fully. Full opening of the swinging tailgate requires space behind the car. This space sometimes is a challenge for owner, when accessing the boot in tight parking place.
This midway breaker will help stopping the tailgate midway, so that you can keep the tailgate half open, as in the photograph. Owner can still open the tailgate fully by pushing it open further. The angle at which the tailgate movement get high friction midway can be customized by MidAngle parameter (if you use Customizer, or download the OpenSCAD file to modify).
This breaker has 3 parts, if you use Customizer, select appropriate Mode to generate corresponding part. They are assembled to the boot door hinge as shown in the photographs, by 2 pairs of nut & bold. The nuts & bolts are not printed, you will have to get them elsewhere. The nuts have hexagonal perimeter. The size of nut and bolt can be customized (by BoltRadius, BoltCapRadius, NutMaxRadius parameters). Default models are for bolt of radius 2mm, bolt cap radius 3.5mm, nut hexagonal maximal radius of 3.95mm. You can also download the default models.
After printing, embed the nuts in part 3. Try putting part 1, 2 & 3 together and screw the bolt through, to see if they fit and tight, as shown in the photograph of black breaker. If things seem to be OK, then de-assemble them. Open the tailgate fully. Put part 3 behind the hinge, put part 1 & 2 in front of the hinge, then screw the bolts in, to tightly attach the three parts to the hinge. NOTE: part 1 & 2 are not symmetric, try the best fit orientation. See the photographs for reference.
You should print the parts in ABS, 100% infill, to withstand high temperature under the Sun, and strong force at the hinge. Total printing time should be about 4 hours, more or less.
Some more discussions:
In fact part 1 & part 2 can be merged into one part - this will not create any problem while assembling. However, I find breaking into part 1 & part 2 will ease printing setup. Merging part 1 & part 2 will, I believe, require supports while printing, or, to print without supports, require modifying the parts in some way that make the breaker mechanically less robust. But that is just my thought.
Similar models
grabcad
free

M12 x 1.5 Nut & Bolt
...
this is a m12 x 1.5 nut and bolt assembly.
material : brushed steel
motion study's also available in the assembly drawing.
thingiverse
free

30mm Hinge by seddondigital
...and m3 nyloc nut. it is 30mm tall and you will need to print 2 parts per hinge. put one washer at each end and two in the centre.
grabcad
free

Swing set
...swing set
grabcad
assembly of swing set; individual parts including bolts and nuts included.
grabcad
free

Drying-Rack junction
...embly made for fixing a clothes drying rack.
you can print 3 parts (noix x1 & embout x2) and put twoscrews and nuts as axles.
thingiverse
free

Ender 3 oldham nut by ruredi87
...lot. make sure your belts are tight tolerances 0.03mm. also move z seam outside if you can. 2 bottomandtop and 1 middle required.
thingiverse
free

Top #3: Spinning Top with Bolts for Inverted Soda Can by slai98
...he top with two opposing holes using your thumb and pointing finger.
the top can spin for over 2 1/2 minutes with a good start.
grabcad
free

2 Way Door Swing Hinge
...2 way door swing hinge
grabcad
hinge assembly for a 2 way door so it can swing both ways. done in inventor 2018
thingiverse
free

Puzzle lock for geocache by Gelb153
...height of 41mm. insert the bold with the ball in the case (check the opening at the front is correct)
4) finish printing the case
thingiverse
free

Ender 3 Lower Filament Guide for 608 Bearing by raktron
...rdware as shown in photos.
remove nylon nut from the wheel bolt above z motor.
attach assembly and reinstall nylon nut as shown.
thingiverse
free

Anycubic Predator Cable Cover
...a large raft and without supports
remixed from the original idea by seafax
required material:
1x m4 bolt
2x m4 nut
3x cable tie
Trungtt3
thingiverse
free

Holder for extra screens on Ford EcoSport by trungtt3
...ver and the plastic console. you may want to print using black - in the picture i used white for printing to highlight the thing.
thingiverse
free

Customizable Universal Phone & Tablet Stand with Keychain by trungtt3
...ychain
customizable thickness at the depression for hooking phone/tablet
customizable (optional) text on the bottom of the stand.
thingiverse
free

Customizable cd slot holder for phone & tablet - in Ford Fiesta & Ford Ecosport by trungtt3
...ide base hole for reinforcement, as shown in the last photograph. specify the baseholeradius to suit the size of your metal rods.
Ecosport
humster3d
$75

3D model of Ford Ecosport Titanium 2013
... 3d model of ford ecosport titanium 2013 in various file formats. all our 3d models were created maximally close to the original.
thingiverse
free

Xiaomi phone mount for my Ford Ecosport by daili
...ili
thingiverse
xiaomi phone mount for my ford ecosport. supports many different kinds of phones like iphone, samsung galaxy etc
3dcadbrowser
free

Ford EcoSport FreeStyle (2007)
...i, india.this 3d object can be downloaded in .max, .obj, .3ds, .fbx, .dxf, .lwo, .stl, .wrl, .ma, .dae, .x and .asc file formats.
thingiverse
free

ford ecosport 2006
...and pinshape and just look for gaudeiro, from ja thank you
visit to : https://pinshape.com/users/339484-gauderio#designs-tab-open
thingiverse
free
Holder for extra screens on Ford EcoSport by trungtt3
...ver and the plastic console. you may want to print using black - in the picture i used white for printing to highlight the thing.
thingiverse
free

cristian by repuestoscgn3d
...engranajes reparacion motor paso de aire, climatizador. ford fiesta ecosport ...
thingiverse
free
Customizable cd slot holder for phone & tablet - in Ford Fiesta & Ford Ecosport by trungtt3
...ide base hole for reinforcement, as shown in the last photograph. specify the baseholeradius to suit the size of your metal rods.
thingiverse
free

Windshield Washer Tank Cap for Ford by VLAD-MARIUS
...(it is similar to the first generation of ford ecosport produced between 2003 and 2012) . the engine is...
grabcad
free

ECOSPORT
...ecosport
grabcad
solidworks 2015 ou avançado
Tailgate
3d_ocean
$4

Super Tailgate Cinema 4D 3D Text File
...ean, it can be used for design projects for club parties, tailgates, sport events, etc or to create animations. in this packag...
3d_export
$45

Cornhole Game 3D Model
...3dexport cornhole corn hole bag game throw toss skill tailgate party beanbag cornhole game 3d model plutonius 33485...
3d_ocean
$4

Game Day Cinema 4D 3D Text File
...used for design and animation projects for club parties, tailgate, sport events, etc. in...
3d_export
$60

Zil-4334 Wagon
...a troop/cargo carrier. its cargo area has drop-sides and drop-tailgate it is covered by removable bows and tarpaulin. this...
3d_ocean
$9

3D Typography Cinema 4D Bundle-Vol 001
...football loswl make flyer model sport sports summer superbowl tailgate tavern text typography youth youth sports club the 3d...
3d_export
$26

F-Series F-800 CrewCab Customized Pickup Truck 1985
...chassis at visible parts - simplified interior silhouette - tailgate made as separate part, can be moved or animated....
3d_ocean
$9

3D Typography Cinema 4D Bundle-Vol 002
...flyer model news sport sport news sports summer superbowl tailgate tavern text typography youth youth sports club the 3d...
3d_export
$40

truck with sides and stands
...advertising. you can animate the cab doors, wipers and tailgate<br>model made in cinema 4d s24. converted to 3dmax and...
3d_export
$39

wt-9000 grain truck 1974
...detailed exterior and interior<br>- opening doors<br>- simplified engine<br>- bed tailgate made by separated parts that can be moved or...
3d_export
$39

wt-9000 grain truck 1972
...detailed exterior and interior<br>- opening doors<br>- simplified engine<br>- bed tailgate made by separated parts that can be moved or...
Midway
3d_export
$5

MWE Midway Sliding door system 3D Model
...mwe midway sliding door system 3d model
3dexport
door glass sliding
mwe midway sliding door system 3d model hazov 58265 3dexport
3d_export
$110
uss midway cv-41 carrier
...odifications necessary to correct the problem. this model show the last figure of this sea beast. the f-18 are included on files.
3ddd
$1

MWE / Midway
...pg[/img][/url][url=http://imageshack.us/photo/my-images/513/midway1rgbcolor0004.jpg/][img]http://imageshack.us/a/img513
3d_export
$75

Ferris Wheel 3D Model
...ferris wheel 3d model 3dexport ferris wheel amusement park midway circus ride carnival landmark ferris wheel 3d model ethereal...
3d_export
$70

Amusement Ride Spider 3D Model
...3d model 3dexport amusement park ride carnival spider merry-go-round midway circus rides amusement ride spider 3d model ethereal 3d...
cg_studio
$139

Mitsubishi A6M2 Zero - Carrier Hiryu3d model
...rei sen carrier japan zeke fighter plane pearl habor midway .3ds .c4d .lwo .obj - mitsubishi a6m2 zero -...
cg_studio
$139

Douglas TDB-1 Devastator3d model
...devastator torpedo united states navy us fighter pearl harbor midway pacific usn .3ds .c4d .lwo .obj - douglas tdb-1...
cg_studio
$139

Mitsubishi A6M5 Zero3d model
...military plane air forces allied nakajima guadalcanal pearl harbor midway coral sea solomon islands akutan aleutians pacific war world...
3d_export
$60

douglas sbd dauntless
...blows to the japanese carriers at the battle of midway in june 1942. the type earned its nickname "slow...
3d_export
$5

Douglas SBD Dauntless lowpoly WW2 bomber
...blows to the japanese carriers at the battle of midway in june 1942. the type earned its nickname “slow...
Breaker
turbosquid
$5

Breaker Man
...osquid
royalty free 3d model breaker man for download as dwg on turbosquid: 3d models for games, architecture, videos. (1652325)
turbosquid
$140

Spring Breaker
... available on turbo squid, the world's leading provider of digital 3d models for visualization, films, television, and games.
turbosquid
$20

CIRCUIT BREAKER
... available on turbo squid, the world's leading provider of digital 3d models for visualization, films, television, and games.
turbosquid
$19

Circuit Breaker
... available on turbo squid, the world's leading provider of digital 3d models for visualization, films, television, and games.
turbosquid
$19

Circuit Breaker
... available on turbo squid, the world's leading provider of digital 3d models for visualization, films, television, and games.
turbosquid
$19

Circuit Breakers
... available on turbo squid, the world's leading provider of digital 3d models for visualization, films, television, and games.
turbosquid
free

Circuit Breaker
... available on turbo squid, the world's leading provider of digital 3d models for visualization, films, television, and games.
archive3d
free

Breaker 3D Model
...reaking machine bucker
turbosol n020109 - 3d model (*.gsm+*.3ds) for interior 3d visualization.
archive3d
free

Breaker 3D Model
...ng machine bucker
turbosol mini n030109 - 3d model (*.gsm+*.3ds) for interior 3d visualization.
archive3d
free

Circuit breaker 3D Model
...rcuit breaker schneider electric n240211 - 3d model (*.gsm+*.3ds) for interior 3d visualization.
Swinging
archibase_planet
free

Swing
...swing
archibase planet
swing seat swing seat
swing 4 - 3d model (*.gsm+*.3ds) for interior 3d visualization.
archibase_planet
free

Swing
...swing
archibase planet
swing swing seat seat
swing 6 - 3d model (*.gsm+*.3ds) for interior 3d visualization.
archibase_planet
free

Swing
...swing
archibase planet
swing seat swing seat
swing 5 - 3d model (*.gsm+*.3ds) for interior 3d visualization.
archibase_planet
free

Swing
...swing
archibase planet
swing swing seat seat
swing 1 - 3d model (*.gsm+*.3ds) for interior 3d visualization.
archibase_planet
free

Swing
...swing
archibase planet
swing seat swing seat
swing 3 - 3d model (*.gsm+*.3ds) for interior 3d visualization.
archibase_planet
free

Swing
...swing
archibase planet
swing swing seat seat
swing 2 - 3d model (*.gsm+*.3ds) for interior 3d visualization.
archibase_planet
free

Swing
...swing
archibase planet
swing swing seat seat
swing 1 n280313 - 3d model (*.gsm+*.3ds) for exterior 3d visualization.
archibase_planet
free

Swing
...swing
archibase planet
swing swing seat seat
swing 2 n280313 - 3d model (*.gsm+*.3ds) for interior 3d visualization.
archibase_planet
free

Swing
...swing
archibase planet
swing swing seat playground
swing lappset n051113 - 3d model (*.gsm+*.3ds) for exterior 3d visualization.
archibase_planet
free

Swing
...swing
archibase planet
swing swing seat playground
swing 2 n230814 - 3d model (*.gsm+*.3ds) for exterior 3d visualization.
Customizable
3d_export
$10
customizable sd port
...customizable sd port
3dexport
customizable sd port
turbosquid
$99

Customizable character
...alty free 3d model customizable character for download as max on turbosquid: 3d models for games, architecture, videos. (1152525)
turbosquid
$1

Customizable Mug
... available on turbo squid, the world's leading provider of digital 3d models for visualization, films, television, and games.
turbosquid
$1
Customizable Spider Mech
... free 3d model customizable spider mech for download as blend on turbosquid: 3d models for games, architecture, videos. (1462055)
turbosquid
$20
Customizable Egyptian Pillar
...zable egyptian pillar for download as ma, obj, fbx, and blend on turbosquid: 3d models for games, architecture, videos. (1307376)
turbosquid
$75
Fully Customizable Hospital
... available on turbo squid, the world's leading provider of digital 3d models for visualization, films, television, and games.
turbosquid
$20

Customizable Caste Pieces
... available on turbo squid, the world's leading provider of digital 3d models for visualization, films, television, and games.
turbosquid
$15
Customizable Tea Cup
... available on turbo squid, the world's leading provider of digital 3d models for visualization, films, television, and games.
turbosquid
free

Water Bottle(Customizeable)
... available on turbo squid, the world's leading provider of digital 3d models for visualization, films, television, and games.
3d_export
$49

Book customizable 3D Model
...3dexport
book booshelf novel teach library learn read pages cover fairy tales
book customizable 3d model guitargoa 74240 3dexport
Ford
3ddd
$1
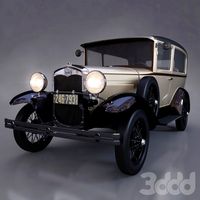
Ford A
...ford a
3ddd
ford
ford a.
длина: 4191 мм
ширина: 1702 мм
3ddd
$1
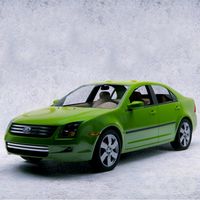
Ford Fusion
...ford fusion
3ddd
ford
ford fusion
3ddd
$1
Ford 32
...ford 32
3ddd
ford
ford 32 tuning
3ddd
$1
Ford Focus
...ford focus
3ddd
ford
двухместный ford focus
3ddd
$1

Ford focus
...ford focus
3ddd
ford focus
3d_export
$10
Ford-transit
...ford-transit
3dexport
ford-transit van
3d_export
$69

ford-mondeo ford-fusion
...vertisements or games corona render and materials all textures include in *.rar files lighting setup is not included in the file!
3d_ocean
$69

Ford Mustang
...n
car ford mustang speed wheel
ford mustang high poly with details and materials used materials are included /.3ds/.obj/.fbx/.skp
3d_export
$30
Ford 3D Model
...ford 3d model
3dexport
ford
ford 3d model afshin 37528 3dexport
3ddd
$1

Автосалон FORD
...он ford
3ddd
автосалон , здание
автосалон ford. выдерживает крупные ракурсы. всем удачи!