Thingiverse

Custom Lightsaber #3 - No Supports by jasonramey
by Thingiverse
Last crawled date: 3 years, 4 months ago
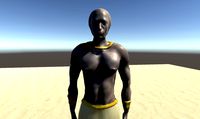
This is yet another lightsaber handle that I designed. It's about 13" long. I wanted to give it an elegant and cohesive look from end-to-end. And it only takes about 10 minutes to assemble. I designed this with a square hole down the center to insert square beams for easy alignment during assembly.
For assembly, you'll need:
a tube of super glue
the belt clip assembly here
Print one of each part except the following:
2x button2
8x pommel_knob
Assembly
Glue a 30mm beam (beam30) into the underside of the emitter, a 65mm beam into the pommel_cap, and center a 60mm beam in the center_ring. Although there are 3 different sized beams, you can also just print out multiples of beam65 instead if you want a little extra support and alignment. If you want to create your own custom beams, they have a 10x10mm cross section.
Line up upper_panel to the underside of the emitter and glue. The long parts should be in line. upper_grip should fit under that. emitter_shadow will drop down into the tip of the emitter just to give it the illusion of depth.
With the 65mm beam on the pommel cap, put on the pommel and lower_ring. Then put on lower_panel so the long part is opposite the belt clip socket on the lower ring. Then comes the lower_grip.
Now the two halves come together. Glue the center_ring onto the end of the upper_grip so the button shroud is opposite the long part of the upper panel. Glue on the lower so the long part of the lower panel is inline with the button shroud on the center ring.
Now glue button1 and 2x button2 into the slots on the upper panel and button3 into the center ring. The pommel_knob pieces will go in the slots on the pommel. And if you've printed out the separate belt clip assembly, the knob goes in the socket on the lower ring.
Similar models
thingiverse
free

Custom Curved Lightsaber #4 by jasonramey
... questions. after letting the super glue cure, let your nerd flag fly! may this lightsaber be a fine addition to your collection!
thingiverse
free

Custom Lightsaber #2 - No Supports by jasonramey
... lower. there's a protrusion on the lower which should face to the left. this protrusion is where the belt clip knob will go.
thingiverse
free

Jocasta Nu's Lightsaber by CaseStudyno8
...wer) together. the connection is small but it worked out for me, curious to see if it holds true for everyone printing it.
enjoy!
thingiverse
free

Custom Creation lightsabers Mk1 by Impul5e101
...1x power block strip 2.0mm
2x power block strip 1.2mm
1x button block
1x button
3x 10x4 or 10x5 plug
enjoy the print & build!
thingiverse
free

custom lightsaber
...-blade
inside diameter: 35mm
outside average: 45mm
male and female connections 7.5mm long/deep
connections outside diameter: 38mm
thingiverse
free

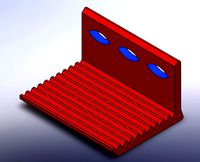
Antec P180 Lower Hard Drive Cage by PeachyBun
...alignment, use pc fan screws or the alignment pins.
if printed in pla, make sure there is adequate airflow to keep the hdds cool.
thingiverse
free

Lightsaber Belt Clips
...overtec belt clip (holds at least 4 pounds with 20% infill and .12mm layer height).
galaxy edge sabers are a little over 2 pounds
thingiverse
free

Grand Inquisitor's Lightsaber by CaseStudyno8
...rings' joints with glue. there are some tricky parts to this hilt and there are a lot of pieces but the result is super cool!
thingiverse
free

Starkiller's Lightsaber by CaseStudyno8
...rsonally i used supports generated in cura on the emitter shroud, upper kyber chamber, back wire and front wire.
happy printing!
thingiverse
free

Temple Guard Lightsaber by CaseStudyno8
... upper emitter inner with support generated in cura. be sure to print two red buttons, two black buttons and two emitter inserts.
Jasonramey
thingiverse
free

Decorative Push Button - No Supports by jasonramey
...per glue, set the button with the hollow on top of the spring. for the double button housing, you'll obviously do this twice.
thingiverse
free

Ender 3 Pro MeanWell PSU fan cover/muffler by jasonramey
...cond screw. this should ensure that there is always a screw holding the fan in place and it won't fall into the power supply.
thingiverse
free

Customizable Tabletop RPG Initiative Marker - No Supports by jasonramey
...f text
todo
allow up to 2 lines of text
customize font
refine positioning of text
have option to put text on both sides of marker
thingiverse
free
Custom Lightsaber #2 - No Supports by jasonramey
... lower. there's a protrusion on the lower which should face to the left. this protrusion is where the belt clip knob will go.
thingiverse
free
Custom Curved Lightsaber #4 by jasonramey
... questions. after letting the super glue cure, let your nerd flag fly! may this lightsaber be a fine addition to your collection!
Lightsaber
3d_export
free

lightsaber
...lightsaber
3dexport
the best lightsabers in the galaxy:)
3d_export
$6

lightsaber
...lightsaber
3dexport
lightsaber belonging to an unknown jedi of the old republic.
3d_export
$5

Lightsabers
...lightsabers
3dexport
rusty and clean lightsabers like in star wars
3d_export
$5

lightsaber
...lightsaber
3dexport
i fan star wars and i do my lightsaber
3d_ocean
$4

Simple Lightsaber
...simple lightsaber
3docean
jedi lightsaber starwars
lightsaber model that is ready to be rigged and animated.
turbosquid
$4

Lightsaber
...squid
royalty free 3d model lightsaber for download as blend on turbosquid: 3d models for games, architecture, videos. (1691034)
3d_export
free

lightsaber 3d
...lightsaber 3d
3dexport
the best lightsabers in the galaxy:)
3d_ocean
$10

Lightsaber
...er multi format multiformat skywalker star wars
made a high poly lightsaber from the star wars franchise. this is my own version.
turbosquid
$15

lightsaber
...
royalty free 3d model lightsaber for download as max and obj on turbosquid: 3d models for games, architecture, videos. (1165564)
3d_export
$5

lightsaber
...lightsaber
3dexport
Custom
3ddd
free
Customized
...customized
3ddd
комод
customized, chest, cabinet
3d_export
$50
Custom motorcycle
...custom motorcycle
3dexport
custom motorcycle
3d_export
$21
Funko custom
...funko custom
3dexport
funko custom
turbosquid
$2

Customs
... available on turbo squid, the world's leading provider of digital 3d models for visualization, films, television, and games.
turbosquid
$2
Customs
... available on turbo squid, the world's leading provider of digital 3d models for visualization, films, television, and games.
turbosquid
$10
Custom Car
...turbosquid
royalty free 3d model custom car for download as on turbosquid: 3d models for games, architecture, videos. (1584212)
3d_export
$7
Custom glasses
...custom glasses
3dexport
3d custom glasses;<br>textured with non overlapping<br>rigged: yes
turbosquid
$80
Custom sportbike
...d
royalty free 3d model custom sportbike for download as fbx on turbosquid: 3d models for games, architecture, videos. (1313435)
turbosquid
$30
custom truck
...squid
royalty free 3d model custom truck for download as max on turbosquid: 3d models for games, architecture, videos. (1329357)
turbosquid
$10
custom alien
...squid
royalty free 3d model custom alien for download as fbx on turbosquid: 3d models for games, architecture, videos. (1244065)
Supports
turbosquid
$5
Support
... available on turbo squid, the world's leading provider of digital 3d models for visualization, films, television, and games.
3d_export
$8
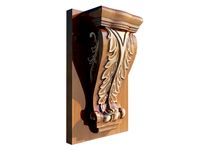
Support 3D Model
...support 3d model
3dexport
support cantilever console
support 3d model tasal 73900 3dexport
3d_export
$5
phone support
...phone support
3dexport
phone
turbosquid
$12
Support bars
...squid
royalty free 3d model support bars for download as max on turbosquid: 3d models for games, architecture, videos. (1411542)
turbosquid
$8

support weights
...id
royalty free 3d model support weights for download as max on turbosquid: 3d models for games, architecture, videos. (1411538)
turbosquid
$2
headphone support
...royalty free 3d model headphone support for download as sldpr on turbosquid: 3d models for games, architecture, videos. (1357583)
turbosquid
$2

Support for flowers
...royalty free 3d model support for flowers for download as max on turbosquid: 3d models for games, architecture, videos. (1463543)
turbosquid
$14

Flower Support
...alty free 3d model flower support for download as max and obj on turbosquid: 3d models for games, architecture, videos. (1497066)
turbosquid
$5
serum support
...yalty free 3d model serum support for download as c4d and obj on turbosquid: 3d models for games, architecture, videos. (1551267)
3d_export
$10
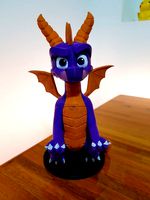
spyro joystick support
...spyro joystick support
3dexport
joystick support of spyro dragon
3
turbosquid
$10

Mountain Bike 3 -3 of 3
...model mountain bike 3 (#3 of 3) for download as fbx and blend on turbosquid: 3d models for games, architecture, videos. (1438752)
turbosquid
$6

Rock 3-3
...urbosquid
royalty free 3d model rock 3-3 for download as obj on turbosquid: 3d models for games, architecture, videos. (1628065)
turbosquid
$29

Books 150 pieces 3-3-3
...books 150 pieces 3-3-3 for download as max, obj, fbx, and stl on turbosquid: 3d models for games, architecture, videos. (1384033)
turbosquid
$3

Genesis 3 Clothing 3
... available on turbo squid, the world's leading provider of digital 3d models for visualization, films, television, and games.
3d_export
$5

hinge 3
...hinge 3
3dexport
hinge 3
3ddd
$1

Розетка 3
...розетка 3
3ddd
розетка
розетка 3
turbosquid
$50

is-3
... available on turbo squid, the world's leading provider of digital 3d models for visualization, films, television, and games.
turbosquid
$10

Mountain Bike 3 -2 of 3
...model mountain bike 3 (#2 of 3) for download as fbx and blend on turbosquid: 3d models for games, architecture, videos. (1438750)
turbosquid
$10

Mountain Bike 1 -3 of 3
...model mountain bike 1 (#3 of 3) for download as fbx and blend on turbosquid: 3d models for games, architecture, videos. (1438743)
3d_export
$5

3 CATS
...3 cats
3dexport
3 cats pen holder