Thingiverse
Curved Lithophane Box by DCRobotics
by Thingiverse
Last crawled date: 3 years, 3 months ago
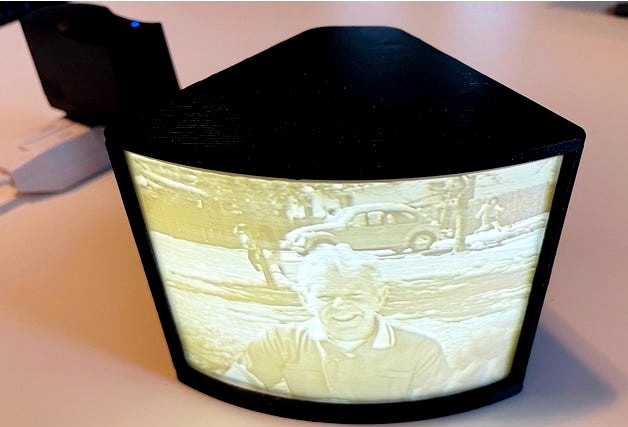
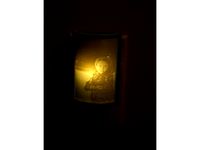
Curved Lithophane Box.
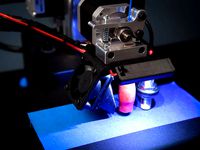
I wanted to make some lithophane lightboxes for some gifts and I found lots of good ones here on Thingiverse. However, I wanted one that was curved, held just one lithophane, and had a completely enclosed light box, and I just wasn't finding what I wanted. So I jumped into Fusion 360 and came up with this design.
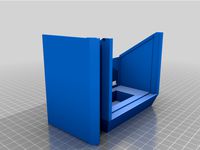
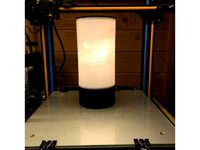
Print the LithoBody.stl and LithoLid.stl models first. Flip the LithoLid over before you print it. No supports are needed. I used a 0.6mm nozzle with 0.3mm layer height. It worked great and only took about 3 hours for the body, 1 for the lid. A 0.4mm nozzle with 0.2mm layers works good too, but it will take twice the time. Instructions for printing the lithophane are at the bottom.
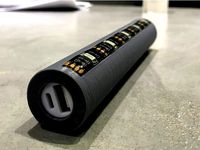
Electronics Parts list:
12V LED light strips. https://amzn.com/B00HSF65MC
On/Off Switch: https://amzn.com/B07SPY9H7Y
LED Strip Connectors: https://amzn.com/B01DM7EXX2
DC Power Supply and Connector: https://amzn.com/B08BRPK9J9
Zip ties: use whatever you have on hand that fits.
Assembly:
Insert the DC Female Terminal Connector into the hole in the back of the model. There are two printed supports inside the model that will hold it into place. It will be a tight fit, but once you snap it down in there, its not going to move.
On the LED light strips, cut off two segments of 3 LED lights. Look for the cut marks on the strips. Insert the LED strips into the LED Light Connectors. The wire from the connector gets routed back through the slot at the bottom of the LED pillar on the model. Then zip tie the connector to the model, routing the zip tie through the slot on the side of the LED pillar. After the connector is secured, remove the backing from the adhesive of the LED light strip. The adhesive will help hold the LED strip to the model, but I've found that adding a couple drops of super glue to the adhesive makes for a stronger hold.
Insert the switch through the rectangular hole. On the switch, the "I" should be on top and the "O" should be on the bottom for proper On/Off orientation. The switch will snap into place, but you may need to use a little force to get it all the way on there.
Wiring time! Very simple switch circuit.
Take the 2 Red wires from the 2 LED connectors, twist them together and then insert them into the positive (+) terminal of the DC power connector. Make sure you have about 1/4 inch bare wire stripped away before you do this. Screw in the connector once the wires are inserted.
Next, we'll insert the Black wire into the Negative (-) terminal of the DC Power connector. Cut the Black wire to the right length (ensuring you have enough room to comfortably reach the Negative terminal) and then strip 1/4 inch of wire bare. Insert into the Negative terminal and then screw tightly.
Finally, you'll be connecting the two Black wires from the two LED connectors with the Red wire from the switch. Pull all three of these wires up out the top of the model. Cut them all to the same length, about an inch above the top of the model. Strip 1/2 inch from all three wires. Twist them and then solder them together. Add heat shrink to fully insulate the connection. (Note: There are multiple ways to connect these three wires. Do whatever works best for you, and is safe.).
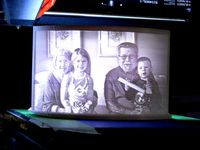
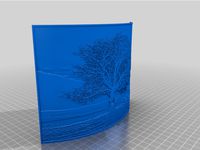
Lithophane:
To generate the lithophane, use: https://3dp.rocks/lithophane/
This lithophane model is designed to hold images that have a 4:3 aspect ratio (100mm wide x 75mm high). Please crop your pictures to this ratio before using the website tool.
Key settings are...
Select "Outer Curve" model
Model settings:
Maximum size = 100
Thickness = 3
Border = 2mm
Thinnest Layer = 0.8mm (recommended if you're using a 0.4mm nozzle)
Vectors Per Pixel = I used 6, feel free to play around with this
Base/Stand Depth = 0
Curve = 60
Image settings:
Positive Image
Mirror Image = Off
Flip Image = Off
IMPORTANT: After you've generated your lithophane STL from the website, import it into your slicer. Pay attention to the model height. It may be slightly over 75mm (not sure why since a 4:3 ratio on a 100mm wide image would make the height 75mm, I typically see models around 75.5mm +/- 0.2mm). Adjust the "z" height of your model down to 74.9mm, but make sure your slicer is not scaling the "y" and "x" axis as well - you should only scale down the "z" axis.
Happy Printing!!!
I wanted to make some lithophane lightboxes for some gifts and I found lots of good ones here on Thingiverse. However, I wanted one that was curved, held just one lithophane, and had a completely enclosed light box, and I just wasn't finding what I wanted. So I jumped into Fusion 360 and came up with this design.
Print the LithoBody.stl and LithoLid.stl models first. Flip the LithoLid over before you print it. No supports are needed. I used a 0.6mm nozzle with 0.3mm layer height. It worked great and only took about 3 hours for the body, 1 for the lid. A 0.4mm nozzle with 0.2mm layers works good too, but it will take twice the time. Instructions for printing the lithophane are at the bottom.
Electronics Parts list:
12V LED light strips. https://amzn.com/B00HSF65MC
On/Off Switch: https://amzn.com/B07SPY9H7Y
LED Strip Connectors: https://amzn.com/B01DM7EXX2
DC Power Supply and Connector: https://amzn.com/B08BRPK9J9
Zip ties: use whatever you have on hand that fits.
Assembly:
Insert the DC Female Terminal Connector into the hole in the back of the model. There are two printed supports inside the model that will hold it into place. It will be a tight fit, but once you snap it down in there, its not going to move.
On the LED light strips, cut off two segments of 3 LED lights. Look for the cut marks on the strips. Insert the LED strips into the LED Light Connectors. The wire from the connector gets routed back through the slot at the bottom of the LED pillar on the model. Then zip tie the connector to the model, routing the zip tie through the slot on the side of the LED pillar. After the connector is secured, remove the backing from the adhesive of the LED light strip. The adhesive will help hold the LED strip to the model, but I've found that adding a couple drops of super glue to the adhesive makes for a stronger hold.
Insert the switch through the rectangular hole. On the switch, the "I" should be on top and the "O" should be on the bottom for proper On/Off orientation. The switch will snap into place, but you may need to use a little force to get it all the way on there.
Wiring time! Very simple switch circuit.
Take the 2 Red wires from the 2 LED connectors, twist them together and then insert them into the positive (+) terminal of the DC power connector. Make sure you have about 1/4 inch bare wire stripped away before you do this. Screw in the connector once the wires are inserted.
Next, we'll insert the Black wire into the Negative (-) terminal of the DC Power connector. Cut the Black wire to the right length (ensuring you have enough room to comfortably reach the Negative terminal) and then strip 1/4 inch of wire bare. Insert into the Negative terminal and then screw tightly.
Finally, you'll be connecting the two Black wires from the two LED connectors with the Red wire from the switch. Pull all three of these wires up out the top of the model. Cut them all to the same length, about an inch above the top of the model. Strip 1/2 inch from all three wires. Twist them and then solder them together. Add heat shrink to fully insulate the connection. (Note: There are multiple ways to connect these three wires. Do whatever works best for you, and is safe.).
Lithophane:
To generate the lithophane, use: https://3dp.rocks/lithophane/
This lithophane model is designed to hold images that have a 4:3 aspect ratio (100mm wide x 75mm high). Please crop your pictures to this ratio before using the website tool.
Key settings are...
Select "Outer Curve" model
Model settings:
Maximum size = 100
Thickness = 3
Border = 2mm
Thinnest Layer = 0.8mm (recommended if you're using a 0.4mm nozzle)
Vectors Per Pixel = I used 6, feel free to play around with this
Base/Stand Depth = 0
Curve = 60
Image settings:
Positive Image
Mirror Image = Off
Flip Image = Off
IMPORTANT: After you've generated your lithophane STL from the website, import it into your slicer. Pay attention to the model height. It may be slightly over 75mm (not sure why since a 4:3 ratio on a 100mm wide image would make the height 75mm, I typically see models around 75.5mm +/- 0.2mm). Adjust the "z" height of your model down to 74.9mm, but make sure your slicer is not scaling the "y" and "x" axis as well - you should only scale down the "z" axis.
Happy Printing!!!
Similar models
grabcad
free

Inline Switch - On/Off Toggle Switch for LED Lights - AC or DC - For Larson Electronics LED Lights
...connector. the input wiring whip is offer with a female twp pin deutsch connector, battery clamps, or ring terminals termination.
grabcad
free

Inline Switch - On/Off Toggle Switch for LED Lights - AC or DC - 5ft Input - 1ft Output
... clamps, or ring terminals termination. the 1ft output wiring whip is terminated in a male water tight two pin deustch connector.
thingiverse
free
Lithophane Housing by GingerTwin57
...er.com). the leds and lithophane are properly spaced for even lighting. i used 12v led light strip and got a nice warm backlight.
thingiverse
free
Lithophane frame and LED mount by ClydeCoulter
...te a negative (black= thick, white= thin) lithophane with software such as http://3dp.rocks/lithophane/
makes a nice night light.
thingiverse
free

LED Light for Creality Ender 3
... led strip light connectors, 10x l shape 2 pin right angle corner connector, 10x strip to strip connectors, 2x dc connector"
thingiverse
free
Portable Ambient Light LED Powerbank by vmi
...te controller 5v
single 18650 diy powerbank
18650 li-ion battery
22mm switch
wire
soldering iron
glue
heat shrink tube
multimeter
grabcad
free

Lithophane Add-on for Nintendo Switch Dock
... control that comes with the led light strips. also you can 3d print your own lithophane designs to insert into the front cover.
thingiverse
free
LED Strip Light for Printrbot Simple Metal by DaveM
... the lights themselves, soldered to 22 awg wire. the strip is adhesive-backed, but i added a few dabs of epoxy for good measure.
thingiverse
free

Amoeba LED Lamp-V1 by ChrisTheViolaNerd
...ints, and negative battery terminal will be wired to the (com) switch point. no wires will be connected to the (nc) switch point.
thingiverse
free
Lithophane Night Light by krwill101
...lso make sure the aspect ratio is 3:2 there are a lot of places that go into better detail about how to get a quality lithophane.

Lithophane
3d_export
free

lithophane of elfen lied
...lithophane of elfen lied
3dexport
elfen lied lithophane free
turbosquid
$25
Table Lamp (Bamboo Motif Lithophane Accent - Model 015)
... available on turbo squid, the world's leading provider of digital 3d models for visualization, films, television, and games.
thingiverse
free

at at lithophane by philip3dprinter
...at at lithophane by philip3dprinter
thingiverse
at at lithophane
thingiverse
free
Lithophane universe
...lithophane universe
thingiverse
it is a lithophane if the universe
thingiverse
free
Lithophane Moon
...lithophane moon
thingiverse
lithophane moon
thingiverse
free
Lithophane Sphinx
...lithophane sphinx
thingiverse
lithophane sphinx
thingiverse
free

Lithophane NewYork
...lithophane newyork
thingiverse
lithophane newyork
thingiverse
free
Lithophane by sromanos
...lithophane by sromanos
thingiverse
experimenting with lithophanes
thingiverse
free
Tree Lithophane
...tree lithophane
thingiverse
a lithophane of a tree
thingiverse
free

Toyota Lithophane
...toyota lithophane
thingiverse
toyota lithophane logo print.
Curved
3d_export
free

curved sword
...curved sword
3dexport
a curved sword
3ddd
$1
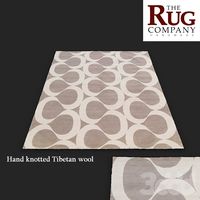
CURVE
...wave oscillates rhythmically across this rug.
hand knotted from tibetan wool, curve is available from stock in a range of sizes.
3ddd
$1
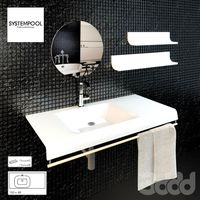
SYSTEMPOOL Serie Curve
..., serie curve , раковина
systempool serie curve
3ddd
$1
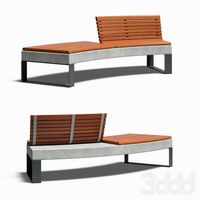
DIAMANTE Curved Bench
...diamante curved bench
3ddd
diamante curved bench скамья
diamante curved bench
3ddd
$1
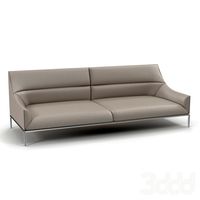
Enne Curve Sofa
...enne curve sofa
3ddd
enne , curve
диван enne curve, размеры -h800x920x2350mm
design_connected
$27
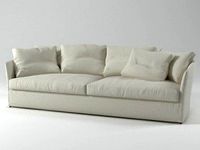
Curve Sofa
...curve sofa
designconnected
living divani curve sofa computer generated 3d model. designed by lissoni, piero.
3d_export
$5
curve base handle
...curve base handle
3dexport
curve base handle
3d_export
$5

simple curve handle
...simple curve handle
3dexport
simple curve handle
turbosquid
$2
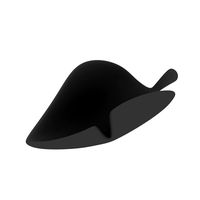
Curved leaf
...urbosquid
royalty free 3d model curved leaf for download as on turbosquid: 3d models for games, architecture, videos. (1641948)
turbosquid
$2
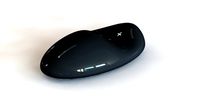
Curved Mouse
...rbosquid
royalty free 3d model curved mouse for download as on turbosquid: 3d models for games, architecture, videos. (1314525)
Box
archibase_planet
free

Box
...box
archibase planet
box carton cardboard box
box 2 - 3d model (*.3ds) for interior 3d visualization.
archibase_planet
free

Box
...box
archibase planet
carton cardboard box box
box 1 - 3d model (*.3ds) for interior 3d visualization.
3d_export
$6

box
...box
3dexport
box
3d_export
$5

Box
...box
3dexport
box
3d_export
$5

box
...box
3dexport
box
3d_export
$5

box
...box
3dexport
box
archibase_planet
free

Box
...box
archibase planet
box box for paper notebook pencil
box - 3d model (*.gsm+*.3ds) for interior 3d visualization.
archibase_planet
free

Box
...box
archibase planet
box carton cardboard box
box n170111 - 3d model (*.gsm+*.3ds) for interior 3d visualization.
archibase_planet
free

Box
...box
archibase planet
box carton cardboard box
box n050411 - 3d model (*.gsm+*.3ds) for interior 3d visualization.
archibase_planet
free

Boxes
...boxes
archibase planet
boxes box case bin
boxes n281213 - 3d model (*.gsm+*.3ds+*.max) for interior 3d visualization.